Willys Jeep 1943 WIP


Collabration time!

I’m currently making a 25 pounder field gun (link in signature) And it just came to my head how awesome this jeep would be with my gun. It’s still in pretty early progress, but If u want to I can send pm to u when I’m done and we can put them in a scene :smiley:
Btw very good model looking forward to seeing it finished.

if you want more realist I would suggest to use real tire not UV map
then it will look a lot better
to get a nice UV mapping you might need diffuse + AO +spec + displace map

it can be done but the real thing is way better then a fake one!

very nice work here
keep it up

happy cl

Looking very nice. You have a sickness that I share. I love the history and get wrapped up in it as well. When I was a kid I built a life size B-17 fuselage in my dad’s orchard. He eventually had to tear it down. It least this model won’t clutter up your yard.

Good idea. However, the 25 pounder gun was a British 87 mm howitzer and the trails of the gun are much too large to fit the trailer hitch of a jeep. It needed a larger truck to tow it. Who knows what crazy modifications soldiers made in the field to the jeep. They seem endless and so someone may have towed a 25 pounder with a jeep, but I doubt it.

The most common artillery piece towed by a jeep was the 75 mm pack howitzer and that wasn’t very often.

Anyway, if I can keep this model small enough, I intend to up load it to Blend Swap where all of my models are CC-0 and free to be used for any purpose.

Take care

I tend to agree with you. I haven’t decided which parts I’ll paint and which I’ll used an image texture.

I’ve been doing a lot of research on texturing techniques in preparation for this model. I’ve seen some beautiful photo realistic texturing that is all hand painted. I’ve also seen the same using images.

Thanks for the advice. I’ll put it in with all the other ideas and inspiration I’ve collected so far.

Take care

A hand built life size B-17 fuselage in an orchard?? That’s beyond even my over active imagination.

However, if you want to take virtual shot at improving a B-17, my B-17 on Blend Swap is CC-0 and could use some improvements. I’ll eventually redo all the textures and add more detail like the crew and better interior modeling, but anyone who wants to retexture it is free to do so. It’s a B-17F so to be historically accurate, you should keep texturing consistent with those of 1943 and 1944. Early 1944 the B-17G began to replace the F models in large numbers. By late 1944 there were not many F models flying combat missions, though I’m sure there were a few still in the fight.

Take care

I happened across your C-47. You are a really skilled and detailed modeler. I can see you’ve done a lot of research to attain that kind of realism.

Someday, I’d like to know how you are doing the rivets though I suspect they are bump maps. My B-17 model could benefit from riveting like that.

The modeling on the jeep is essentially complete and everything is UV unwrapped.

Later I’ll add some accessories inside the jeep later, but texturing begins now.

It may look pretty much the same as the previous images, but there are a number of small details that have been added.

Attachments


Here’s a quick photo I did on how I do the rivets:


And yes you are correct, they are bumps.

Thank you for your comments, You’re model is looking AMAZING!

Thanks for the tip. I would have guessed that you used a similar technique in Gimp or Photoshop as it seems that one would have more control using the layers. But I’ll give Blender’s texture paint a try and see what happens.

Sometime this year, I’ll drag out my B-17F on Blend Swap and redo it in Cycles. I wanted to add rivets the first time around, but they were horrible. I think the resolution for the bump map was too low and the pixilation was causing them to come out like blobs of melted chocolate instead of rivets. But I didn’t know much about texturing techniques then (and still don’t) but I’m slowly getting better.

But I’m running out of time. I wish they had computers and 3D CG back in the Stone Age when I was a teenager as I might be pretty good at modeling by now. But it wasn’t so bad back then. I remember the Ice Age, the Wooly Mammoth roaming the plains, hunting Sabre Tooth Tigers, and sitting around the fire at night listening as the elders described the legendary exploits of Gork.

Thanks again.

I remember the stone ages believe it or not. It wasn’t until I got in high school that I finally got a 286 that allowed me to line art 3d in a REALLY early version of autocad. I then got a student verion of 3d studio (autodesks early version of MAX) on 3-1/5" floppy and and really had fun. Yeah having blender as a kid would have made a big difference for me too, but I’m not sure my childhood would have been as fun staring at a screen instead of building all those movie props in the back yard. One time we flooded my father’s rear field and built 12’ long gallions we scratch built to simulate San Francisco harbor in 1862. We could have done all that in Blender today, but it probably wouldn’t have been as much fun:)

Excuse me for this very late and off-topic answer! FMB, thank you very much! Currently I am collecting materials about SBD, and reading some books written about this airplane or its pilots. During last summer my colleague visited three US air museums that have SBDs in their exhibition, and send me several hundred photos of their details. The only element I am currently missing are precise wing dimensions (the spans and chord lengths at the key ribs). Yes, I will create a WIP thread when I start making it. (I will begin later than I expected, but it will happen, for sure).

P.S. Some time ago I have found the P-40 drawings I used in my books on this Russian page.

I’m with you on that one!

I admit that I’ a bit slow. But then I’m 70 years old.

This is the result of baking the AO maps. It took longer that expected because during the process I noticed a number of changes that needed to be made to the meshes, the UV maps, and I needed to add some additional details.

Here’s the results.

Attachments


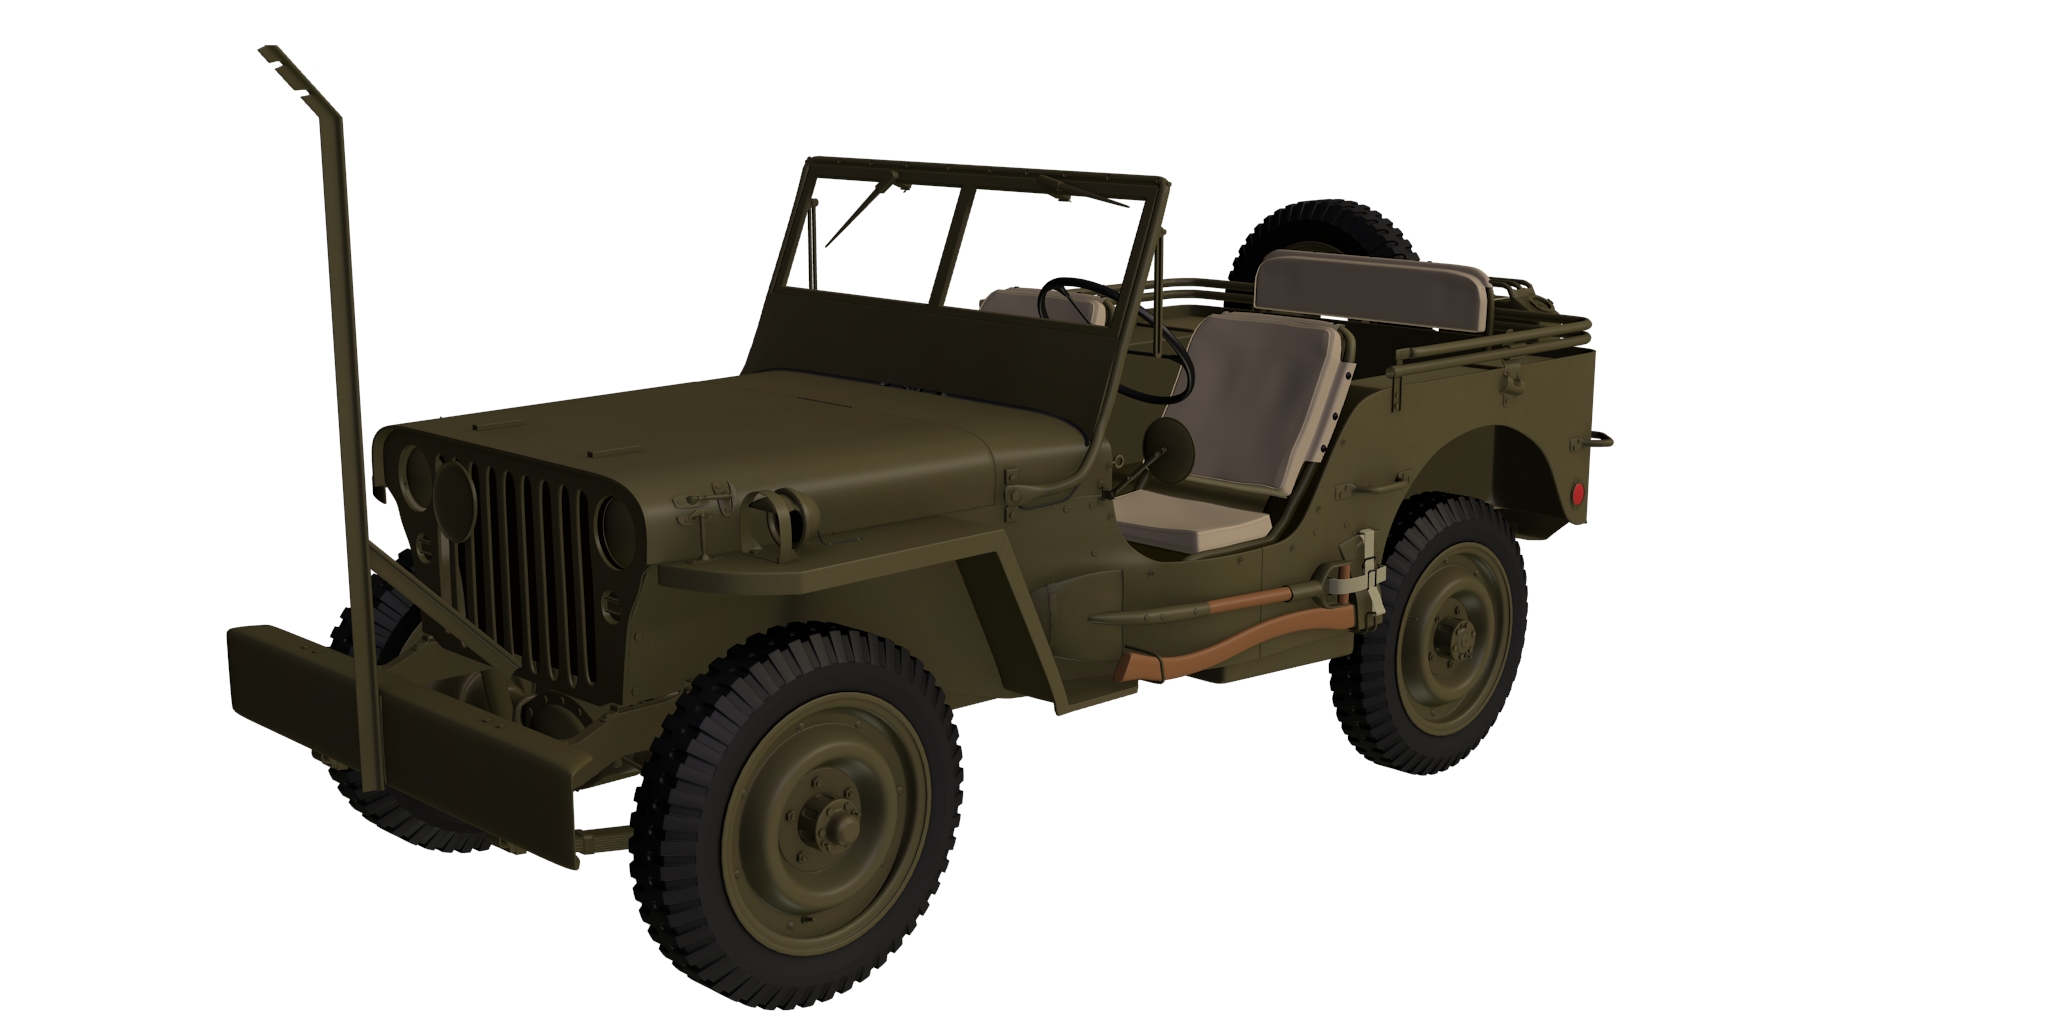
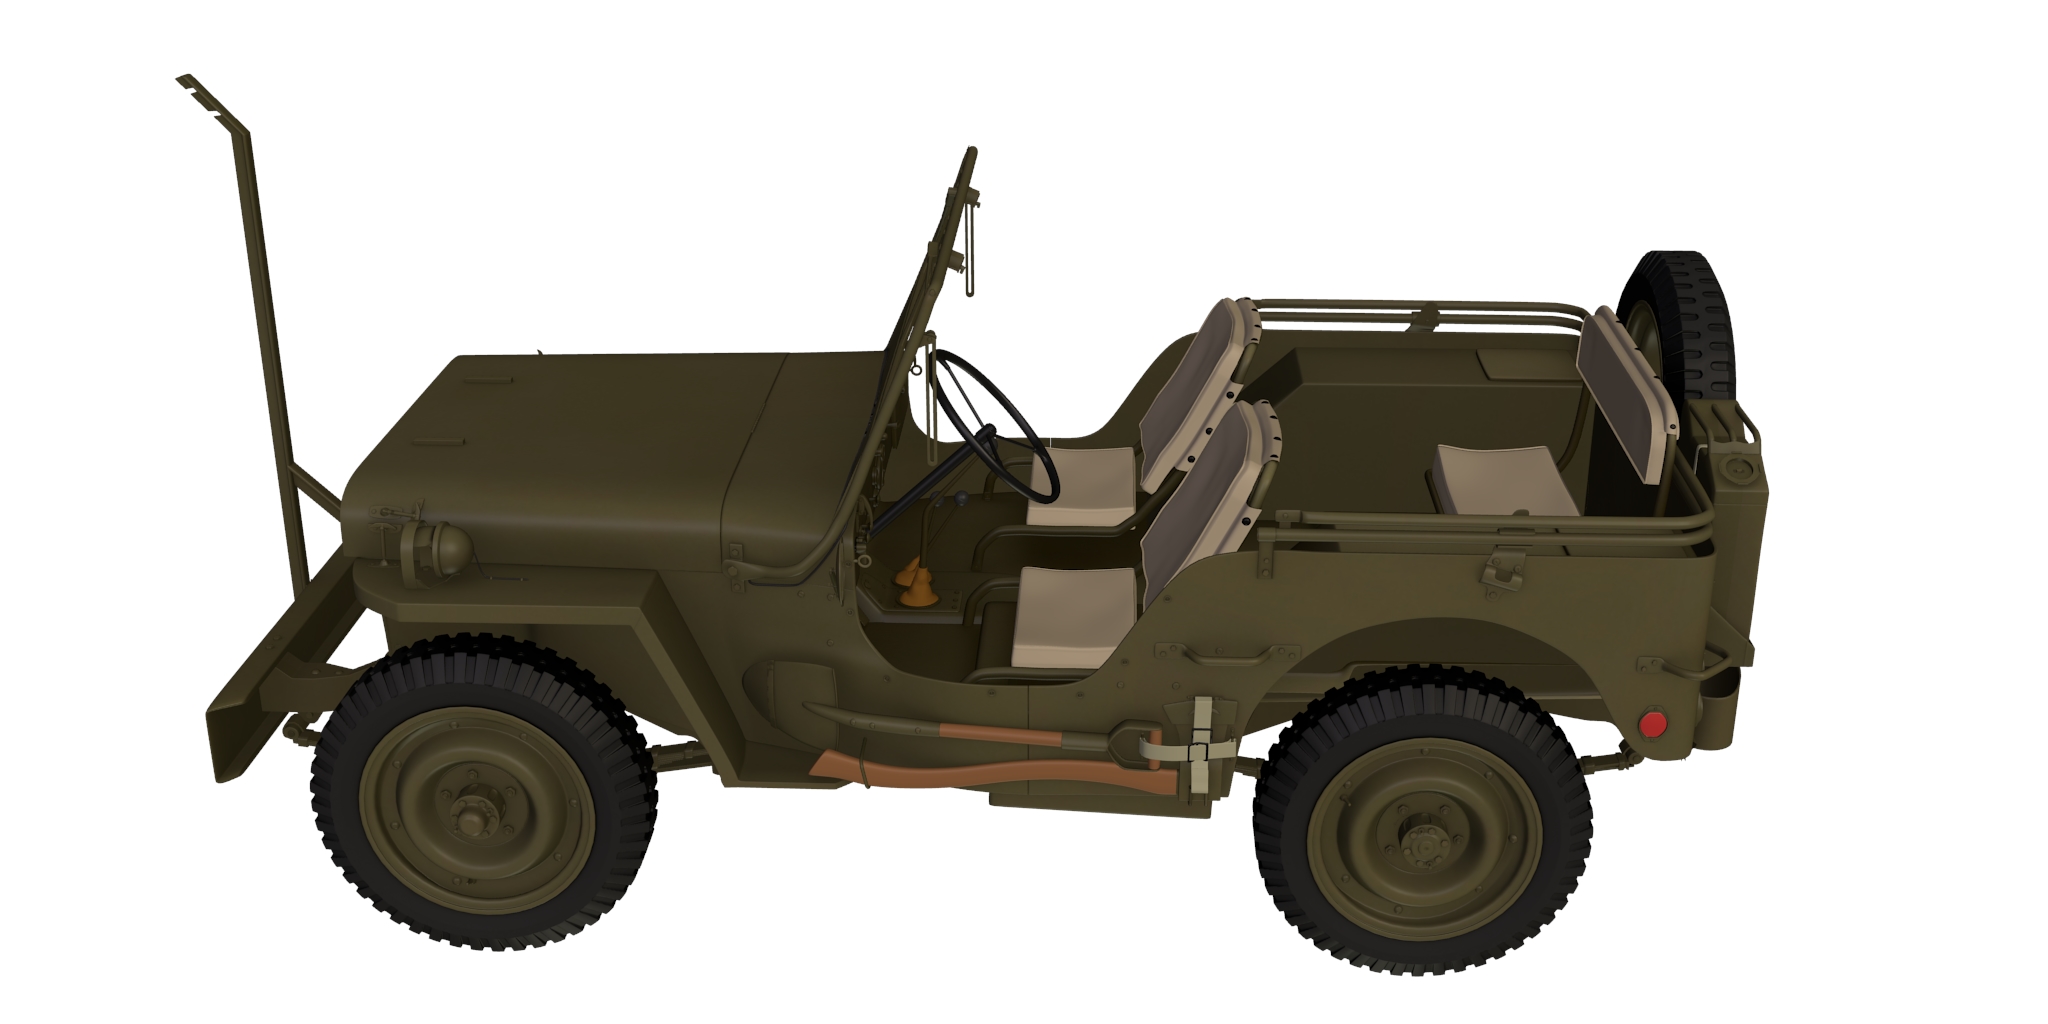
I’ve combined the AO maps with the very basic texture colors that I’ll use as the base. Yes, I know, the colors are not realistic but that’s because they are just place holders for now. However, the colors are taken from WWII jeep reference photographs. There were lighter olive drab paints, some jeeps were painted in “forest green,” some olive drabs were more of a brownish green. These differences were due to the lack of a standard for paints and Ford and Willys used whatever paint was available that came close to what the government wanted.

The same goes for the seat covers. They too had a wide range of colors depending on exposure to the weather. I think these seat covers probably need to be a bit greener, but I’ll fix that in Cycles.

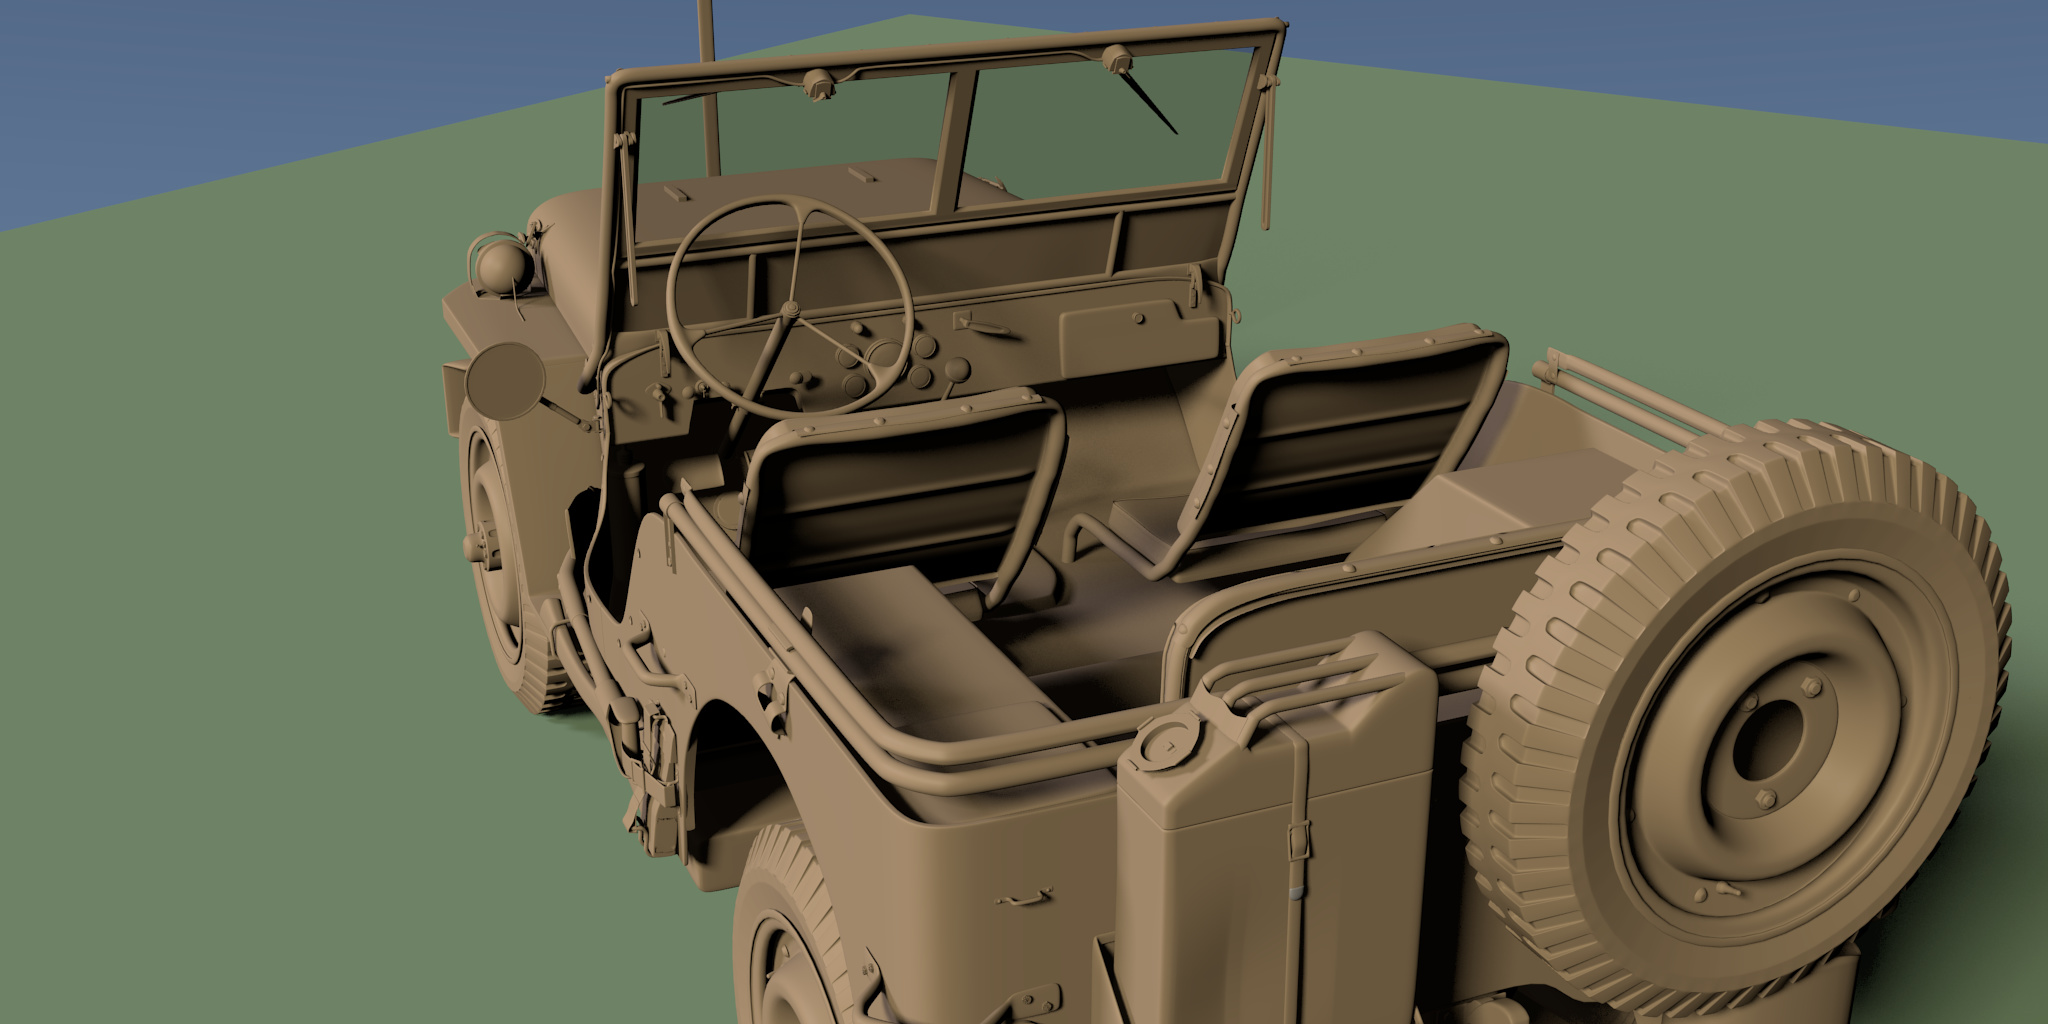
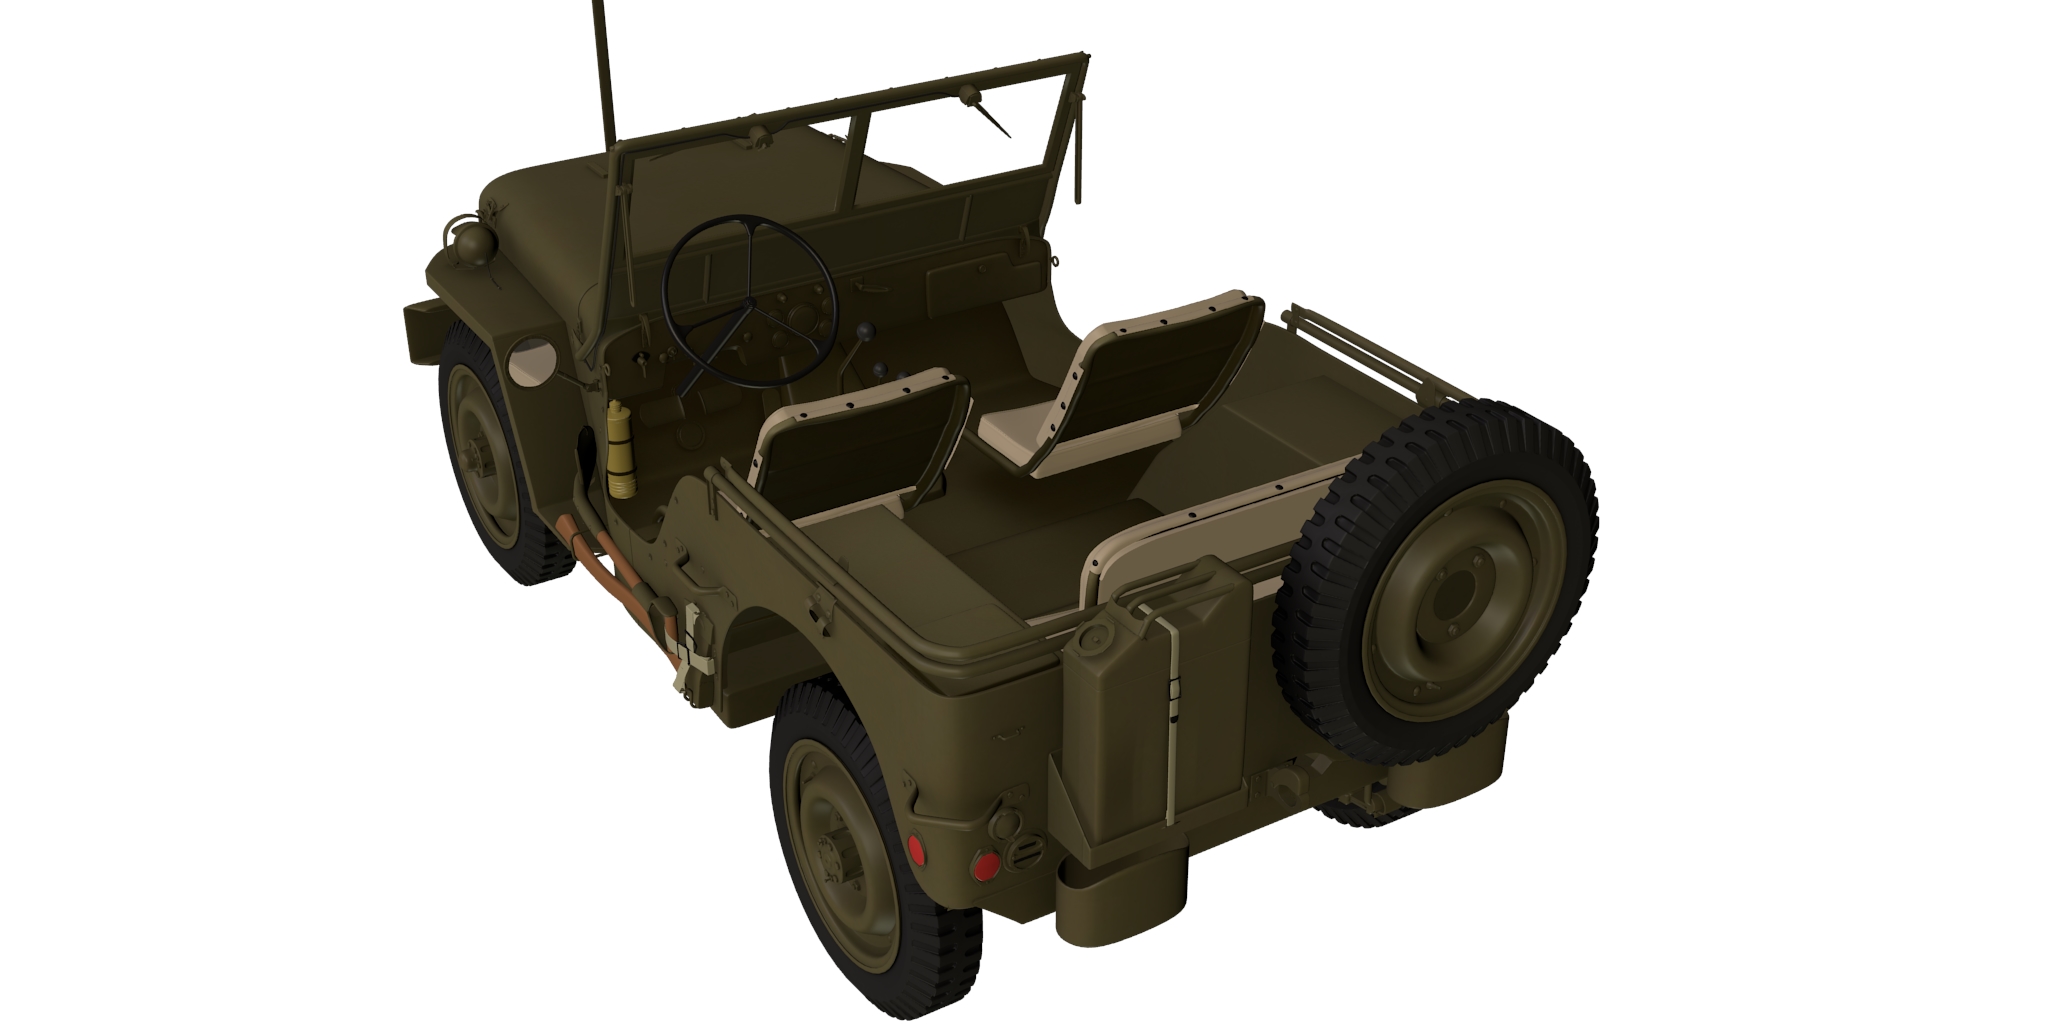
When manufactured, the Jeep was painted almost completely olive drab. There were very few other colors: the seats, wires and rubber tubing, tires, reflectors, etc. Here I show the wood on the shovel and axe. Some jeeps were delivered with the wood varnished and some delivered with the wood painted olive drab. Just for some contrast, I chose to show the wood as varnished.

The color of the leather boot for the gear shifts ranged from a very light tan to a rich dark brown that was “roughed” meaning that it wasn’t smooth leather.

So far, all the modeling, UV maps, AO baking, and base colors have been done in Blender Render. It’s just easier for me to do all the basic in BR/BI. The next step is to switch to Cycles and begin the detailed texturing, lighting, and the background for the final scene–which will be in an urban setting with rubble from the war/combat.

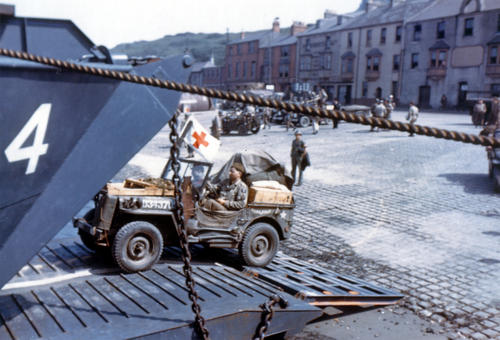
Suggestions on improving are welcomed. If any Jeep experts see a problem, let me know. On the other hand, I’ve yet to see the same configuration of a jeep in two reference photos.

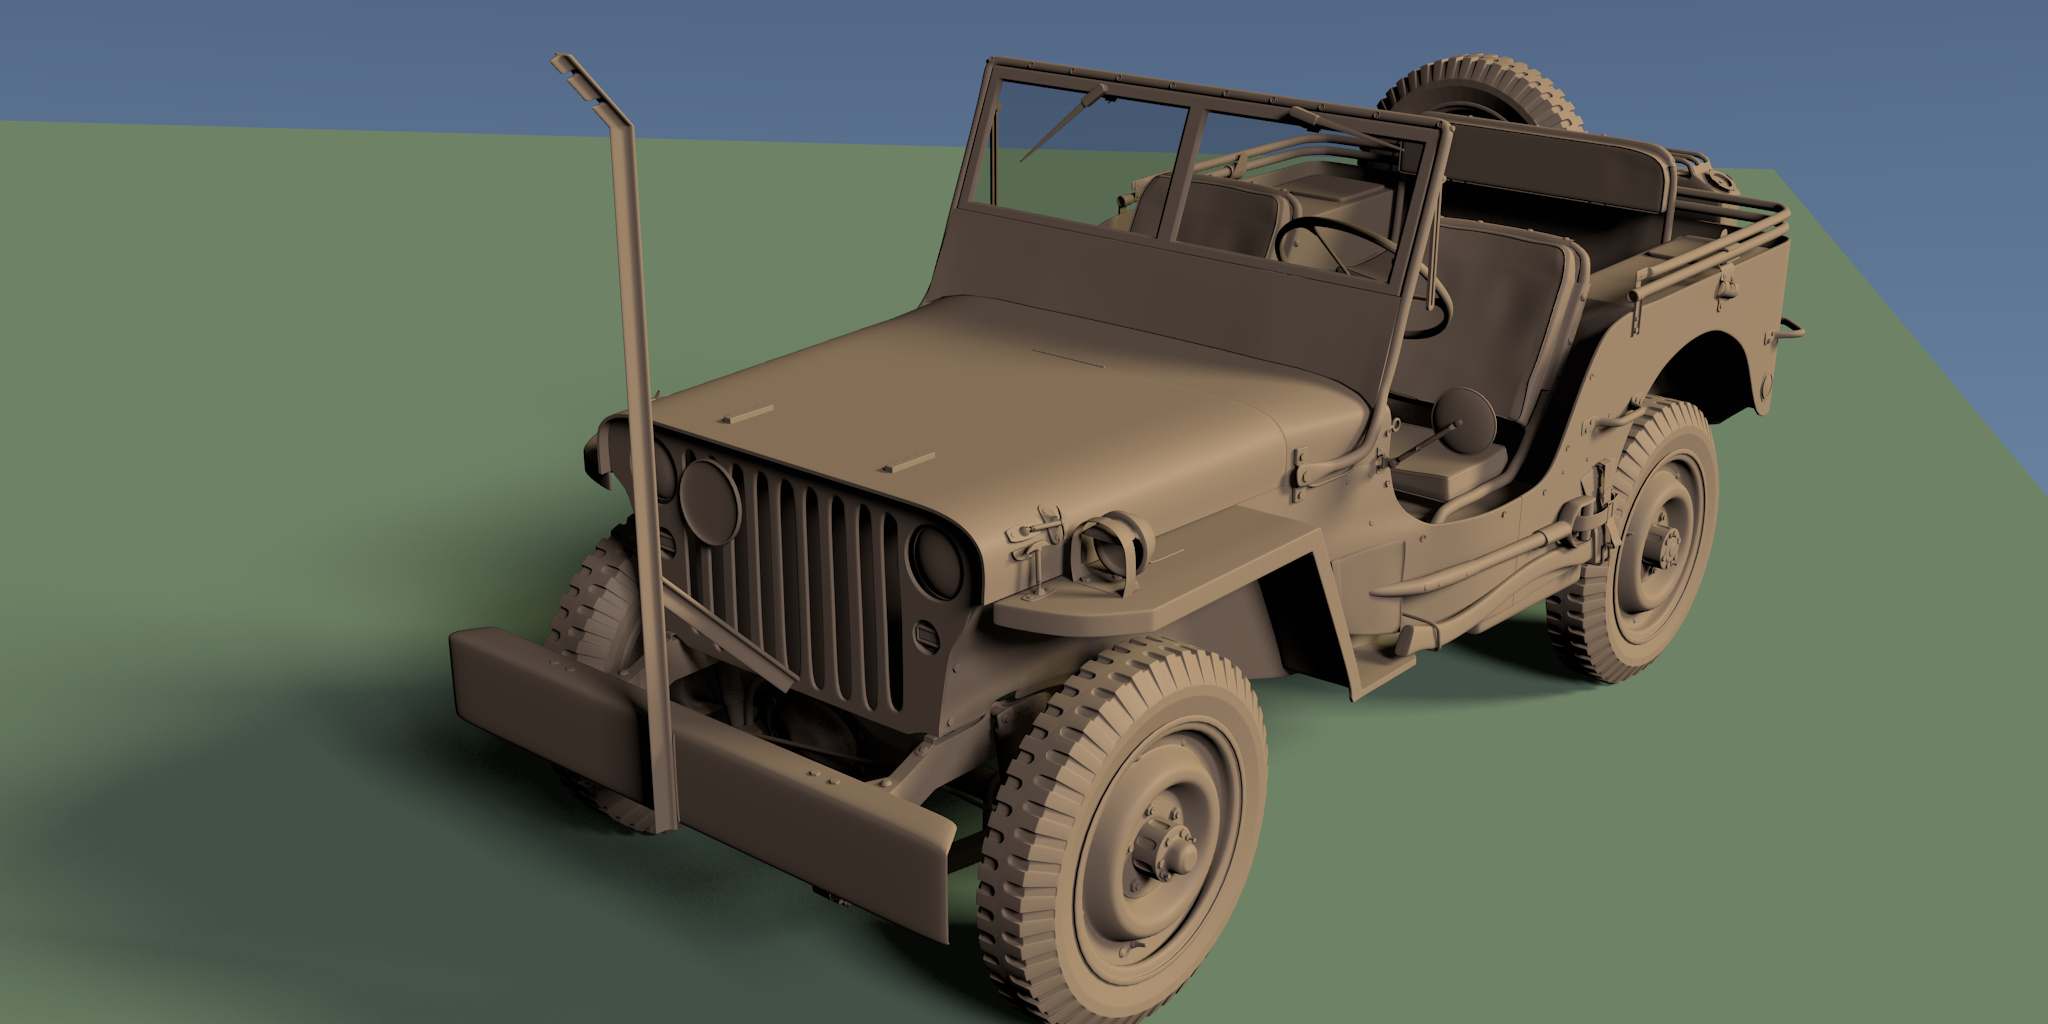
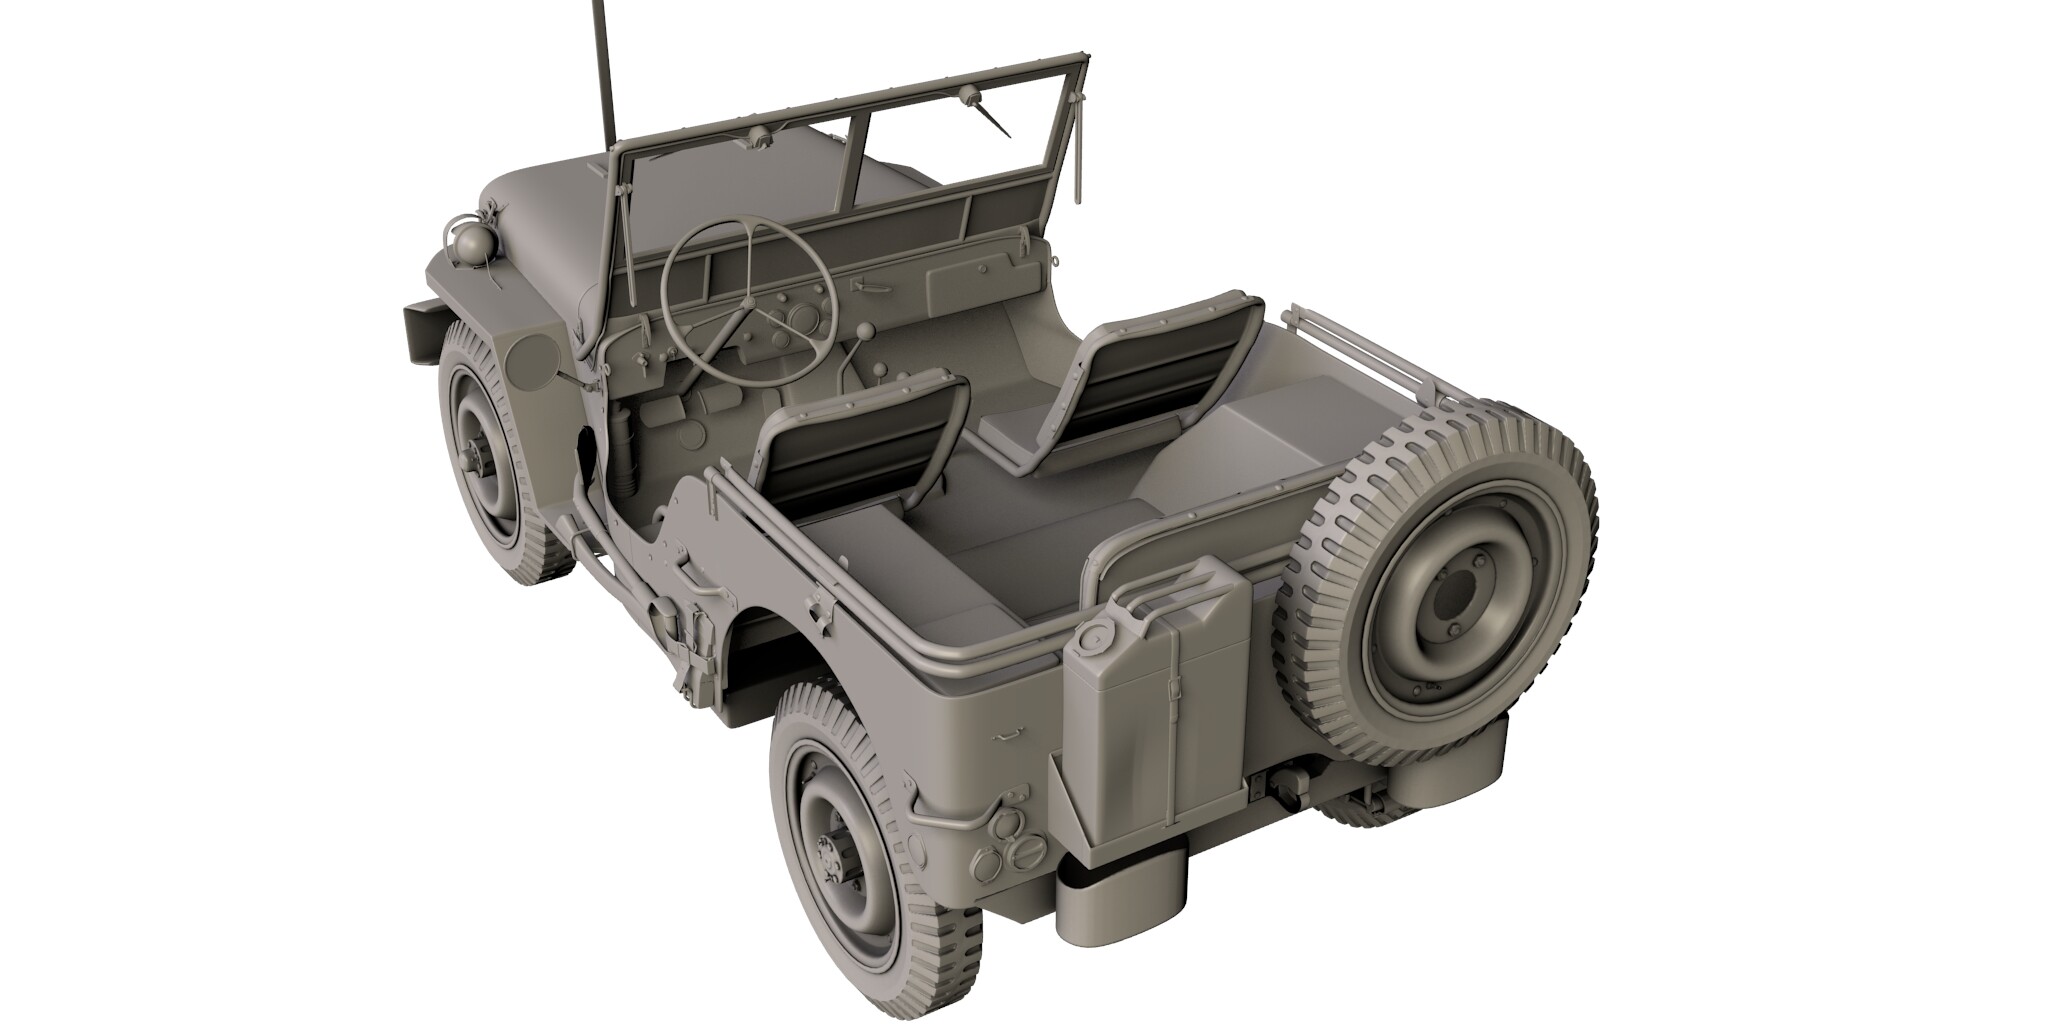
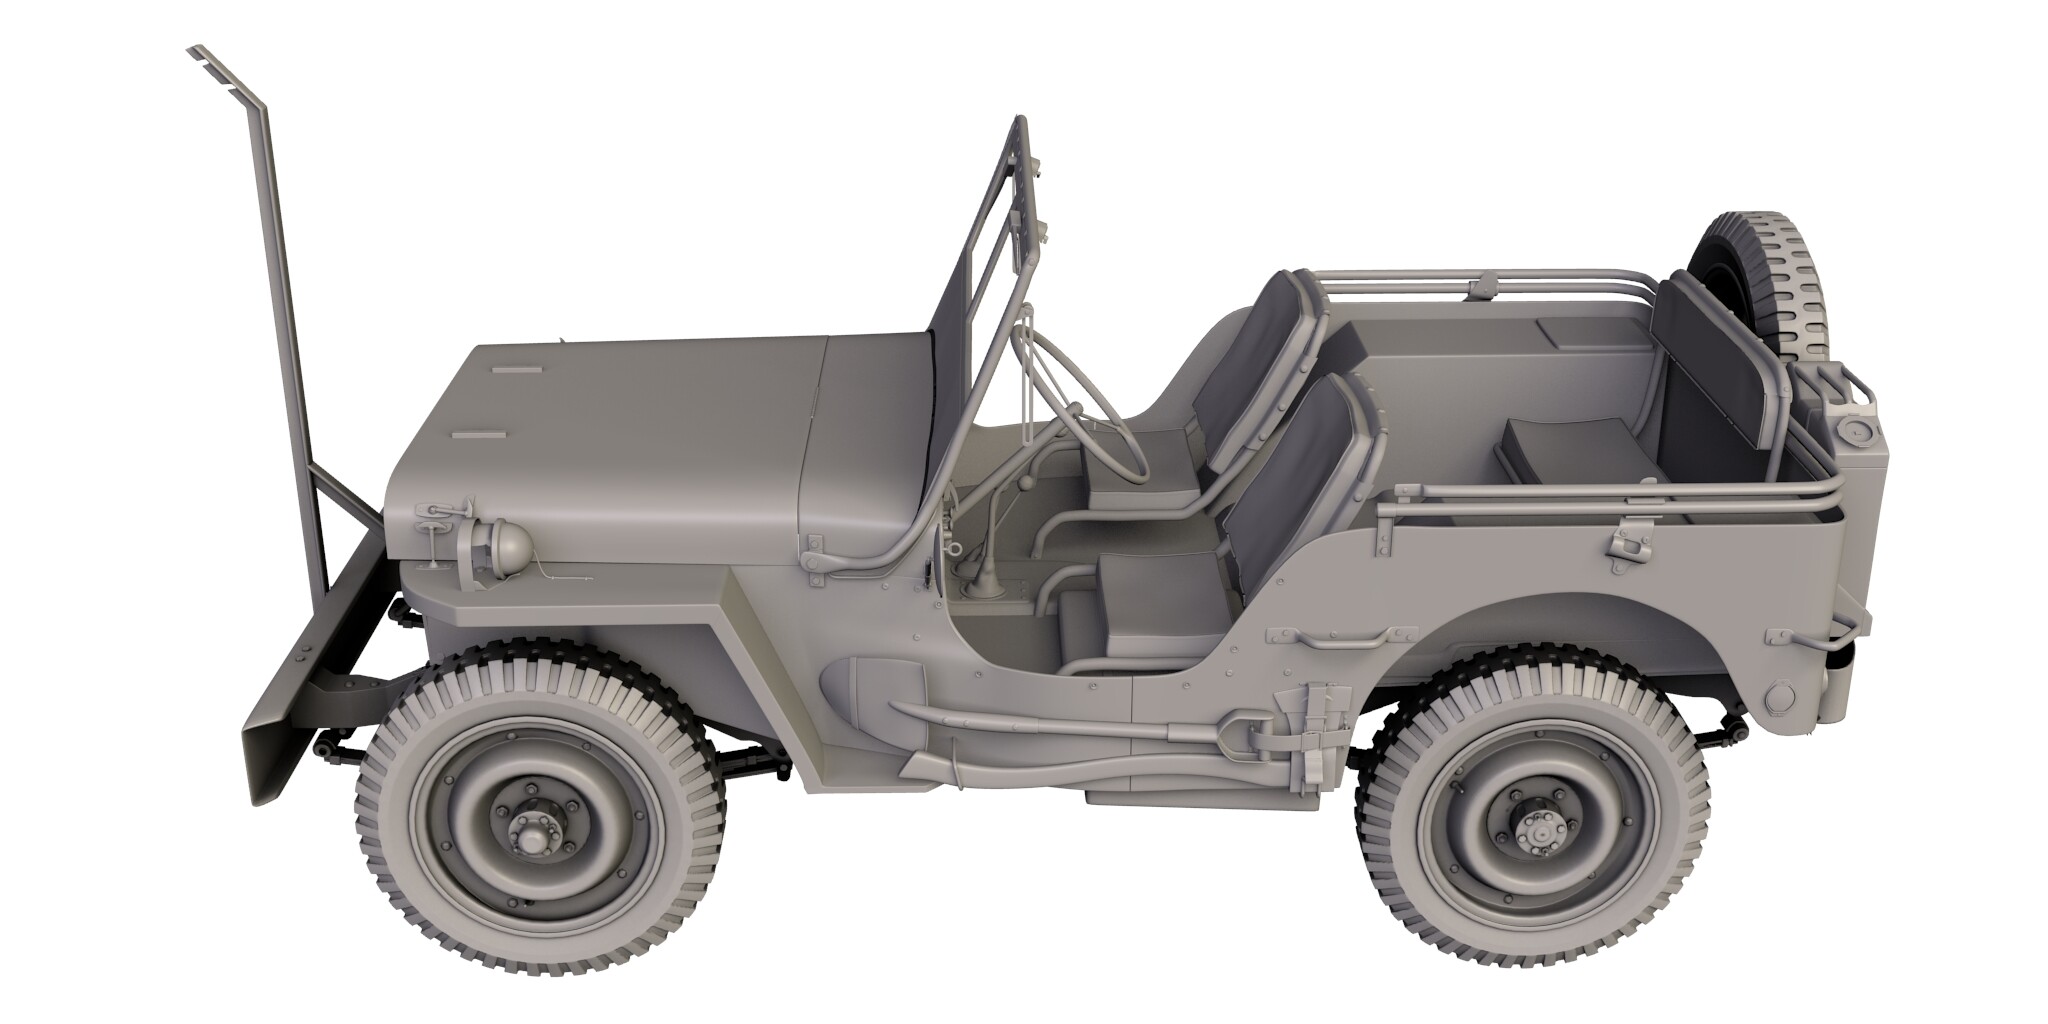
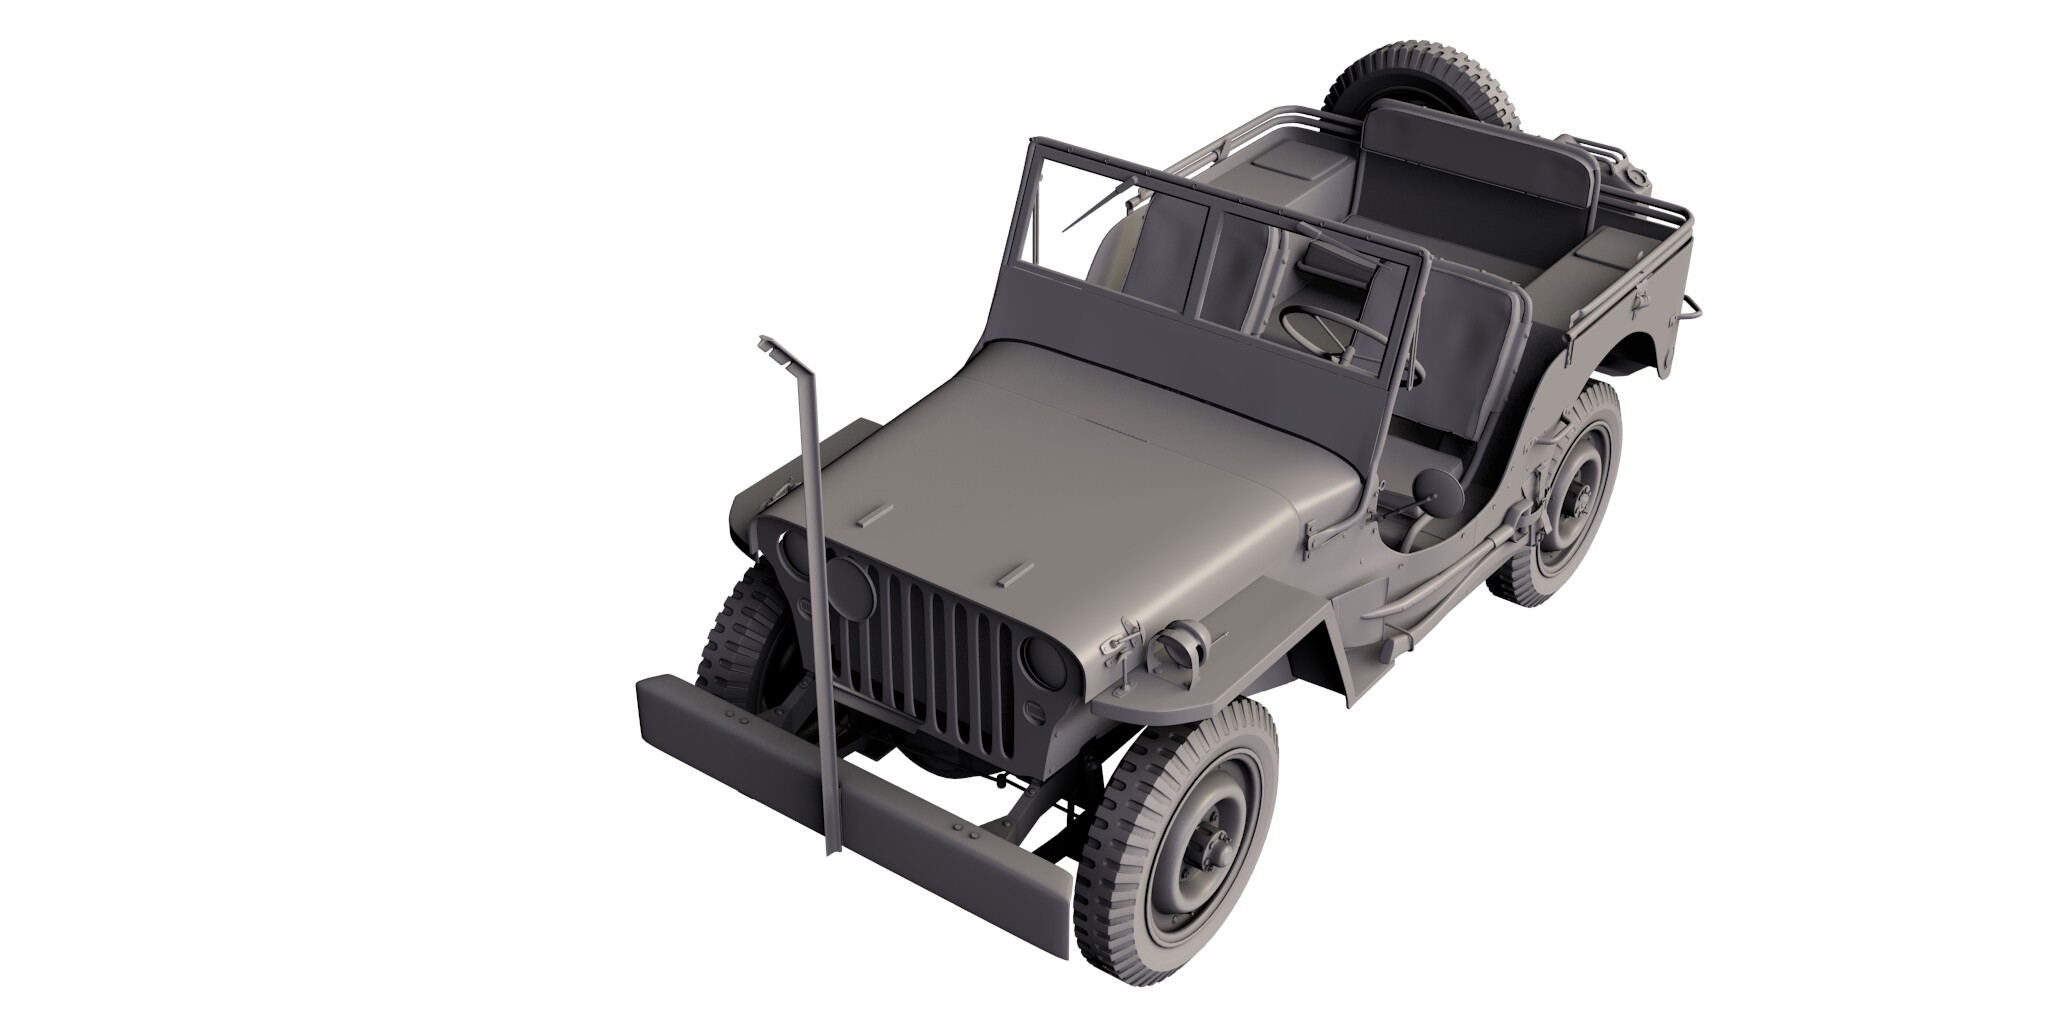
As I said earlier, I had never modeled a vehicle and so I wanted to start with a simple subject. The Jeep was angular and simple in its appearance, but it turned out to be difficult–at least for me–to model. If I were to start over, I would like to model it in much greater detail including the details on the frame, engine, transmission, wiring, etc. The visible screws, nuts, and bolts are about 98% accurate. There are a couple of bolts under the front fenders that I missed. I’ll see about adding them in Cycles.

This model is about 95% accurate. I tried to be as accurate as possible, but I could not find official blueprints and so this is a composite of many references. I did do my best to represent a Willys Jeep circa 1943. But after I finished modeling and doing more research, I realized that I have included a couple of details that were only on the Ford manufactured version of the Jeep. Oh well, live and learn.

BTW, the lighting looks strange because I turn off shadows when I’m modeling so I get a cleaner look at the meshes and I forgot to turn shadows back on before rendering the images.

Attachments


looking nice

did they really paint the shovel and axe too ?
seat looks too clean
need to add some texture or deform it a little may be!

happy bl

FMB, comparing to the case from post #28 this “AO” version looks better!
Could you show how this baked AO texture looks like (maybe mapped on your unwrapped mesh, to get an idea about corresponding model elements)? I did use AO in Blender Render, but I found that I do not need it in Cycles - but maybe the image of a baked AO can provide a kind of a minor “dust/dirt” effect for this Jeep?

Yes, if you look at the many WW II references, you will see that the wood portions of the tools were painted olive drab. Whether they were painted OD or left with a varnish finish seems to be a matter of who produced the tool and whether or not they had the paint. during WW II paint was in short supply and parts were not painted or they were painted with local paint mixes. No one seemed to care.

one problem old pics are BW so difficult to see color !LOL
some rare pics/ films might be in color but have to be lucky to find these !

happy cl

If you do enough research, you will eventually find interesting differences in vehicles, aircraft, etc. Color photographs of WWII are not too common and color photographs of the object you happen to be modeling are even rarer. Actually, I’ve found that movie film that have been converted to video are some of the best color references.

Attached is a picture of a Ford or Willys jeep with the shovel and axe painted the same olive drab as the jeep. Actually, you can often tell painted tools in BW photos as well because there is no contrast between the wood and the metal–meaning they are the same color.

I can find about as many photos where the wood on the tools are not painted. I don’t know why the difference. My guess is that factory production tools were painted and replacement tools in the field were not. There are other possibilities, but there seem to be as many jeeps without painted tools as there were with painted tools. Go figure.

Attachments