Change of direction slightly as I was mocking up the scene it became apparent what I had in my head wasn’t going to work as there was no reason for the horse and human to be in the scene where they were So instead of medic they now engineer and then I remembered M.U.L.E. both the old Atari game which i spent many a happy hour playing and the Robert Heinlein reference’s / general beast of burden which all fell into place better.
Very rough mock up these are all just holding models to get the scene set happy to take feedback as ever on the composition! Hopefully giving it a sense of drama, there will obviously be plenty of pyrotechnics etc. the sheiding over the city I’m hoping to shamelessly rip of the guardians of the galaxy bit where all the nova prime ships link up the square piece in the front of the scene is a lift for access.
The real horse (M.U.L.E.) model has lights and compartments that open etc. so it will be obvious what it’s role is hopefully. I’m pleased with my HRDI the moon is actually a flat image I re-shot in blender with a damp track pointing to the centre with the equirectangular camera and transparent background so I have effectively a dynamic hrdi now where I can move the moon around in the world layer but it has the correct distortion wherever I put it.
What I like is that you did a blockout first. That’s a professional and serious approach. I often skip that and then I have to redo it
Regarding the scene I would say: There is simply too much going on. That is difficult in terms of storytelling. You should think a moment about who your hero character is. Is it the horse? Is it the woman? Or is it the turret in the foreground? The city? The ship in the air? Difficult.
After that give your hero more room. And although it is seen very often the rule of thirds has is right. All this could help to focus more on the story. I could easily imagine the engineering unit (horse and woman) taking a more prominent part. And everything else can be arranged around them and perhaps pushed into the background?
Btw: Is your HDRI a real High Dynamic Range Image? The lighting looks too flat for that.
And, please, don’t let me discourage you! I’m just telling you about all what I did myself
I think the lighting looks flat as I’ve just got diffuse on everything while I position and create the real models + I was using a jpg proxy rather than the 45meg exr file I was thinking that I was not focusing enough on them it’s good to hear that confirmed, I was going to have a lot of that stuff in the background quite blurred out but then I guess thinking about it that’s a heck of a lot of the composition with obscured detail let me have another go, I only blocked it out as I can’t draw well and I can knock up silly little models for placing quicker but I’m loving the freedom it is giving me.
Also one of the podcasts by andrew price he had a really good comment about getting the idea out of your head and onto paper even if it looks terrible as it makes you realise all the pieces that wont work as your mind glosses over them!, that’s why I blocked this out and that’s exactly what happened I had this grand vision in my head as soon as I started trying to make it real it fell apart full of holes Just doing a video for a friend at the moment so had to put this to one side for a bit but it wont take me long then I’ll get an update and I’m not discouraged at all, far from it I really appreciate the feedback and every time I get a little better, this is all new to me! Building a rail gun as well for planetary defence
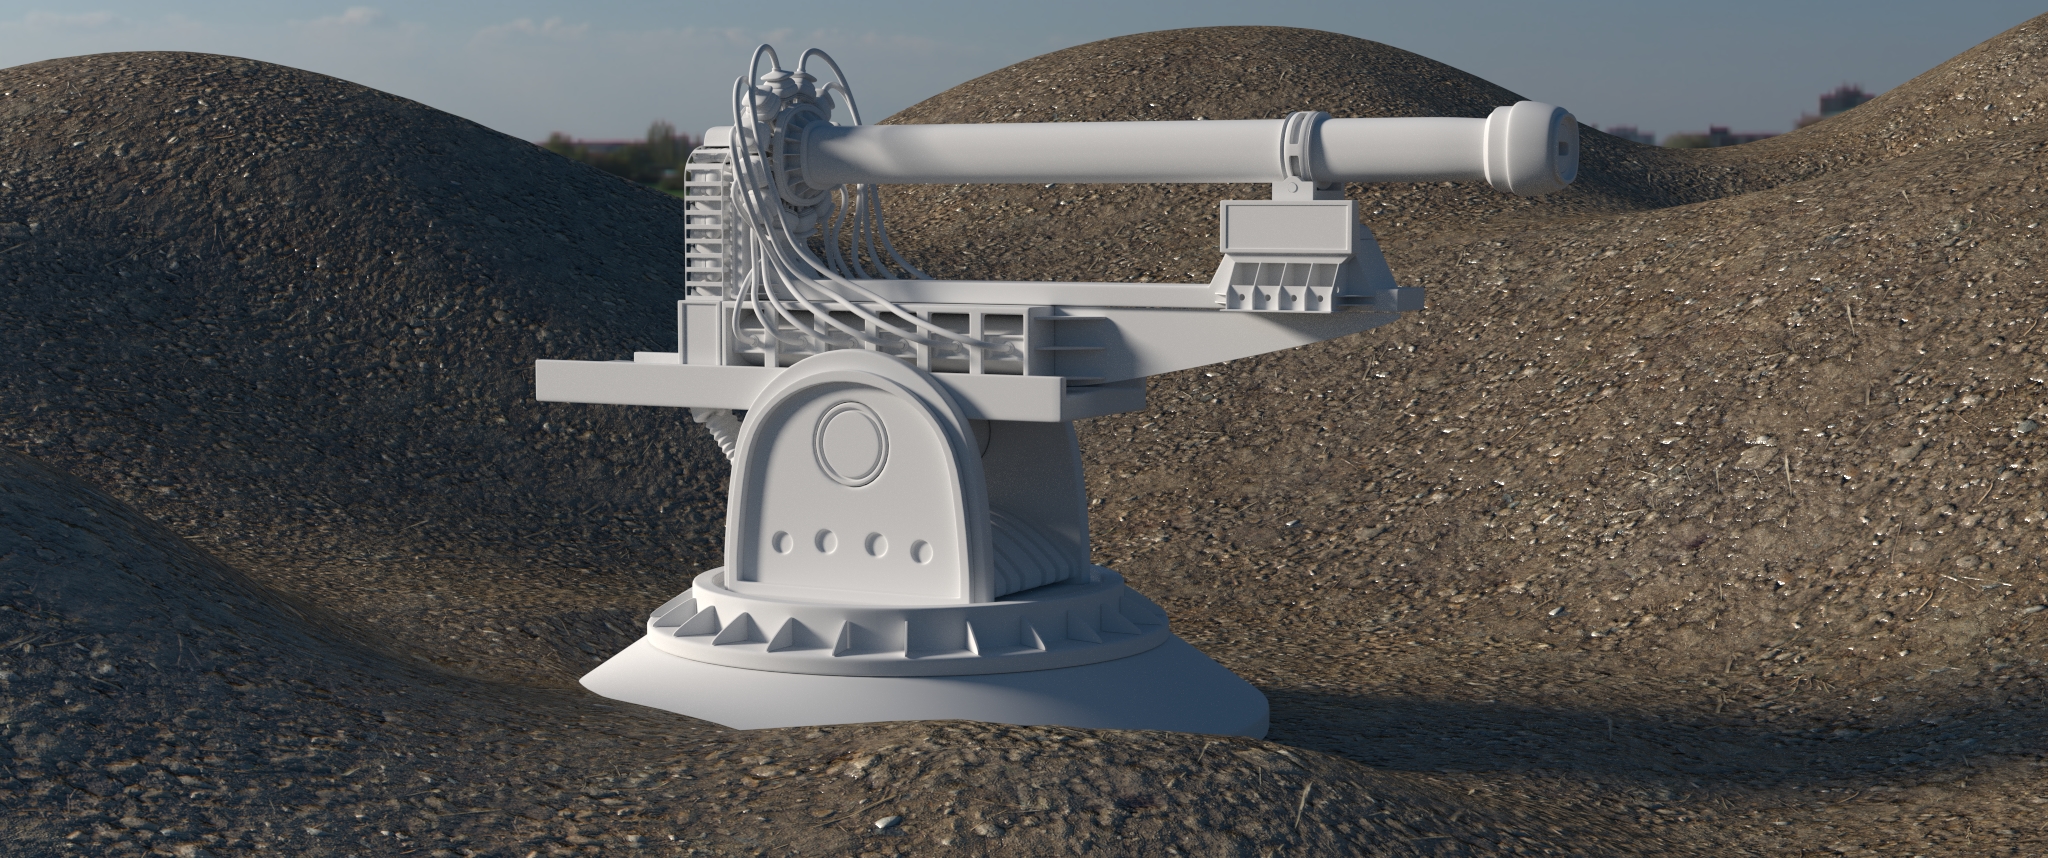
Made the gun they are going to be fixing today, will have another go at setting the scene tomorrow
It’s a rail gun but I’ve tried to base it loosely on what’s being tested at the moment (well I obviously don’t know for sure as I’m sure it’s secret ) most of the scifi ones I’ve seen have an open chamber but I don’t think that would work, can’t see how the projectile would stay located, the projectiles have a conductive outer covering that splits as they eject as I understand it letting the main projectile loose at vast speed. Lot’s of power required that’s the most unlikely piece of this I think, my portable nuclear power generator is a little small
I’ve got so much uv unwrapping to do at some point with this it’s not even funny!
edit and I just noticed I forgot to apply one of the mirror modifiers on the frame at the front when I joined some stuff well you get the idea not rendering them again!
Freestyle mesh renders, love it, thanks for pointing me in that direction!! that offset add on is really cool as well I’ll use that a lot I think.
Probably a little high poly count but I’ve modelled everything to be fairly complete not just what you can see as my system can handle it and it means they are all individual assets in their own right that I can reuse, like really I know I didn’t need to go so detailed on each bullet but if I want to add it exploding later and the casing coming away I have it ready!
I’m tempted to work out how to add weld to the joins looking at this, wonder how hard that would be, will have a read!
Also I’ve got some polls there over 5 but I figured it didn’t matter if it was on a flat surface that I was never going to deform? for anything I’ve done like skin etc. I’ve kept it quads and 5 pol max but as few as poss. I couldn’t see any issues but if it’s going to cause problems it’s easy enough to change!
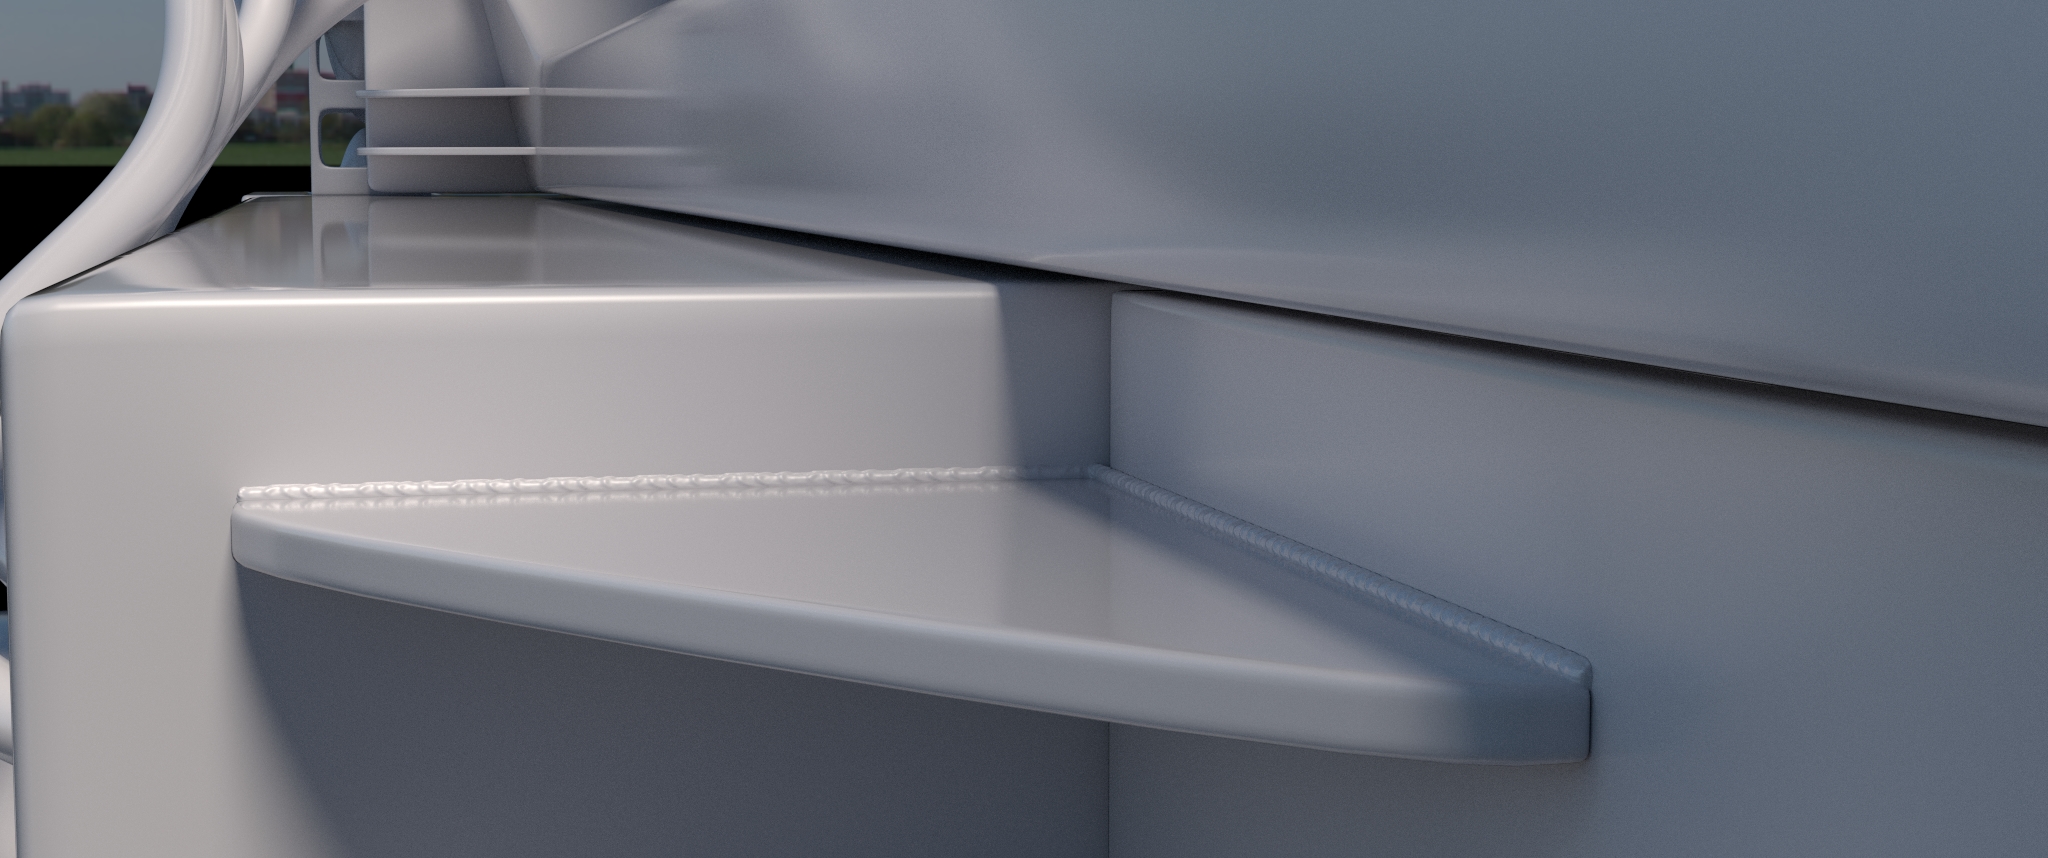
Figured out how to add welding if I need it, not going to stick it everywhere just if I need it in a shot, pretty pleased with that figured it out myself and managed to think my way around making the displacement texture nicely.
A little manual but can make it fit any shape I need to and easy now I have patten to do it.
Basically select just the verts and edges from whatever models I want, no faces, then duplicate and separate by selection.
Limited dissolve add skin modifier ctl A to scale to fit add and apply one level of sub surf to make it round
Go into edit mode highlight the 2 rows of faces that will be visible + ends, uv unwrap follow quads average so it’s all one strip 2 high ish
Add sub surf 3 levels, add displacement modifier and weld texture I made make sure it’s uv unwrap as cords for displacement and strength way down around 0.015 can also use contrast on the displacement image to tweak as well.
Rotate uv map 90 deg if needed to it runs same direction as weld image scale to fit displacement texture on the y axis and then just scale the x until it looks good for amount of repeats.
Not sure if there is an easier way do do it but I quite like the results, I’ve see some tut’s with particles as well, I didn’t try that as this seemed to work ok!
The wires are cool, Umii and the detail shot with the welding also. Good approach on how to create a welding, very creative and a clever combination of the given tools. The weld seam looks convincing to me - don’t know what a professional welder would say, but I think it sells it well.
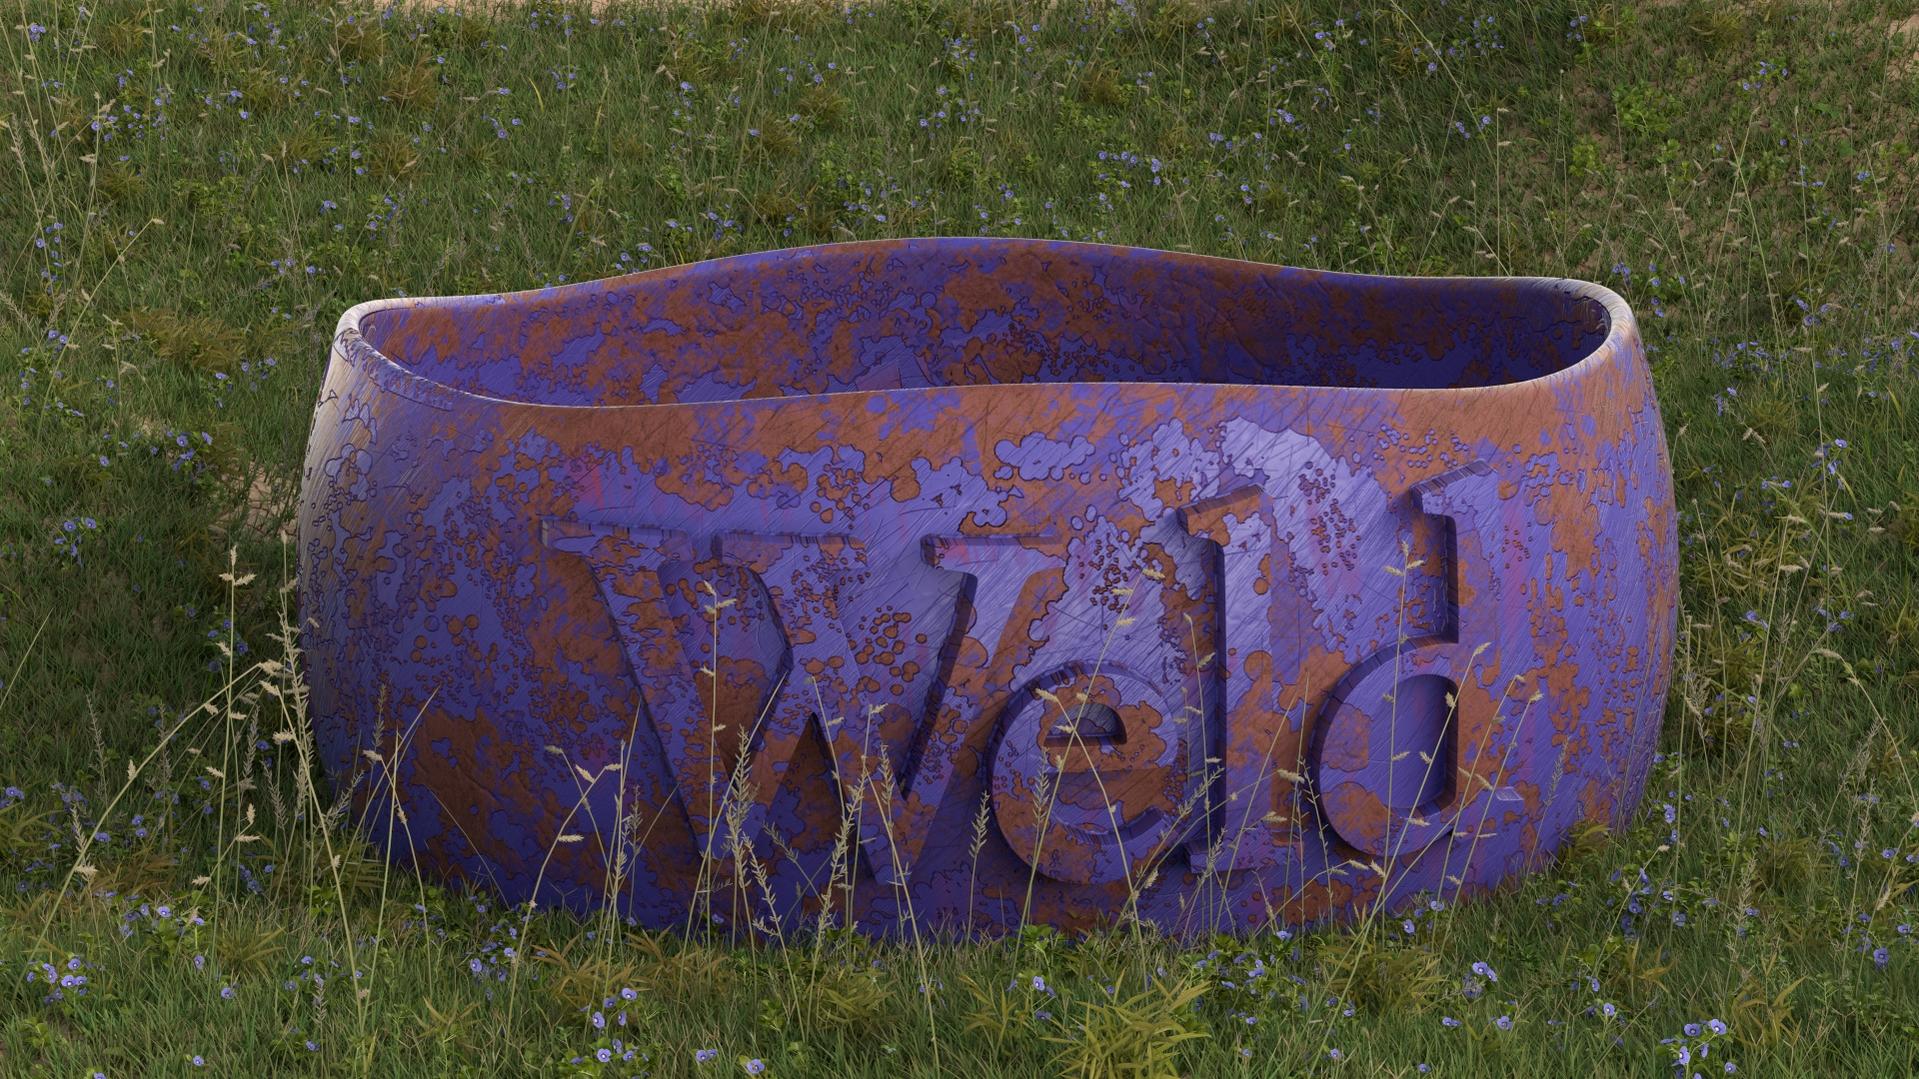
Got distracted playing with the weld technique, holds up on more complicated curved surfaces as well, started playing with textures and tablet also, this is to much scratching etc. I was just looking at one of Andrews tutorials on rust just playing with some ideas seeing how it all worked, the painted masking works well I can see me using that a lot but I painted direct on the model rather than the flat uv unwrap as I seem incapable of doing anything in 2d using tips from pieriko’s painting vid and added a bit of a fresnel effect on the gloss I think if I was doing it for real I’d add that in all over to the paint looks too flat but it was just a test, anyway back to modelling assets for the scene now, it’s never going to end
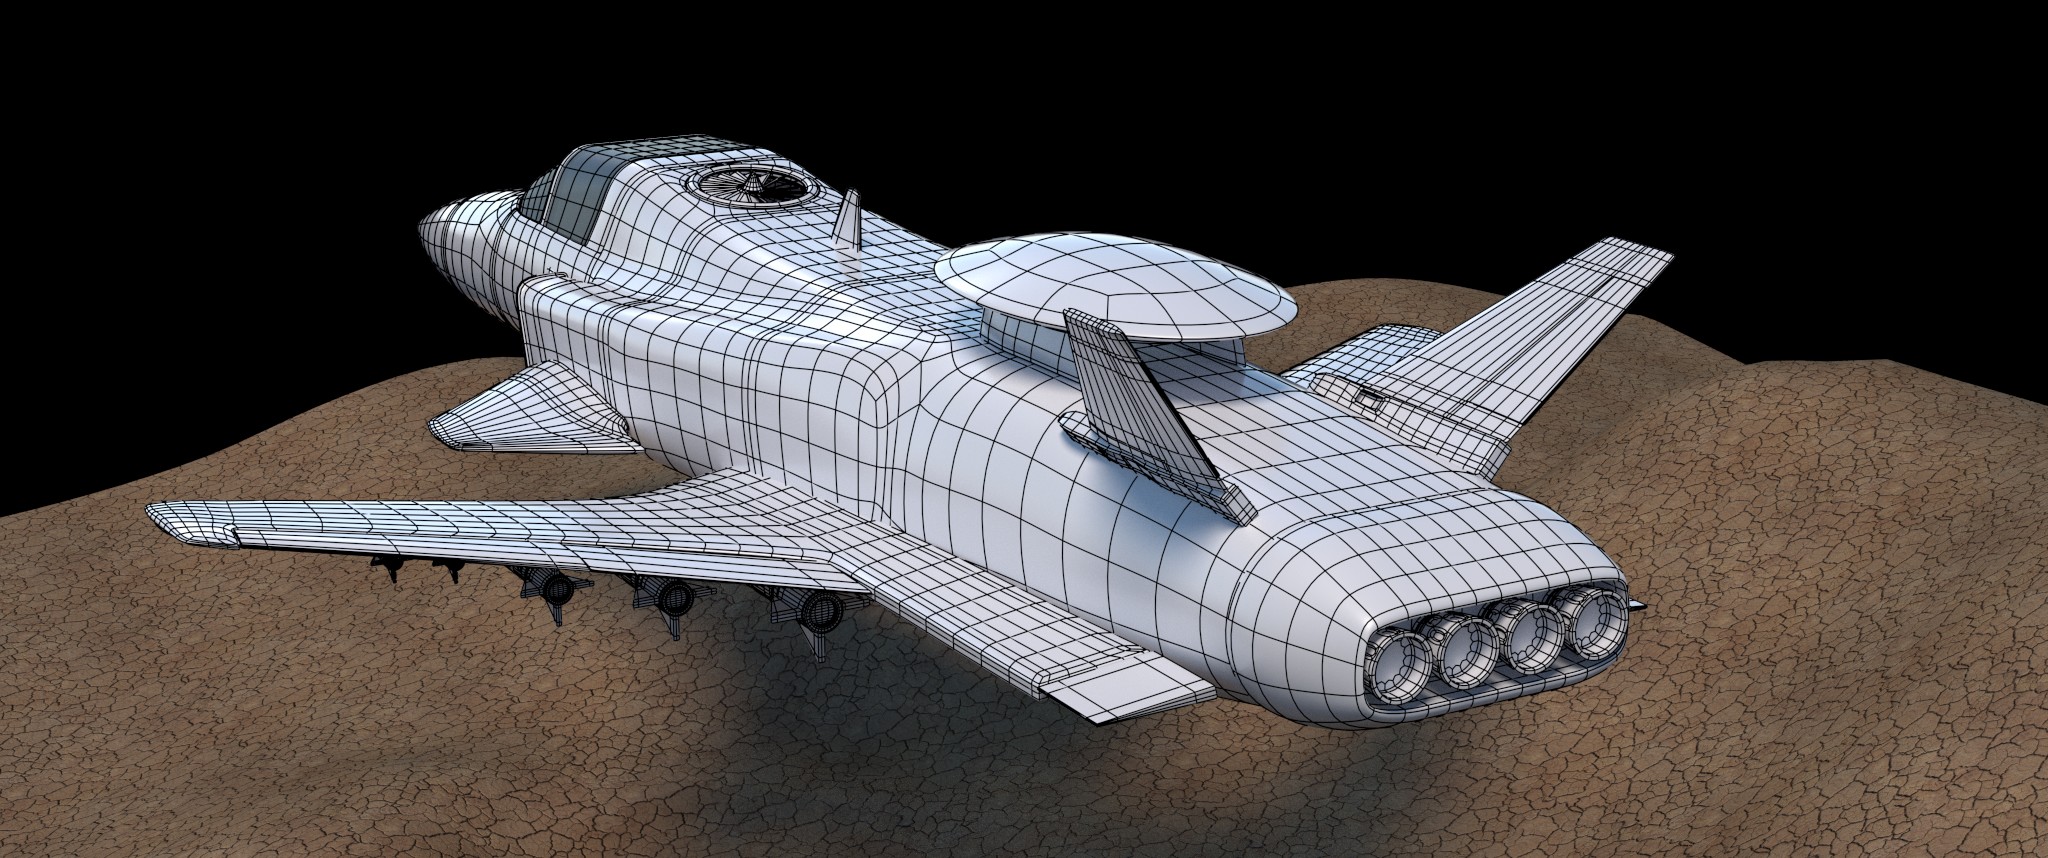
Made this as a start for my alien space ships, the scene is going to have some enemy spaceship type things in the background, light attack, I’ve started with doing a rough model with the x-29 as a reference, I always figured aliens made that anyway and I like the wing shape. It’s not supposed to be an exact copy just a likeness and I haven’t gone mad on detail as they are going to be in the background. Next I’m going to pull it apart and make it wider in the body and generally chunk it up a bit and add some sort of VTOL capability hopefully! (and fix the dodgy corner in the rear wing I just noticed!)
Be curious no longer something like this, I’ve not gone massively detailed as it’s not going to be that close in the shot but I’m going to redo the missile holders they look rubbish I was being lazy and paid the price I’ve tried to keep it near future for the overall theme so I’ve tried to do evolution of existing technology’s, thinking this is more of a recon but with some offensive capability and can also do vertical take off and landing if needed. As always happy to take feedback! it’s not going to be close in shot tho, I’m looking forward to texturing it tho I quite like it.
Clothing next! toying with the idea of trying to do a 3d scan with my camera been reading some tut’s and have an idea how I might be able to get a better result as I can film nice quality 4k with mine and have a steady cam, will see if we get some nice weather and plenty of light! or I may just model it
Tided up missile holders, think this will do for where it’s going to be in the scene unless anyone notices anything really out of whack! Ended up with 2 models out of the process as well, happy days. Going to have a read up on how to rig clothing properly before I start creating that in case I need to take anything over and above quads and poll management into account like the body mesh before I start.
I’m getting close to having all the modelling done except for rocks and bits and bobs like that. Suspect clothing will take me a while haven’t done that before and I’m thinking about a bit of a mix between soft combat gear and a bit of hard tech but will see what unfolds!
Just playing this isn’t what the scene is going to look like I still think setting the scene is going to be the hardest bit of this for me but we will see! texturing is going to be challenging as well I think.
Clothing next! toying with the idea of trying to do a 3d scan with my camera been reading some tut’s and have an idea how I might be able to get a better result as I can film nice quality 4k with mine and have a steady cam, will see if we get some nice weather and plenty of light! or I may just model it
Huh! I’m sure that will be interesting. Perhaps that would mean a big overhead compared to a sculpting/modeling approach. But the experiment and the learnings you can make with this would be worth it, I guess.
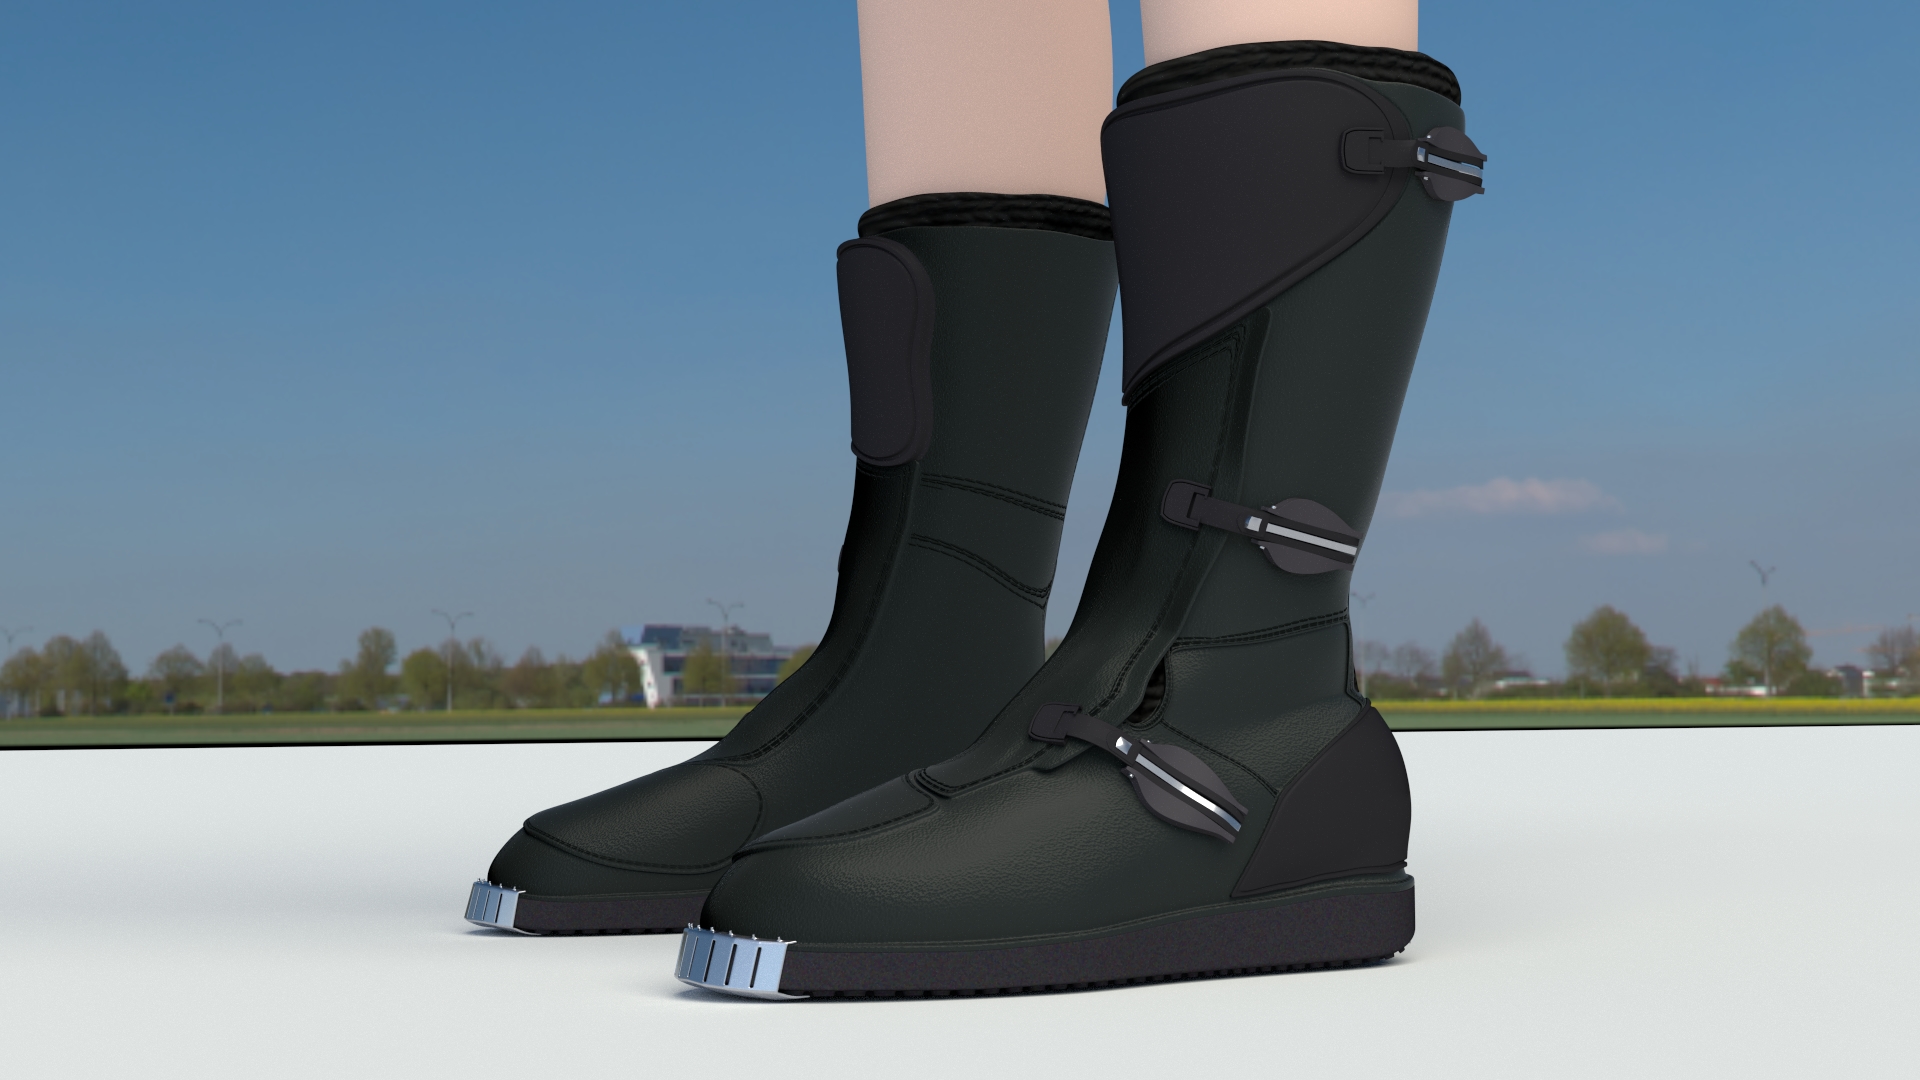
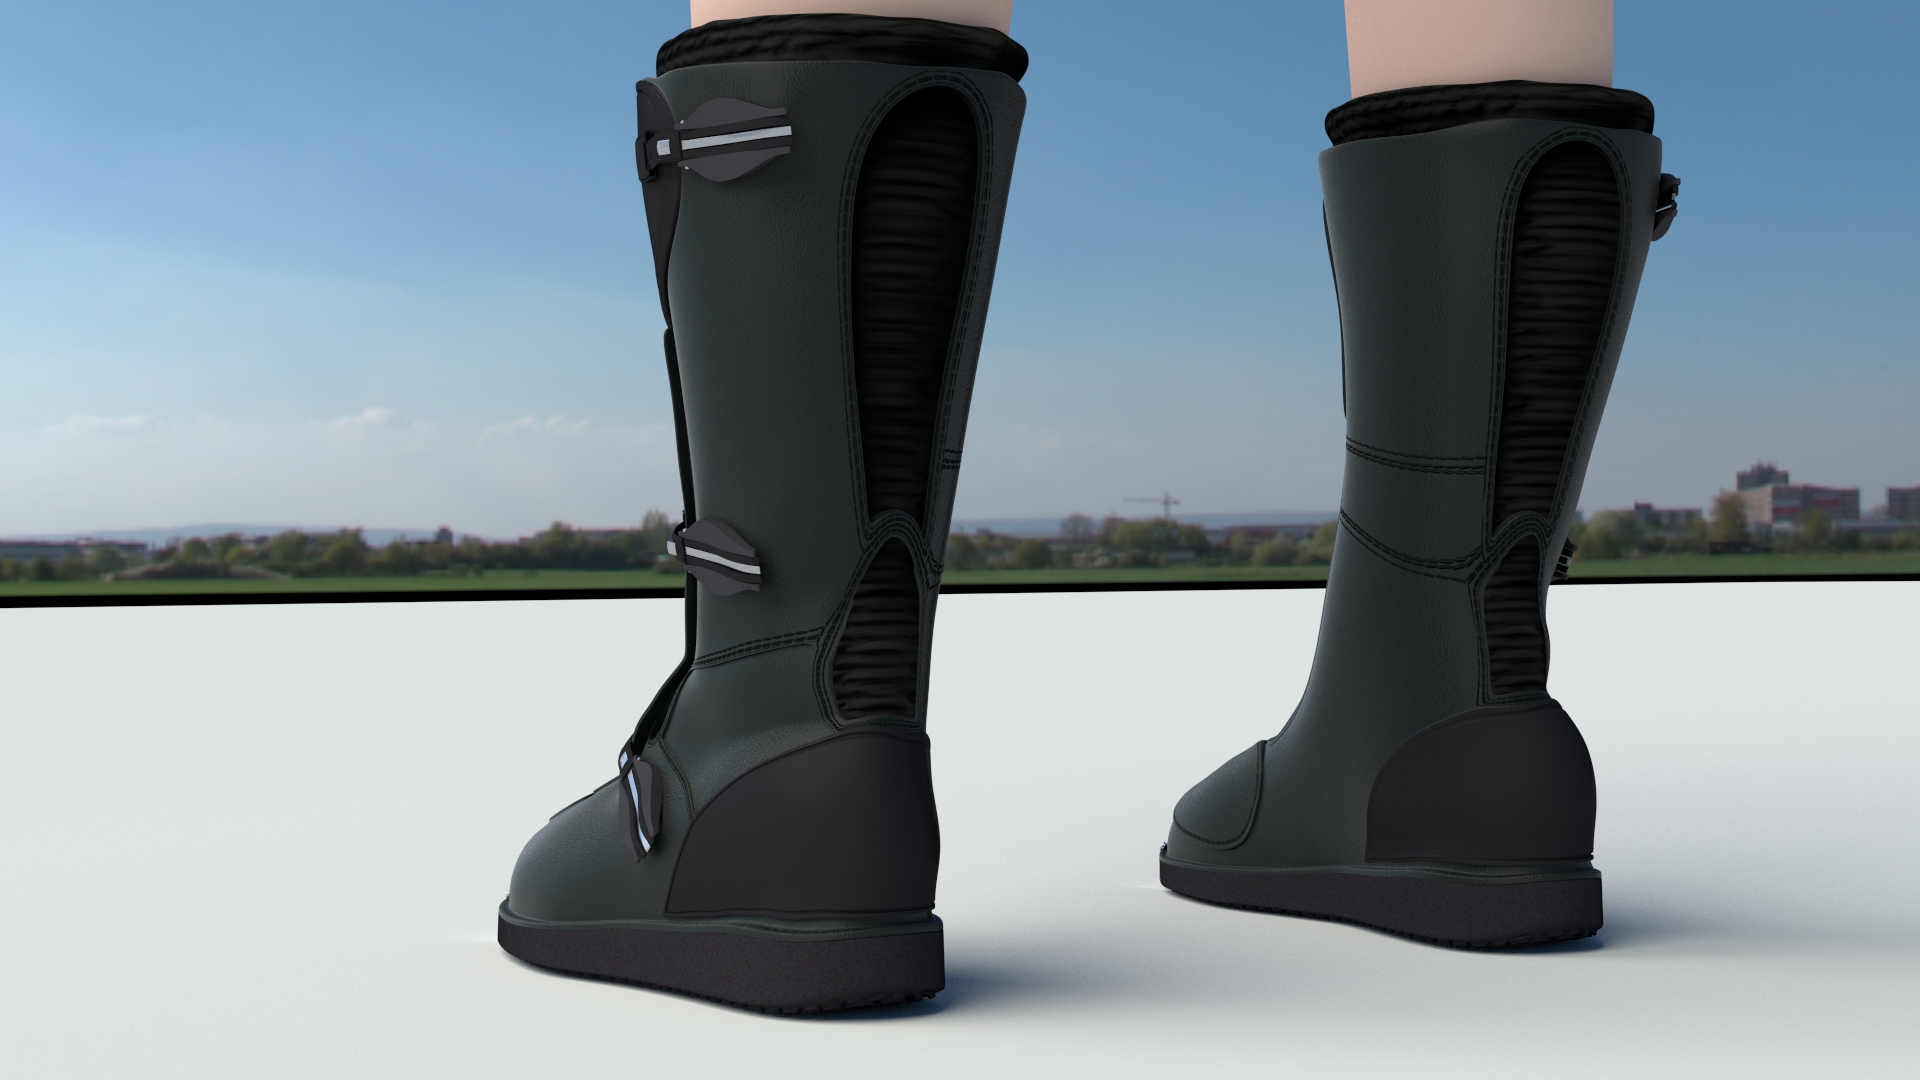
Boots! Loosely styled on some of my motorbike boots, temp materials but I needed to add something as I couldn’t really get a feel for how it was looking. Ended up modelling it to cold and wet to be playing with camera outside to try and scan it
Now I should have probably asked this before I started :)!!! but I wasn’t sure if it was going to cause me issues if I had done all the different sections of the boot as separate objects i.e. where the leather overlaps when I came to pose it and weight paint, I thought it might so I modelled the boot as one object which caused me a bit of planning and extra topology but I managed it, I was wondering for next time would it have been ok if I had done it separate or would I have got gaps if I posed it where they were separate which is what I thought might happen. It would have been a lot easier to do it as separate objects and tidier.
Anyway I quite like them for a first go at something like this, needs dirtying up and scuffing etc. and a couple of bits annoying me but I’ll see in a few days took a bit of getting used to modelling something non symmetrical as well! Trousers next I went quite high topology as I’m posing it not animating and I figured I could always bake a normal map from it later on a low polly version if I ever wanted one with a more sensible polly count.
Really cool and good looking boots. I think modeling the parts as separate parts would have been possible. Then you could join them together, so they form one mesh. And I’d expect they behave like one mesh with regards to rigging and weight painting. But I’m not speaking out of experience here.
Thank’s! I asked in the modelling section as well but didn’t get a response! I think I’ll do some tests tonight to double check it should be easy enough to test I guess, it’s bugging me, I got distracted entering the weekend competition need to get back to the trousers next, I will finish this at some point but I’m having fun and that’s what it’s about
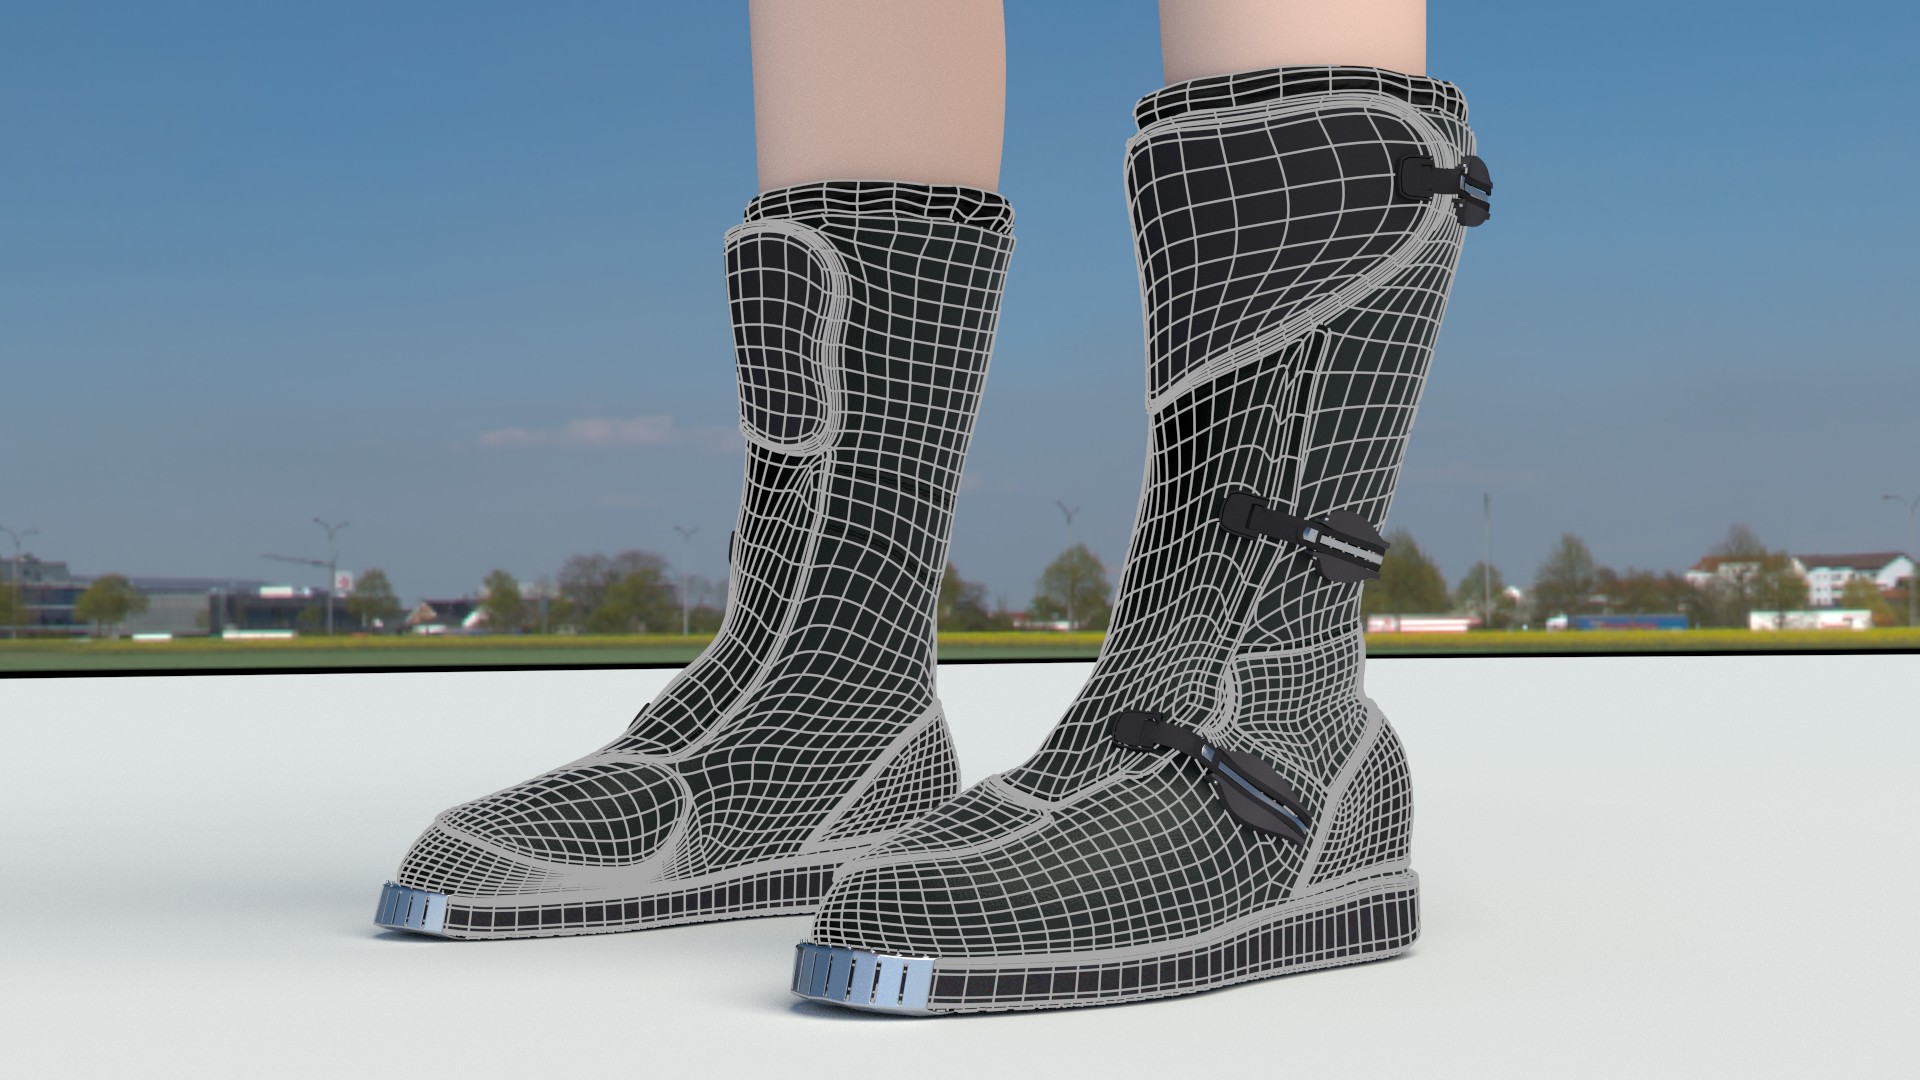
Did some tests def better easier to pose it if it’s one mesh, these are both the same boot default parenting to rigify metarig but I separated the panels in place on the front one and they don’t get auto weight painted nicely and you get gaps I’m sure I could fix it repainting but the solid mesh just works default so I think I’ll just plan ahead and do that. Glad I spent the time making the main boot out of one mesh now A bit dense but tbh I don’t need to sub surf it as much to get it smooth so nothing much in it really.
Must do trousers now, figureing out best way to do pockets and belt loops etc!
Jumping around a bit! rigged face so pleased with this need to finish inside mouth but the basics all there. Used the new rigify pitchipoy metarig it’s awesome but there are a good few subtleties what are different to the original rigify as well as just the face for setting it up nicely. I ploughed through the 2 hour extravaganza posted by the developers below which also involved me having to download the whole thing and edit the audio back in sync in 3 places so I could follow it, not sure how many people would bother with that!
Anyway looking past all that the info in there is pure gold also includes how to add additional custom bones and controls and also a section on how to set up the auto weight paining properly and the best explanation of how the bones impact that I’ve seen. Also includes how to set up proxy meshes then copy the weight paint to the real mesh for clothing etc which I’ve been searching about for how to do properly. I’ll put together a basic tut on the initial rig this week I think as I’ve not seen one out there yet.
Well done. The facial rig seems to work well. And thanks for the link to the video tutorial. I bookmarked it for later but I guess I’ll first wait for your shorter one I scraped through the two hours and found that it is a profound introduction and covers many topics. But something shorter would be welcomed for starters.
I need to do it so I remember as much as anything some really good tips buried in there.
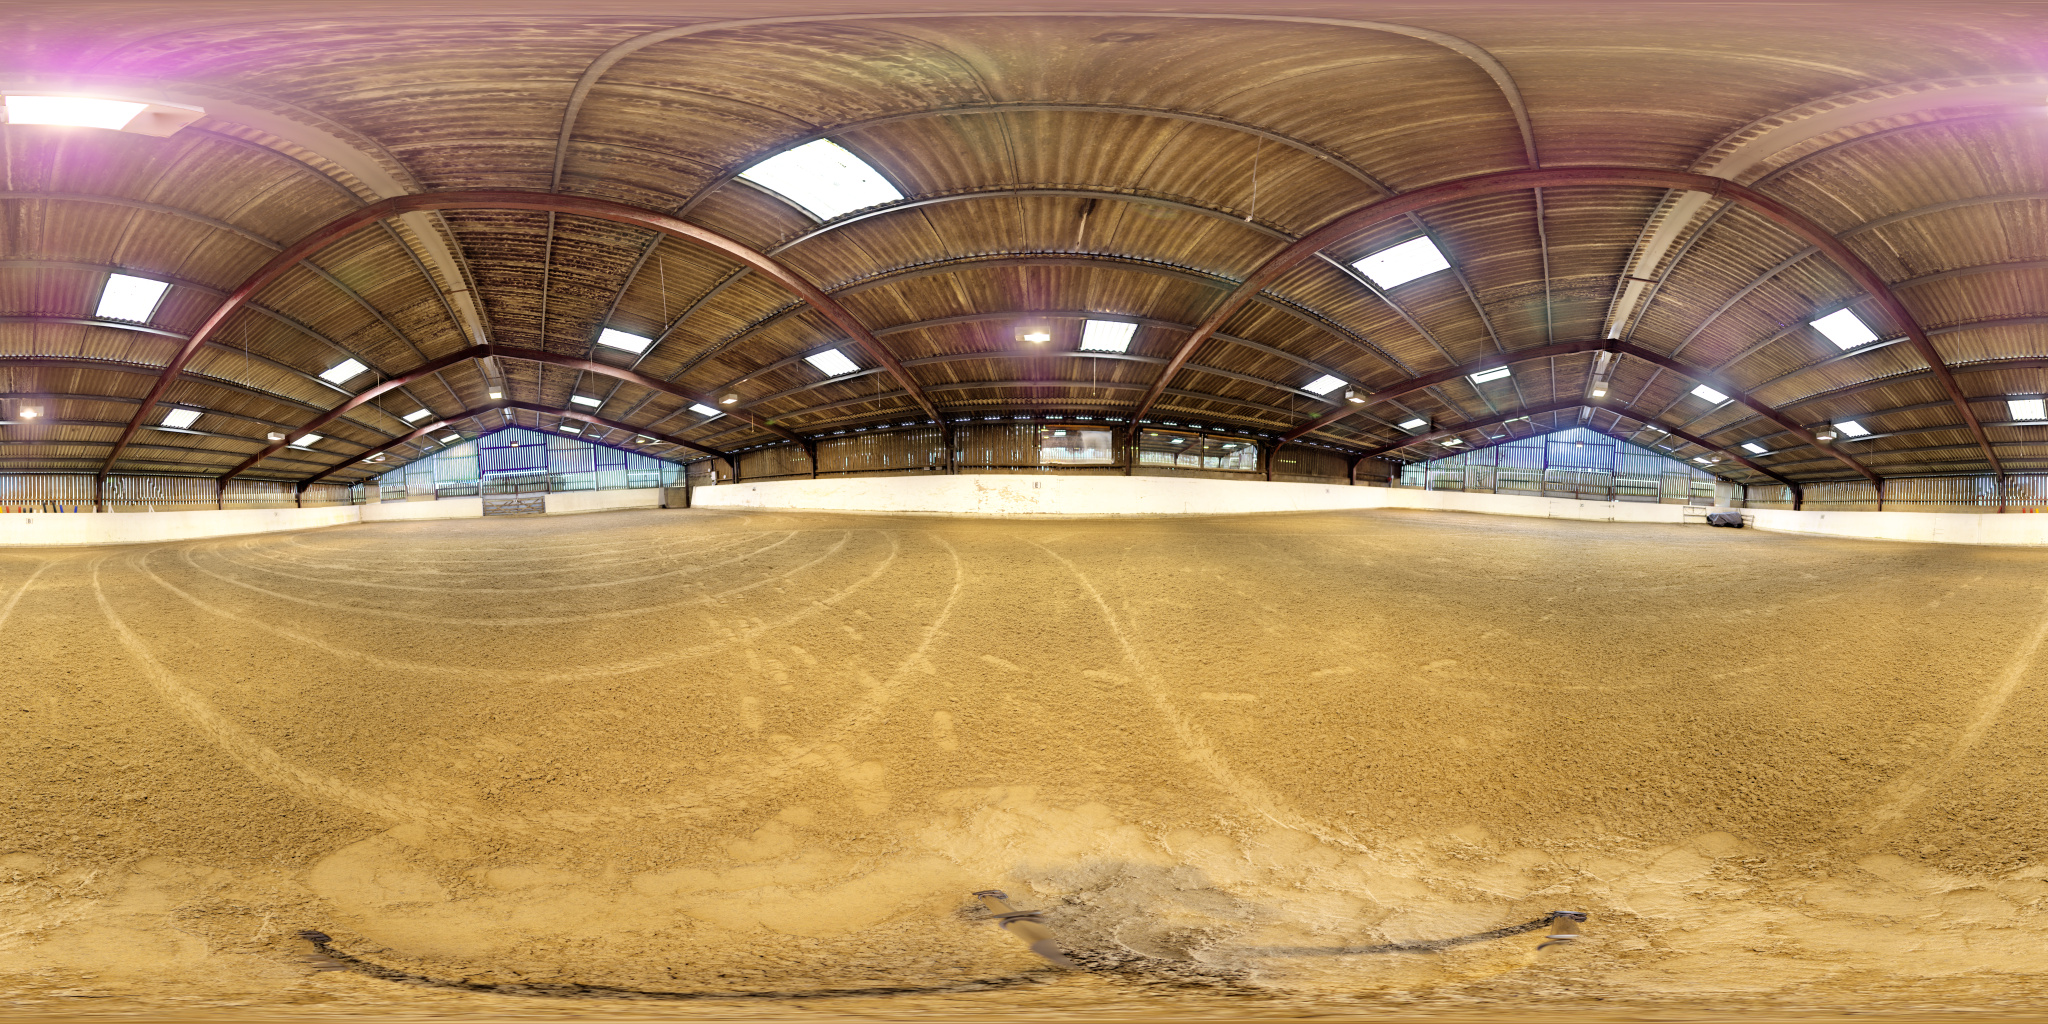
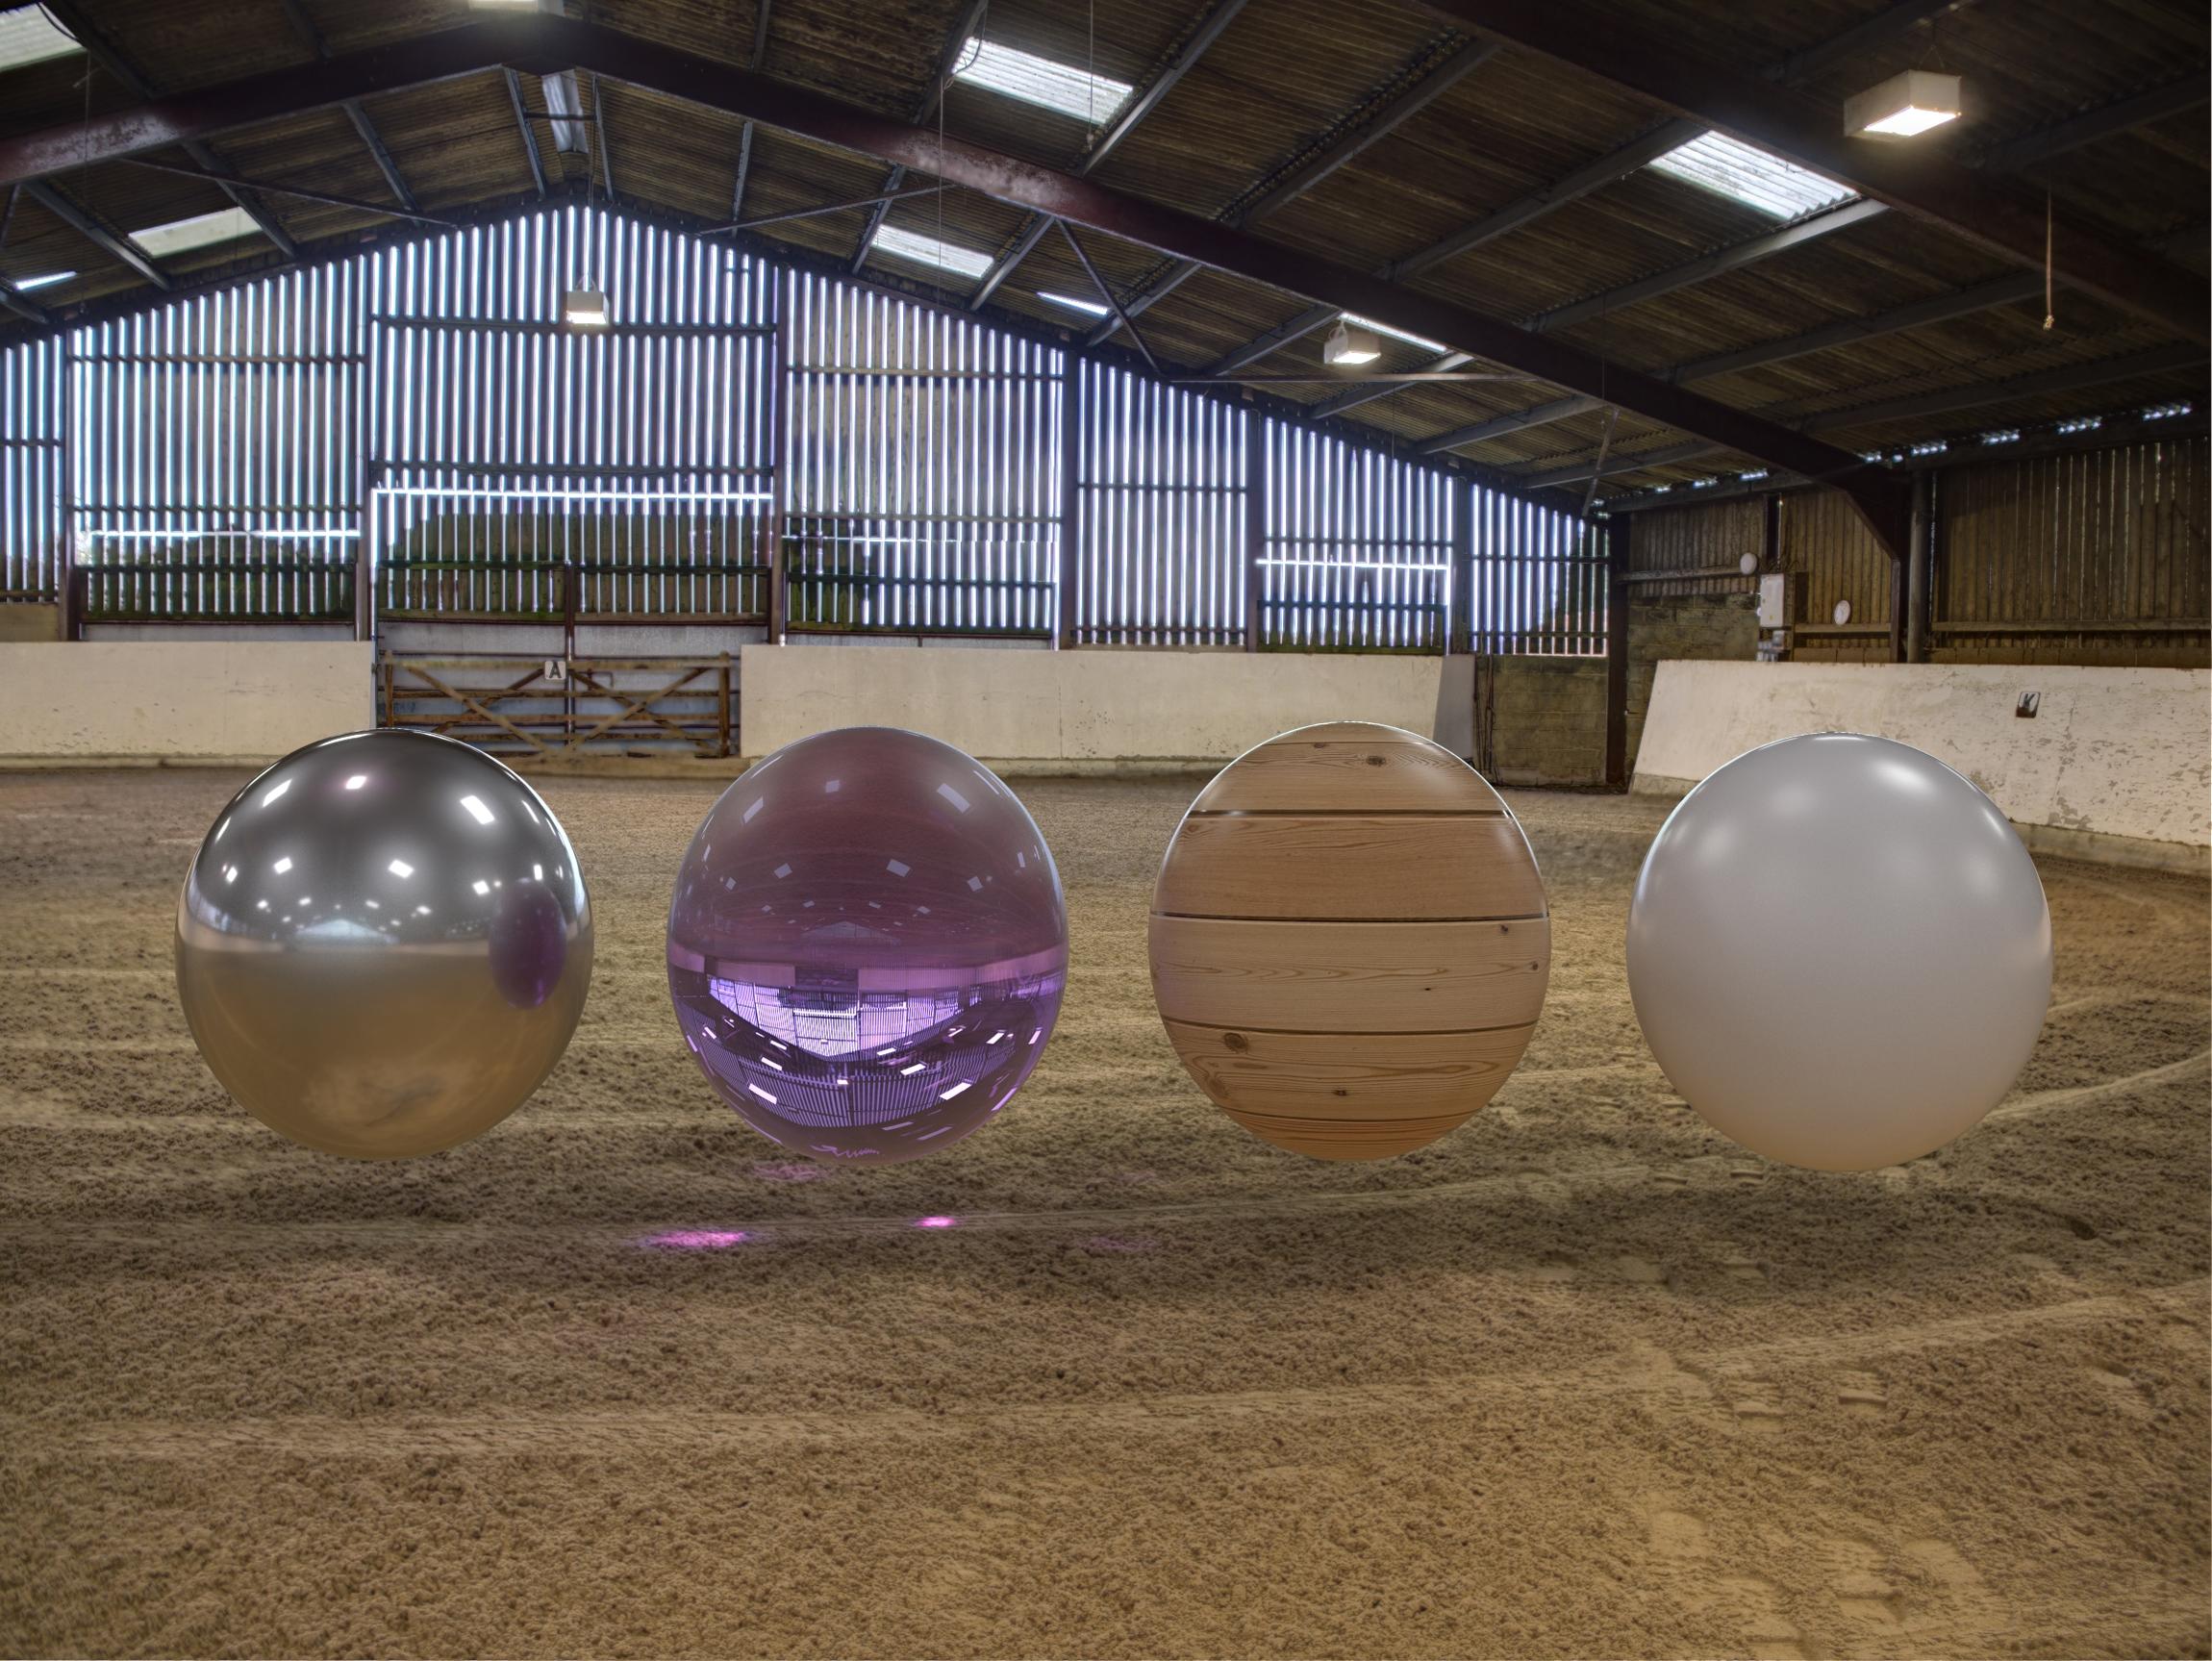
I’ve experimented with something else I wanted to get some different HDR’s for lighting, I made this yesterday I think I have it correct I have full res version as well this is abut 3rd of the size! It comes out a bit darker have to pump it up to around 50-100 to use it I’ve been running with 2048 map resolution and multiimportance settings in the world settings.
I think it’s dark just because of the dynamic range I captured was about 80 pictures each one made out of 7 RAW photos combined shot at 1 stop intervals so -3 to 3 then stitched it all together you can def crank it up without blowing out like a jpg/png etc…
If anyone has a sec and want’s to give it a test run and let me know if it works ok for them I’ll post it on blend swap I think I got it correct.
This is what it looks like, quite funky lighting which is why I wanted to get it, don’t use this image it’s just tonemaped JPG will look rubbish use the dropbox link above. Can’t help the slight purpling it’s the uv filtering on the digital camera at some angles with a wide angle lens that’s pretty challenging lighting conditions tbh, had my trusty leica 15mm prime out
 So instead of medic they now engineer and then I remembered M.U.L.E. both the old Atari game which i spent many a happy hour playing and the Robert Heinlein reference’s / general beast of burden which all fell into place better.