This is a cool concept, and your animations and scenes are a lot of fun! I’m looking forward to more.
I agree about the ears, would help the composition although it would’t be “realistic.”
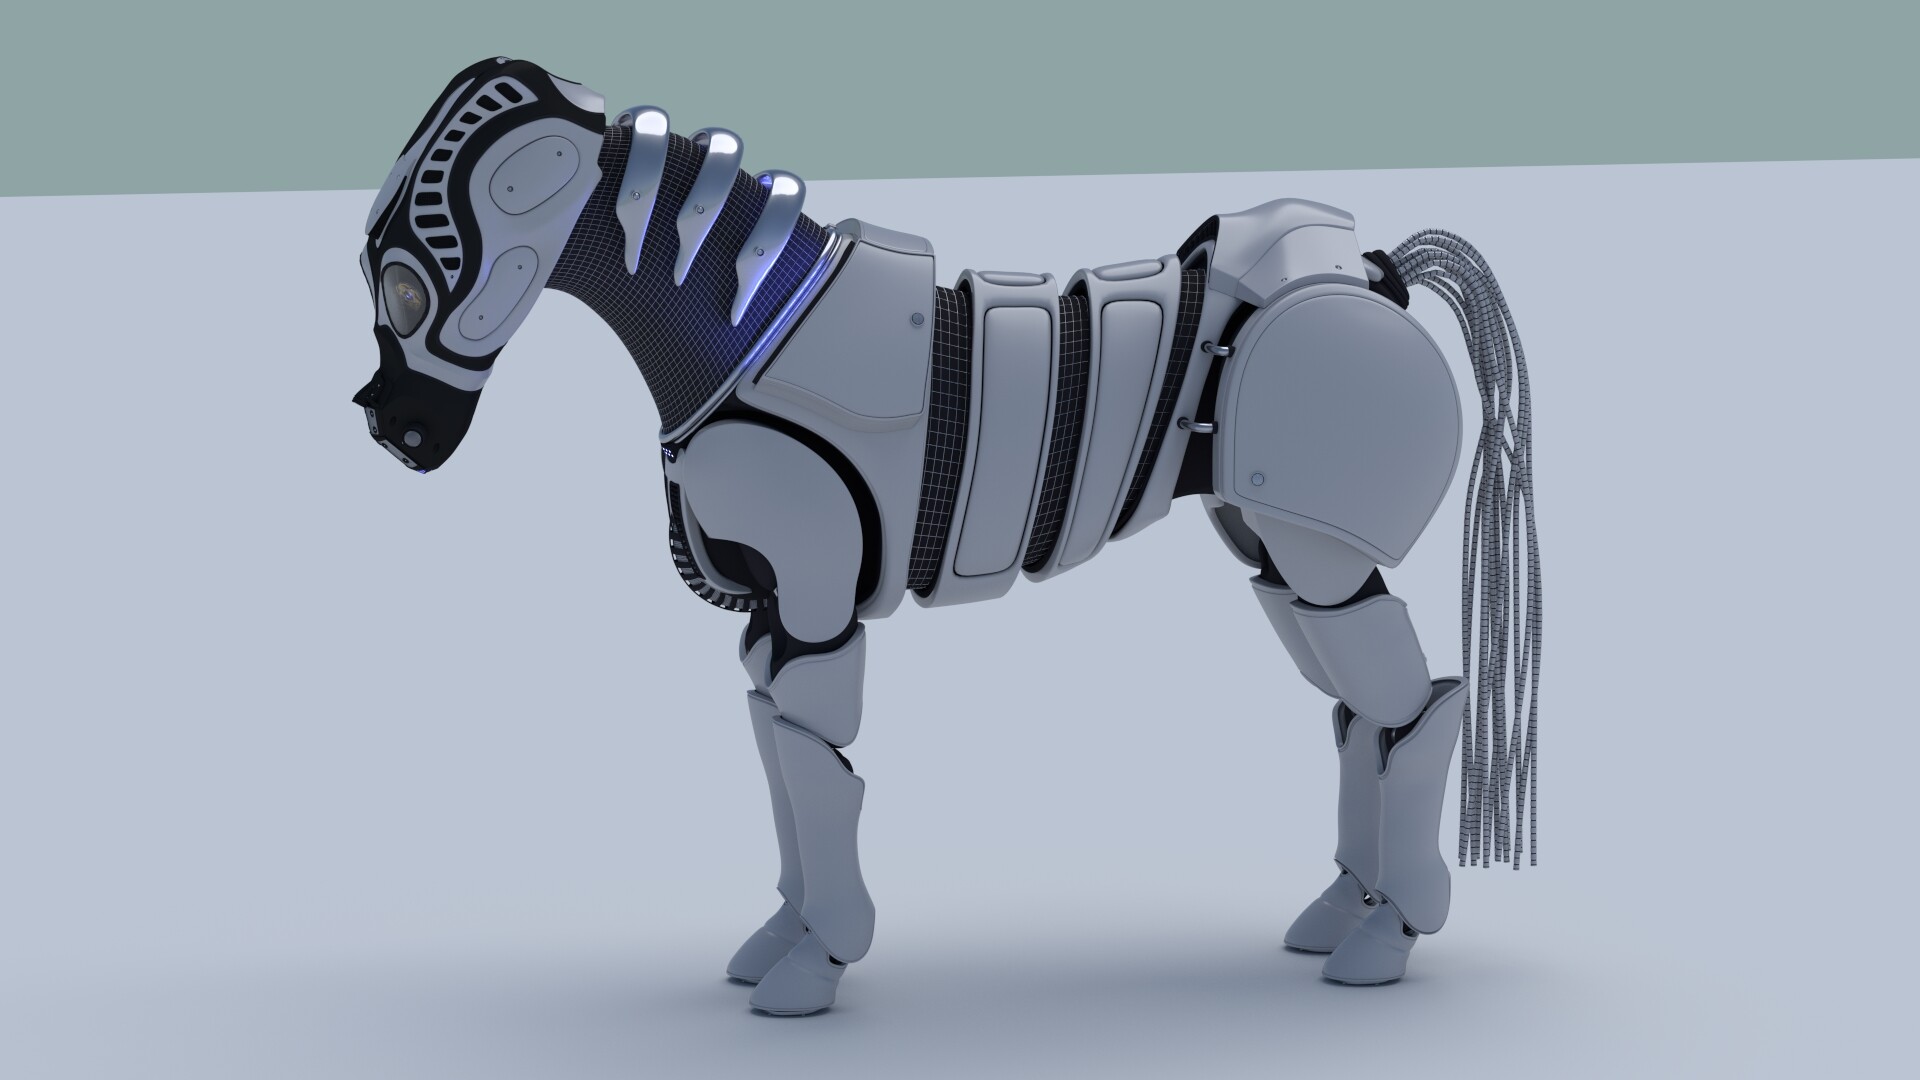
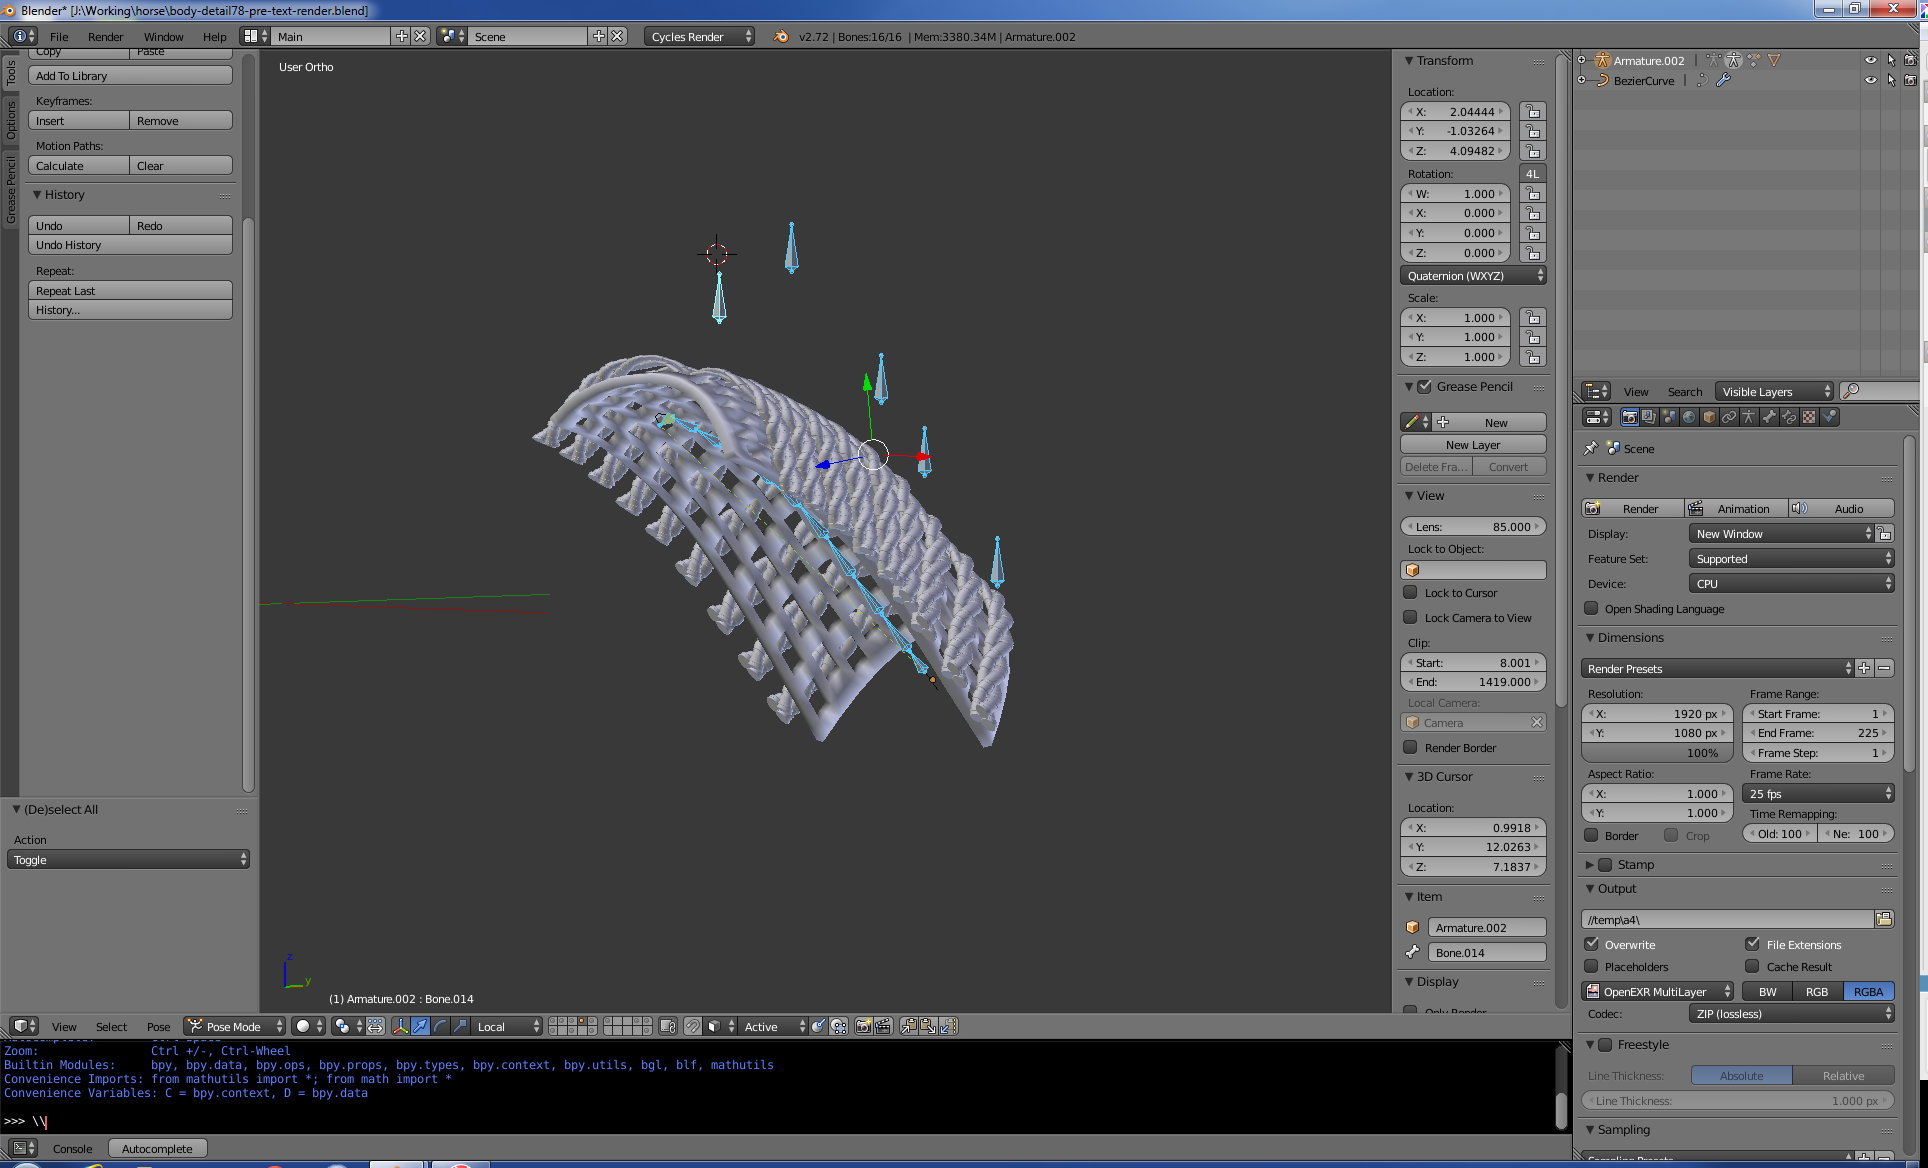
Started work on tail, agree with feedback!, will look at ears and mane after I have this tail sorted :-), have some ideas for mane now I have this rig running, took me a few goes to get something I could pose, experimented a bit with hair particles etc but curves, array modifier, hooks and bones seem to be the easiest to manage for this, but I do wan’t to make something fluffy now!. Tried a few things but this seems to have potential, I need to now extend the panelling to go around the tail at the back of the horse and bring the top of the tail closer together then out but I’ve rigged it all so that’s just a case of taking time posing it. but I think it’s getting there.
Quite pleased with the rig, it also will auto extend and add new segments etc. so I can easily adjust the length without stretching, additional bones at top are to manage the tangent of the curves I’ve used as a guide.
That’s a cool idea for the tail and also well done technically. It’s good that you can control the tail with the rig. I’m sure you’ll find a solution for the plating!
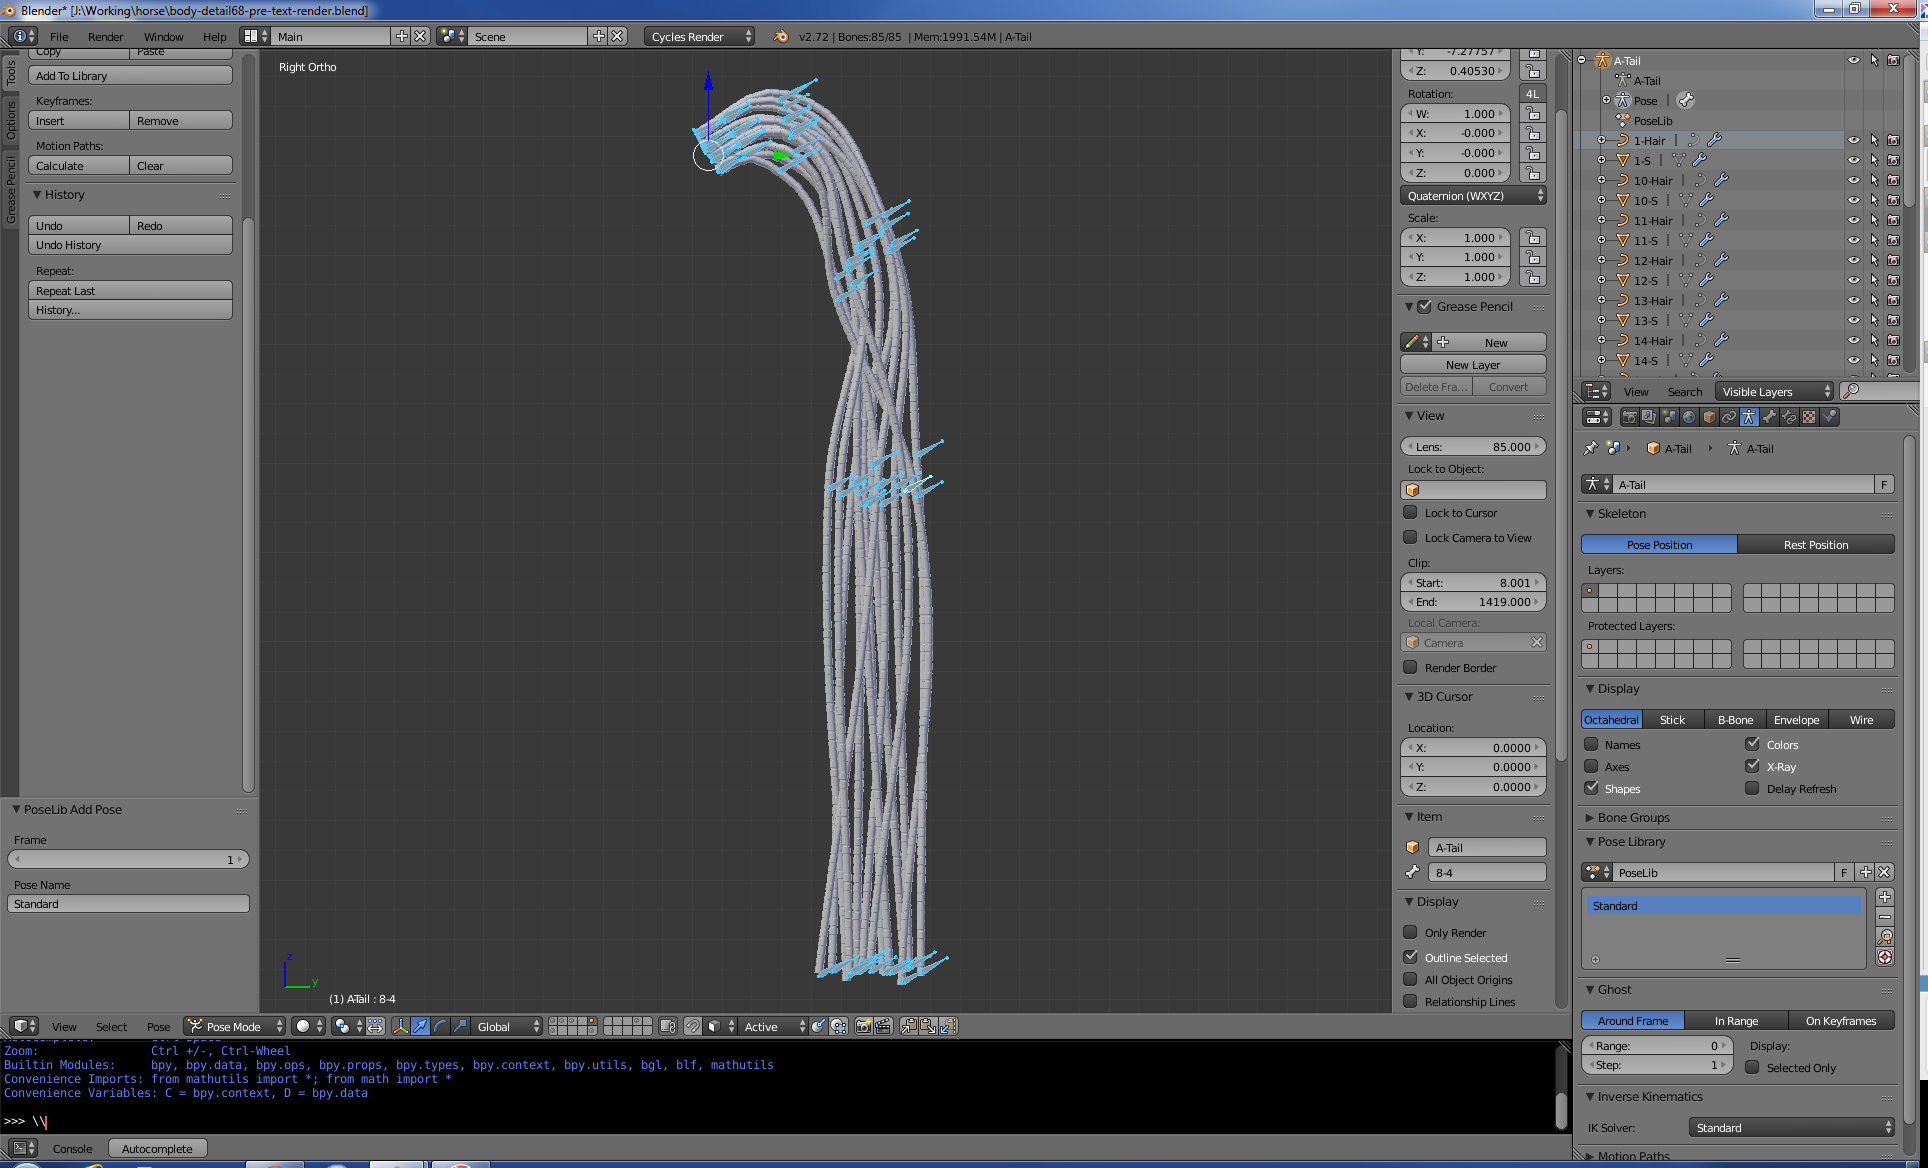
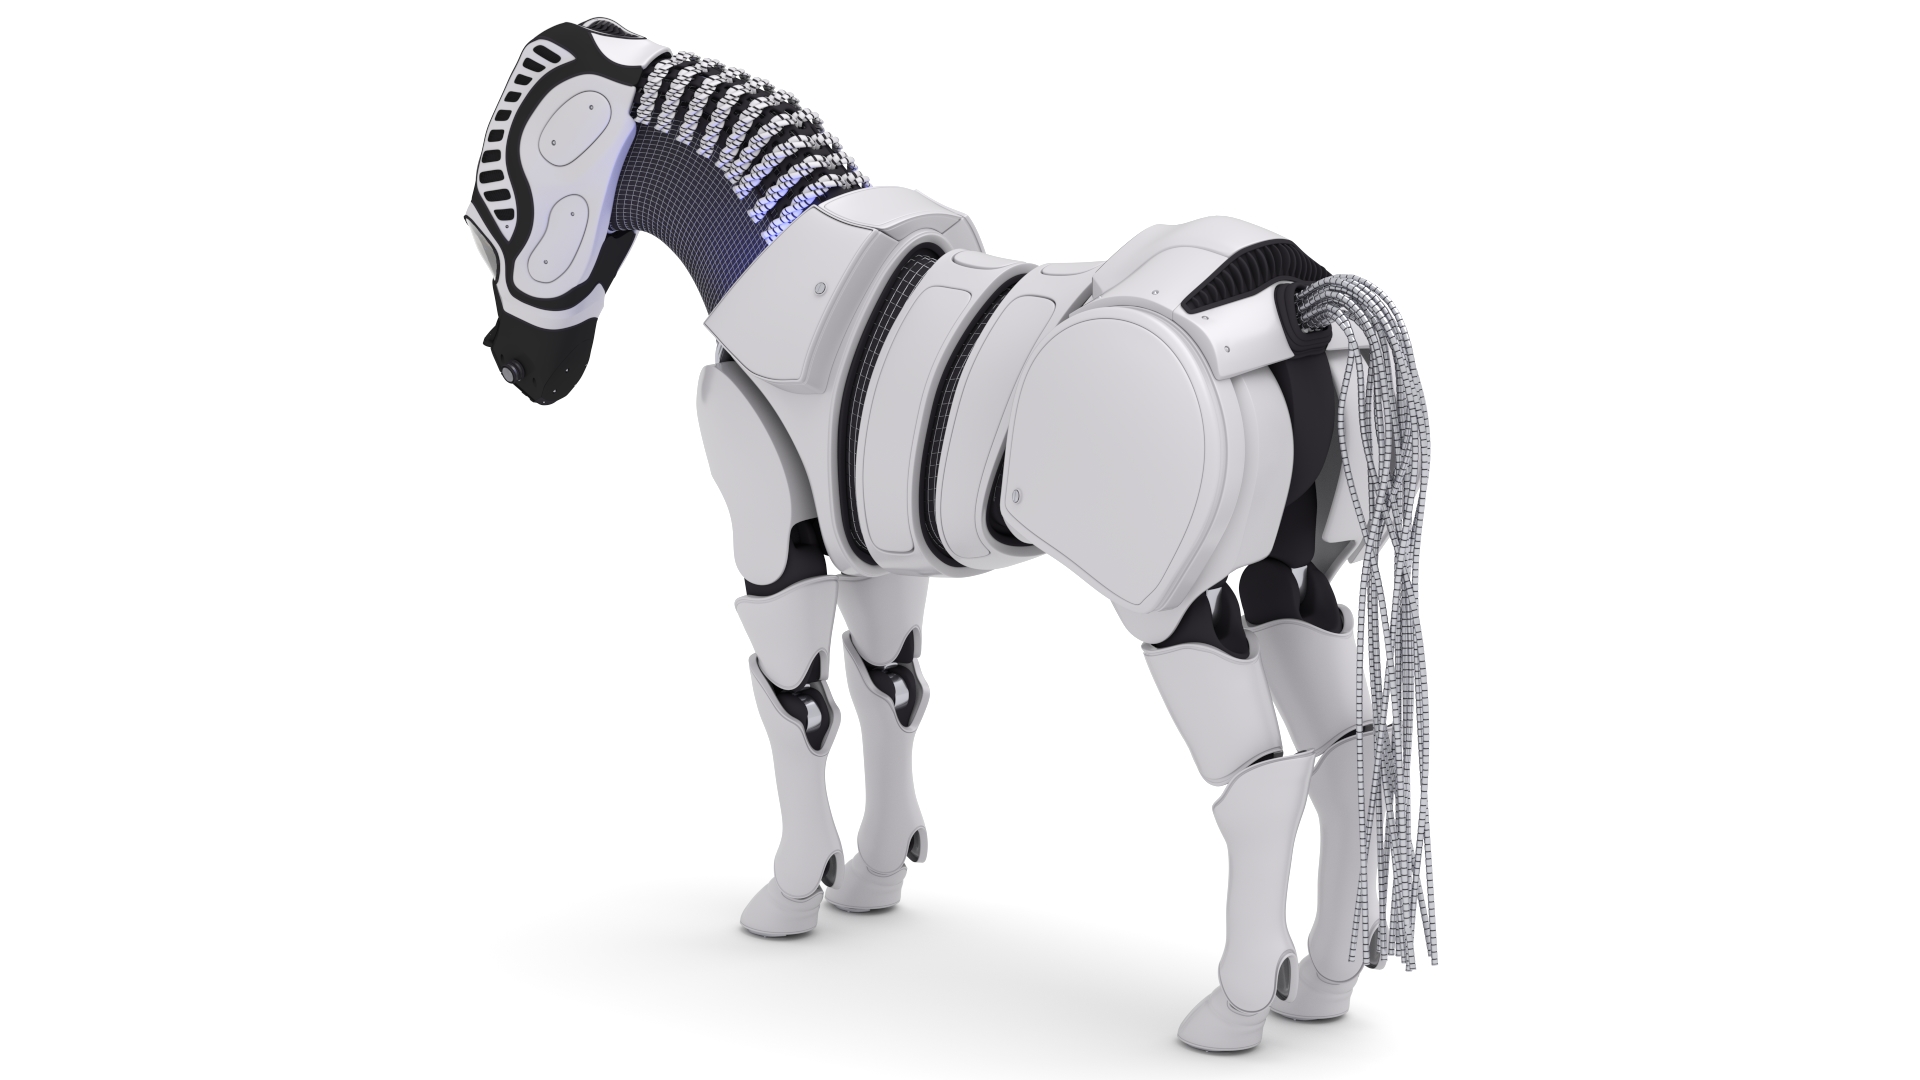
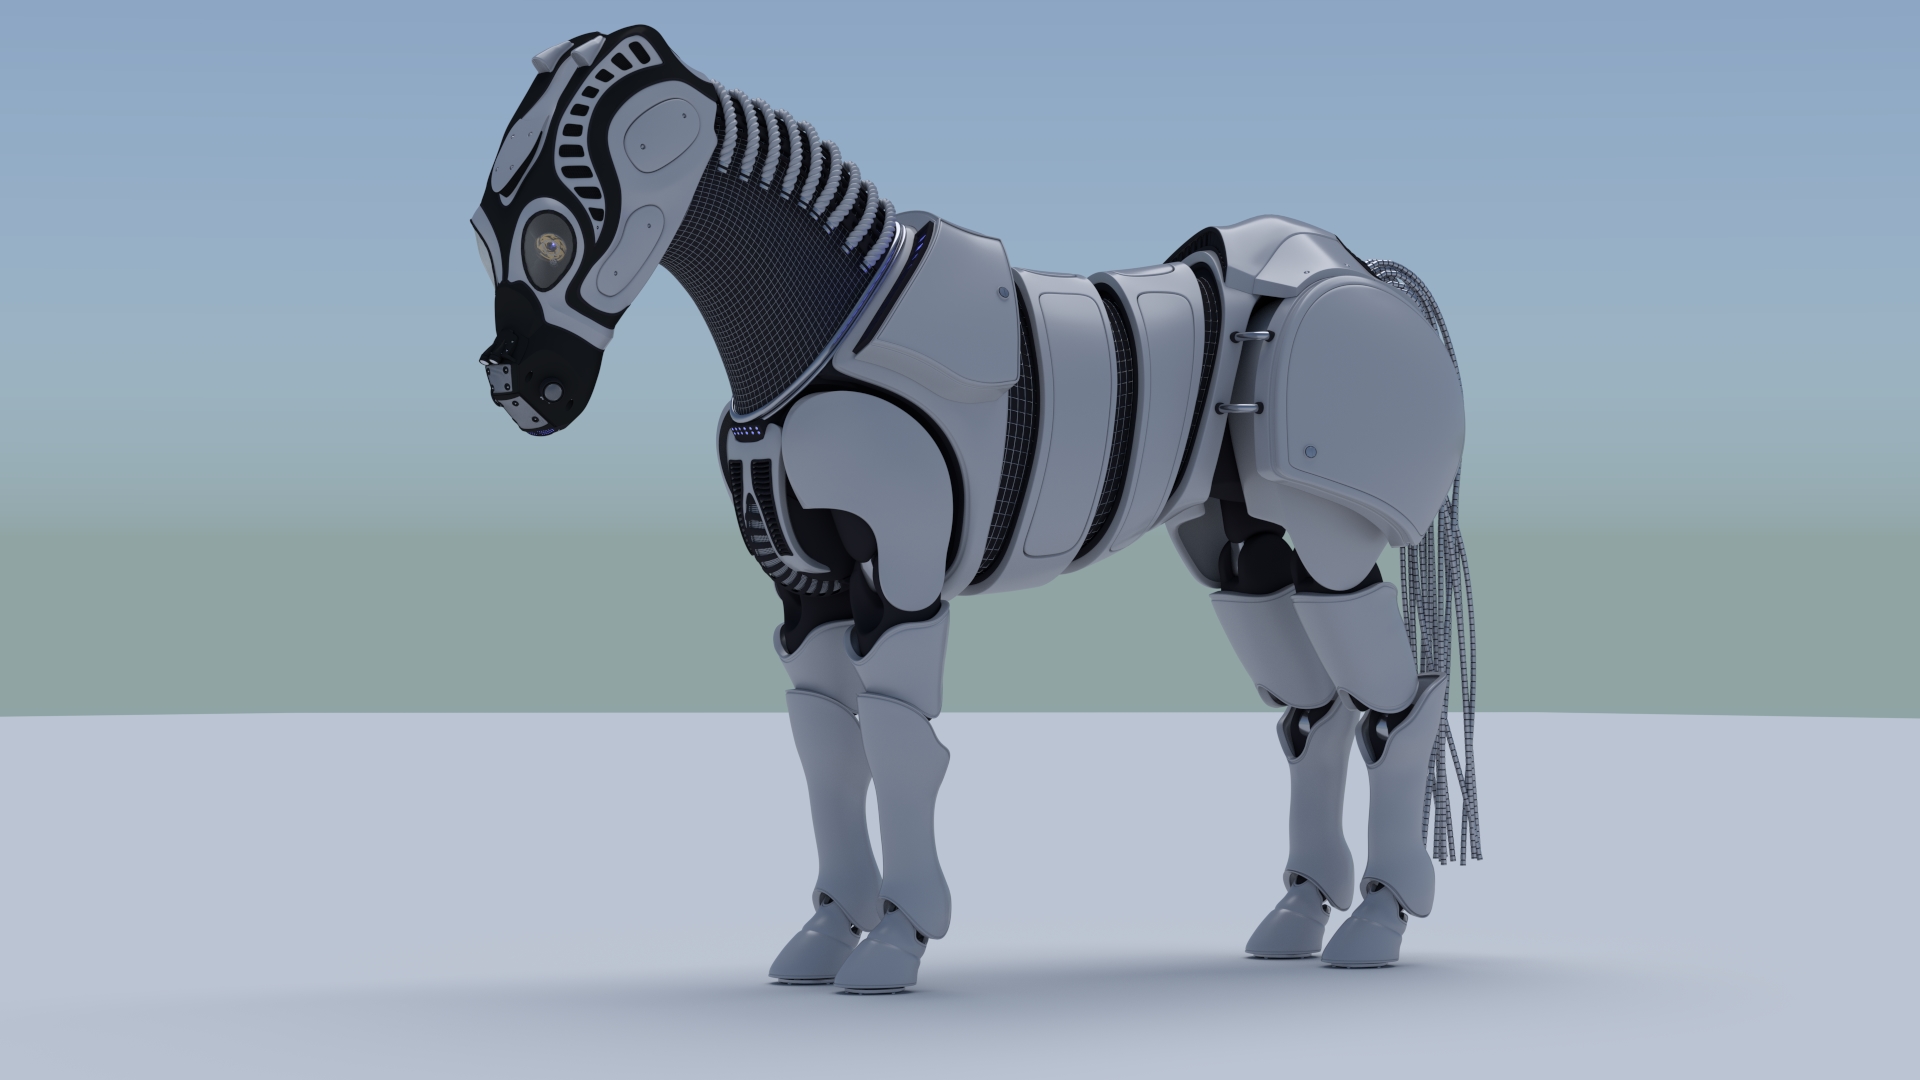
Finished tail and rebuilt rear to support it, finally came up with a solution I was happier with for the neck, I think I might tweak it a bit so there is a bit more variance in the plaits but it works took me ages to figure out a way to create something I could pose. Ears next! then I’m def taking a break and working on either the main scene or the human that I’ve decided is going to be in it. Think it will be the human I want to see if I can sculpt a head 
The base of the plait mesh is auto weight parented to a spline IK Rig driven by a curve then I added control bones to the curve and then joined each plait to the mesh and allocated each one at full weight to each relevant bone vertex group so it’s all one object and the plaits follow the IK spline as well as the base mesh all controlled from the underlying curve.
I think I now have one of every type of basic rig setup on this now which is probably over the top but this project is about learning blender and I’m certainly doing that!
FK driving multiple IK rigs for the Iris
Spline IK for the Plaits with hooks to bones from the curve
Standard IK rig on the neck but tracked by a set of segmented B bones and stretch to target for the neck with shape keys
Standard FK rig for the main joints
Array modifier tracking a curve and with the curve modifiers + bones controling the curve for the tail
Hooks, parenting and Laplacian deform on the joining pieces for the main body to the flex as it poses.
Ok, done for now I think! redid plaits I’d made them too busy and coincidently Reynante had just put up a short tut on Rope that I adapted which looked nicer (http://www.reynantemartinez.com/how-to-model-a-rope-in-blender.html)
Didn’t go mad on the ears but put something, I think this is good enough for now, needs texturing and some tweaking but I’m going to start work on the human element of the scene now! Essentially if you see another helmeted figure I sucked at doing a proper human face but going to have a go at sculpting something, will be a while before I update I think need to to research and reading for next bit!
Thanks for all the feed back so far!!
thanks!
Mark
I’m curious how this will look. Human faces are difficult indeed. But with your modeling skills - I wonder why you want to sculpt it instead of modeling it.
I can’t draw very well but for some reason I appear to be finding I’m able to sculpt so if it’s a complex shape I’ve been sculpting / boolean the POC quickly then retopologising it. It didn’t actually occur to me to try and just model it ![]() I’ve just ordered a tablet to see how that goes just using a mouse for the sculpting at the moment.
I’ve just ordered a tablet to see how that goes just using a mouse for the sculpting at the moment.
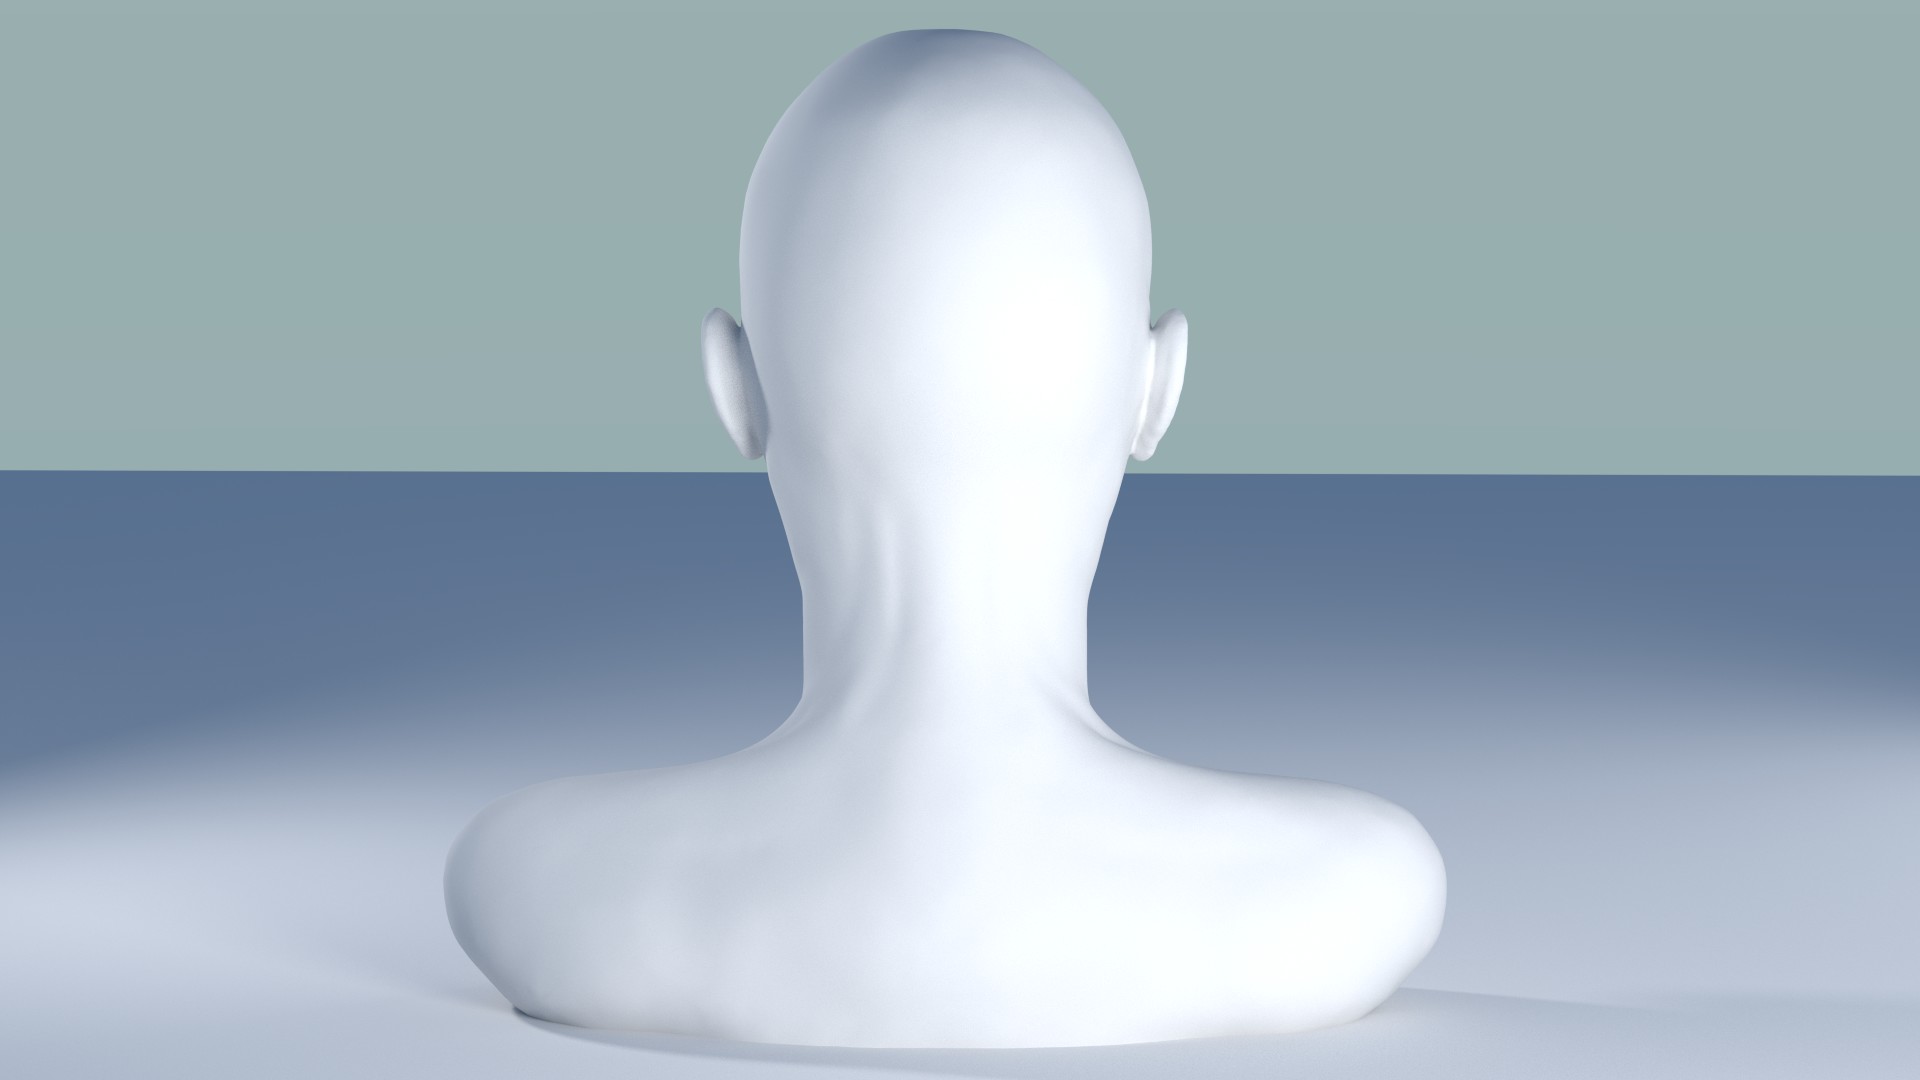
This is what I’ve managed so far it went a bit quicker than I was expecting!, I gave up trying to do the person I want to do directly so I’ve got some anatomy references and tried to do a sculpt to them to get everything in the right place ish and the muscles like I did with the horse then I was going to take this and try and tweak it to match what I want. Not sure if that is a good workflow or not !! The ear was a nightmare to sculpt who designed it like that ![]() I’m still not happy with it but figure you wont see it any I’ll try and sort when I create the mesh. I’m going to try and do the next stage properly and not have it mirrored as I noticed now I’m looking at faces in more detail and watched a few courses they all wonky I can’t believe I never noticed / thought about that before!
I’m still not happy with it but figure you wont see it any I’ll try and sort when I create the mesh. I’m going to try and do the next stage properly and not have it mirrored as I noticed now I’m looking at faces in more detail and watched a few courses they all wonky I can’t believe I never noticed / thought about that before!
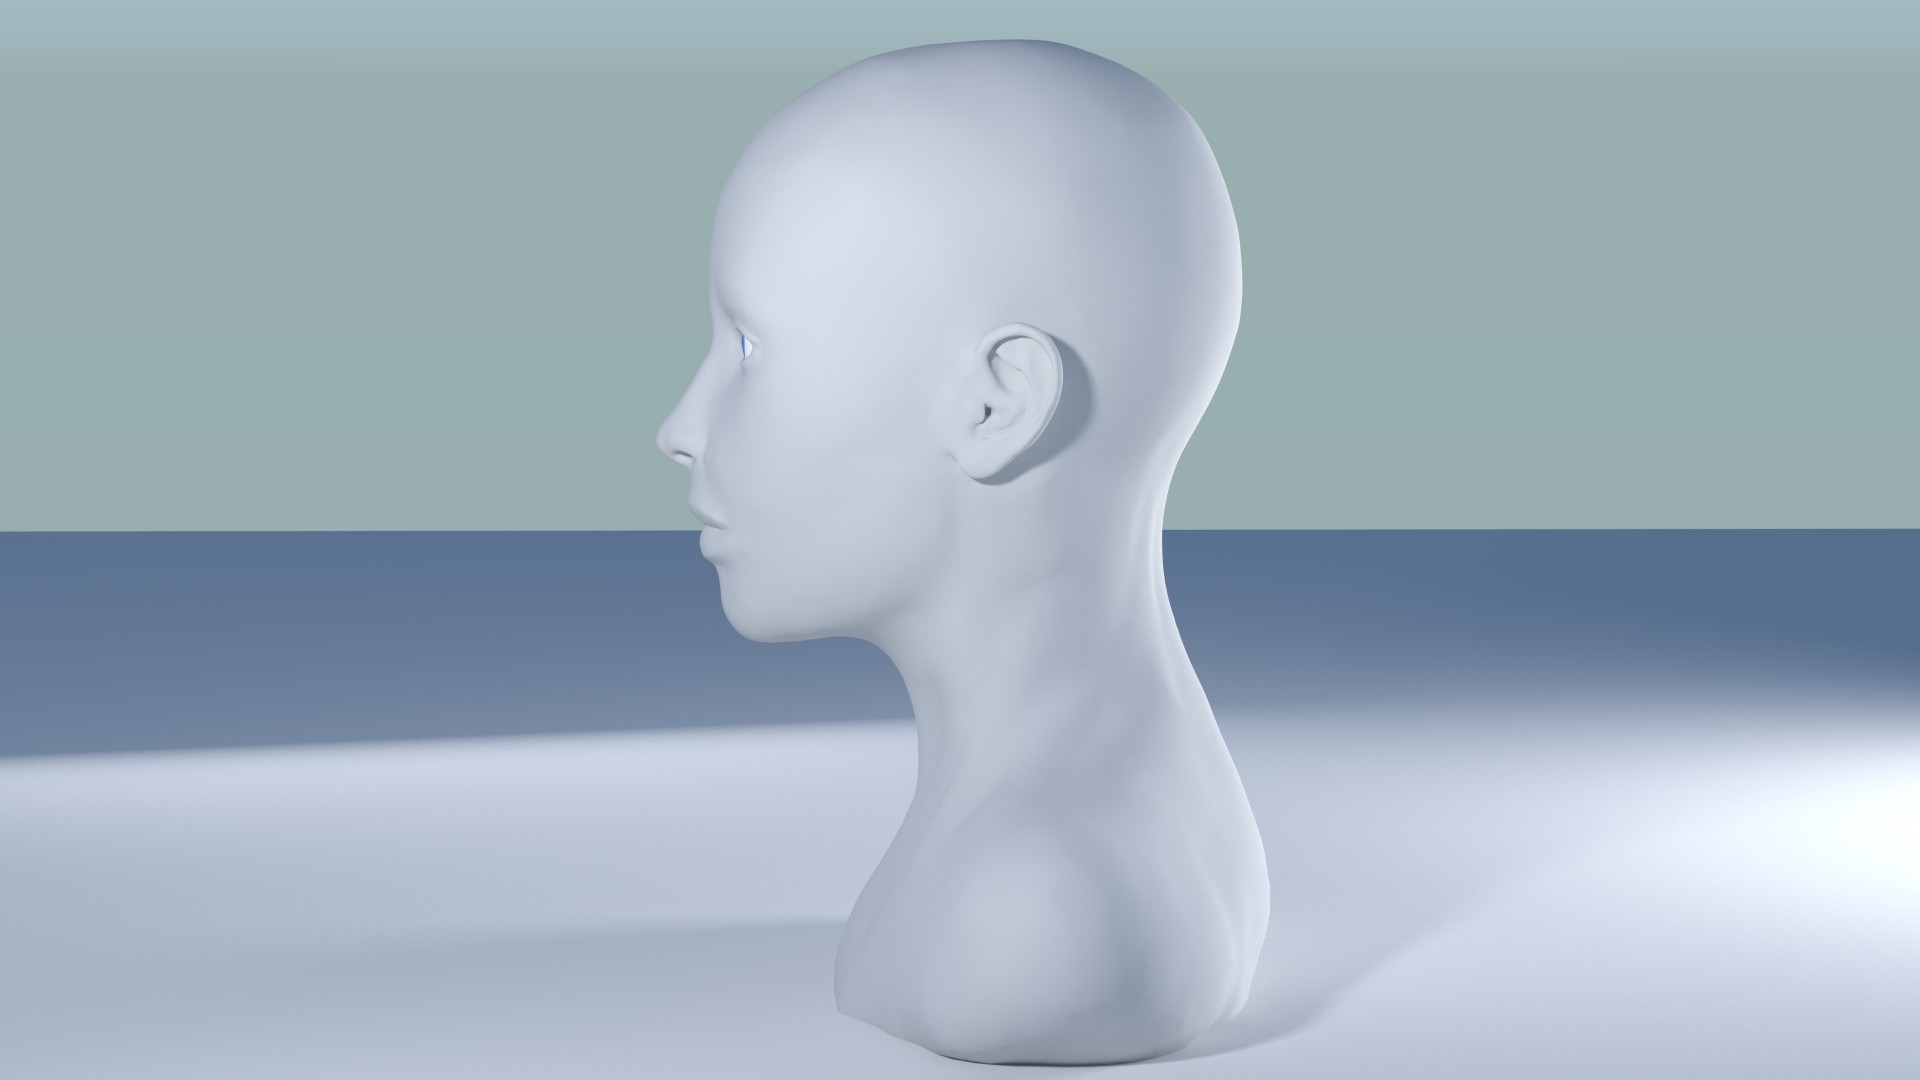
No idea if these are good or not, they look pleasant to me but I guess it’s getting to the subjective point! These just the anatomy base I’m going to work from that I’ve sculpted so far so they symmetrical. Going to do real particle hair so not sculpted that. I like the side profile best (apart from the ear!)
I’ve just ordered a tablet to see how that goes just using a mouse for the sculpting at the moment.
From my own experience I can tell that this changes everything - from sculpting to texturing. I can’t imagine how I ever could do any halfway decent texture painting before the tablet ![]()
Starting from anatomy refs like you did is always a good thing. And it seems to have paid off. The main shapes are there and within normal ranges, only the mouth is a bit wide, if standard measures should apply. But I maybe wrong, since you didn’t show us the front view.
The head model is already looking good. I’d say it’s clearly a female head. Or maybe an older child. Was that what you’ve been going for?
Impressive work, sir! I will be watching this closely. Your rigging and modeling skills are top notch.
Thanks! Yes looking forward to getting the tablet, going to be interesting I mainly write left handed but use a mouse right handed and do a mix for other activities, I’m not quite sure how I’m going to set it up yet, we will see!
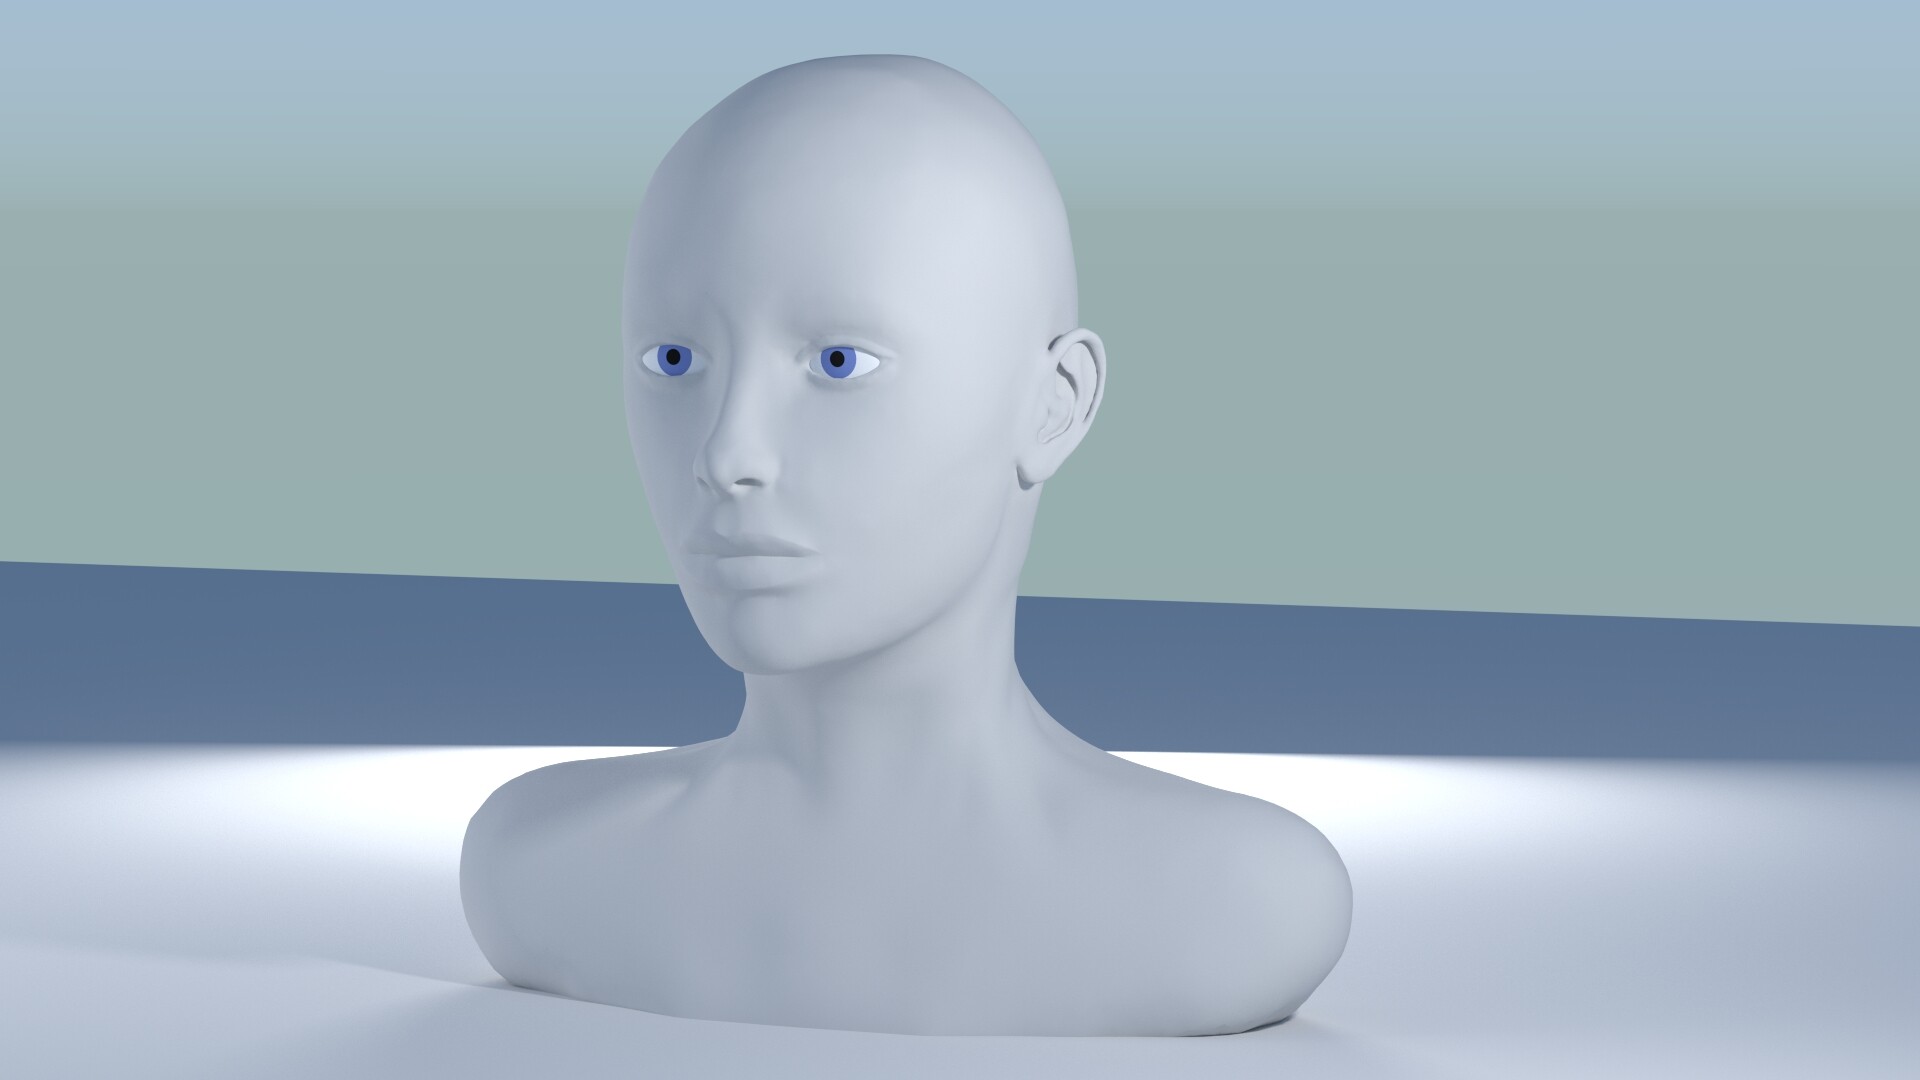
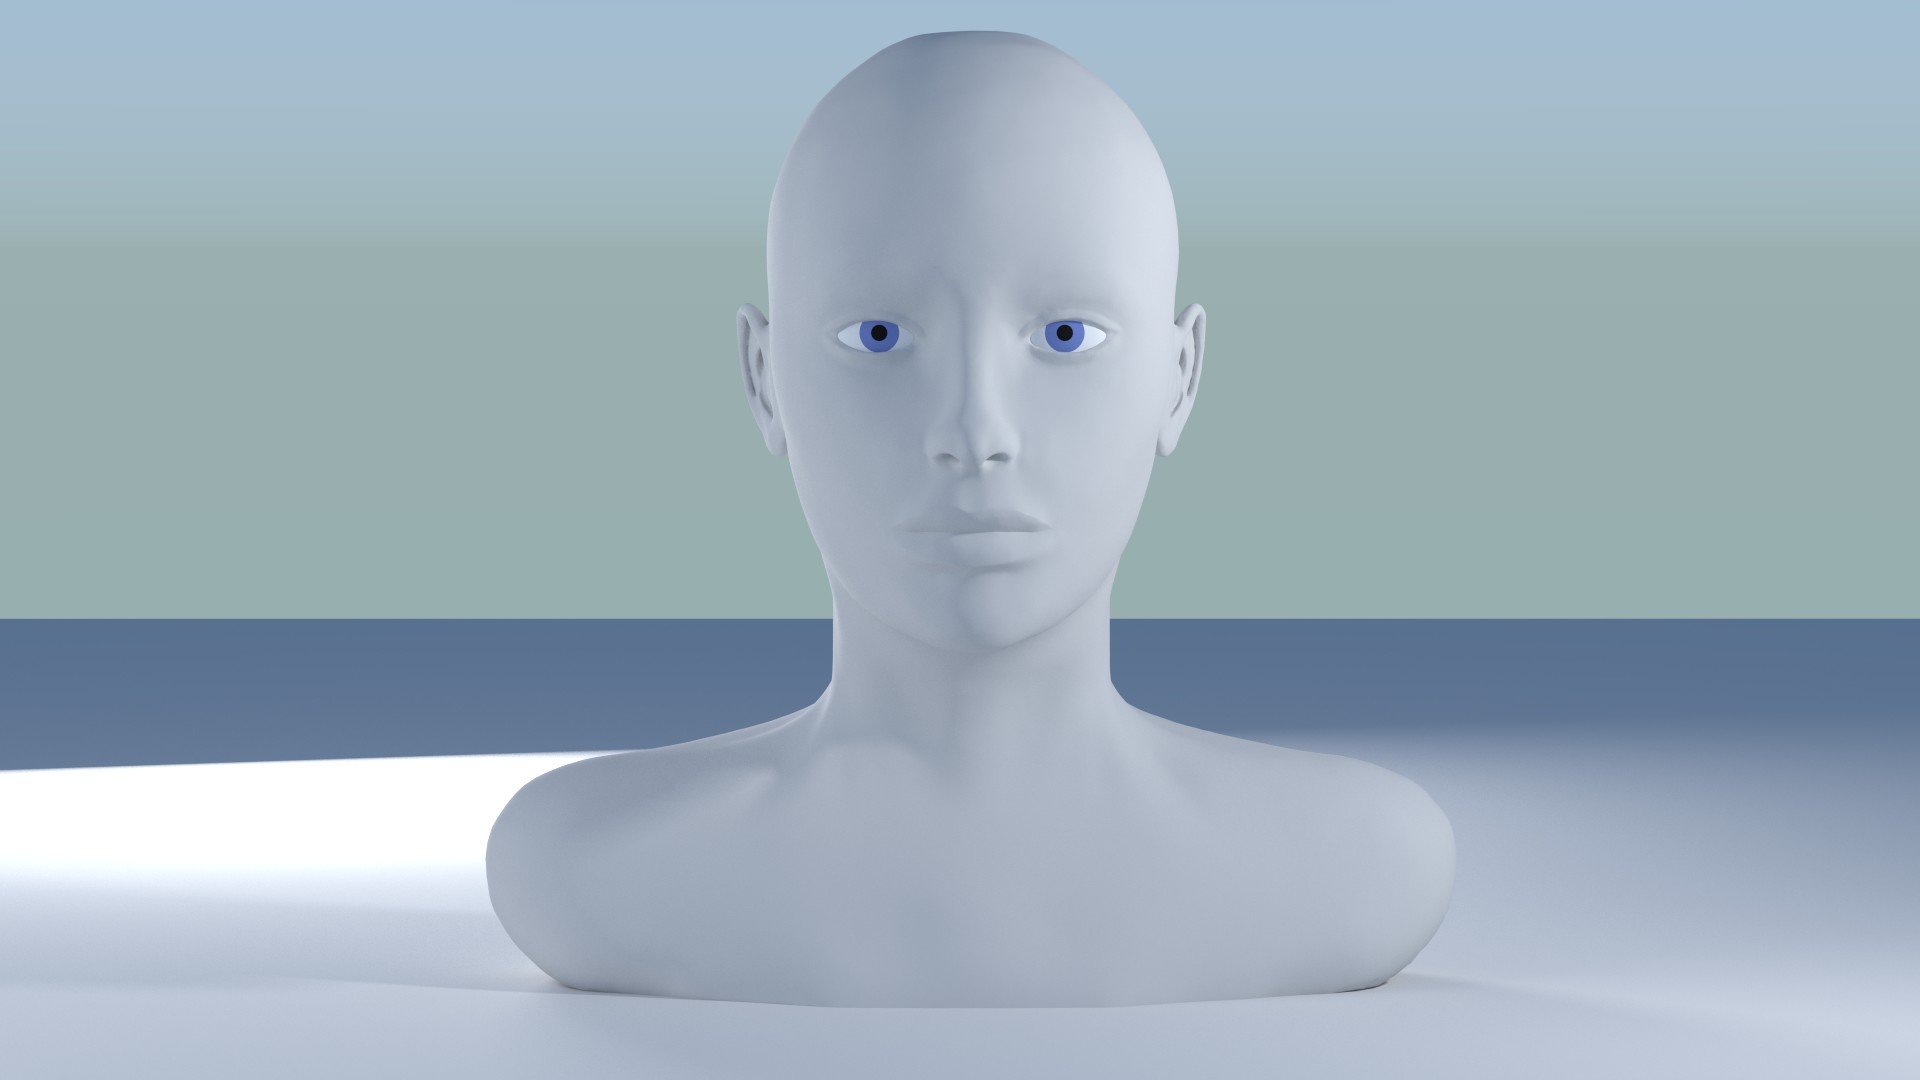
Here’s front shot and 360 I left rendering while I was out this morning. I was not sure about the mouth either it matches the reference but it doesn’t mean the reference is correct! it’s certainly larger than the person I’m thinking of but then she’s also got a square jaw line as well, I need to have a think about that. Going to retopologise what I’ve done and then make any changes to the mesh then I can use shape keys etc. Just reading up on best places for the edge loops and pols if I want to animate / pose it in the future, may as well set the base mesh up now.
It is a female I’m aiming for so glad it looks feminine ![]() I tried hard to do that, it’s really interesting when you start looking at the differences and it’s amazing as I’m working on it just how wrong making a small change can make it seem which I’ve read about around face recognition before but was funny to feel it in practice as I was working on it.
I tried hard to do that, it’s really interesting when you start looking at the differences and it’s amazing as I’m working on it just how wrong making a small change can make it seem which I’ve read about around face recognition before but was funny to feel it in practice as I was working on it.

Thanks DanPro much appreciated! will try not to let everyone down ![]() I’m learning as I go I’m sure I’ll get some bits that don’t work so well at some point!
I’m learning as I go I’m sure I’ll get some bits that don’t work so well at some point!
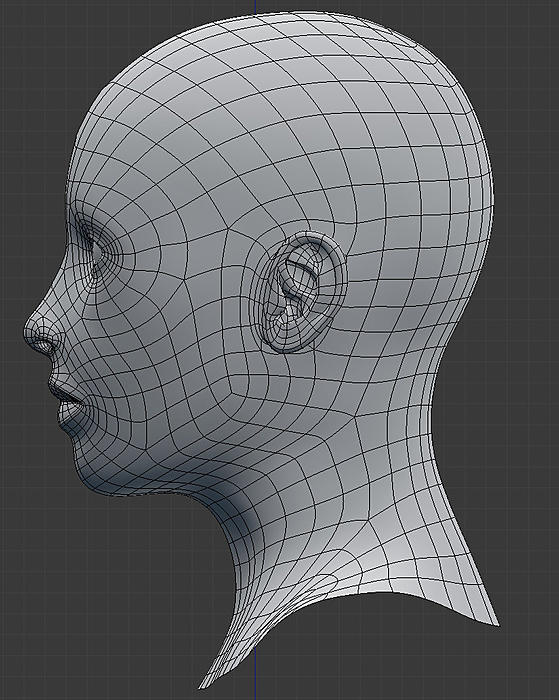
Had a go at retopologizing the sculpt, followed the head topology overview by Jonathan Williamson at the bottom of this post, is a few years old but seems relevant still (hopefully!) I added some extra loops to the side of the nose to get the shape I wanted and the separation if I needed it. Couldn’t get the ear as low geometry as in the video and have a few 2 many pols on the ear probably but if I understand it correctly it would be ok as it’s not moving much when I pose it and I’ve tried to keep them off the big surfaces. Does this look ok for posing / animating in the future, I want to get this correct as Im going to base my other meshes on it so if anyone has a sec any feedback would be great! Managed to do all quads and I’m never doing an ear again Might go back on the ear and see if I can simplify it a bit but it looks ok rendered so don’t really want to fiddle if I don’t have to.

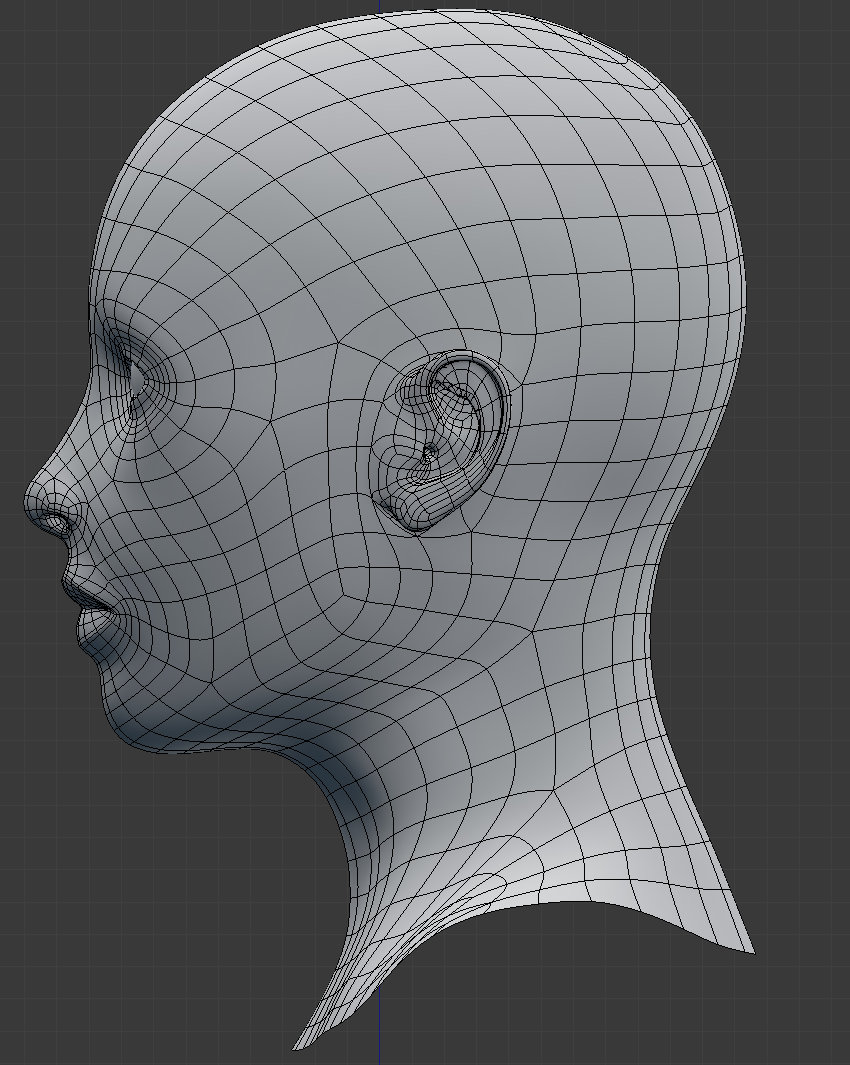

Hi Umii, the mesh looks proper and the poles are in good places, as far as I see. You are right when you place them in areas that would not deform much when you animate her. As you did with the nose you can add some more geometry or shift the poles whenever you want to workout other facial features. I personally find the pole in front of the ear a bit problematic because it tends to produce pinching on the cheekbones in some conditions. Therefore I moved it more upwards to the temple. But I’m not sure if that’s not causing other problems, though.
Ears are really tricky to model, especially when you want to keep it all quads. And yes, if you are going for realism you may want to revisit it  Here is a good tutorial that I used recently as a starting point to model an ear.
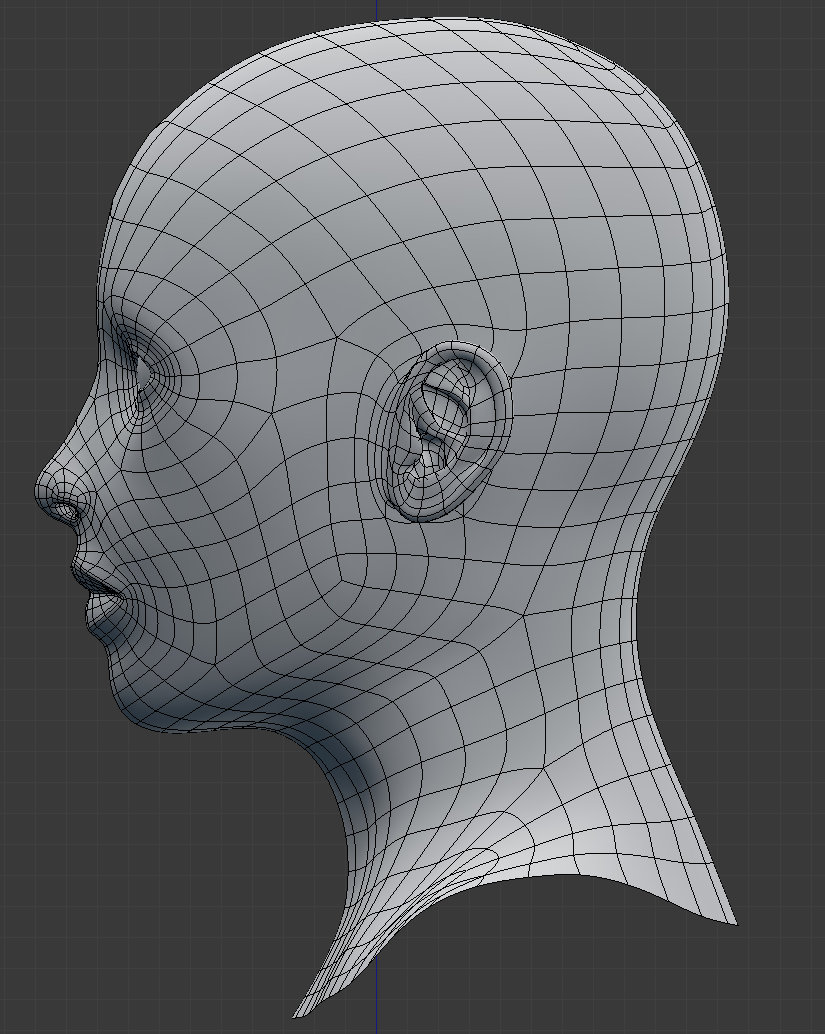
Awesome link thanks, I’m kicking myself I know that when I start getting loads of topology like I did on my remesh of the ear that I’m doing it wrong, I should have stopped and thought about it like I always say I will and never do ![]() I want to get this correct so I have this to work from in the future. Re did ear following that tutorial for edge loops but just modelled it rather than sculpt and remesh, also looked at more real referance images as well as just the anatomy reference I was using got a much better result I think and then joined it back up with the main mesh. Much happier with this and it’s really easy to move around with proportional editing etc if I need to do other ear shapes in the future. thanks again for the link and feedback really helped!.
I want to get this correct so I have this to work from in the future. Re did ear following that tutorial for edge loops but just modelled it rather than sculpt and remesh, also looked at more real referance images as well as just the anatomy reference I was using got a much better result I think and then joined it back up with the main mesh. Much happier with this and it’s really easy to move around with proportional editing etc if I need to do other ear shapes in the future. thanks again for the link and feedback really helped!.
Tweaked mouth a bit as well, this is a render of the remesh with 2 levels of sub surf, came out ok I think. going to do some teeth next then try and get it looking like a real person. Not sure if I’m going to go for realism or not yet but I figured it was better to start from realistic and deviate rather than the other way around!
Did teeth, jaw and tongue.
While I was looking for reference pics for teeth I found this blog http://byaapplication3d.blogspot.fr/p/ents-3d.html
- It has all the reference pics in as much detail as you would ever want
- They have written a blender teeth generation script, it’s in French but it’s easy enough to follow and it’s insanely good was absolutely no point me doing the teeth they have done such a good job, I just quickly built a rough jaw structure ran the script and then positioned the teeth.
If you are on the forum thank you! great work real attention to detail and it just works, can’t believe it’s not got more comments and hits.

Again good progress. The ear has turned out nice. I came across this teeth addon lately and I agree - it’s really awesome. It also has nice maps for the teeth.
Next step will be the whole body?
I was so pleased in the end with the ear it makes such a difference I got a bit obsessive about it! I was thinking I was going to spend a little bit of time seeing if I could get the head looking real, my rational is if I can’t I’ll go a more mechanical / cyborg route, if I can tease out a face I’m happy with either stylistic or realistic then I’ll go with that and do soft clothing which I’d like to try (and I want to try doing hair!). I know I can do the body / mechanical if I go the route but I don’t know if I can make a convincing face yet which I suspect is going to be the hard bit.
That’s what I was thinking, will sleep on it ![]()
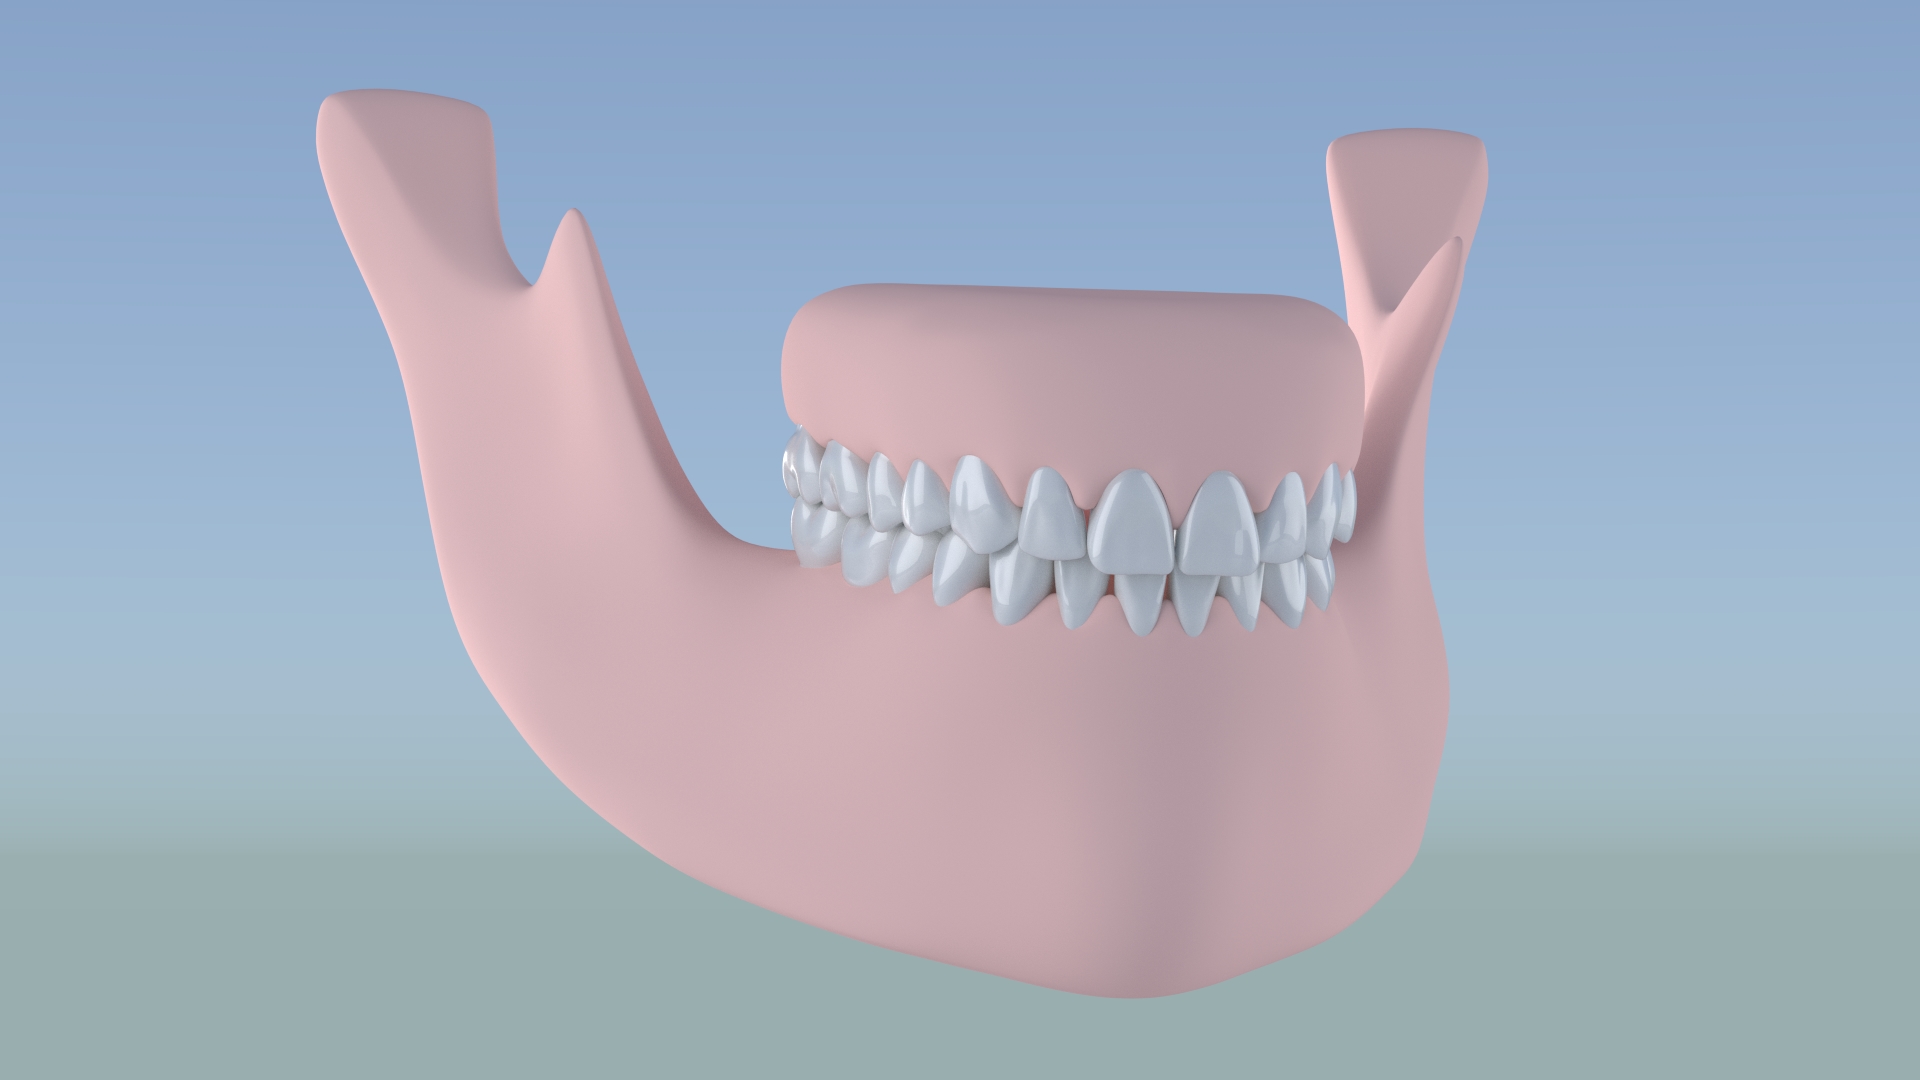
Ended up redoing jaw I had again forgotten to look at real reference pictures or at least I was looking without seeing and I’d not done the gums properly at all she was at best going to have dentures, worst pretty advanced gum disease! Fixed up topology while I was there figured I’d end up reusing this again in the future so may as well do it properly and have it as an asset, can easily tweak it now, hadn’t realised how much the gums actually came up into the teeth before. Left bottom jaw bone which is probably overkill but I found it really helpful for placing and checking proportions even if it’s not being seen. Obviously not textured or anything!
Going to get on with changing the head from the anatomy sculpt to someone more real now + I’ve realised that the anatomy pictures I was using must have come from a 3d model in the first place as I’ve seen a few rendered 3d versions on the site I got my 2d pics from and mine looks very similar which I’m actually pretty pleased about for attention to detail but I also don’t want anyone thinking I cheated if they recognise it! as I got it amazingly close in the sculpt! but you can tell mine is a lot softer and my ear is better 
This is unless I get sidetracked and do the eyes first, I’m wondering if I can rig the iris for a human eye!

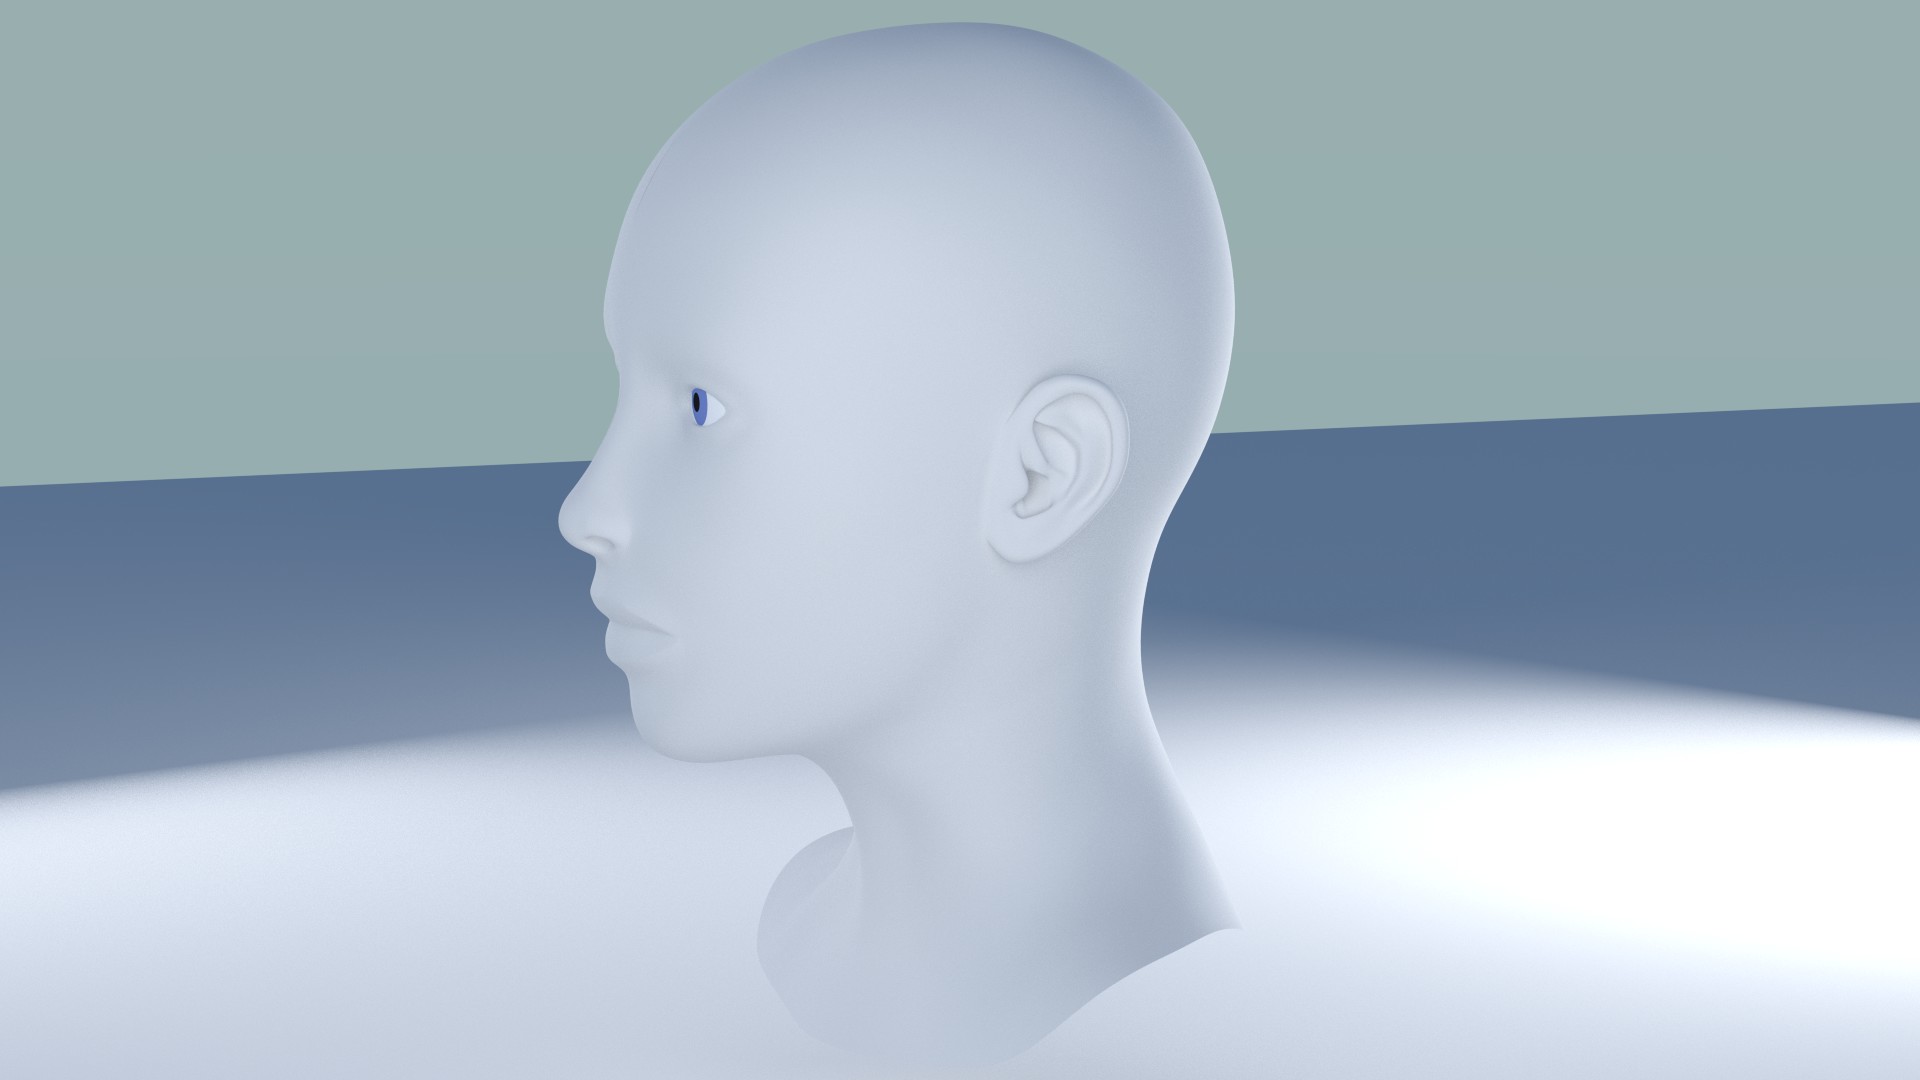
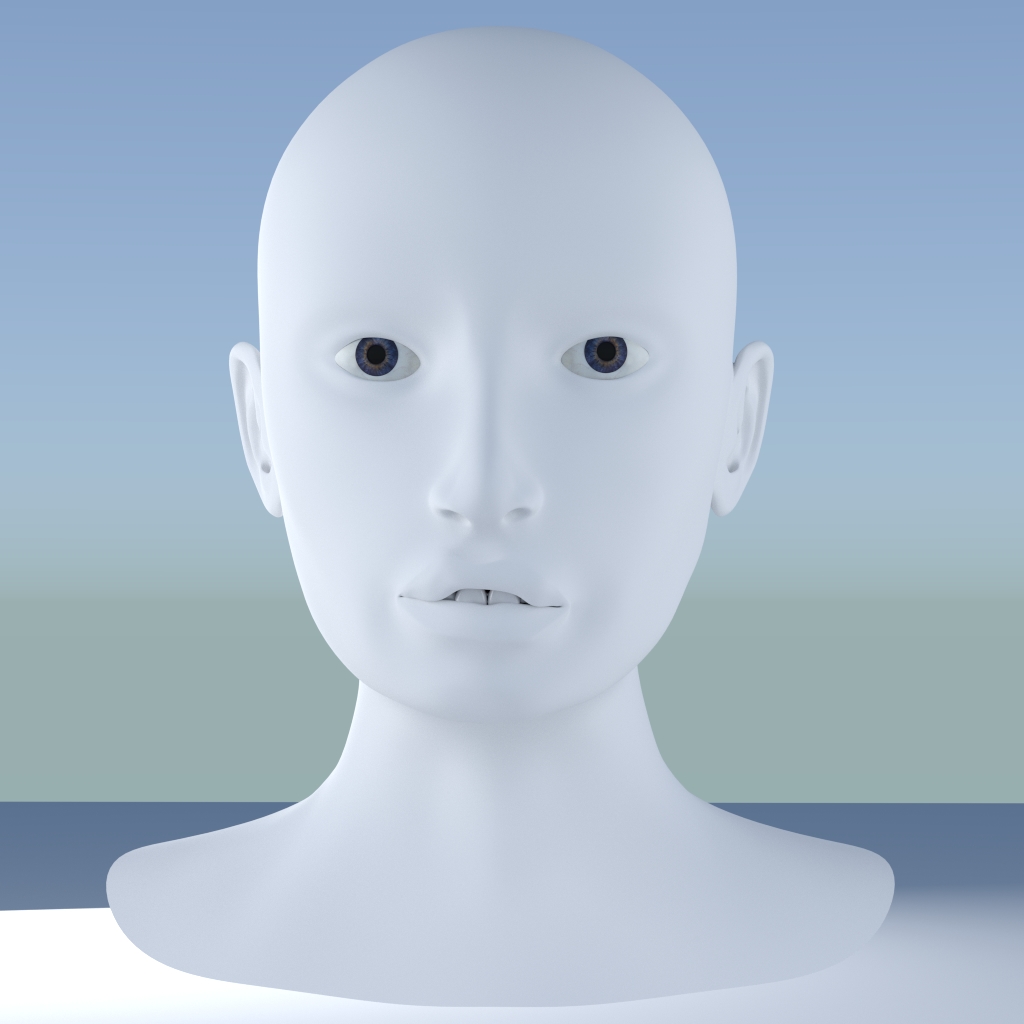
Wanted to see if I could do my own thing with the head before I started on the rest and this is no where near where I want it to be but I’ve convinced myself that with a bit of time and effort I’ll be able to get something I like so going for human female rather than female cyborg robot type thing, rest of the body next I guess going to come back and pose the head properly hair and sculpt all the detail etc at the end when I’ve got the scene created etc. and am doing the textures. Rigged the irises as well that was easier than I was expecting just used shape keys and it looks cool when it stretches the texture in and out. those are not final textures for the eyes just holding ones need to learn sub surface scattering etc.
The area around the eyes seems flat to me and not deep and round enough.
here is a picture for you to compare with.

your side view
Also look at how the deep the chin is on the top picture and look at how the eye brow and the ear lines up.
Another thing I’m noticing is the face seems to wide from compared to the picture above and another thing is the neck is too short.
The neck should long as half of the size of the head.
Sorry if for my nitpicking is too harsh.