Awesome lizard and elephant!

great anatomy!:yes:
I am studying your character, using your renders as a reference, especially the clavicle,neck, arms and torso.
One can perfectly see the muscles/skeleton interraction!
Thanks for sharing!
nice smile!
didn’t have time to finish this in time for halloween, but I figured it’d make a good sketchbook post
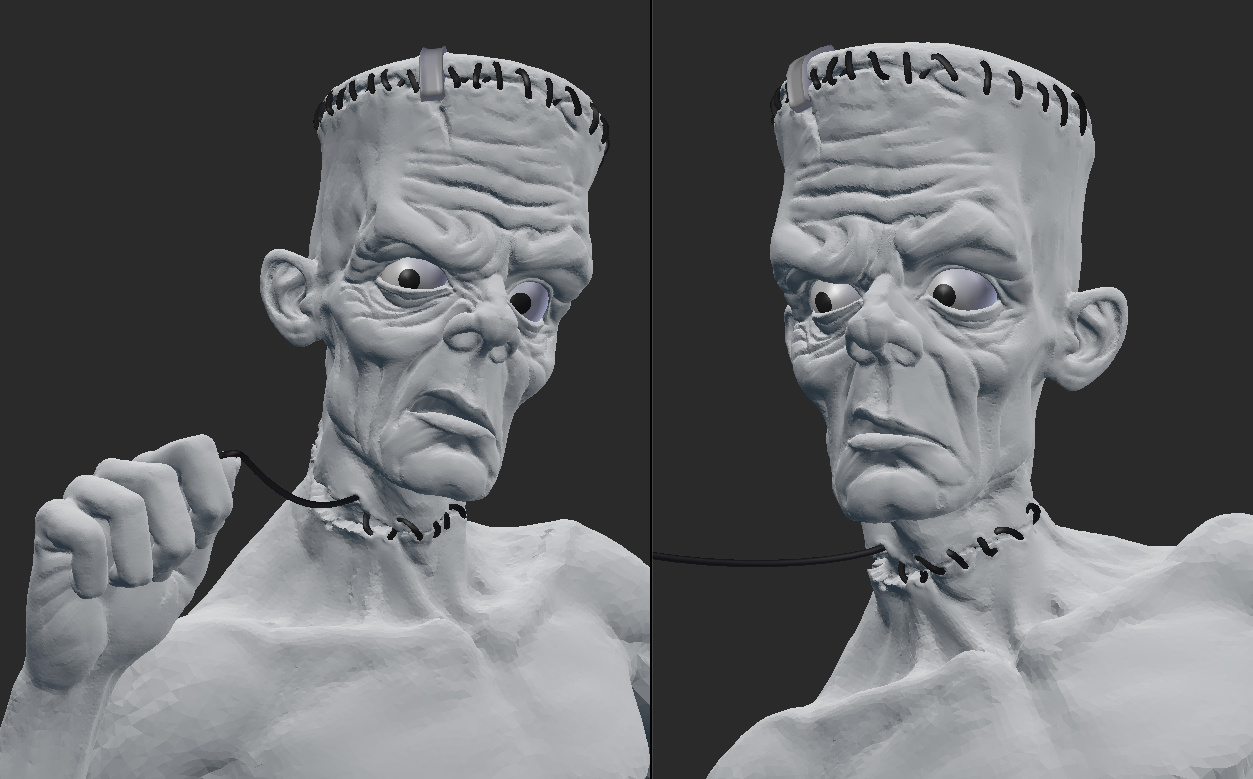
ha still funny though
 Great work! Pity you didn’t finish it, the concept is sooo great.
new sculpt!

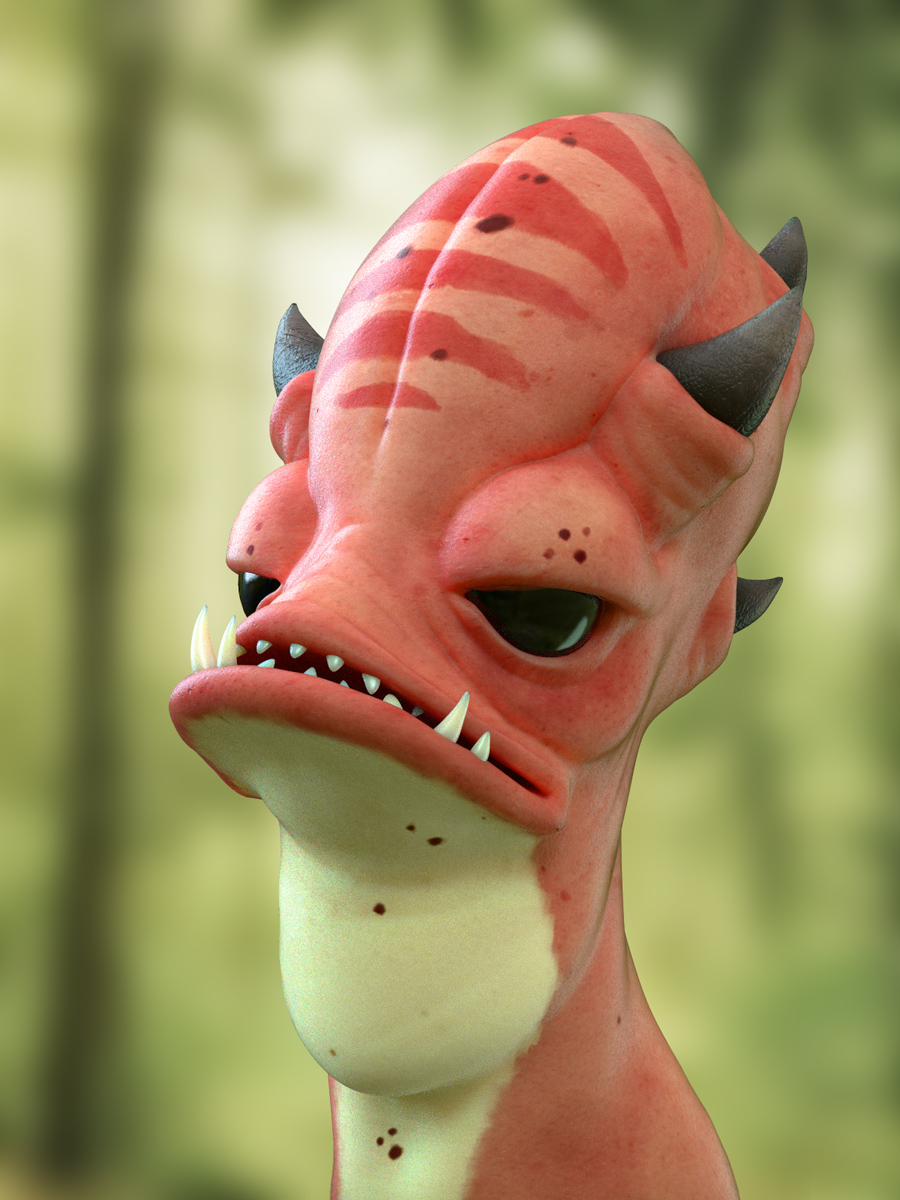
did this for the weekend challenge, decided to share some of the texturing process too:
First I painted the base diffuse texture using a few basic colors and a textured brush mask. This took maybe an hour or so.
Then I made a new texture for skin details. I used a skin texture as a stencil, and used the same textured brush mask to paint everything in.
I make a cavity map to emphasize some of the sculpt details in the final texture. I do this by duplicating the sculpt, applying the highest multires level, then use Dirty Vertex colors in vertex paint mode. I do a full render bake by giving it a shadeless material and enabling vertex color paint.
Then I combine all three textures in photoshop. I play around with layer blending modes and opacity, but I usually end up using multiply, overlay, or soft light.
from there, it’s pretty straight forward to derive the spec and bump maps.
EDIT:
added .blend here: http://www.blendswap.com/blends/view/72431
Hi!
This is a very nice creature! I like the textures and the clean texturing process very much. I don’t know if you’re familiar with this guide, but if not, you will definetly like it. A point light map may give an extra boost to the textures of such a character.
Wonderful posts, as always expected from you.
The way you added cavity is the only method we have in blender.
This cavity map should work as a mask when painting.
We had some discussions with Psy-fi on this matter.
I really love your #24 post.
glad you guys like my creature  I’m tempted to get him printed
esgeee: awesome guide! I was familiar with the DOTA 2 character art guide, which I refer to from time to time, but not that texture painting one. thanks for pointing that out
michalis: I’ve really been out of the loop recently, so I’ve probably missed a lot of discussions…not really sure why you’d use the cavity map while texture painting though O_o
A cavity map used as a mask when painting is very important IMO.
Any decent tex-painting app supports it and blender painting is not among them. :no:
Psy-fi (Anthonis) is aware of this.
Truthfully, we need a more efficient way to calculate cavity.
Something under cycles, on the fly… maybe.
The good news is, cycles baking is coming soon.
Jeepster does it again! Very cool sculpts. I especially like the latest creature, looks very cute but also kinda dangerous.
thanks ninthjake 
I was browsing creaturebox a couple days ago and found some really cool character designs
decided to sculpt one of them for fun…spent 2-3 evenings on this:
AH YESSSS, love it.
This thread is delicious Jeepster!
Thank you for sharing your texturing workflow.
Do you mind talking a bit about the shading and lighting of the last creature? …uh …and texturing?
I’m more into texturing nowadays and I love your style.
Cheers!
Really cool sculpts, full of character and great texture tricks
Wonderful sketchbook Jeepster. And thanks for sharing your knowledge so freely.
Hey dude, awesome stuff going one here.
I like the lighting in the last one. The first one would make a perfect cute pokemon lol. :3
Creature-box is always a great inspiration.
Keep it up, I`m following your work.
thanks for all the comments! glad you guys like it
the lighting setup on that render is pretty simple - it’s just an area light, two rim lights, and a mirror ball image for environment lighting (the background isn’t from the mirror ball though - I rendered it with a transparent background and composited it in photoshop). Here’s a screenshot of the node setup I used:
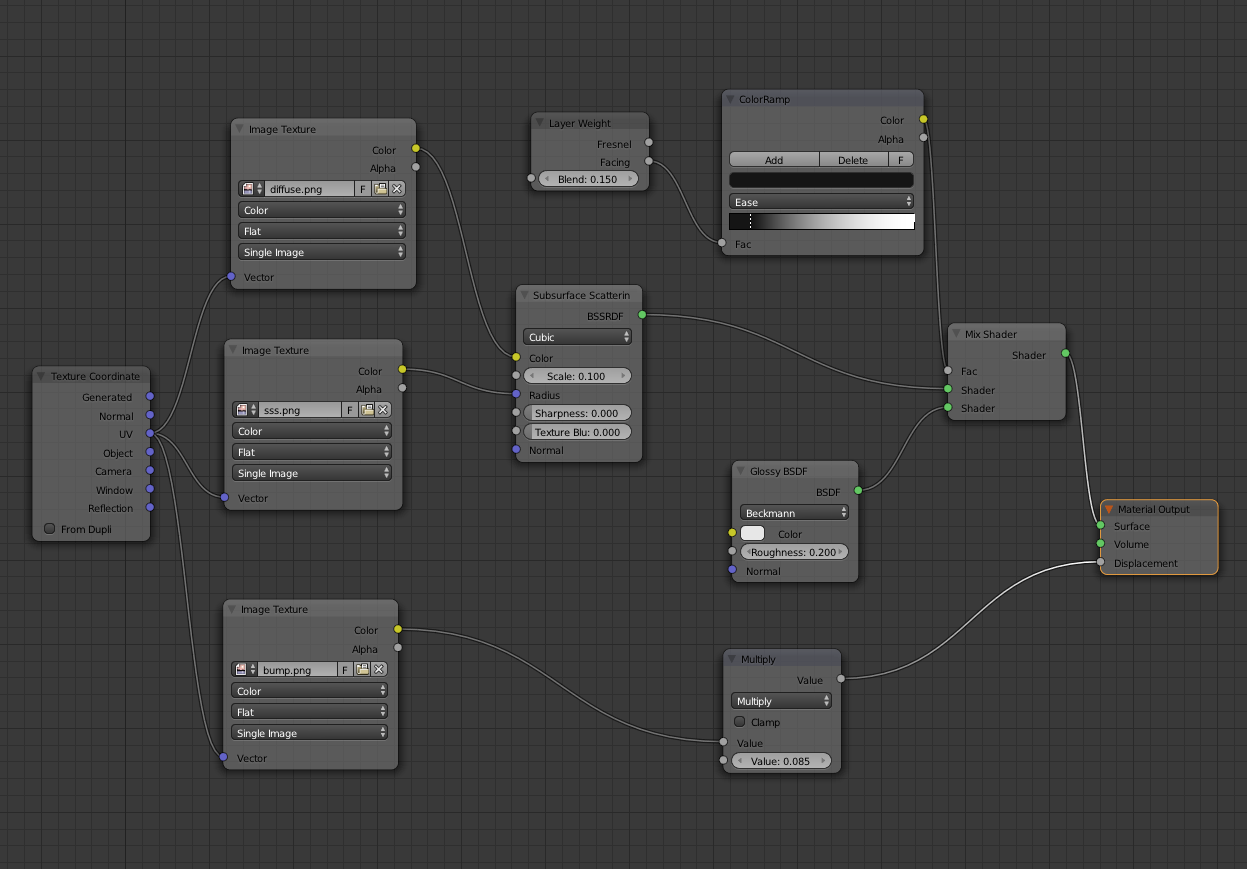
If you’re interested in learning more about shading, i’d highly recommend the Shading the Pancake Hobo tutorial at cgcookie. I watched it just before doing this new creature, and I learned a lot more than I expected to.
Thank you for the node tree Jeepster!
About the CGCookie course: I will… as S€€N as I can!