Thank you I will definitely be considering it.I already used edge split modifier just not on those.I did not know you could use bevel for that.
If you are going to start beveling loads for edges I would suggest using the bevel modifier then you can just take it off again if you need to it makes it much easier to manage your modelling as its non destructive so if you need to change your mesh you don’t have lots of fiddly bits to deal with and if you get too high polly you can take it off swap to edge split etc. If you look at the edge menu there is a bevel edge weight use that on the edges you want to bevel just drag it to full unless you specifically want different weights (select the edges and bevel weight again and type -1 if you want to take it off) then add the bevel modifier and select the option to use weight as the limit and it will only bevel where you have the edges weighted. Just be mindful of where you have different shapes joining etc. don’t just bevel everything think about where you need it and how any shapes join together or you will get glitches as it does its best.
I suspect if you are aiming for low poly you might want to use edge split and loops more but bevel can give really nice specular heights on the hard edges remember nothing in real life has a perfect sharp edge and edge split gives you a really hard edge but it’s just a trade off as to what looks good and poly count.
starting to look much better well done!


Continues to look better and better! Few quick presentation tips-
-It’s really hard to tell what something looks like from straight ahead or side views- The best angle for model display is usually 3/4th view.
- You always light your models with one really harsh sun lamp, and that drowns half your model in shadow. For display, You should always use both a main “key” light AND a second, less powerful opposing light to fill in the shadowed areas.
Could you post a blend example?So I can see what your talking about.
It would be nice to see some procedural textures being used with at least 2 materials…
This would make it look more appealing 
Check out this blend that was posted on the blendswap.com website :
http://www.blendswap.com/blends/view/77404
You mean node based texturing?I am scared to touch it.I do logic bricks but that seems a little complex to me.My colored robot legs.


I don’t use Material Nodes or the Cycles Render, but they are a great features…
Use procedural textures : http://wiki.blender.org/index.php/Doc:2.6/Manual/Textures/Types/Procedural
5 Texturing Tips for Technical Artists : http://cgcookie.com/blender/2014/09/25/texturing-tips-techies/
glad to see you are improving very very fast! keep on with it!
I suggest you to try following solarforge’s advice on materials, it is very satisfying to see your own work looking more “realistic”.
Well, the first time you’ll try cycles and nodes might be a bit confusing. the first time i tried after an hour i thought “no way, i’m done with this crap”. then i watched some tutorials, and i have to say that texturing is as funny as modelling (in my opinion).
The ones that helped me a lot are blender guru’s one, the are really really step to step and easy to follow:
This one is an introduction to cycles:
this one on the nodes:
http://www.blenderguru.com/tutorials/introduction-to-texture-nodes/#.VMIwkLA-KlM
and this a bit more advanced.
The site is cool because sometimes you have also the blend files of the tutorial, so you can follow him at any step.


Okay, few things. First, showing objects (especially boxy ones) from the front exclusively is never a good idea, because a huge amount of information about the form is being lost. Take a look at this picture:

Both cubes are identical, but the one on the left could be any length (or even taper) and your viewers would never know. Consider a 3/4th view next time, or multiple views together.
Next, you are still lighting everything with one light source and that’s creating ugly and concealing shadows. I’ve done another picture for this:

The areas circled in red are completely in shadow and so your viewers cannot see any form or detail there. High contrast lighting might be great for horror scenes, but it’ll ruin any display shot. Add more light sources coming from different angles to fill in the dark areas - the yellow lamp image suggests one possibility.
Finally, a few more general criticisms. Your procedural texturing is, to put it perhaps too bluntly, ugly as all worldly sin. Your robot material looks like a lava lamp mated with a tacky glass dream catcher. I guess the broader point is that any texture isn’t necessarily better than no texture. Robots are generally made of metal, some are made of plastic, some might even be made of wood or skin. But no robot is made of cloud based procedural noise patterns. Your material is simply colour without definition; It doesn’t suggest any actual substance. Are you trying to evoke the look of some real word substance? If so, which one?
The point of materials, like the point of all CG art, is to evoke the look of a real object - Not real in the sense of existing in our world, but in having a history, a creation, a story, a point. Every decision you make should be in service to that, and if you don’t know what your robot is made of, then decide and go from there. Figure out what this substance looks like- How shiny is it? Is it shinier in some spots than others? What kind of colour variations are on its surface, and where do they go? Answering these questions will give your art and materials a sense of tangibility that no modelling, however intricate or accurate, could ever convey.
I’d reaaaally suggest you read this article; (http://www.chocofur.com/6-shadersamptextures.html) It’s mostly theory and it’s mostly geared towards Cycles but I think anyone starting materials work would benefit enormously from it (and you should be using Cycles regardless if you are serious about quality rendering- especially since most modern game engines also use node based materials)
I have some things to say about the modelling as well but I don’t want to dump too much on your plate at once. Keep at it and don’t worry, you are improving!
Is that what you mean for the lighting and position.Okay I tried to make a metal texture in gimp here is the result.


Actually you’ve gone to far the other way; you’ve buried your model in highlights. Your addition “fill” lights should be less powerful than your main light.
Also, can we get some close up of the textured areas? You’re camera is too far from your model and your images are 60% blank space. Change the render image dimensions to something more vertical and make your robot as much of the screen as possible so we can see the material details.

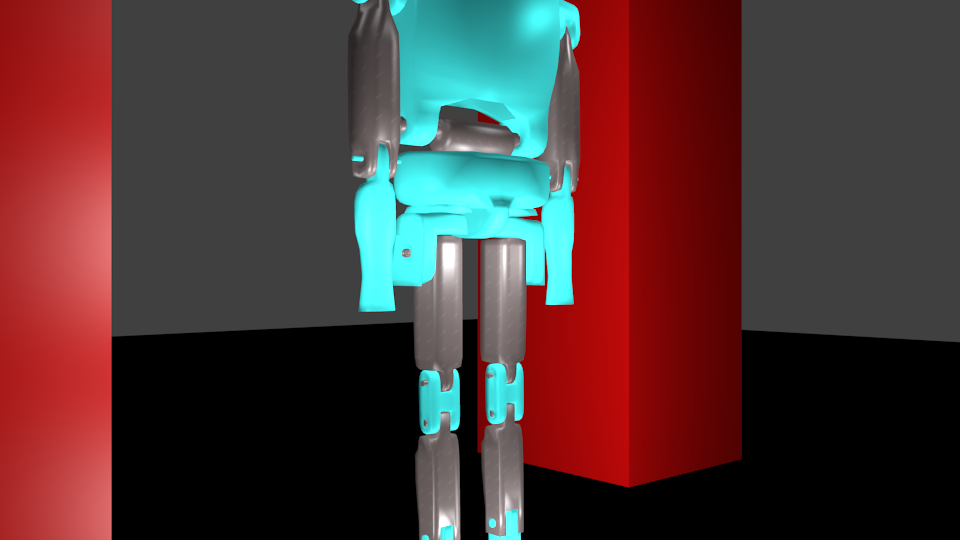
Honestly no, it doesn’t look any better- Just busier. You’ve added elements but I’m not sure you’re understanding the basic concepts I’ve been trying to explain to you. What on earth is that big read brick supposed to be? What is it made of and why is it there? You say you’ve made a metal texture but I cannot believe you actually looked at any pictures of metal, watched any tutorial on metal materials in Blender, or even looked at how other people have handled metal in their work before making it. The only thing that is sort of accurate is that its grey. What are those small, lighter dots supposed to be? Are they paint? Bumps? Scratches?
Look I know materials work is daunting but you may want to take a few days to research other people’s work on the subject before you try again yourself. I can’t help you improve if you aren’t willing to put in the effort and delay the gratification.