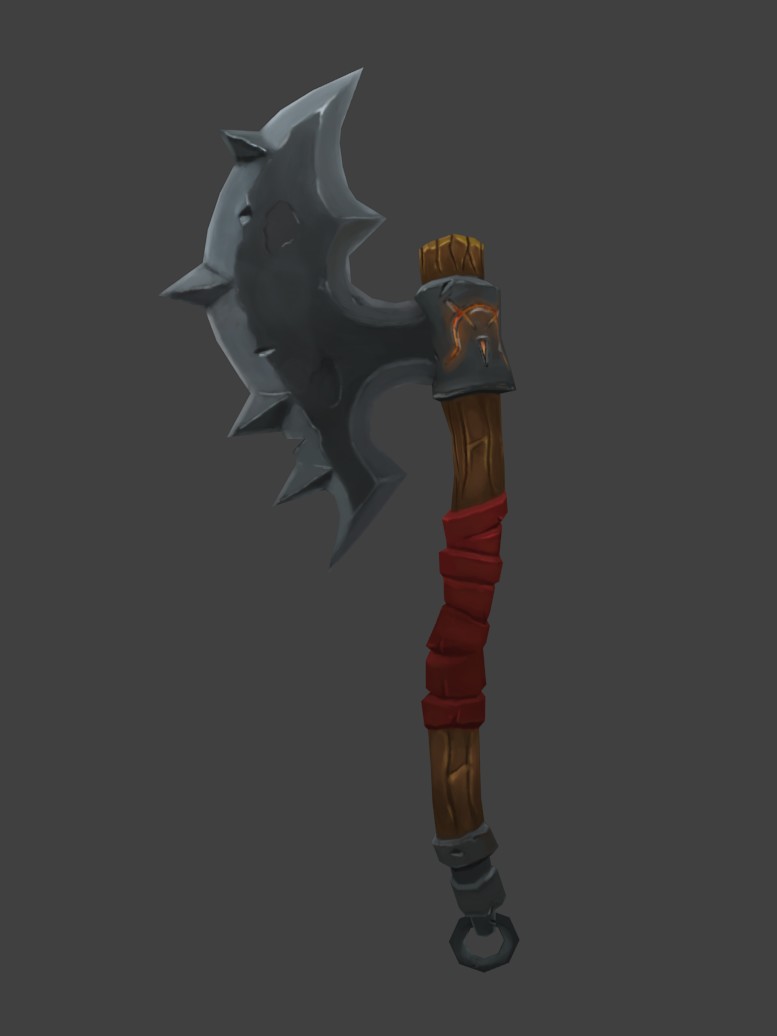
My god man, amazing job on the axe (the rest as well, but the axe just pops out). I guess the texture could use a bit more grunge/dirt.
Wish I had the steady hand in texturing you have. My textures usually come out all wobbly and I get anything but the clean, crisp stuff you’ve got going on.
Painting looks good. I am not sure what kind of look you are after, but it helps to add lots of colors within the image, so that you don’t end up with on solid hue. Most object are lit from bounced light from all over with different colors. Easy way to simulate with Gimp is to create an layer over the image, then just air brush it with different color all over. Then just play with different mixing mode and Opacity until it looks good. Here is your map dulled up with that method:
@Disfixional thanks man I’m pretty new to texturing this is the first time I have sat down and painted them but I have some experience with digital painting and that is playing a big part in my learning pretty quickly. I will definitely think about adding some dirt on the axe
@ridix Thanks for the tips There were some different hues thrown into the chest but maybe I was a little too subtle I should have changed it up a bit per plank.
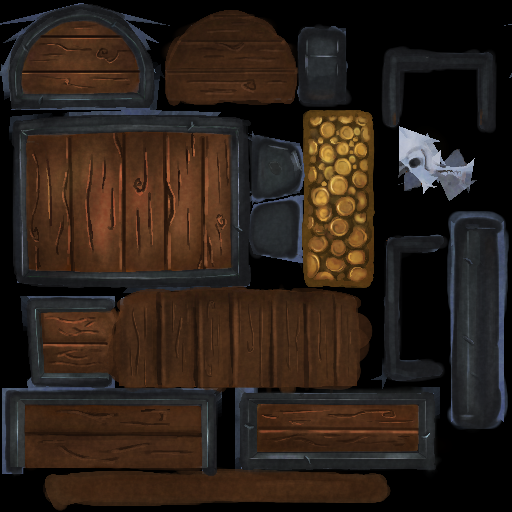
Okay another wip shot of the axe
I tried to make a glowing insignia it didn’t work out too well
I am working with a diffuse only pipeline so all lighting is hand painted in like in War Craft Frozen Throne or Torchlight . I don’t know if emission maps are a done thing with this workflow? It’s a little hard to find info on this workflow actually, next-gen and PBR have so many tutorials and blog articles on them. Maybe it’s because it’s because it’s a little old school or I just haven’t searched places like polycount enough.
xrg posted a blend file one page back and that is the kind of setup I am going for. But people paint glow effects in digital paintings all the time so I’m sure I can crack this nut.
Well, if you look at my house, lantern, and crystal formation (all in the same thread), All of those have emission maps. No heavy lighting effects, or 2D camera filters or anything. I mainly use them to keep the glowing part just a bit brighter than the rest of the texture. Then again, I might be a complete idiot when it comes to these things
I think a lot of the time the game engines handle the actual halo/glow, but I need to research that myself too. In your case, I think you can use a saturated orange with the brush blending mode set to additive, and avoid painting the halo/glow part entirely. Paintover example.
Seriously, nice job on that one. It looks better than some of the ones I’ve seen at Polycount.
@Disfixional I am none the wiser on how its done too but I will keep emission maps in mind for my next project @xrg thanks for the paint over and the tip xrg that was actually the look I was going for, I wish I had read it before I called this one done. I think I might go back and just redo that part again
@Gremllin I am not thinking of anything like that at the moment. I’m just enjoying learning low-poly modeling and texturing. I do look at Unity every now and then but I just want to keep it simple and focused.
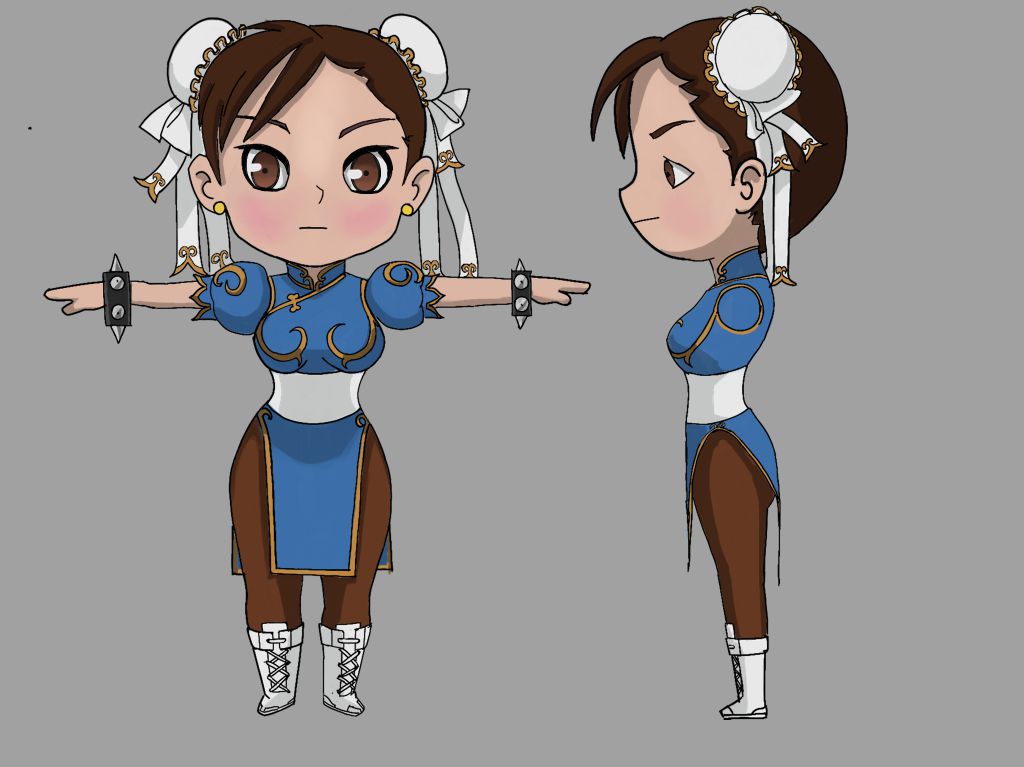
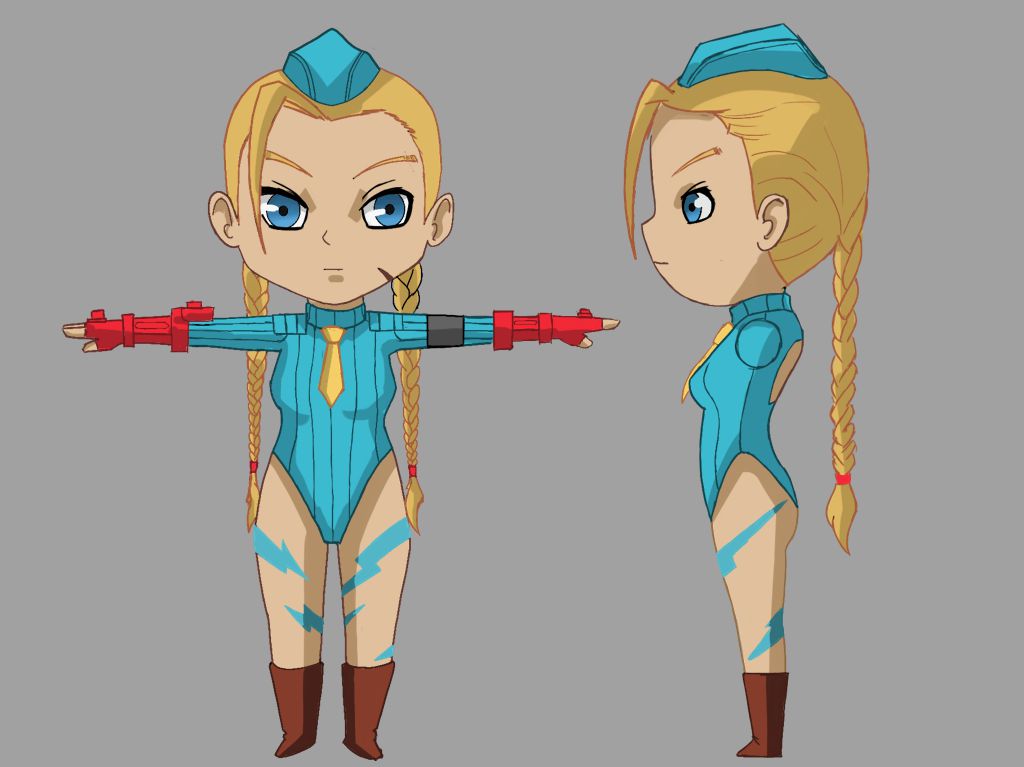
I did the cammy modeling sheet, it re-used a lot of the chun-li drawings so it was quick to do. I have started modeling and will post when I am done.
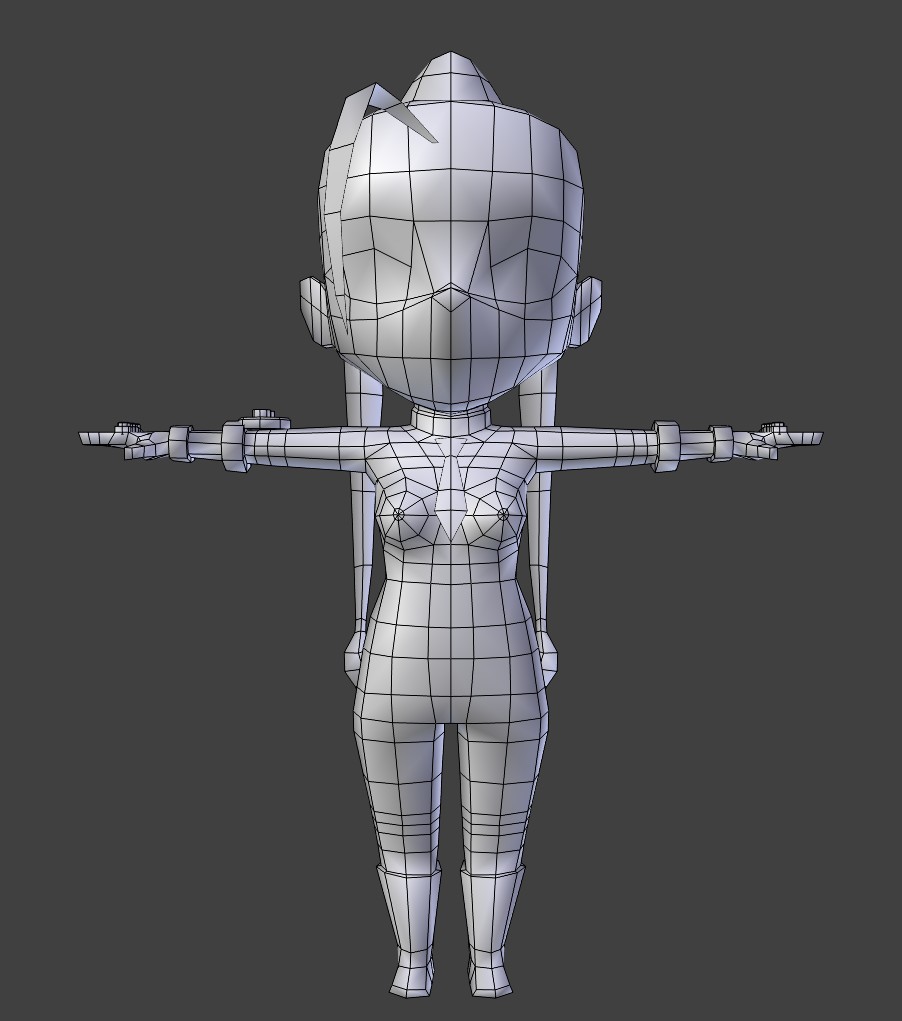
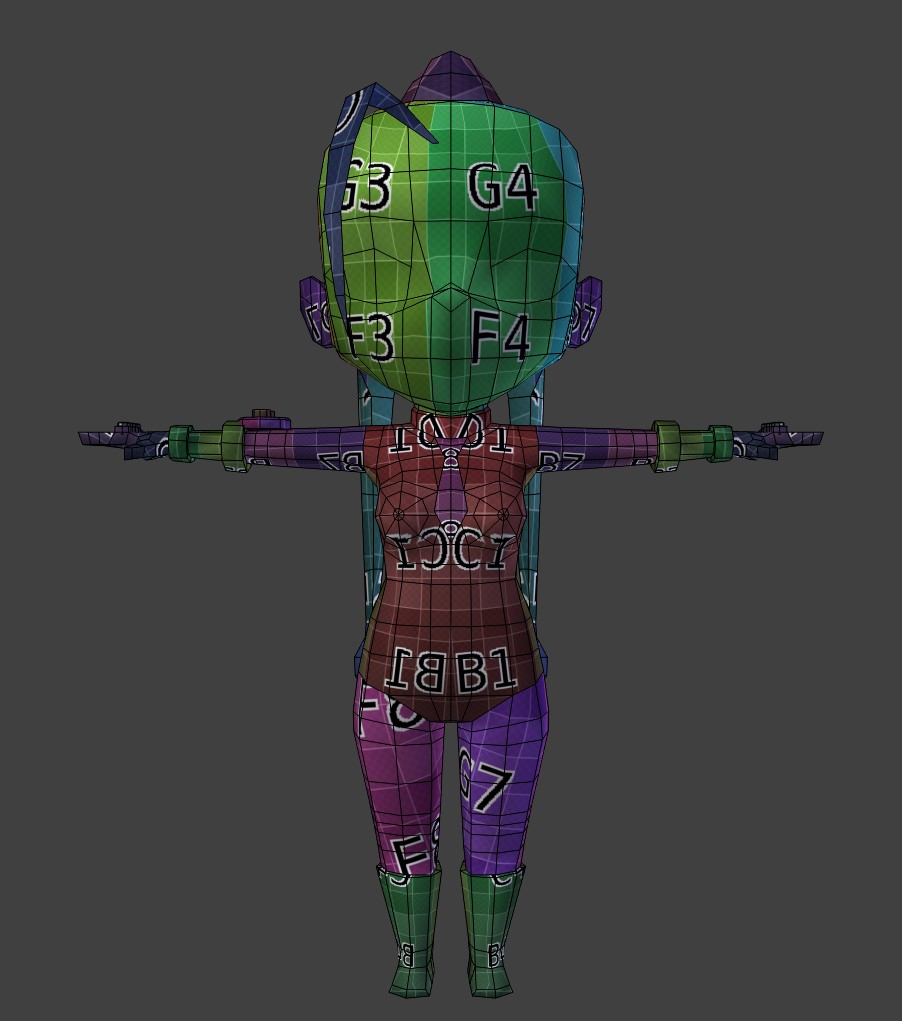
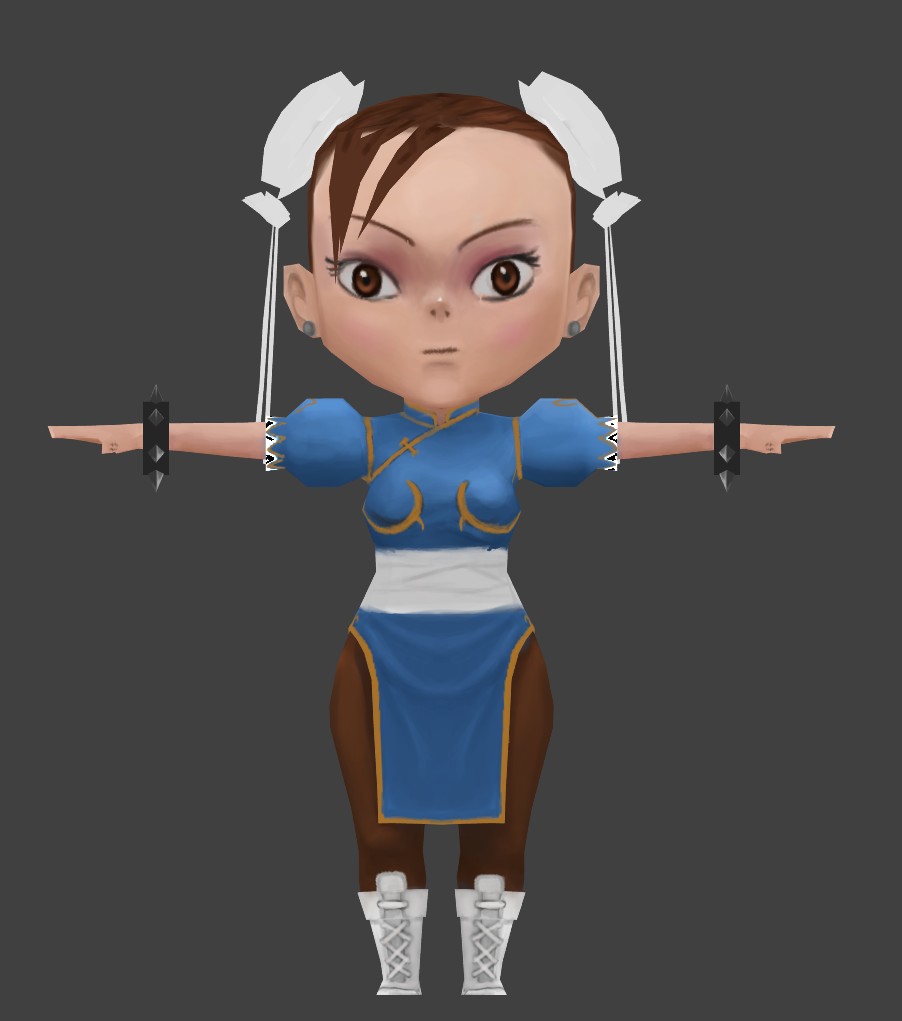
Cammy wires, I am going to rig this one up so I better do that before unwrapping and painting the are some things I want to fix with the topology but I want to see how this version moves first.
I could have been further along but spent most of the week end re-watching humane rigging there is just too much I forgot rigging. I want to rig these models.
These are very, very cool. I’ve been looking at your thread, and the things that XRG and Disfixional have done, and thinking,“I really need to learn how to do this.” As much as I like the photorealistic renders (and one day want to create), I love this style of creating low poly textures.
I baked a light map to help with the painting and have started with my line work. This is going to be a lot of work. I am thinking that I should get my Chun Li model to a similar state.
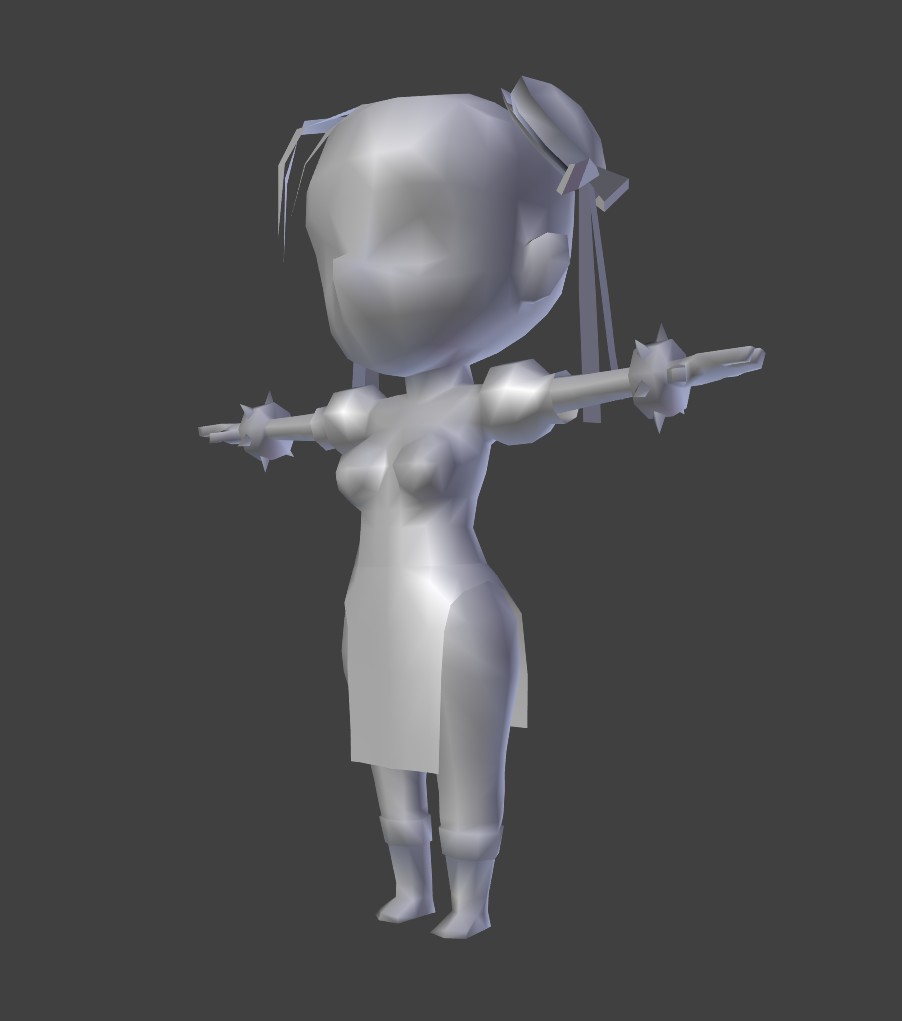
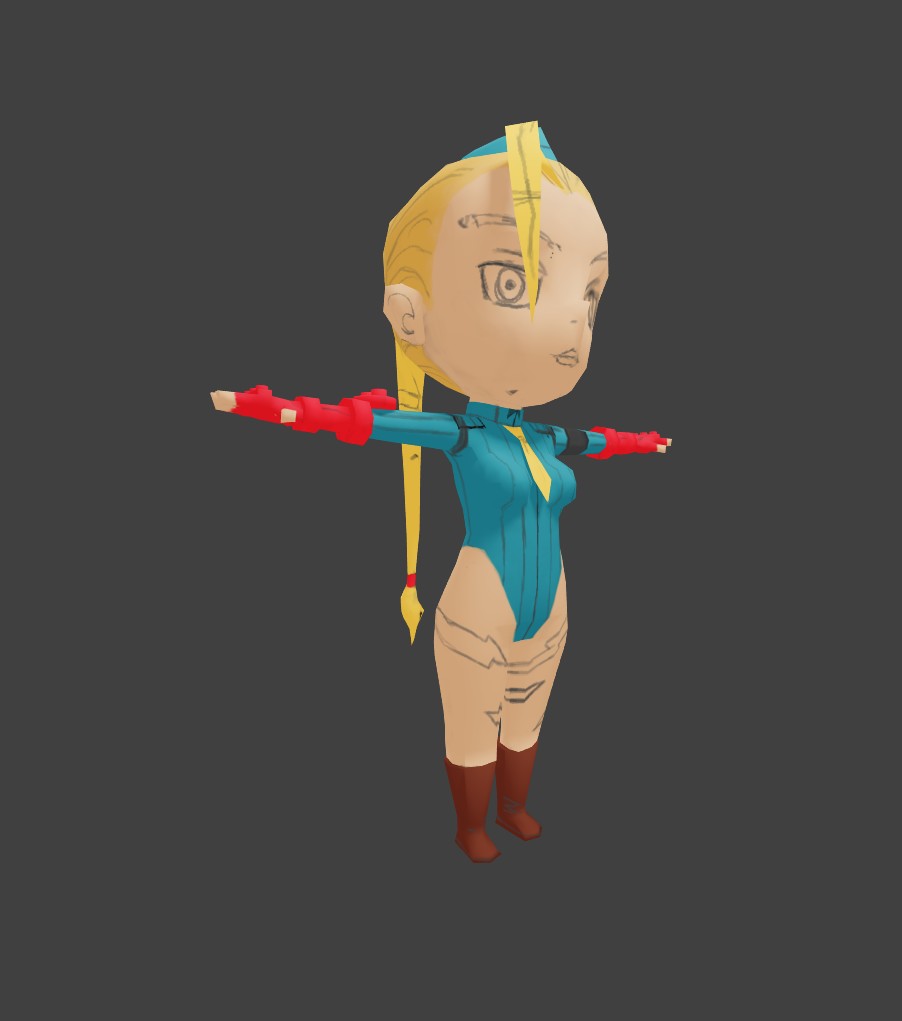
First wip shot of the chun li model. I am noticing some issues with the way I modeled the face of both cammy and chun li but I will just press on as my focus should be on texturing.
I am quickly learning that small brush sizes are a PITA when texture painting in Blender. I will finish this off in Krita but I want 90% of the work to be done in Blender.