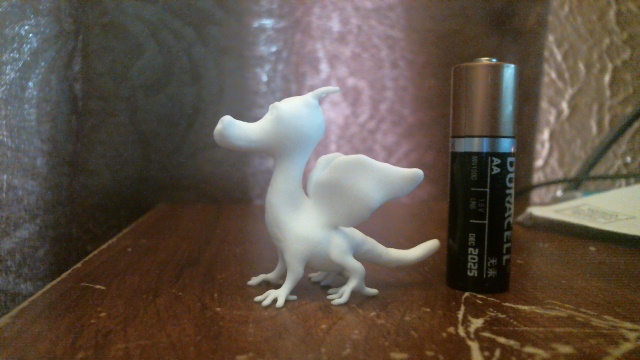
Finally got around to printing my dragon sculpt that I did back in June of 2014. Not all the detail came through, but overall, I like how it turned out.
Finally got around to printing my dragon sculpt that I did back in June of 2014. Not all the detail came through, but overall, I like how it turned out.
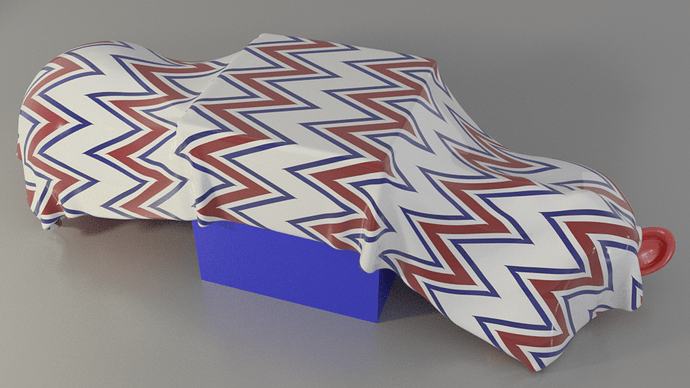
Especially if you’re into architectural visualization, this might interest you! This is a PROCEDURAL zig zag (or ripple) pattern!
Have you ever wondered how you can do a zig zag (or ripple) pattern that can be found on blankets, shirts, curtains, etc? It turns out that a small variation on the crossing stripes I did a couple of months ago is exactly how to do it. I thought so at the time, but didn’t explore it. But today, I had a breakthrough that allowed me to figure it out.
If you saw my stripes tutorial, essentially what you need is one more “stripe” set up, but instead of coloring the stripe, all you need to do is set the colors on the ramp to black and white with one at 0 and the other at halfway (.5). Use the rotation values on the colored stripe patterns to angle them so they’re about they are close to the same angle, but with one of them in the opposite direction (Here, I used 0,0,0 for the rotation of one set and 90,0,0 for the other). Then, on the black and white stripe, set it to the value for a horizontal or vertical stripe. (Here, I used “horizontal” because of the way my object was positioned and modeled, but whatever works best for your situation and the look you’re going for.) Use the black and white output as the factor for a MixRGB to “switch” between the two.
One thing you may notice when tweaking the stripes is that one abruptly ends. That’s okay, because it’s easy to “shift” the pattern by adjusting the X or Y location value on that stripe. Here, I just quickly eyeballed it, but you can be more precise so that you a) get into the correct stripe pattern and b) line up the stripes so that they zig zag.
This was a pattern I knew would be possible once I figured out the stripes to begin with, but hadn’t thought of how to achieve this look until today.
I plan on doing a tutorial to show how to take the stripe pattern and create this look so you can see it in action, but was excited to see that I had the right idea!
Very nice! I would like to see your tutorial when it’s done… looks pretty useful.
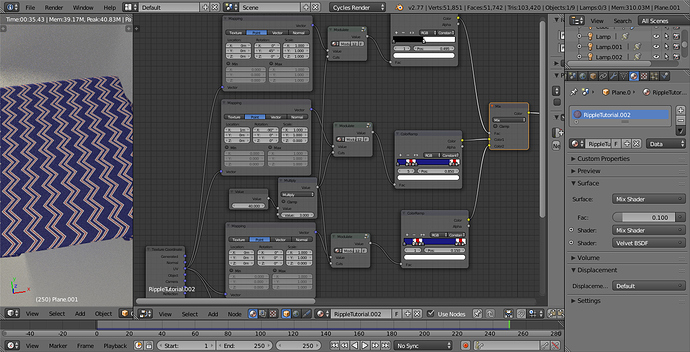
Nodes set up preview… I’m working on doing a tutorial, but here’s a quick look at the node set up.
The modulate node is the same node Bartek Skorupa showed in the Shader Forge Wood tutorial on CG Cookie. The nodes that feed the Cuts input help to control how frequently the pattern repeats.
The striping pattern itself is controlled through the color ramp, both in terms of the color and the size of the stripe within the pattern. The key in the ripple pattern is to have both be the same pattern, just fed different coordinates.
The top set is just a mask for the factor input to determine which striping pattern you’re using.
I’ll explain it in the tutorial and how to vary the angle of the ripple – which isn’t adjusting the value you might think.
It’s available! If you don’t see it in the tutorial section, I’m just about to put a link to it on my site in my signature.
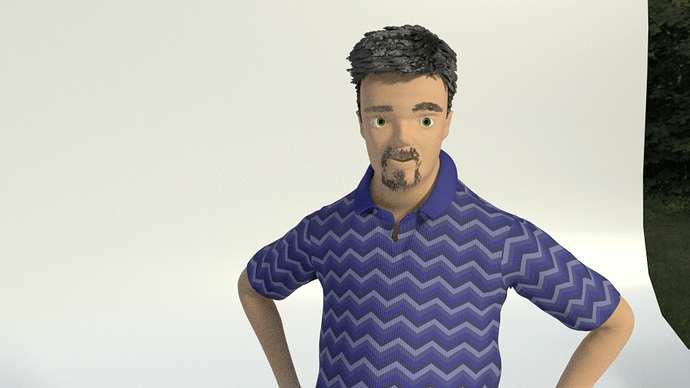
After making the tutorial live last night, I played around some with a texture pack I got from the BlenderMarket by graphiccompressor. I used his nodes for the texturing, but substituted a diffuse node for one of the glossy shaders and used my ripple pattern + Kent Trammell’s Fresnel node for the non-bump stuff. I like how everything turned out on this one. A definite improvement on the texture I did have.
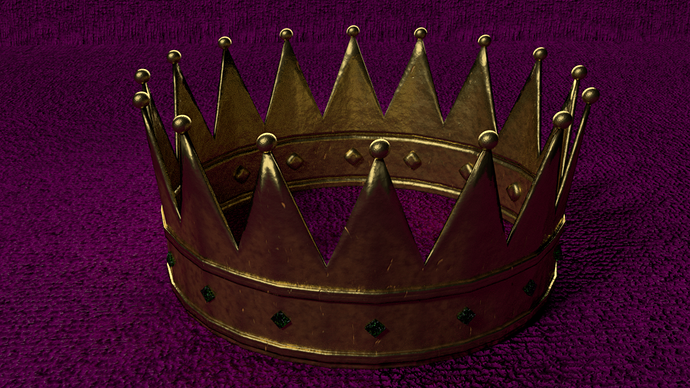
I did this crown as a quick project after being sick for several days. For the textures, I used some materials from Reynante’s Cycles Material Vault. Overall, I like how this turned out.
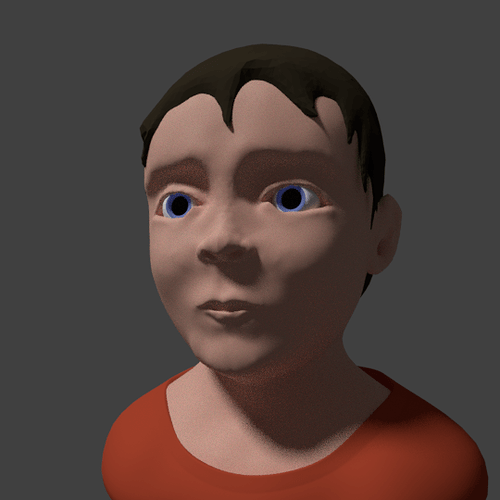
A sculpt I did of my son after watching a webinar on Creating Memorable Characters with Michael Defeo. He shows a method for sculpting in Zbrush that I had to adapt to Blender. This was the result. It’s a bit cumbersome in Blender, but workable.
Seems I go through periods where I’m not posting much and while I haven’t done a lot of Blender work over the summer, I have been working a bit the last few weeks, especially since I got the new computer  Now that I have a nicer computer, I’ve been rerendering a few of my older projects at a higher resolution and/or sample size. Almost through all the ones I wanted to do, so it’ll be back to real work soon
In the mean time, here’s a couple of my favorite abstracts I’ve done in the last few weeks.
This one I’m calling Olympic Torus because I thought of it and did it while watching the Olympics. I used a couple of materials from Reynante Martinez’s Cycles Material Vault. The “outer” one is gold and the “inner” one with the stripes is using the painted wood, modified just a little to fit a look I was going for. The wood texture was a last minute thought to give interest to the stripes, but I’m glad I chose it, because I think it looks great in this image.
This one is Colored Cubes, a variation on a theme I saw in a tutorial. I did the blocks a bit differently, and this is more of an orthographic view, which lent itself nicely to the Freestyle lines. It was also a bit of color theory play.
Essentially cylinders generated on a sphere through a particle system. I added a little modeling on the cylinders for interest. And also a little color theory play as well.
Torus Knot with Torus Tissue
While I do plan on going back to work on the character stuff, I think I"m going to continue doing these abstracts as a way to explore features in Blender and experiment with textures nodes.
For this one, I was playing around with the tissue add-on by Alessandro Zomparelli. I used a slightly modified torus as the basis for the tissue on a Torus Knot.
The texture on the object was an interesting experiment. I used a musgrave texture fed through a modulate group (you can check out my stripe tutorial or Bartek Skorupa’s Shader Forge wood tutorial on how to put that group together) with a cut of 1 as the factor for a color MixRGB node set to mix with the second color being a variation in Value and Saturation to the top color. The result kind of looks like the patterning you get on some desert snake skins.
Love the yoda and the dragon bad ass!!!
Wow… Been far too long since I posted in here!
Okay, so here’s a couple of recent projects:
Red eye tree frog
Ridged Torus
Clove Hitch – one of a series of knots
I have a few more, but a couple of them, I want to get feedback on for improvements. Lately, I’ve been doing a number of abstracts like the knots or the torus and using them for quote images as well as experimenting with some low poly work like the frog. And I was going to do a sculpt recently, but had to delay that so my tablet could recharge the wireless battery ![]()
While I’ve been lax over the last few months, I’ve picked up steam the last couple of weeks and hope to have more interesting stuff to share soon!
Shell Abstract
This is tonight’s expermiment in abstraction. I got this look by crossing 2 magic texture nodes at a 90 degree angle with a noise texture overlaied. Using Microdisplacement and Filmic Blender.
interesting, looks like a tentacleball.
I thought it looked like the suckers on an octopus too! 
Wow… really? Haven’t posted here in that long? Hmmm…
Be sure to read the ingredients
Practicing a little table design for a contest
Curves practice. Unfortunately, I think I lost the file on this one, but it was fun making. This was using the Curly Curves that was added in 2.79 (though this image was made with a RC release).
Some of the abstracts are really clean and shiny, you also appear to be really getting the hang of procedural generation as well.
The knots look good as well (it would be quite tricky for me since I’m not good at all with making real knots). As with some other sketchbooks, the ability to make individual objects is clearly demonstrated, but it’s always nice if they had a sort of scene to go with them (doesn’t have to be complex).
Wow this looks really great… Keep up the good work
Wow… seems like it’s been a while since I posted in here… and I never posted one of my favorite works from last year anywhere? Time to fix that!
This is a longhorn diamondback rattledillo. Wish i’d done more work to finish him off, but… This was inspired by a challenge Draw With Jazza and another did, taking 3 creatures and mashing them up. I tried to chose 3 that would be very representative of Texas. The Longhorn cow and armadillo were shoe ins. The rattlesnake, while not necessarily limited to Texas, I think are plentiful enough here that it makes sense. The result is a creature I’d hate to run into in the wild ![]()
Trying to get back into working more regularly in Blender and exploring 2.8, so hope to have more low poly, sculpts, and, of course, knotty pictures to post soon!