looking pretty cool Doris! I find teh very realistic hair and no textures a little strange, but very nice!
hi ng- i can post uv and a short how-i-did-the-rig tomorrow after work. the rig is the first i made, so do not expect wonders…
thanks xrg 
thanks michalis. yes this is still wip. good point, i will work on the ears some more.
michael, yes it looks odd, but i wanted see him renderd even though it still is wip. i want paint textures next weekend we will see how this works, i am not good at “color”
ok, here you go, ng ![]()
these are my uv’s. i had the idea to scale the pieces highlighted in orange down, since they are covered by cap or hair. so i could scale otheres up, inparticularly the face piece, meaning i could paint finer details with same map size.
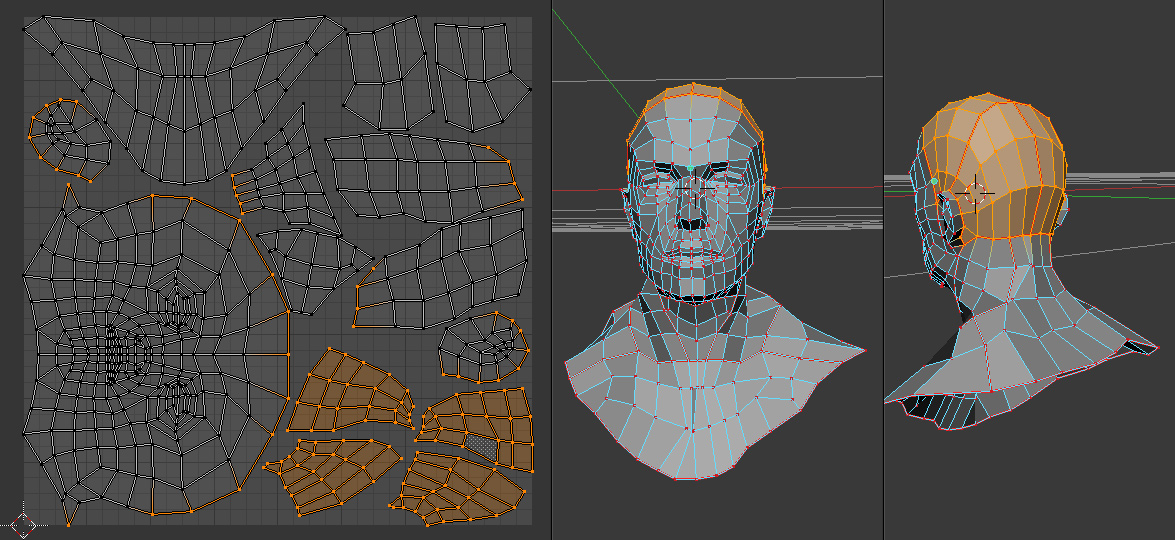
as to the rigging. it is very basic what i did, but for this purpose works well.
- i begin by creating a single bone (shift a -> armature -> single bone). then i go to edit mode and edit this bone by scaling moving into the place where i want it be. (if you cannot see it properly because the mesh is hiding the bones, you can put the armature in x-ray display mode.) then i select the tip and extrude the next bone. again move, rotate and scale it into place. keep doing until all bones you need are there. exit edit mode.
- now choose your mesh, add a armature modifier. in the object field select your armature. now the mesh knows it should work with the armature, but we need to tell it which bones influence which vertices. for that
- deselect everything. select the armature, put it into pose mode (this is where edit mode is too) now when the armature is selected click your mesh object once, and immediately(!) after that choose weight painting mode. your mesh turns dark blue. now right click a bone to select this bone, and then paint on the mesh the are which should move with this bone. it becomes red with yellow green borders (for smooth transitions). when you make a mistake, put the brush to substract and paint over, it turns blue again. put back to mix or add and continue.

do this with all bones. you can test the bones while weightpainting, to see if the mesh moves as you want. sometimes stray points left behind, that means you forgot to color some vertices. undo the bonemovement, color the stray vertices, and thats it. now
4) exit weight paint mode, and you can pose your armature, and the mesh follows ![]()
so, i hope this gets you started, please feel free to ask more if needed, i will try to help what i can ![]()
edit: oh, i forgot to mention, if you use a multires modifier too, like i did, you want the armature modifier on top of that. i have put it on top of modifier stack. this ensures when you sculpt the mesh stays in the posed position, so you can fix any odd areas that came from posing (like overlapping polygons or messy areas). this would be difficult if the mesh pops back in the symmetry pose when going to sculpt, which happens when the multires modifier is above the armature modifier… just saying, since that drove me crazy until i understood what was happening… lol
many thanks doris.I assume you can still sculpt on it just as long as you don’t add any more polys to your base mesh?
seems simple enough for a bust! I’ll give it go on my next project.
this started out as dyntopo right? I think it did,I think I commented in dyntopo thread,losing my memory haha.
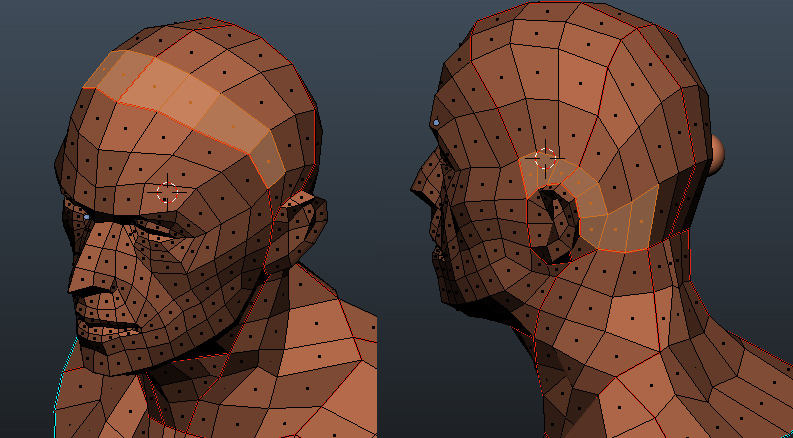
yes, it started as a dyntopo, you see the retopo in the uv layout image i showed. and, yes, you can sculpt more even after posing… i have not tried to add vertices, but i guess the multires modifier would answer with spikes… and, what i did is add the armature to eyes, cap and shirt too, and so when i now move the armature, all parts move with the guy, he does not loose his eyes or cap  i thought this was awesome
Dyntopo, retopo, toprow.
congratulations.
Congrats on the feature!!
This is very impressive doris! How did you do the hair?
WOW! nice stuff you are do some top notch work doris
Congrats on the toprow
great work!!!
Amazing work Doris !
wow. very nice.
wow, what a great surprise! and i have not even repaired the ear as michalis suggested… lol… thank you all for congratulations. a happy moment ![]()
and to your question about hair, blenderjax.
i did the hair very basic as well. there is actually only hair where we can see it, under the cap he is bald.
- i made two vertex groups,
then i made a particle system hair for each vertex group. i used emission of 1000 and children 100 on each. i put lenght a tad longer than i wanted the endresult, and used low random setting. important is in the cycles setting to set the rootsize appropriate, in my case 0.1 was good, this depends on the scale of your model. mine is correct realistic scale. and important is in the cycles setting the shape, i used 0.7 which gives a shape for the single hair that resembles human hair. then i went to comb the hair. i simply used a big brush and combed it into place. i tried to get the job done with few strokes, to me this gives better results. and after that i used the cut brush and cut the hair like a hairdresser would do, along the borders to get the hair do. thats all. it took only about 10 minutes
edit: and this is how the hair looks in viewport …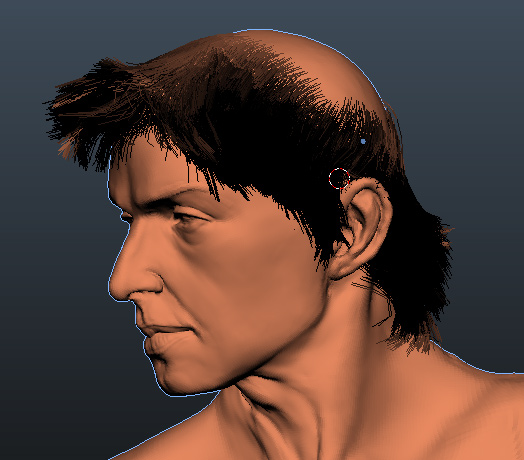
@doris,
This is an amazing sculpt, The level of detail you put into this piece is very well done…
Congrats on top row :RocknRoll:
Cheers,
~Tung
thank you tungerz…as i plan to texture this sculpt, there will be much more detail than is here now. we will see. i am excited to push it further…
Very Nice work Doris !
Awesomeness! Congratz on the featured.
The basemesh looks really good, and the neck is very well rigged!:eyebrowlift::eyebrowlift:
Did you use corrective shapekeys to control the deformations?
thank you too! its really a great feeling to get featured
filou.rod, no i have only the rig. i do not plan to animate the bust, so i thought shapekeys is too much work. (and i would have to learn them too ;-))… i just wanted a way to be able to easily change the pose slightly but possibly globally after i have created lots of detail in the multires modifier, you know, getting a pose to really transport an emotion or “statement” is depending on very subtle changes. so i thought a rig would do that. i corrected the bad deformations and messy area in the sculpting stage.