@Ace Dragon, I want to apologize in advance for possibly already downloading this “latest release” from 20-Aug-13 - but I don’t know where to download it from? Your signature says “get them here” which loops back to the 1st page of this topic - and the 1st post (from 2011) does have a download for a 2.65 version - maybe you just update to that “link” location, so it actually is the most current version of this? … seems like I remember something like that and downloaded at least the one from that post, but it seemed hard to “test / play with” in 2.70
thanks again, it’s people like you that keep me trying to get a good handle on this
I really think your collection is stellar, I did try some of the “Ubershaders…” but really liked yours and was more intuitive for me to work with - just couldn’t get it to work right in B 2.7! looking forward to using the latest , when you have a lull in your fantastic renderings! No big rush, thanks
Also love your art, diplomacy,candor and tecnnical talents - you are a gifted, dedicated human
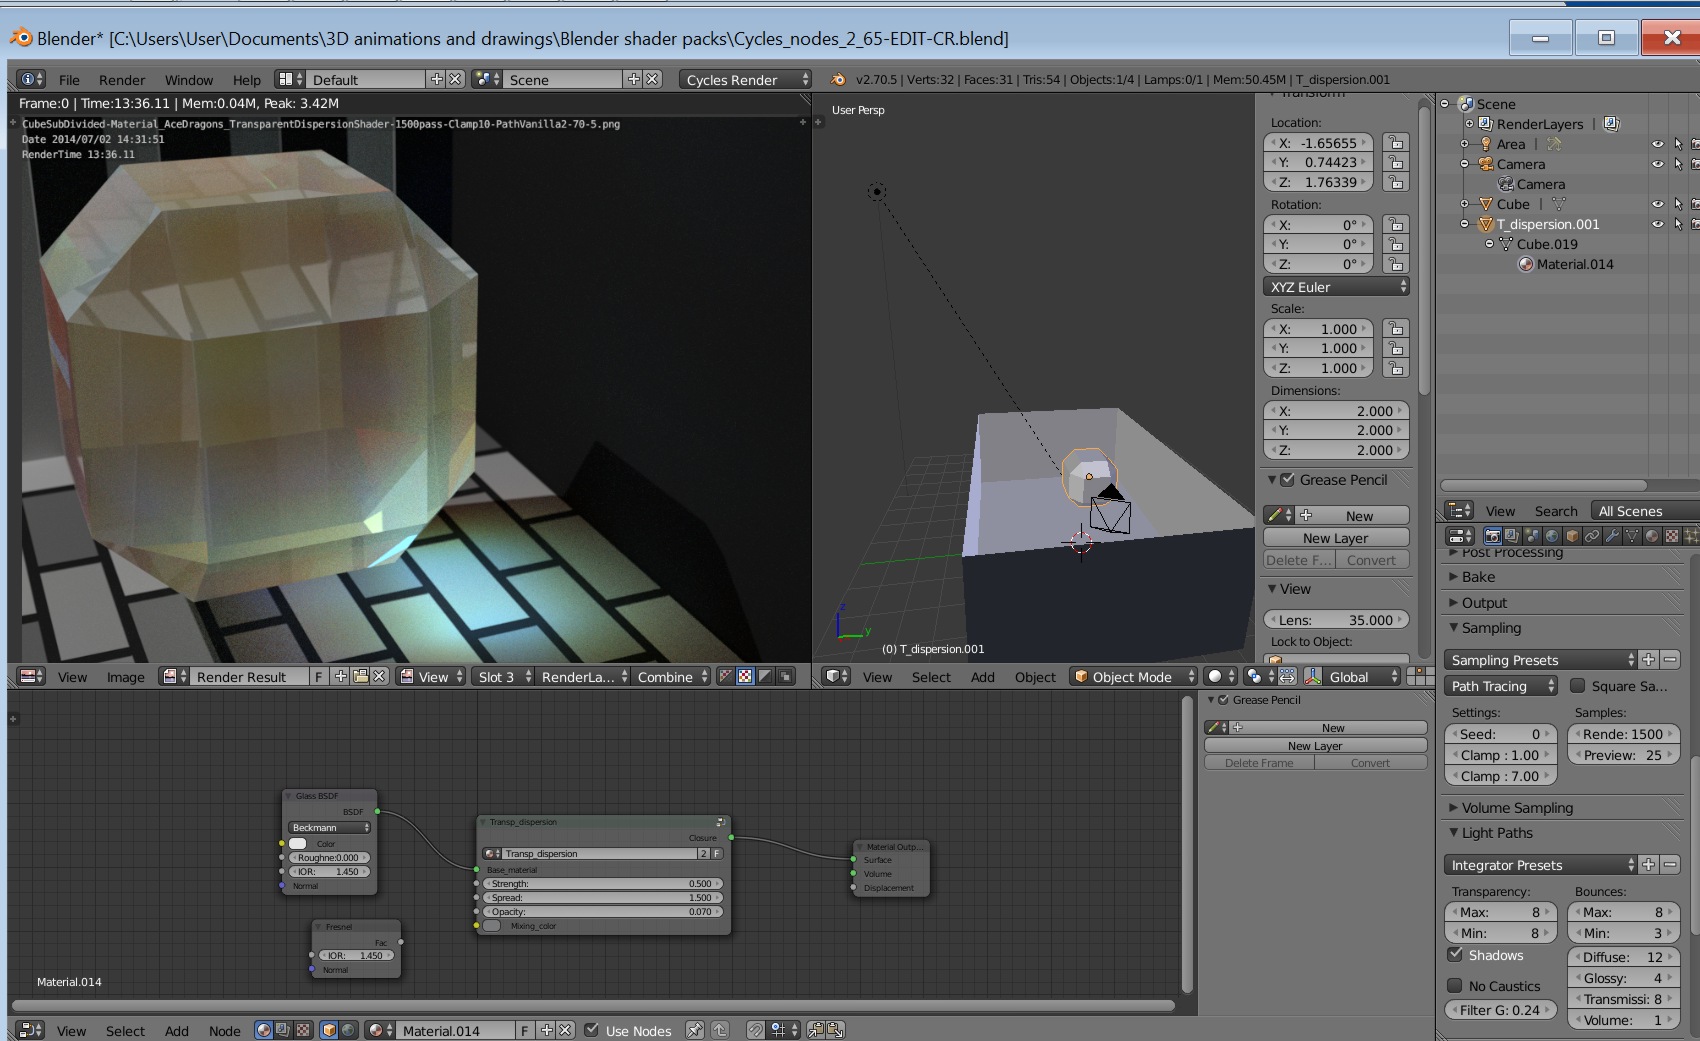
Very nice ,intuitive and realistic shaders - great looking “caustics” from the “Transparent dispersion” shader. Looks so nice that it doesn’t bother me as much that their aren’t any “spectral dispersion” - rays! ( I understand it’s because cycles is not “bidirectional”, mostly for the reason that it would make it much slower.) Very impressed and intrigued about the way you set up your blender file!
Your giving me hope (from my narrow noob perspective) to try work more again with cycles. Been trying to get a handle on LUX (mostly cause of spectral ability), does a lot of good stuff, but it’spretty tough to understand also - and not very intuitive/and or overwhelming.
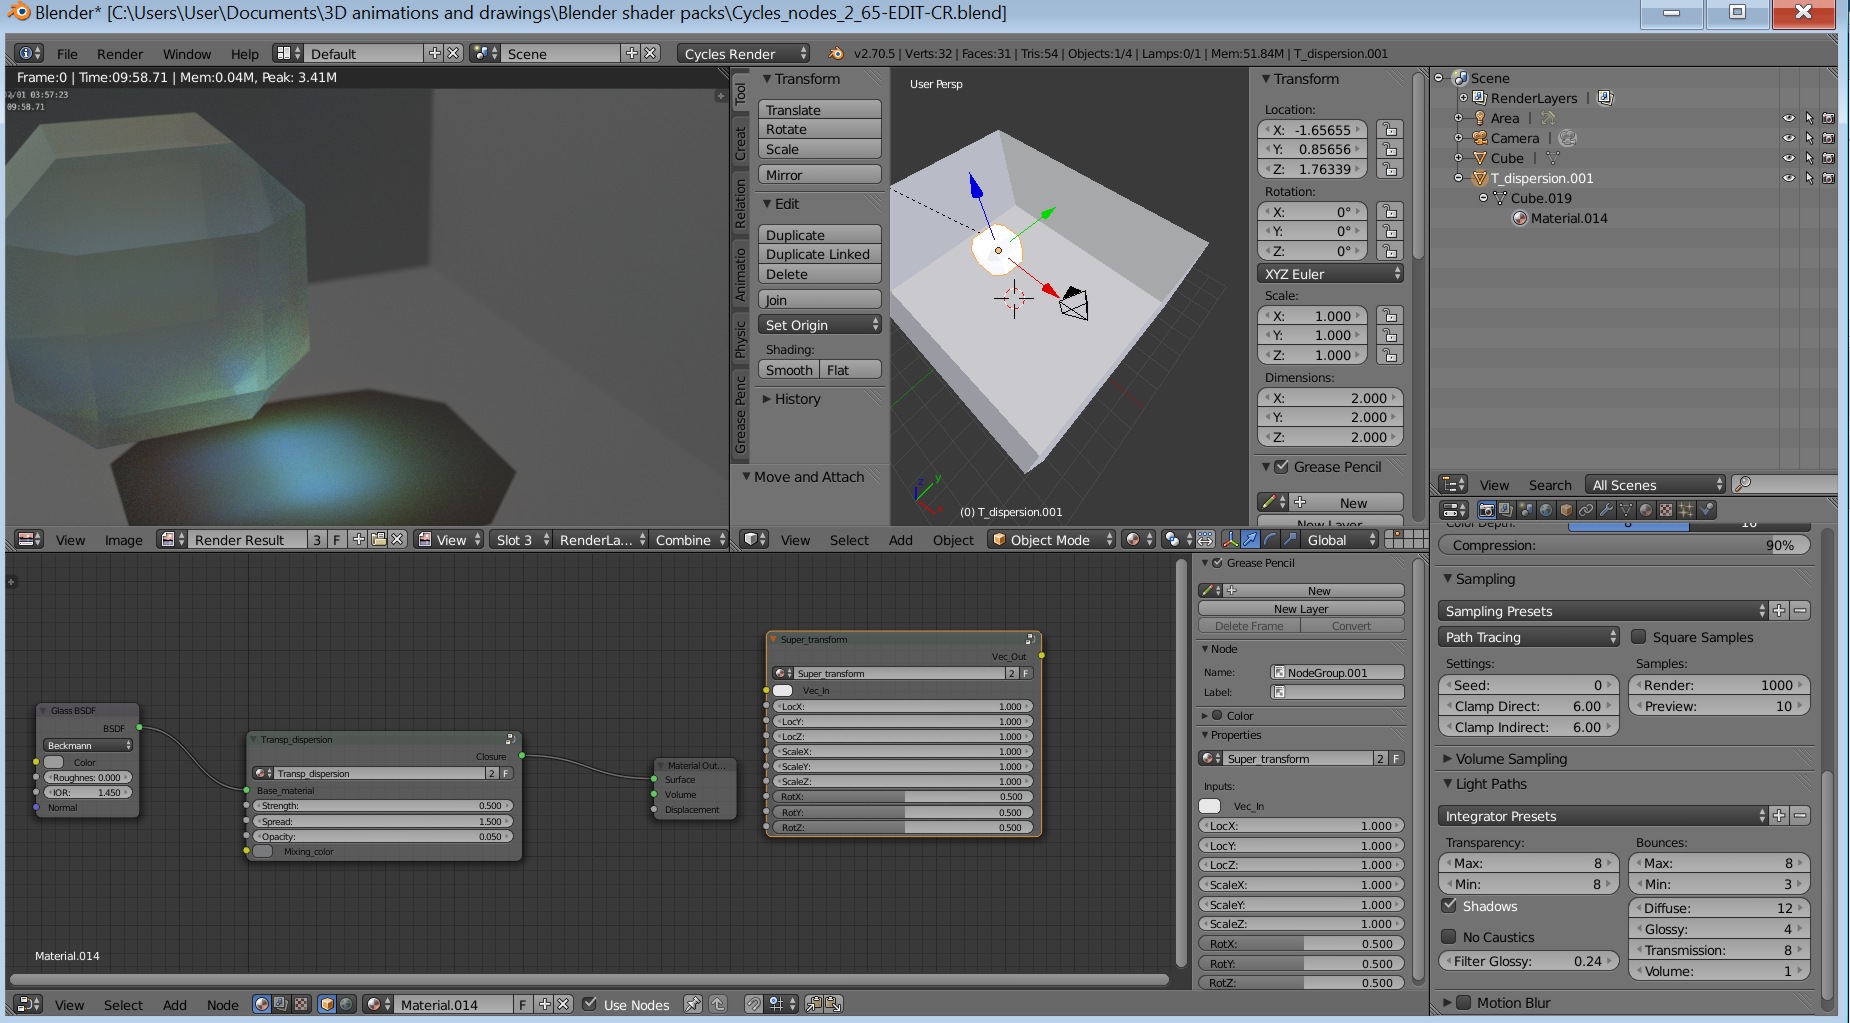
I used a copy of your shader file & deleted all the other objects, except this cube - now I have a question about why the color (both internal and dispersed/caustic) is blue and green? I set one area light to white w 1000 power, turned off world, made a grey BSDF cube as a ground plane and walls? Oh ya, whats "Super transform in the node window? Is it active in this “matreial.014”? Here’s a screen shot
To note, you don’t actually have to start with the provided file in your own scene. You can just do append > select file > node trees to get a list of the group nodes and import them without the objects.
Also, yes, it’s been a little tricky to get a good dispersion shader for transparency to work (haven’t touched it in a while), I might have to revisit it.
Thanks for your response, I did know I could append/import (and even just select what I need for a given project), but your scene looked so cool, with the “Sky node”, giant ground plane, etc. Then I started playing around with your example file, I was really happy - and intrigued - at how you had “set it up” and so many things work “better” in IMHO. The thing that caught me right off the bat was the “fish eye/wide angle” user perspective setting you chose to use in your viewport. I’m sure it’s all “elementary” and right there in the Blender setup /user preferences file, but for me I often don’t even know there is a “better way” unless I experience it, or at least watch a “youtube-ish” video closely.
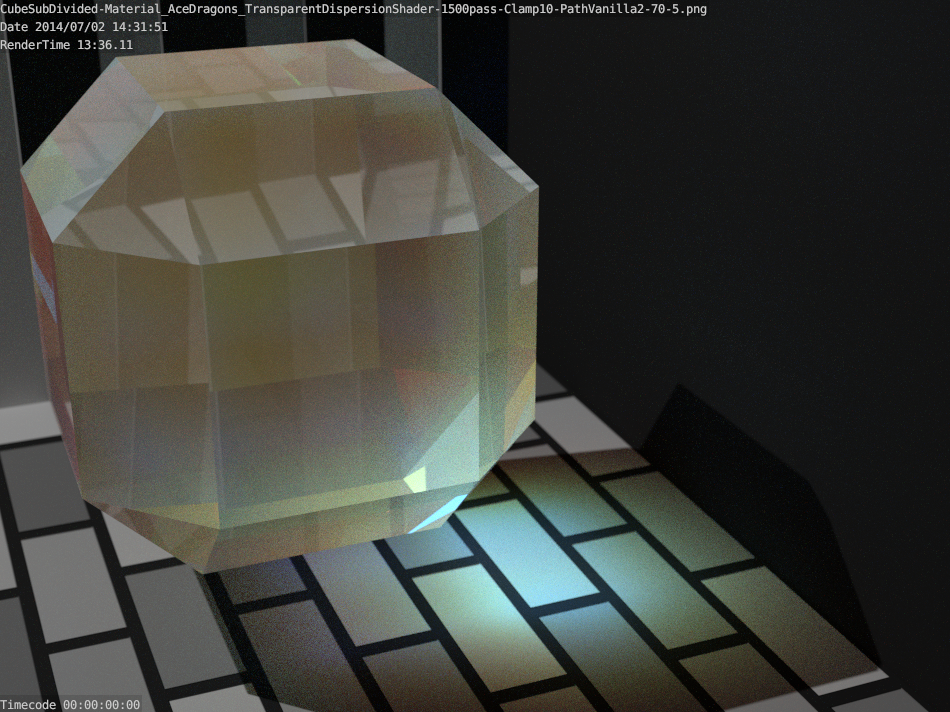
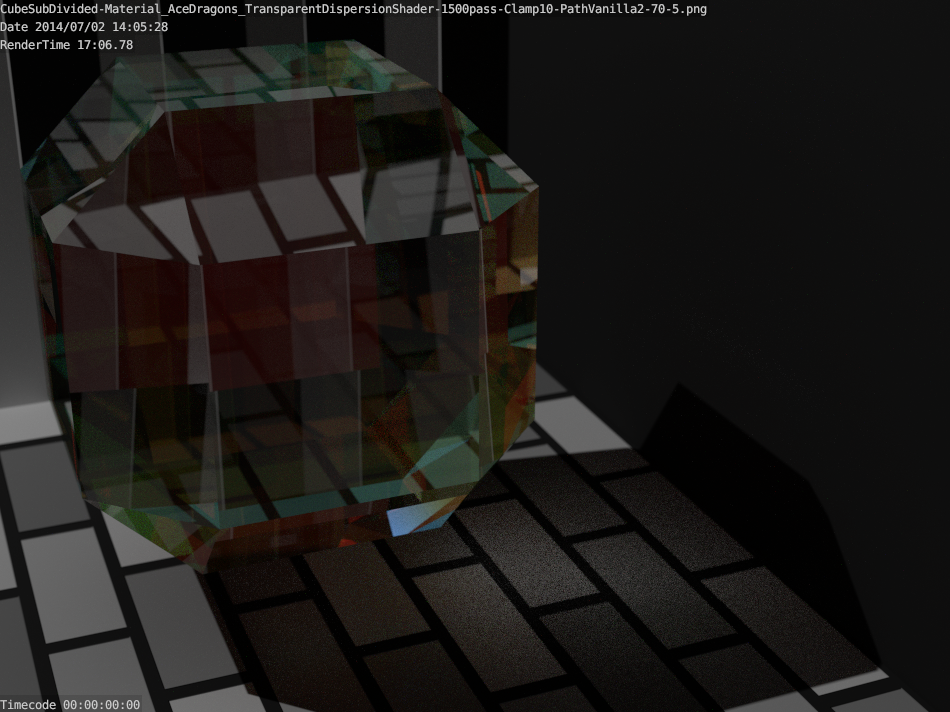
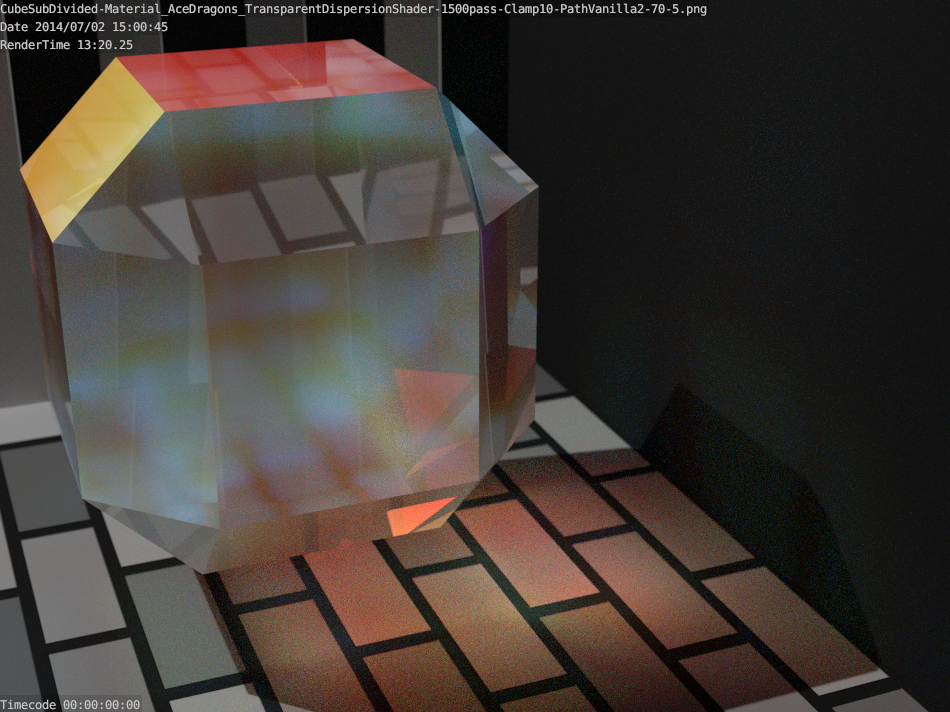
I’m playing with the “spread”, here’s at your original setting of 1.5, There is a lot of opacity/cloudiness and also at any spread setting I’ve tried - EXCEPT for a setting of 1.0, which gives off hardly any light dispersion/caustic AND the clarity is very good (no major opacity) - it’s is the only spread setting that clearly shows the background through the entire glass object. I also notice that the some colors produced make it look like a “real” large piece of common glass i.e “coke bottle green” - maybe that’s just a “happy accident” in the way the shader works at this time? - I don’t have any color in my single area light (1000 power), no environment and the brick texture on the walls and ground are all “grey scale” colors. Here’s some images - in my next post I show a screenshot the render & node settings, from rendering spread 1.5.
All of these renders were done at 1500 passes, PATH mode, clamp direct 1.0 - indirect 7.0
-Simplified and improved the Glossy Translucent shader, you now have the option to use the depth information separately to use in any shader mix you wish (providing it makes use of transmissive rays). The simplification and reduction in over-engineering also fixes any falloff problems it had before.
-The old glass dispersion shader has been replaced with a new and improved one, initial tests show marked improvements over the original
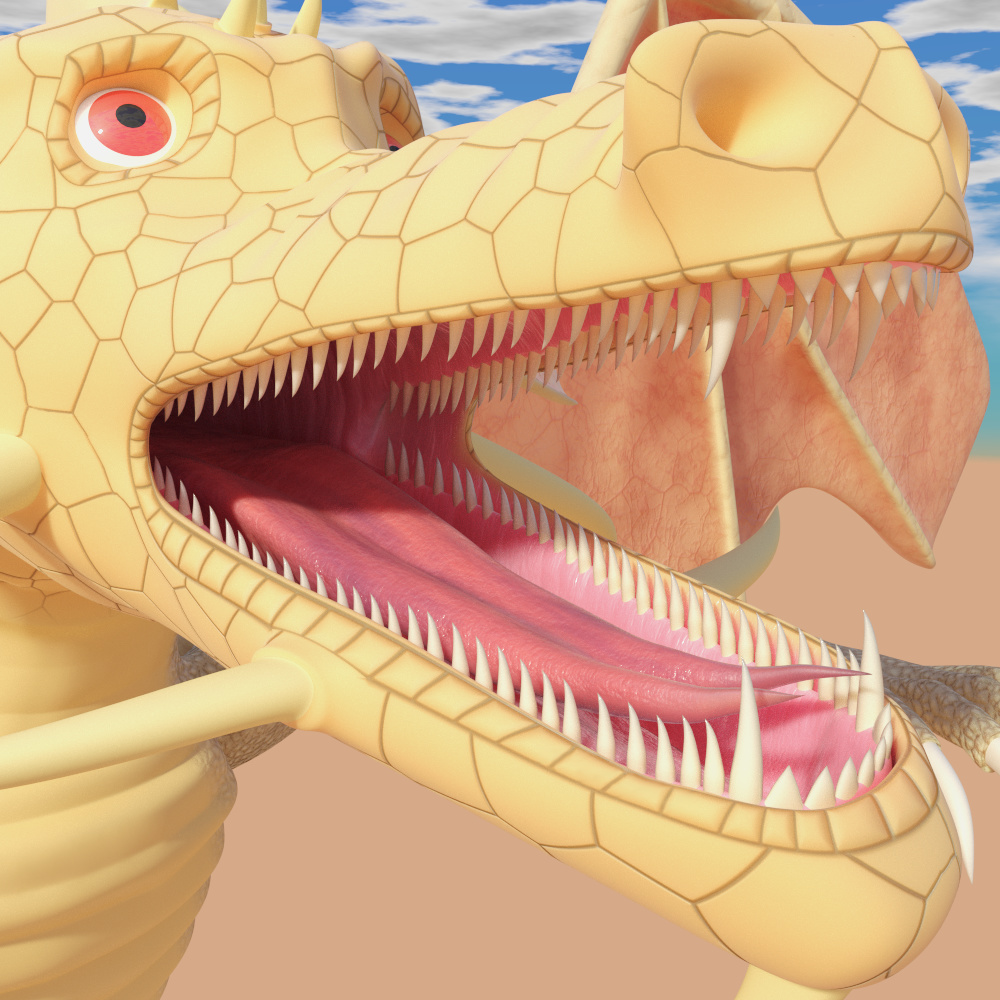
-Updated the SSS Mat material with new fresnal and energy calculations (which also can reduce SSS shader-related darkening on edges and thinner regions), the Dragon renders below show what you can do with it.
Re-overhauled the refractive dispersion shader, it should now produce smoother and better results with no tinting of the material. A brightness control was also added.
The fresnal calculation technique in the Physical Glossy shader was replaced, it should now be easier to control and should be capable of producing photoreal (as well as more artistic) results much more easily.
Ace Dragon - what a treasure trove of tasty trinkets you have provided with your node groups. There isnt a snowball in hells chance of me understanding the inner workings of them all I suspect but if I can understand even some of how you have set these up then Ill have learned a lot.
If you would be so kind perhaps you could give me a pointer ?
I was trying out your sky texture node group. I assume this is a replacement for the sunshine group or is it meant to work in tandem with it?
Also, I tried altering the sun size but the sun remains quite large. Even usinga wide angle camera it still seems very big. I find this a problem with the blender sky sun as well - it always seems too big. How can the node group be tweaked so that a smaller sun is drawn?
When sun size goes down much below .9 it just whites out the sky. ramping the value up beyond 1 ( even right up) just hits a ceratin size and thats it and its still too big. A big sun is great for rendering illumination I think but if the sun is in shot it just feels way too big.
This is due to how the mapping of the sun works (it’s the only way I know that doesn’t require an image). You will need to use values like 9.990 or 9.995 to get a small sun (with the consequence of having to really ramp up the intensity).