Hi MeiaLua,
I made the same setting as you but the result is different, why?
https://dl-web.dropbox.com/get/Public/Radial_texture.jpg?w=51ee3a38
Can you send us your property panel view too, please?
Thanks in advance.
Spirou4D
Hi MeiaLua,
I made the same setting as you but the result is different, why?
https://dl-web.dropbox.com/get/Public/Radial_texture.jpg?w=51ee3a38
Can you send us your property panel view too, please?
Thanks in advance.
Spirou4D
Update 5 changes (a long time since the last update, but should contain enough changes)
NEW::
SLOPE MASK:
Does a blending effect based on the slope of an object, useful for cases like terrain, moss, ect…
Initial brightness - the starting point for applying the slope effect
Contrast boost - boosts the contrast so you can see an actual, noticeable blending based on the slope, this combined with the first option can allow the blending effect to only be on faces that are almost vertical or start at very low angles.
TRANSPARENT DISPERSION:
EXERIMENTAL: Replaces the dispersion option in the glass2 node, generally you would input a glass shader into it and the dispersion shader will be added onto it to give it a chromatic dispersion effect.
Base material - the original material that the effect is being added to, you’d generally want a glass shader as the input or the glass group node.
Strength - the strength, how strong the separation of the colors are
Spread - the spread across which the different colors (RGB) is refracted, the aim was to allow a tight area of refraction for all the colors if desired depending on what the artist wanted
Opacity - how much the effect is added to the original shader, you wouldn’t really want to set it really high as that could break energy conservation
MIRROR DISPERSION:
Replaces the experimental aberration feature in the super glossy2 node, but still experimental and may or may not work well in some cases.
Base material - works the same as the one for transparent dispersion, only this time you would want a shader with reflection instead.
Strength - the strength of the dispersion effect, how strong the separation of the colors are
Opacity - the amount the effect is added to the material, like said before it shouldn’t be sent as high as it can go depending on how bright the initial material is.
FAKE SHADE:
Creates a shadeless material not unlike seen when the shadeless option is used in a Blender Internal material, lighting will not affect a material that’s only using this node, which may bring desirable effects like fog when used with the distance blend node.
Color - the input color, the lack of a shading effect means how the color looks in the picker will look a lot like how it will look in the render
Brightness - set the brightness, generally if the effect is too dark, this can make it brighter (or darker)
IMPROVED/CHANGED::
Super Glossy 2 and Glass2 no longer have the aberration input, most artists will probably not use it in most cases and removing it makes for faster rendering, new nodes like seen above have been created to allow application of these effects separately.
Simplified fresnal controls for shaders that use it, now allowing the same results with two inputs instead of three, gives a small speedup in rendering, any group nodes using a fresnal type effect or any effect seen at steeper angles to the camera now use the Blend weight node as well to speed things up just a little bit more.
New input for Super Fresnal: Blend Mix - Because it now uses the blend weight node, you can now mix the effect between one affected by whether faces are pointed towards the camera to the traditional fresnal effect as seen with the fresnal node, because it’s a mix you can mix the effects together as well as just going with one option.
Enjoy the new stuff:)
Hi, thank you for the new stuff.
This is the first blend rendering is slower on the gpu than on cpu, could somebody testing this?
Cheers, mib.
Update 6 changes (total number of changes aren’t as much as a last one, but they are more significant)
NEW::
GLAZE:
Arguably the most significant new node since version one, glaze is intended to be a powerful new node that, while it can create a similar material to what Super Glossy 2 does, it works more in a way where it not only uses the add shader node to allow the appearance of a ‘glaze’ on an object, but also contains scattering and transmission options to allow for a wide range of effects such as an object appearing somewhat translucent, soft, and/or something that might have a milky or creamy appearance. This node also makes use of an input material so you can add these shading properties from any base from a simple diffuse node to an initial node setup.
Coating color - the color of the glossy coat to apply to the object if desired
Coating roughness - the roughness of the code, small values will give a highly glazed look
Coating opacity - the opacity of the coating, turning it all the way to one will give a look resembling the output of the glossy node while turning it to zero will remove the glaze effect
----]
Translucent color - the color for the basic translucent component, works the same as the basic translucent node
Scattering color - the color for the scattering component which uses the velvet shader, can be used to give a very soft effect for an object
Scattering opacity - a mix determining the visibility of the translucency or the scattering. high and low values will favor either the basic translucency or the more complex scattering.
----]
Transmission color - the color for the transmission component, makes use of the glass node
Transmission roughness - the roughness, or clarity of the ray transmission through the object, in many cases you may not want this at a very low value
IOR - the transmission IOR, a low value may be desirable for some materials, and for others, a high value may suffice
----]
Base opacity - the visibility for the base material when mixed in on top of the result, depending on the material, you may want to bring back a bit of the original shading or set it to be somewhat visible, but not much.
Shader input - the original shader going that the effect is being applied to, can range from a simple diffuse node to an entire shading network needing a final step before the output.
OTHER CHANGES:
New demonstration scene built to make it a lot easier to see what each node can do at a glance, no more searching around finding which objects contain this node
Fix for the distance blend node, a major shading error was introduced during an effort to remove any color nodes so it can all be math-based and thus require less nodes, but the color node removed was important for clamping the blend values between 0 and 1 and thus was added back.
Various improvements and tweaks for the reflect/transparent dispersion nodes, the chromatic effect from both of them should be more visible now.
I personally haven’t used the glaze node for my own work yet, but tests on its versatility gave a good impression on the idea of it being useful in as many cases as some of the original group nodes, which leads me to see its worth for inclusion in the collection for others to use too.
The following is the most significant update yet, with 6 new group nodes and other changes.
NEW::
DEEP GLOSSY:
The biggest of the new node groups, this is an entirely new glossy material designed for a multi-layer high gloss effect, it does a three layer glossy coating with an additional glaze on top as well as some flakes
1st/2nd/3rd layer col: The reflective colors of each layer
1st/2nd/3rd layer scatter: The amount of scattering on each layer, this is basically the roughness parameter but we call it scattering because it’s controlling two individual shading types.
Blending Spread: The amount of spread in the visibility of each layer, controlled by the face normals, higher values will lead to higher separation between each layer
Blending contrast: Tweaks the visible contrast between the layers, affecting the total blend between the first layer and the third
Blending offset: Allows some control over how and where the layers are blended, lower or higher values may increase an emphasis on having mainly just one or two of the layers visible in most cases
Glaze color: the color of the glaze that acts as the overlay over the entire material, darkening the color will reduce its visibility
Glaze IOR: controls the effect that the normals have on the roughness of the glaze, a rougher glaze coating can be had by increasing the value
Diffusion color: The color of the diffusion that acts as a base for how visible the deep glossy effect is
Diffusion opacity: Controls the overall visibility of the deep glossy effect, a value of 1 is simple diffuse
Diffusion roughness: Simply controls how rough the diffusive base is, nothing special
Flake scale: The scale of the flake texture, uses generated coordinates so it’s affected by scene scale, but the scale is uniform across the whole object, applied by using the bump output
Flake bump: How rough the flaking effect is, anything other than a very low value will also blur out any specular effects caused by the material which may be useful in some cases, also applied by using the bump output
Metal color: Just the base color of the metal
Brush coords: Dictates the direction that the brushing effect goes in, you might want to use UV’s for complex shapes or object coordinates for simpler ones
Brushing scale: Should be left at very high values to avoid making the brushing texture real visible to the eye, adjusts the scale of the brushing texture
Brushing strength: the strength of the anisotropy effect, values below 2 might give you a real subtle effect while values above to 6 give a more realistic one, really high values will also mean a much darker material and is probably not necessary.
Base diffusion/diffusion opacity: the color and strength of the diffuse shader used as a base, you may only need small values to get a decent result
Glow color: The coloring of the glow effect
Power: The power of the glow effect, how much light will bounce off a material using it
Diffuse/Gloss/Transmission strength: Multiplier to adjust the strength on a per-ray basis, you want the glow to be strongest with diffusion and not reflection for example
SUPER TRANSFORM:
Performs a direct alteration of the location and scaling coordinates of textures, allows the warping of textures on a per-axis basis, is used by connecting the yellow ‘Vec Out’ node with the vector input in a texture node or vector-node type.
Vec In: the starting vector coordinates that are to be altered, is a color output but that is due to the RGB separation that makes warping possible
LocX/LocY/LocZ: The amount of alteration received by the translation coordinates, so some parts of the texture(s) receiving these coordinates are translated further than others providing a textured input
ScaleX/ScaleY/ScaleZ: Allows a textured scaling of the texture receiving the coordinates that result when feeding ‘Vec out’ to a texture’s vector input.
Base color: The color of the sky behind the sun
Sun color: The color of the sunlamp itself, people making Earth scenes would generally set it to yellow
Power: The power of the sunlamp, can be kind-of iffy here as it needs a very dramatic increase if the disk is shrunk to the absolute minimum size threshold using the shadow input (up to 100000 or more with the help of a value node), but with larger disk sizes is relatively consistant.
Shadow: Is capable of going to ten before the sun disappears, controls the hardness of the shadows, could be set to a rather low value for a cloudy day for example.
Sun Coords: The input coordinates that the user manually sets up so he can rotate the sun to any needed position in the sky.
TEXTURE CULL:
A texture related node designed to work with culling the detail of procedural textures to speed up render times, this allows you to reduce the procedural texture detail based on the slope of the normal compared to the camera as well as the distance, this will usually be plugged into the detail input of the texture node and can cause very little reduction in texture fidelity because the details become too small to be seen
Culling_startDist: The distance from the camera with which the culling starts, the higher the value the further away the texture must be before it starts losing detail
Culling_contrast: The contrast of the detail reduction slope, this will generally be a very small value unless the scene itself is small scale
Max Detail: The maximum detail level of the texture before culling begins
Normal threshold: The minimum angle a texture must be facing in relation to the camera before it sheds detail based on slope, this value may generally be negative.
OTHER CHANGES::
The glaze node has been altered somewhat and is renamed the glossy translucent node due to its primary function being more a transmission material more than a coated glossy. The translucency is now also controlled purely by a glass node instead of a translucent one where the user would employ high IOR values (from 5 at the minimum to a max of 100 or more) to get a highly opaque material that still transmits light.
The glass2 and glossy translucent node now has a ‘fast transmission’ option that employs the transparent material and a lightpath trick to give a combination of much better transmission (especially through glass) and less noisy transmission, this also tweaks the visibility of caustics in the glass2 node so you may not want a real high value for caustic producing glass. This also effects the ability to see through a glossy translucent object so you wouldn’t want real high values to ensure the objects stays completely opaque while allowing more light to flood through (because the lightpath trick is how much the light is only seeing a transparent material while the camera sees the original)
Redone the slope mask node, it’s now several orders of magnitude less complex than before due to the use of the normal node, some options are also different, namely
Max slope: The maximum slope that this material is applied to, which can include surface normals that are pointing up
Min slope: allows the user to set a minimum slope all the way down to faces pointing straight down, so you would be able to use this with the option above to create a reverse slope mask that only covers those facing down
Range mod 1/2: The minimum/maximum greyscale values used in the mask.
Removed the invert input in the Super Glossy node: Turns out it is not needed to invert the normal mask if you set the values properly (which would include one or both fresnal values below 0.)
Enjoy!
Changes::
Added a ‘Fresnal Invert’ input into the Super Glossy node, this is to preserve functionality after the removal of an add math node to simplify things and possibly make it a little faster, as a result you can do most mixing and fresnal combinations with values simply between 0 and 1.
Removes the manual clamp workaround in several nodes which was done to workaround the fact that you couldn’t clamp math node output, with a clamp option working in Cycles now, they are no longer needed
The Translucency options have been removed from the glaze node to make it more in line to just do what its name suggests, these options are now part of the new glossy translucent node in which we’ll get to that later.
Small improvements to the dispersion nodes (one for refraction and the other for reflection), they should now give better results.
Added some color math to the glaze node to make it much easier to keep it within the bounds of energy conservation
Added a new input ‘Sharp Gloss’ to Super Glossy 2, also added that and ‘Sharp Glass’ to Glass 2, this allows you to directly modulate the effect that the ‘Filter Glossy’ option in Cycles will have on light passing through or bouncing off those materials.
Added Absorption options to the Glass 2 material, they are
Absorb Power - Actually ‘Absorb Color’ but I forgot to rename it, the color of the absorption effect
Absorb Strength - The strength of the absorption, higher values are more pronounced
Absorb Base - The base value from which the absorption is calculated, this will affect how thick the mesh must be before you start seeing absorption
Abord Contrast - Changes the contrast of the effect, higher values mean shorter transitions to full absorption
Added Falloff and other controls to the standard light node to control range and falloff
Smooth - The smoothness of the falloff
Quadratic falloff - Determines how much visibility is given to a quadratic falloff effect, setting this to 0 will make it linear and allow the falloff options to work
Falloff Base / Falloff Contrast - The starting value and the contrast, very similar to the new options outlined for glass except that increasing the Falloff base will mean the light travels further before it gets affected
Falloff Curve - The strength of the curve that eventually lowers the light intensity to 0
New::
Several new node groups were added, among them.
Blur Distort - Can be used to blur or distort another texture, or a combination of both, this does it by manipulating the coordinates fed into other textures and is inspired by a recent node group posting in this forum.
Separate Caustics - Used on lamps, this can allow you to make a lamp either emit diffuse lighting only or caustics only.
IES Lamp - An advanced lamp type, this allows you to get an IES effect by limiting the illumination of a mesh light to a spot cone region as well as shift it in any direction you want, also built in is the ability to use a standard IES light rim effect. This light is also unidirectional due to this purpose.
Ray Falloff - One of the reasons why I couldn’t release this update until now, this allows you to create a falloff effect based on the length of the ray traveling through it, could be used for things like absorption effects and the like.
Glossy Translucent - By and Far the biggest addition yet to the stable of node groups, this is an extensive material that can be used for numerous translucent and scatter effects, including fake, but convincing SSS effects with realistic falloff
Whew: This took about an hour of typing, I hope you enjoy the new release.
Hey, Ace, just wanted to drop in to say Thanks for uploading this pack.
The new Dispersion glass node material is exactly what I’ve been looking around for, and now it looks even better than ever, like real diamond. And there are some really cool other things in there that I’ll have to play with.
The new nodes are really neat.
Thank you again, and for your dedication to the field.
Happy 2.64
Hello Ace Dragon, thank you for your hard work putting together this collection.
I just downloaded the latest version and cannot find the “Halo”-group. Has it been removed?
Halo was in the original node collection file and I don’t think I ever remember copying it over to the one used now.
Personally, I think you might get better results using the ray falloff node on a well rounded object instead, because that can also take thickness into account.
This latest update utilizes features that make it usable only in trunk builds, so if you like being up to date on the latest Cycles stuff, this is for you.
No new node groups this time, but here’s the list of changes.
Ace Dragon, thanks for the latest trunk update! I’ve known about your material collection for a long time and just now tried it out.
My favourite is the Slope Mask material. It reminds me of the abrasion material for BI that was posted on these forums a long time ago, except of course it works on slope, not edges or corners. I thought of adapting your material to create an abrasion version, but I’m poor at math and things like dot product…
Would you consider adding an abrasion material to the collection? If it looks as good as the slope version, that would be great. I guess all that’s really needed is a change in controls in where the second shader is placed, on edges or in corners rather than slope. If the user then combines both the slope and the abrasion nodes on an object, you’d get very realistic results.
Hello again, a new Blender release has come out and that means I can formally release the new update of my node group collection which now makes use of some of the new features in 2.65.
CHANGES/ENHANCEMENTS::
-Minor enhancement to the Deep Glossy material, the material is now energy conserving by default with a control on how much you want to adhere to the rule.
-A few changes to the equation used by the ray falloff node to make it easier to use, now the Falloff_power input should be more straightforward as it will now work better in controlling the power of the actual falloff.
NEW:: - A falloff group node for generic surface falloff for textures and masks
REDONE MATERIAL; GLASS 3:
-This replaces the old Glass 2 material, the material has been created from the ground up utilizing the new refraction shader node and takes advantage of the fact that the mix and add shader nodes can now be used in any combination without causing errors or crashing Blender. It also now uses the ‘facing’ option from the blend weight node instead of plain fresnal for nicer falloffs.
OVERHAULED MATERIAL; GLOSSY TRANSLUCENT::
-The glossy translucent node has received a large number of changes and should now provide a bit more power and more accurate results, bringing with it a bevy of additional falloff options and the ability to make different bumpmaps for the diffuse, scattering, and transmission components thanks to the new stuff in Blender 2.65, the old scattering power option has also been removed because its assumed that one might find it redundant.
The first bunch of options are the same as with release 8, but with a variety of new ones as well.
Hello, Im learning nodes and such and am new to Cycles, just finally got a PC to work with it. Anyways, I have DLed the .Blend and appended a node to my project. Now where is it?..lol…how to I use it?
Hi, the nodes you append should be under the ‘group’ entry in the add node menu.
I haven’t updated this in a while because I assume everyone is just going about and making their own groups (though there’s been a number of additions and changes in the version on my machine).
I just wanted to thank you for these very educational materials and I hope you will keep updating them! In the absence of a very detailed and current manual this kind of unselfish sharing is what makes Blender usable.
The first thing I thought when I saw the pic was, "Hey, that’s my Testwidget!
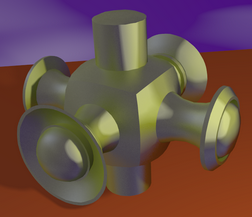
What’s it doing here?"  Little different, but not too far off, is it?
Edit: Of course some of these node groups are completely baffling to me but I feel smarter for even trying to understand them.
Glad to see you’re keeping this project up.
Thanks Ace Dragon.
The file as it is seen in this thread I would now consider outdated, I’ve done a good number of changes and additions since then but I haven’t yet bothered to release it, it’s also gotten a little messy since I started using groups as components in groups.
I’ve just recently gotten done with some ideas I wanted to render out as images so I’ll see if I can’t clean things up and get it uploaded.
Okay, at long last uploaded the latest version with many changes (cleaned up and ready to go).
These additions include…
To note, there’s also various utility node groups and the like that now come packed with others, this is to make the various trees easier to follow and easier to change. I also don’t have extensive writings for each new parameter and new group because there’s just too many to list.
Being new to this, and on a “tangent” where I want to be able to create faceted glass objects (like a sphere) that actually have caustic transmissions with refraction, I thought this might be able to do it - but I can’t even figure out where to download it, except for the link on the 1st page from 2011…
Does it work with 2.7?
thank you
Craig