Splendid, very diligently done! I would really like to know, how you did the simulation without any baking. I don’t want to rush you through the random questionnaire/request though. We will eagerly wait for the ‘techniques’ you used here and would like to share. Thanks.
Thanks for the comments.
>Exzema
Simulation? Do you mean the volumetric stuff?
>swirlypillow
You just need to ask the right questions  and to be fair, the biggest “secret” is your ability to think.
So to start you need to understand the different parts that make the reference image work. The easier part are the stars outside the disk. To be able to recreate them it is important to recognize their variation in color, value, distribution and size . I divided them into two different sizes:


The bigger ones need a round shape, so I used a different texture for them.
I pushed the whole setup a bit further today, just to see what happens… it got more complicated but also better:

So I can say that this setup with additional work allows higher quality.
Yes, the smoke and flames. Are those volumetric point density clouds? Can you please share your settings/parameters?
All volumetric stuff is a vertex cloud used for a point density texture. The vertex cloud is set to not render and the settings for the texture and material are shown in the image.
The color within the volumes is created by point lamps.

Damn you tricking me into sharing. I bet you had an elaborate plan which now unfolds. How could I’ve been so blind…
Oh you! wave fist
The dust is created by progressively combining cloud textures of different size. Which are then used to distort a vertical gradient. After inverting, it is then multiplied onto the glowing part (not shown in the image).
Again it’s important to recognize all variations.

The dust adds fine, natural detail to the disk and it might take some time to get it right.
Next up are additional stars on top of the disk.
wow this is awesome, i really like the after burners and the displacement map used on the planet, or thats if it looks like ones been used
amazing!
congratulations, 5 buks for me 
Thanks yellow duck and street fighter guy
The additional, denser starfield on top of the dust is created by three cloud textures. This starfield is then shaped by the previously created disk.

And that’s how I made the background.
I had a pm asking about compositing. So the next one will show that.
The only special thing I used for compositing was an object index to create a mask for the engine trails, that then allows the glow.

Hope someone learned something.
Hopefully in about 1000 years I can be this good. Outstanding!!!
Zordan thank you so much for sharing. your work is very, very good and it’s nice to have someone actually show how they’re achieving high quality effects in Blender. It makes me see that, if i know what i’m doing, i can make something as impressive!
I Konw its bin a while but if you see this i have a question: how did you make this blue Fire ? is there any tutorial for this ?
Great work By the Way
This is excellent!
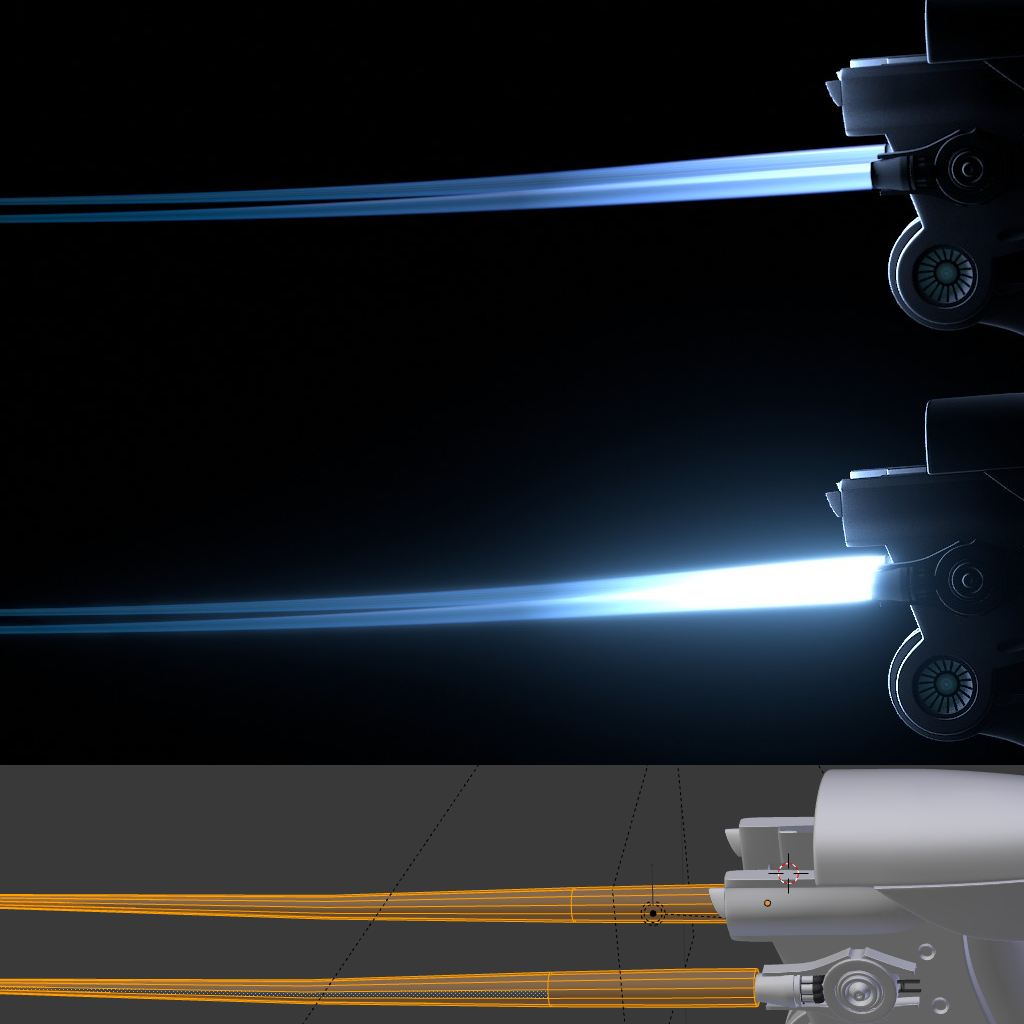
The trail is a simple mesh with a shadeless material (blender render not cycles). The glow is a fog glow node (slightly tweaked with other nodes like gaussian blur and rgb curves) added ontop of the rendered result.
Hope it helps, have fun 
5… days… Man you are a legend… Keep up the good work bro! Wish you all the best
waw ist,s awesome how did you made these rock orbit it,s nice