Long time I don’t post any of my content, so maybe it’s time.
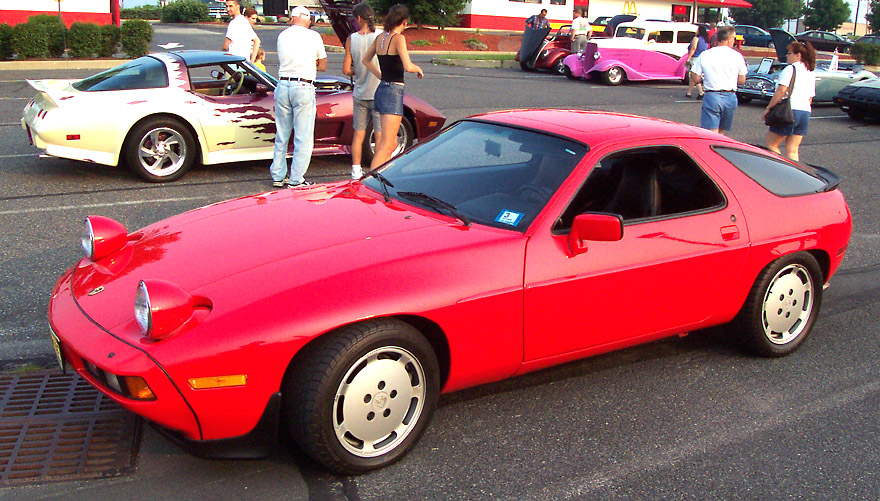
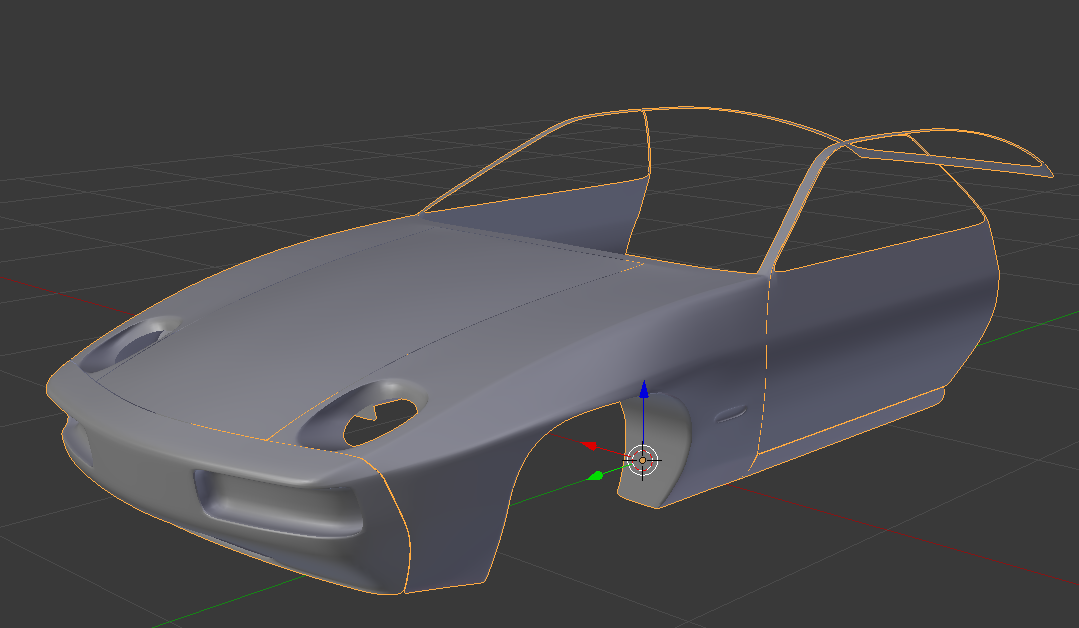
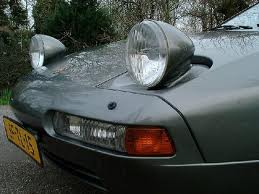
So let’s get in situation. I’ve never finished an existing car before (only invented ones) but I think I now have the modelling experience needed to do a proper job. Besides, I’ve got the advantage of a friend having the actual car, which is quite a blessing because there are no proper blueprints of this exact model. This means I’m using a 1992 model blueprint to get the proportions, which has got different front and tail, so I’m constantly alt-tabbing to Chrome for photos.
I’m on school time right now, so progress will be slow. It sometimes happens to me that I just leave a project because it gets difficult, so I’m posting this one because I really want to finish it, and it seems that I would rather finish a project for someone than for myself… so if you’re intersted in it just let me know.
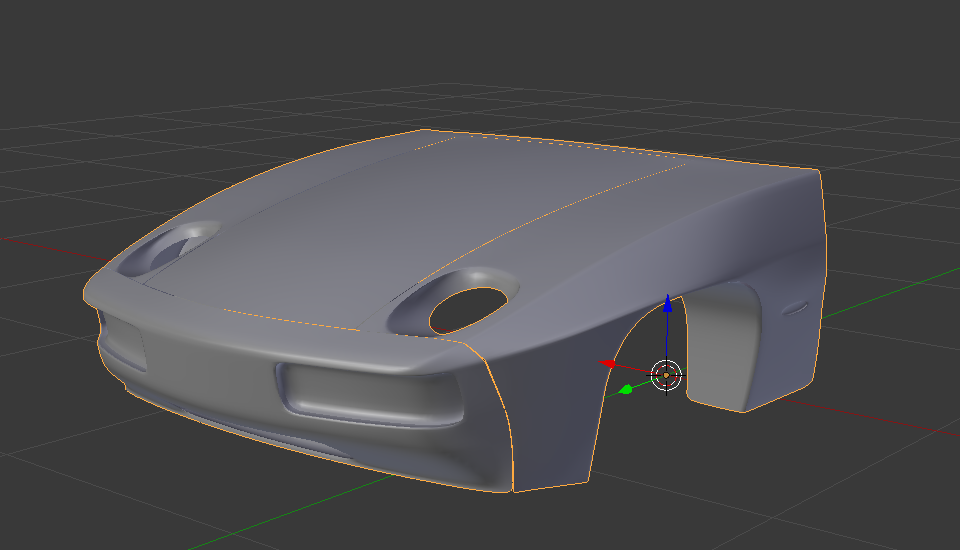
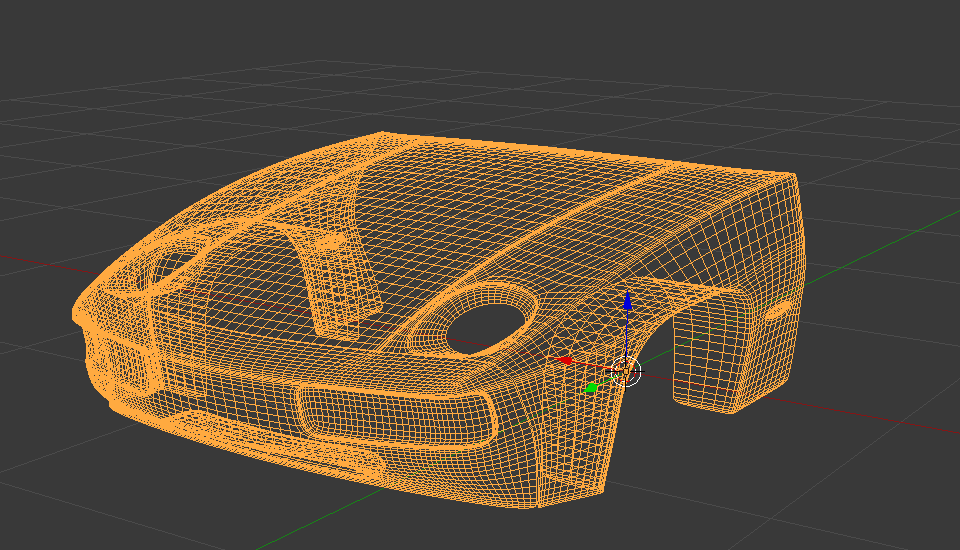
Topology looks clean. I think the top edge of the fender is a bit sharp. Maybe inset the fog light cavity a bit to. The head light look good. I have always had trouble getting mine to look right. Nice work so far.
Thanks for the comment, already fixed it, although I don’t know what do you mean by insetting the cavity. I made the topology match the the foglight so I could just extrude it backwards.
So as i said I’ve been busy and didn’t have much time for Blender so progress is slow…
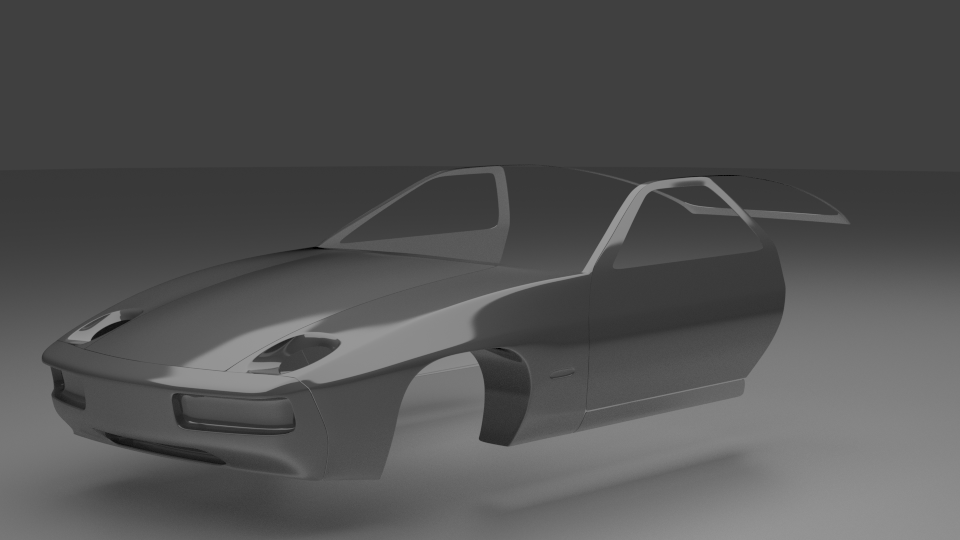
Now’s where the difficult part starts… my blueprints have a spoiler covering everything up… apart from being quite different because the '92 model had a different back. So from now it’s totally photo based.
Some parts still need tweaking, I’ve discovered that the front is too narrow, and I’m not sure of the shape of the back… but I won’t have time till wednesday at least So last update in a couple of days…
To me, the back end of the car (from the edge of door to the tail lights) looks just a little too long. But other than that, it looks amazing!:eyebrowlift:
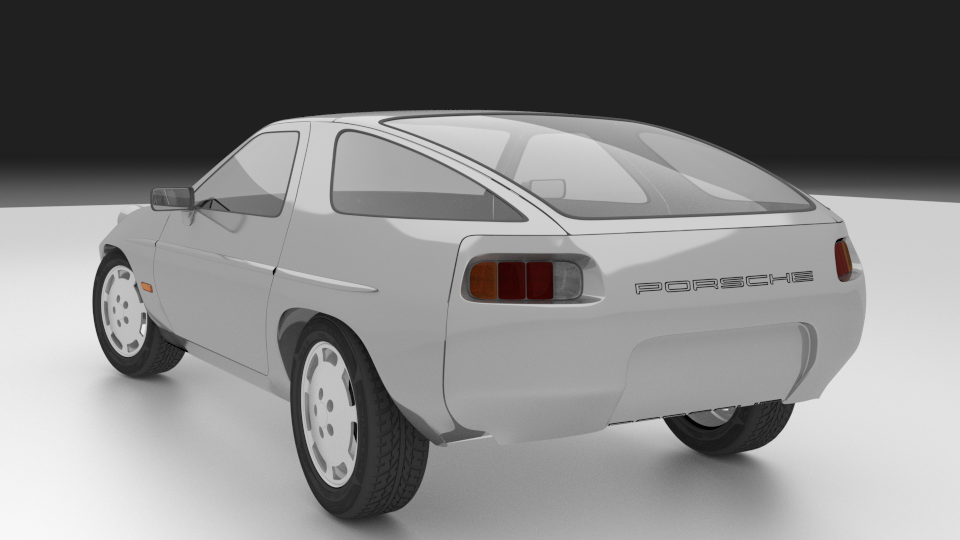
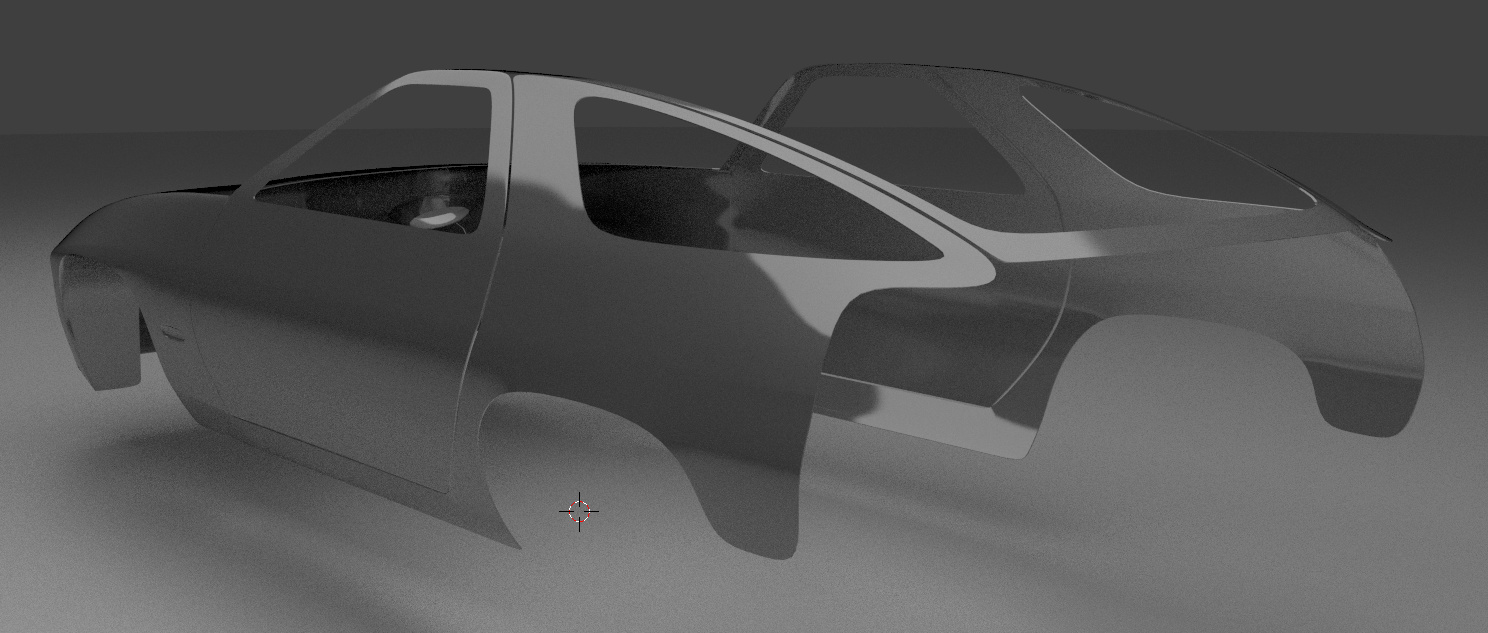
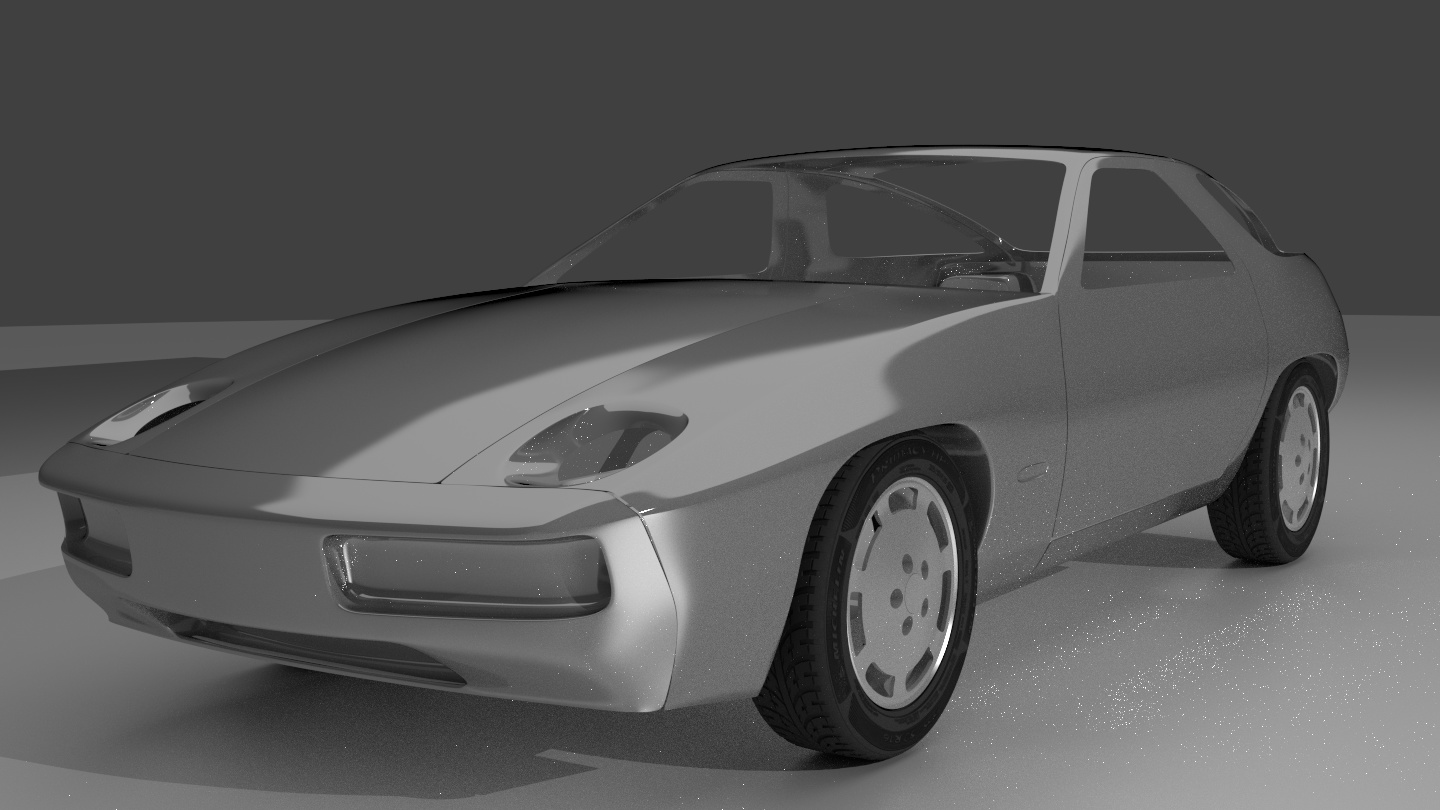
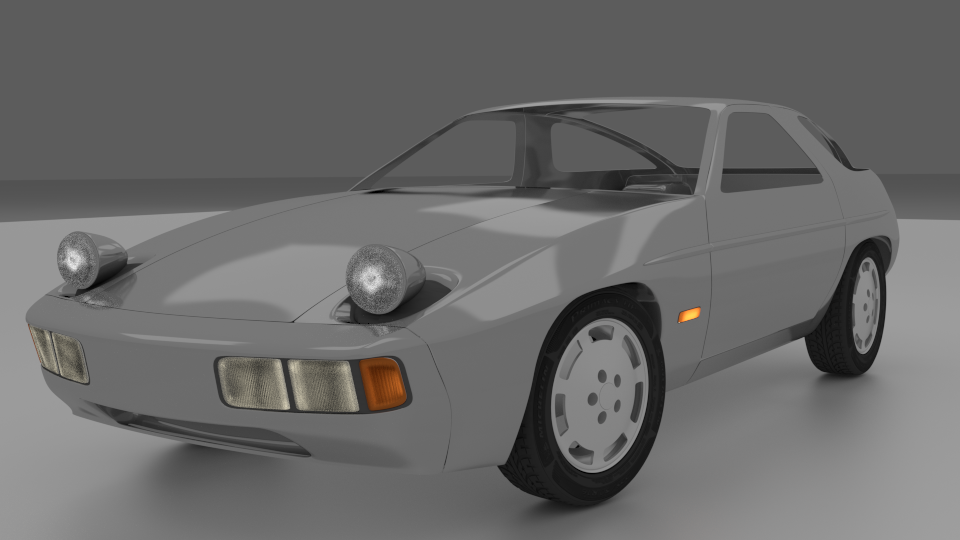
Exams are over… finally had some time to work on the model. As you can see I modelled the wheels and made a couple of fixes in the body.
@ComputerWhiz
Didn’t really make the back shorter, the problem was it was too wide at a point, creating the added length effect. So basically I fixed it.
Looks very good! Just add more details and you’re good to go.
Edit. Maybe the headlights look a bit too small or the perspective is doing tricks to me.
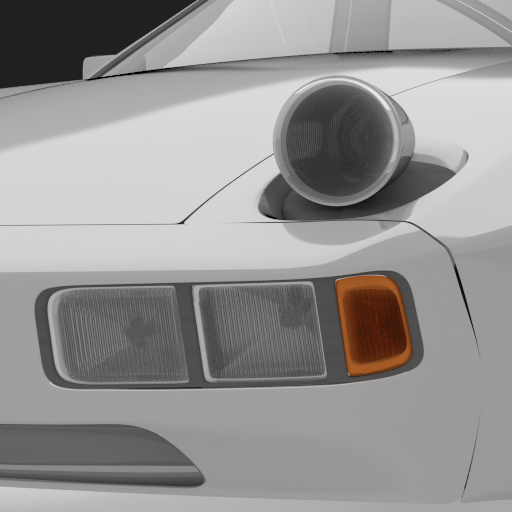
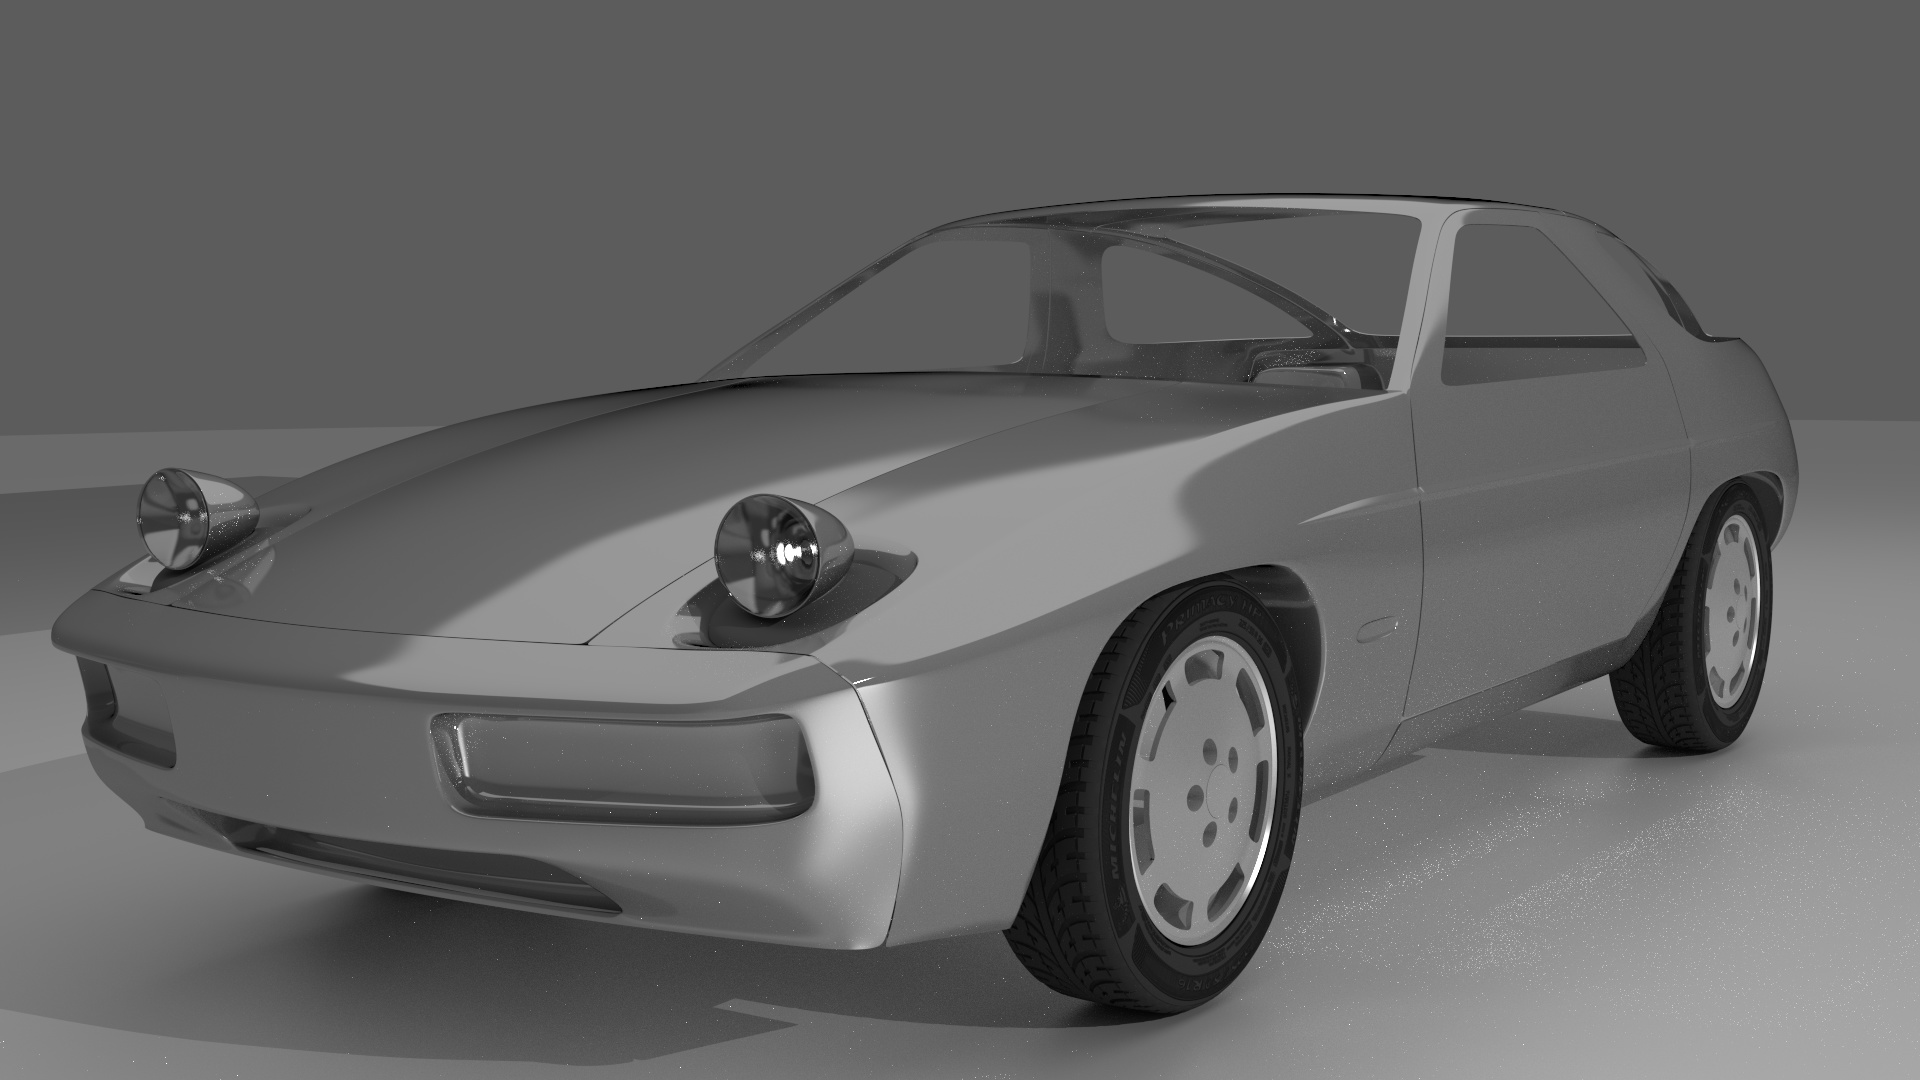
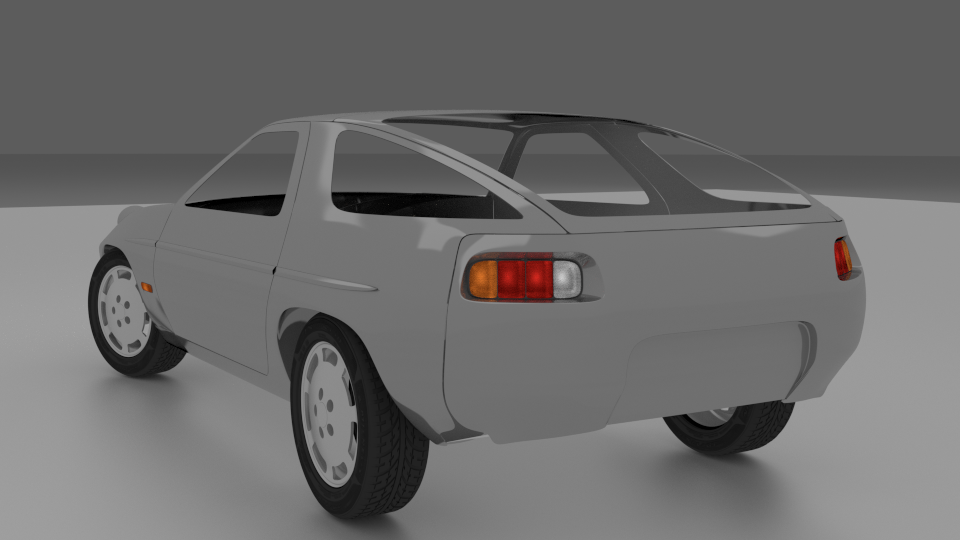
Got the tailights done, and made many, many, many tweaks. Although lighting was obviously among them, as you can see… these are just provisional renders, anyway.
I still have a doubt about the material of the glass that covers the lights…
The glass it’s basically extruded to the inside. The outer part is set to a translucent material, and the inner part is 1.1 IOR Glass with the bumpmap applied to it. They look very much like I wanted them to look, but only when the lights are on. If not, they are just shadowy and dull, and don’t look good at all (like in this render). This annoys me in some way, because I’ve spent a lot of time tinkering with materials, and I’d like to make a render with the lights off.
So any help in that area would be quite appreciated. Note that already appreciate a lot that IconW took me to this level.
Wow, that is a one ugly car! I mean, your model is great, just the car has been probably bullied in high school for being the local weirdo. What were designers thinking with those headlights? (but hey, 1980s). Anyway, the model looks very nice, keep it up!
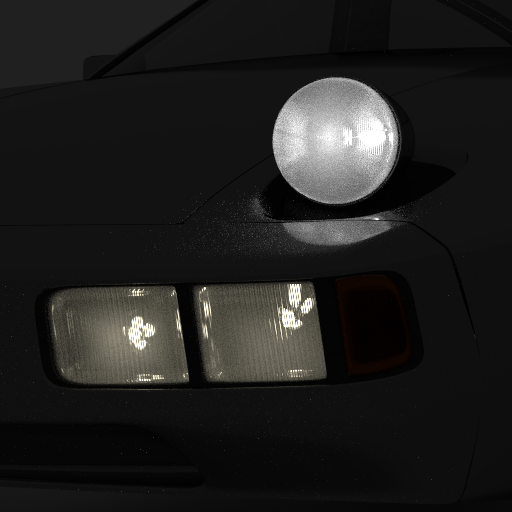
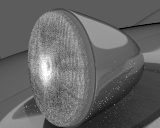
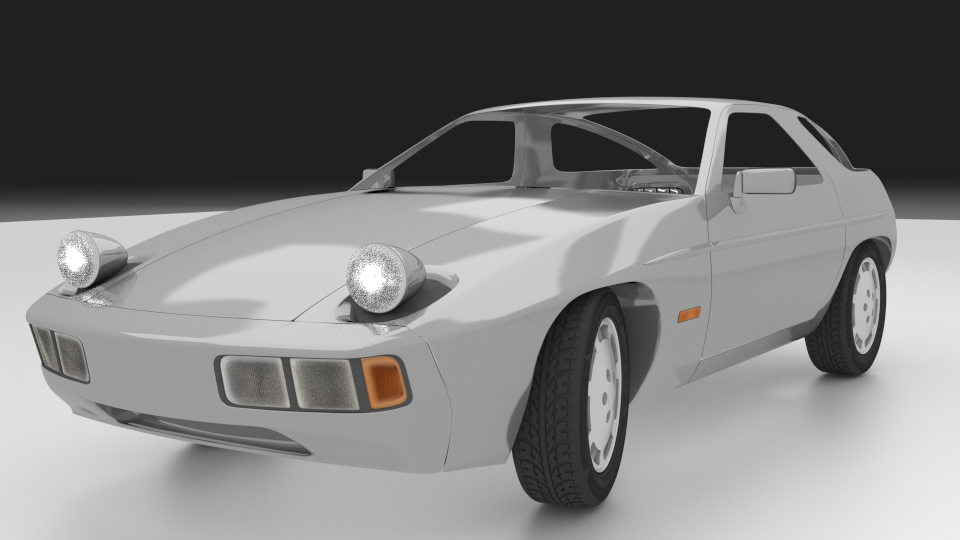
Nevermind about glass covers! I found out, and I’m sharing.
Just as before, inner part is Glass with 1.1 IOR with bumpmap applied. Outer part is as described below.
Glass 1.45 IOR >
--------------------------Mix Shader, Fac based on Light Paths>Shadow >
Transparent > -----------------------------------------------------------------------------Mix Shader, 0.5 Fac
--------------------------------------------------------------------------------Translucent >
I think this works fine, as you can see. Blinker part had a mat assign misstake when I rendered it though, which is the reason for the outside part being lighter.
Not sure if you’ve seen photos, but the whole Porsche letter area shoud be deepened, not just the outlines. And yes, the texture is right.
All I know about bumpmapping right now is that if you plug a b/w texture into the displacement, the black area will be deepened. But controlling it? No idea. I’ve heard about the Multiply node, but haven’t been able to find it…
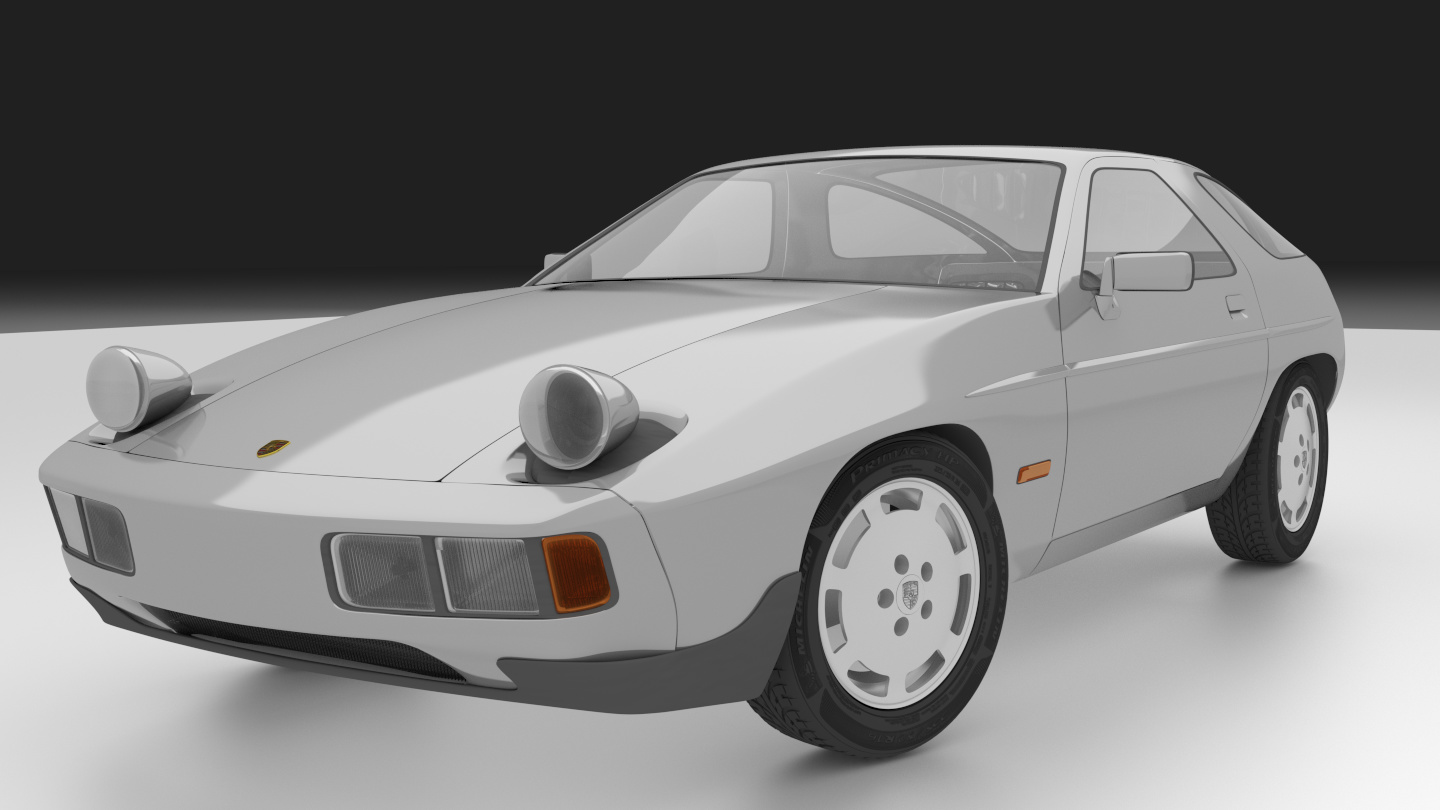
Also did some more things today:
-Porsche logo on wheels
-Porsche logo on front
-Bumper Plastic thingy (have to correct topo a bit in the bumper)
-Grille
-Door handle
The only suggestion I have is in regards to adding thickness to the body-panels, if/when you do. I know some would recommend using a Solidify modifier, which I admit does work great and it’s relatively simple to set up. However it also adds quite a few more vertices that won’t necessarily show up in or affect the final render, making the model a bit more memory-heavy. I’d recommend extruding the edges only, or deleting extraneous polygons to make your model a little “lighter”.
It’s kinda strange, though - the way the panel edges are now, it almost looks like you’re using Toon-style shaders, looks pretty cool :yes:

 So last update in a couple of days…
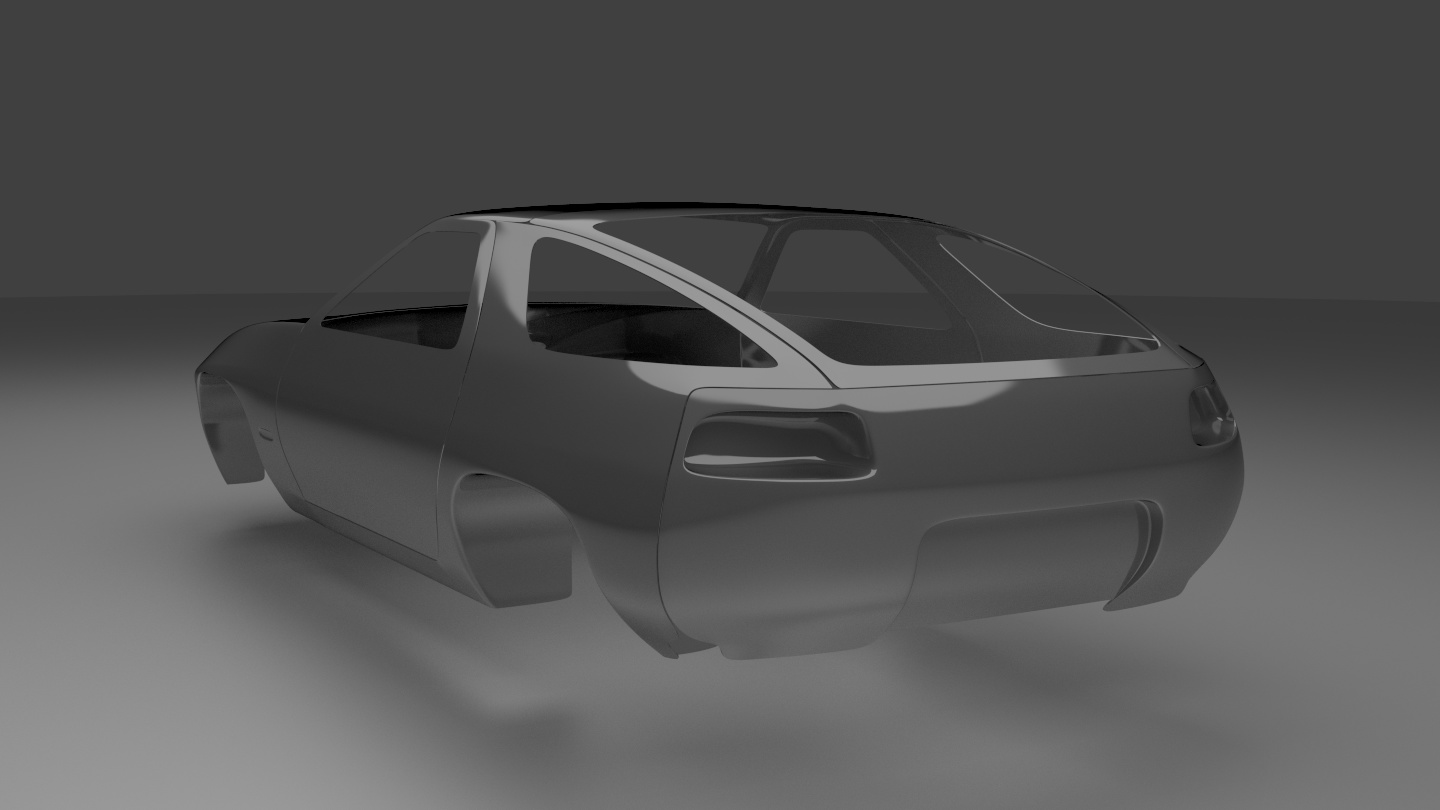


 I mean, your model is great, just the car has been probably bullied in high school for being the local weirdo. What were designers thinking with those headlights? (but hey, 1980s). Anyway, the model looks very nice, keep it up!