3d|slider, Harleynut and 01rich01, thank you! Much appreciated.
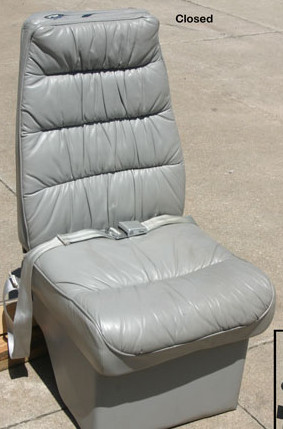
This evening I started to give the cockpit some love. I modelled a basemesh for the cockpit chair. Then I sculpted the wrinkles and baked normal- and ao- maps.
@Harleynut, the last renders have been at 1500 samples. But just because it doesn’t matter at the moment (because I just render stills atm) and to make the last bit of crispness out of the reflections. The glass is pretty clear at 150 samples.
This post’s render has 3000 samples. But as I said that’s not really necessary.
I can only dream about that # of samples…but it sure looks nice. The seat is looking a little like vinyl to my eyes… is that what your going for… or leather?
Try a render with 100 samples and increase the clamp (to 1.5 or less) and set the number of bounces to full global illumination and that should be good for a render. Great modelling btw.
I’ll try the clamping when I start optimizing lighting and materials for render speed. I made the experience that in an animation one can reduce the number of samples because noise is not as noticeable as it is in a still image. One can also use the current frame as the seed and then the noise has more variation from frame to frame which makes it even harder to spot in an animation.
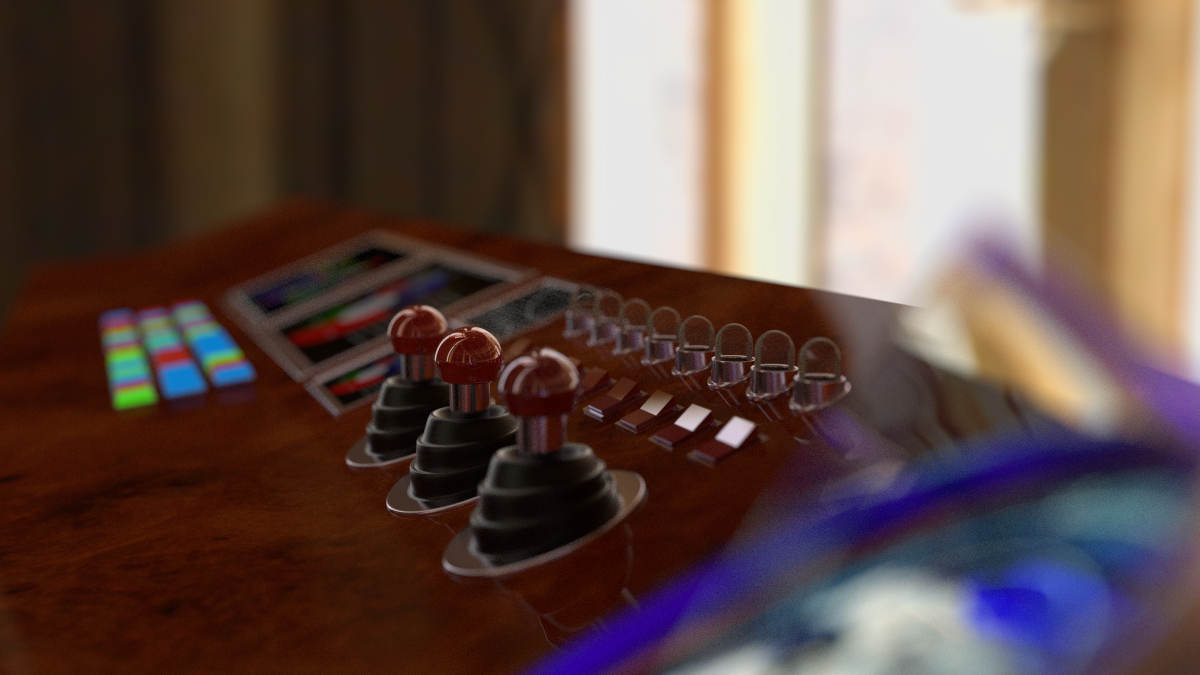
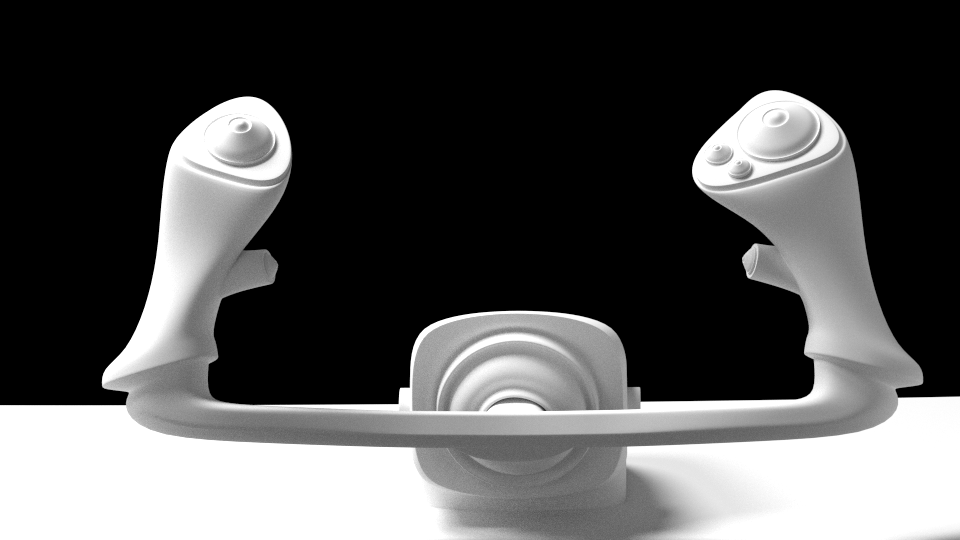
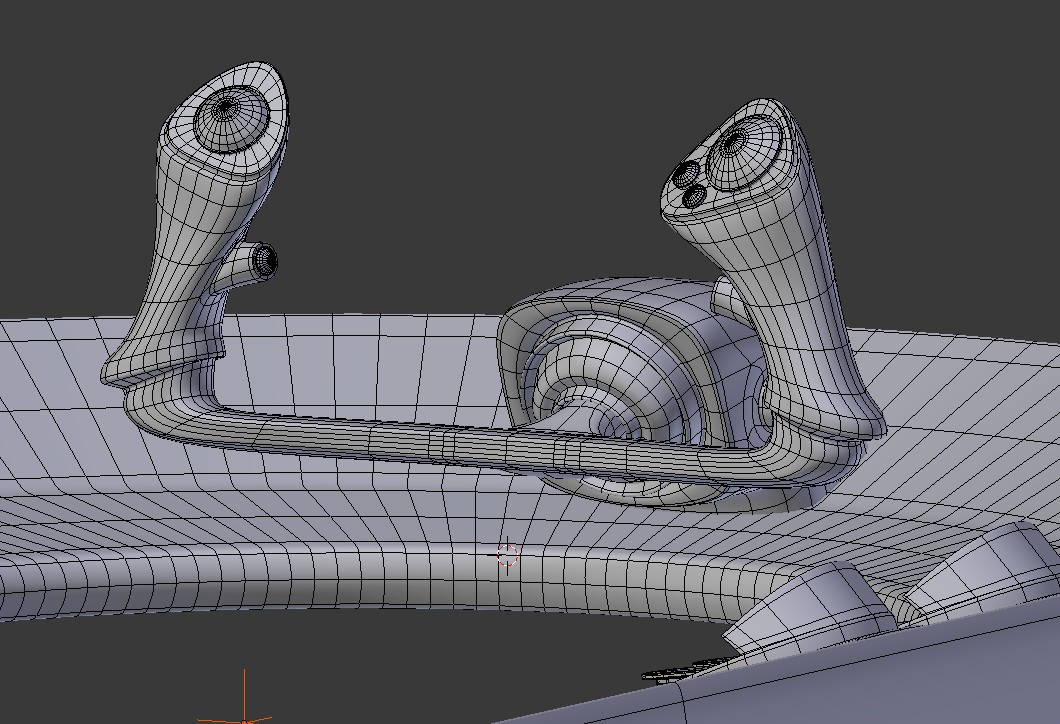
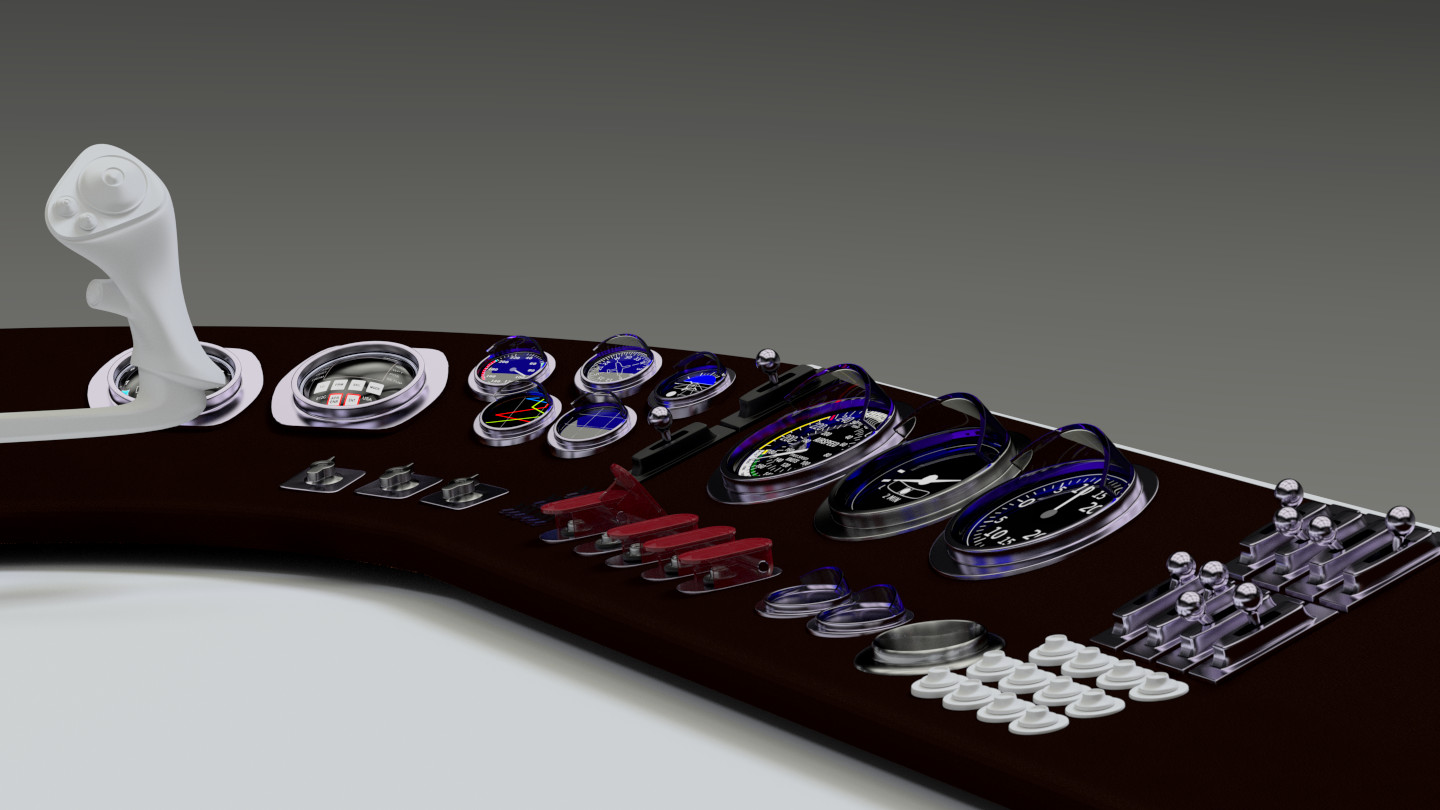
Today I started modelling further parts of the cockpit and I’m not through with it. It’s plenty of work to model all this little control elements.
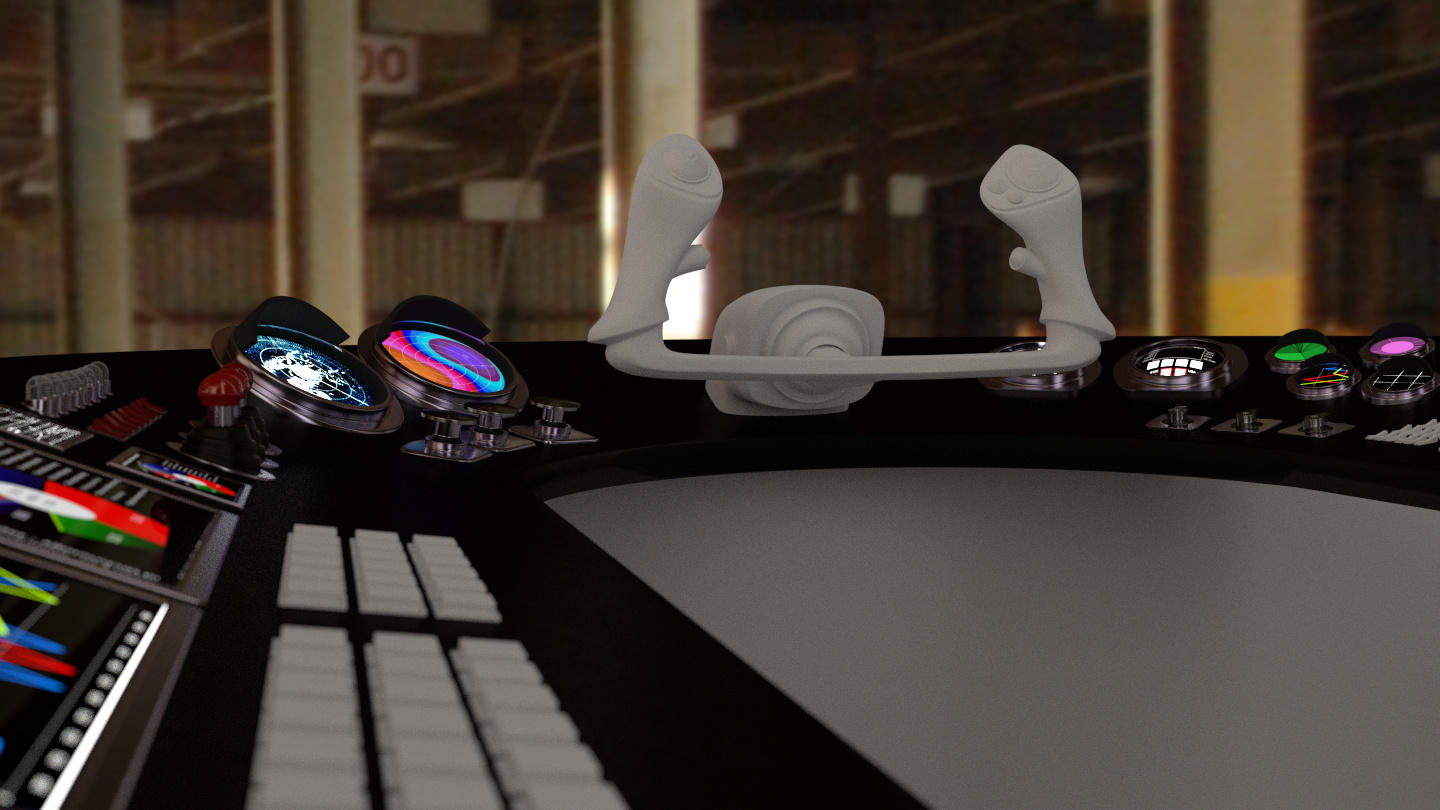
Control council is looking cool… Looks like you have some gauges modeled… The captain would be all confused with all those gadgets, he just wants a cupholder for his rum on his council
The captain would be all confused with all those gadgets, he just wants a cupholder for his rum on his council
Yeah, that’s why the captain is still driving his old mathilde and not such a brand new racer A cupholder was a good idea. I placed one at the right side of the dashboard. Where is monk, when you need coaching in texturing dashboards and buttons
I call it done for today. Here is the current state.
A very colorful control panel Minoribus… It looks jammed packed with all the latest technology Is the council that the controls are mounted to going to stay black, or is that a stand-in material?
Thank you, Harleynut. I thought that a pure “black and metal” would be boring. Too much color?
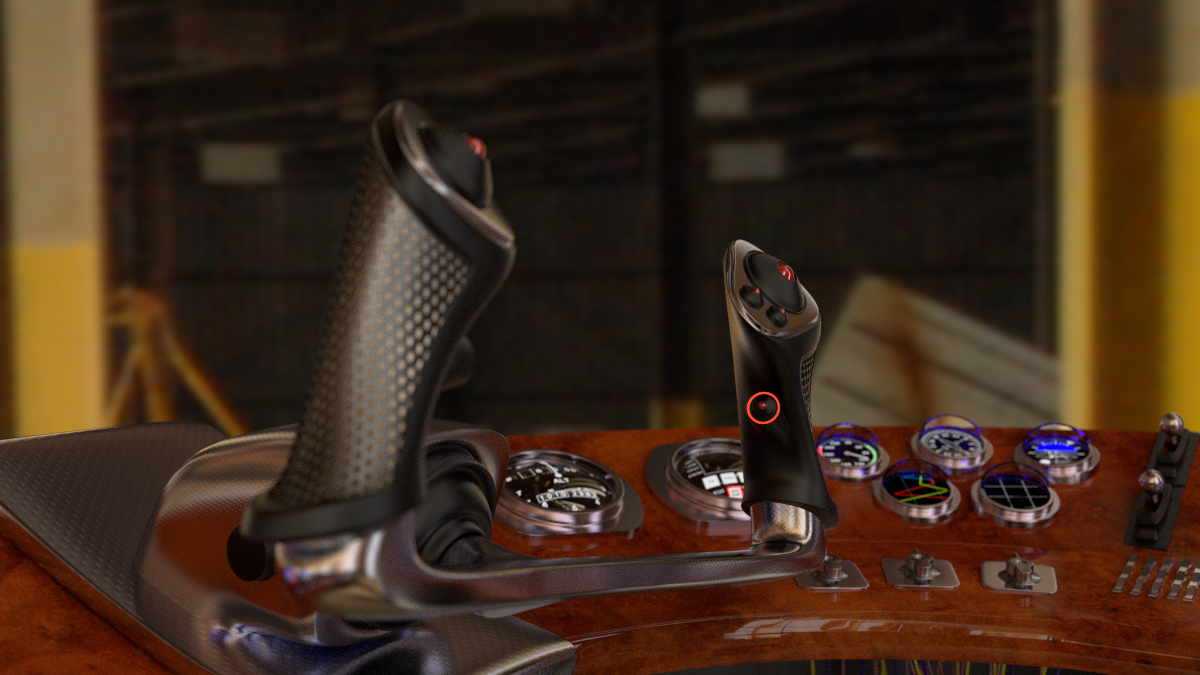
Here is an update. I’m nearly through with it. Some buttons are to texture and some of them have to be aligned to the board. The board has a very dark brown leather texture. But I have to increase the lights really much to see the brown. With this low lighting it is nearly black.
I won’t be too colourful on the panel. The outside goes for simplicity, that should reflect inside. It wouldn’t match if your ouside is futuristic and the inside is old fashioned. I didn’t read the full thread, but that did sticks out to me. Besides that I really like the model. It’s just a shame you don’t see the level of detail in the renders Am interested where this one goes.
Frobenius.Edge, wow, that’s what I call a compliment! Thank you :)!
Xerubian, thanks to you also. But I went the other way. Instead of reducing the color I increased it. I wasn’t happy with the dark leather at all. It was to difficult and inconvenient for the eyes. So I changed that to something which is closely associated with ships, very elegant and very eye candy. Thanks to the unknown author of pixelab.be who shared this wonderful texture (http://www.pixelab.be/blog/2007/07/17/burl-oak-vray-mat-texture/).
As you can see I’m nearly through with texturing the panel. One set of buttons is left and there are still elements which are not aligned in the best way.
As an exception I continue this in the very next post …
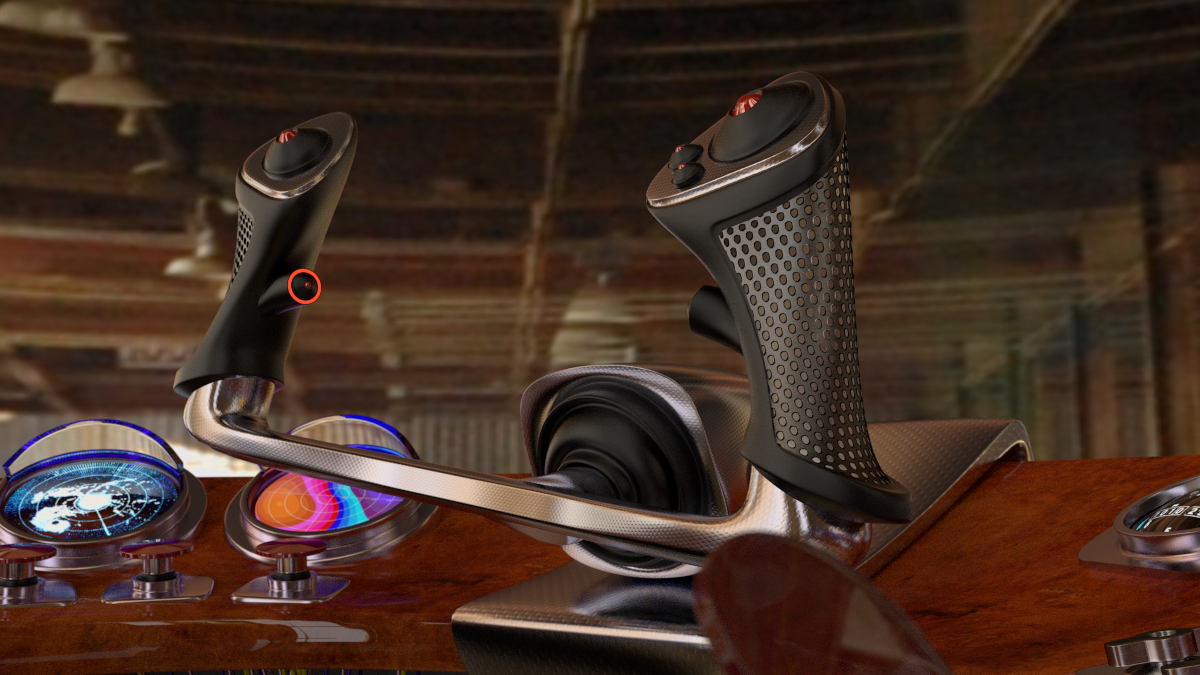
The detail in the steering controls are just wonderful. All the controls are well done, I just really like the way steering control came out. That middle render, on post 34, really shows it off nicely.
I keep trying to figure out what that psychedlic looking control screen is right to the left of the steering column. I definitely like the wood grain you added… reminds me of what you see on Jaguars interiors.
@minoribus The newest edition is looking great in red. I tried baking a normal map from multies, as per a Utube tutorial, but when I go to edit mode the object is displayed as a bounding box? Looks great in object mode and renders fine. But, I can’t UV unwrap this bounding box. In the tutorial he goes to edit mode and there is his object with all the verts and faces. Any thoughts or a tutorial link would be appreciated.
Also I’m I correct in thinking on this project baking normals essentially did what retopo does in other cases. I like to sculpt since I find it more intuitive then pulling verts for some objects. but I’m having a time wrapping my head around this baking process. And, harleynut says you’re the master.
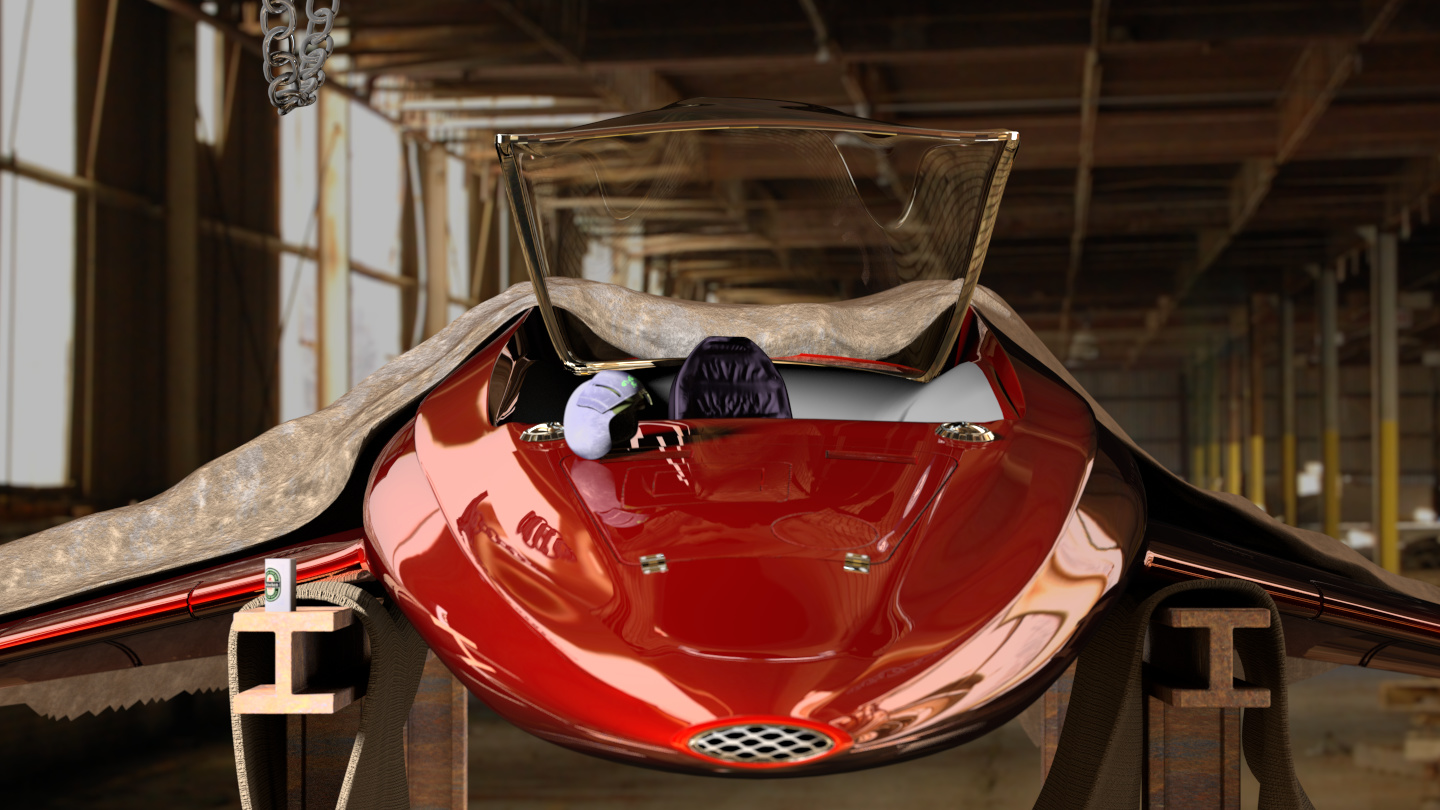
Thank you, theoldgost, I’m glad that you like my ship.
Concerning your question I haven’t understood completely how your workflow is. Mine is as follows
modell a base mesh
UV unwrap the base mesh
make a copy of the base mesh
assign a multires modifier
crank it up to a sufficient level (astonishingly you reach higher levels of multires if you subdivide the base mesh on before that)
switch to sculpt mode and sculpt
in Blender Internal go to bake
choose normals
set bake from multires (important to know: it bakes the difference between the sculpting resolution and the preview resolution of the multires modifier. The preview value of the modifier has to be > 0. The fine the sculpted details are the bigger the baked map has to be. For the ship’s details I used a 4K map.)
before baking make sure in the UV/Image editor that an image is set for the UV map (that sometimes fails and I have to try it several times)
bake it
I did several quick tests on a cube that wasn’t unwrapped before I sculpted. I tried multiresolution and dynamic topology bit I couldn’t reproduce this bounding box behaviour. So I have no clue why this happens with your mesh.
But perhaps your workflow is different from mine? If so please tell me and I’ll try again to reproduce that behaviour.
@martin.hedin, thank you. I was tempted to try that yesterday, but I thought that this would be too much of carbon fibre. But now that you encouraged me I’ll do a test render this evening to see how this would turn out.
The interior became just WOW. If you had that in mind previously, then forget what I wrote above. The level of detail is just amazing! And thanks for the renders
I’m sure you spent a lot of time on those wires, both in texturing and modeling… but don’t you feel wires like that would most likely be either tied off somehow, or even contained in some kind of protective sleeve to protect from getting accidentally bumped into?


 Am interested where this one goes.