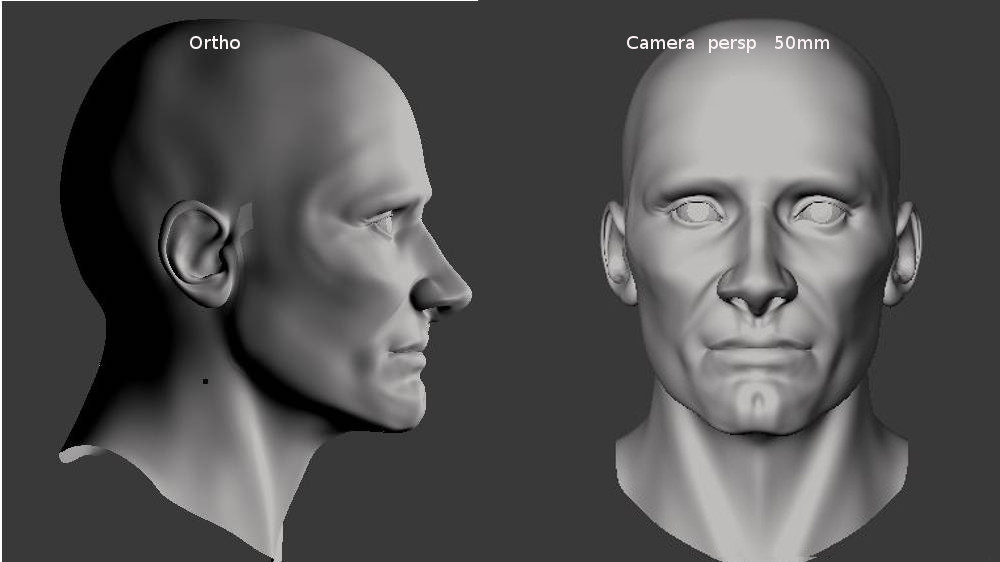
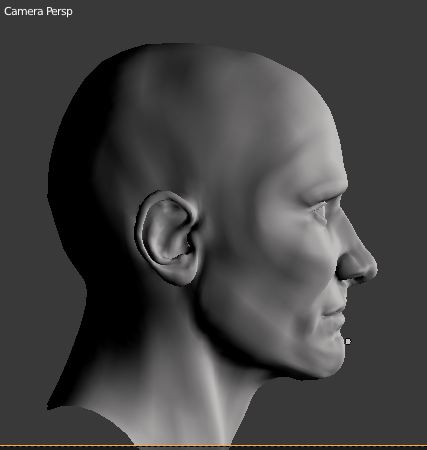
ok thanks, good to see the camera view, it shows you are much closer to where you want to be than the orthographic view lets me think…
about the distortion in the view with perspective. probably the camera angle is still the default 35mm , and therefore you get big distortion. hit n to open the right shelf, find view, open that and put another angle. 50mm works good, or put the same angle you used for the camera… this should give you similar to what kent trammel had in his tutorial series. you notice also he frequently zooms out, he does that to reduce the distortion as much as possible to judge the model. this is still way different from orthographic view…
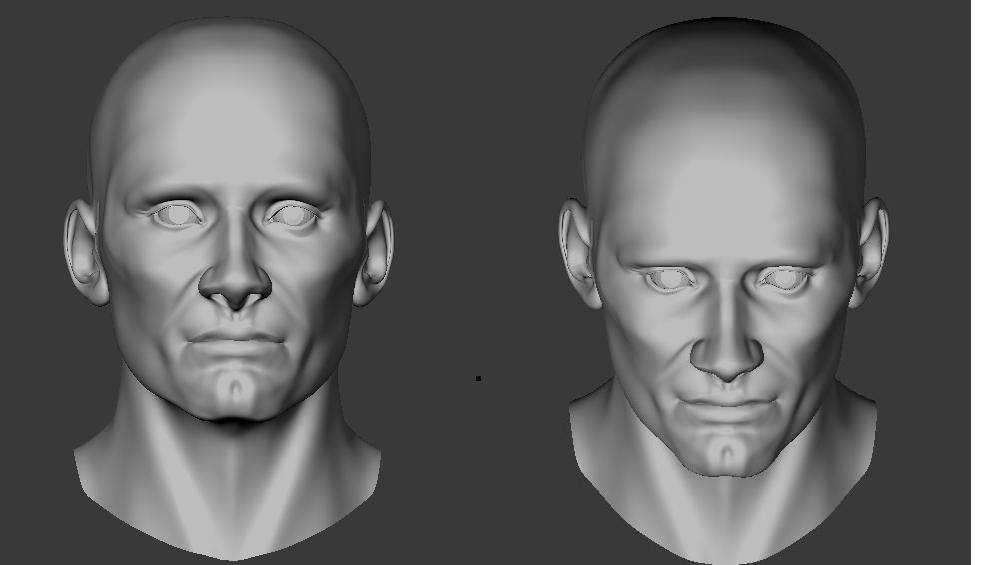
thanks also for the multiple views… very helpful… i think the size of ear is fine, its only the orthographic view that lets them appear too wide. what i would do next is address the neck, its too wide, in particular at the base. the jaw line is pretty much a straight line, but it needs to have a curvature, when you watch kent trammels video, he pushes right in the beginning the jaw a tad inside about the place where the mouth corners are. that gives a slight inward curvature, which viggo seems to have prominently.
the nose, your nose wings are too prominent, the tip is too large, and the top of nose is a tad too wide.
the eye area looks perfect, in particluar in camera view. i would not touch that now, but keep as a constant to judge the other parts from. i think from front view the corners of mouth are too wide. they sit below the eye centers in relaxed view, and viggo seems to have them even closer…
the upperlip area is not correct from side view : see how in your sculpt its a concave curve, while viggo has a convex curve that makes the upperlip stand out clearly. also the upperlip area needs to be more forward than the lowerlip and chin.
forhead could be even a little steeper (meaning more vertical)… not sure about the angle of nose, its difficult to say. check it again, after you adjusted the curve of upperlip
ok, thats for now, it sounds like lots of points, but i am really liking how you are doing the portrait. the eye area is the best, looking only at that i can see viggo clearly. and, i think addressing some of the mentioned points will push it altogether to a good likeness. well done, keep going
This thread should be called “Finding Viggo.” Like finding Waldo.
The tip on how to correct the user perspective view is greatly appreciated. It’s good to know his head is in the zone. I got a general sense, of course, but I’m up close to the quads and verts. Like being right next to a pointillist painting, where all you see a bunch of dots.
Also the point about the curve of the jaw is Spot On.
I’m picking up my shovel again … well, maybe right after coffee.
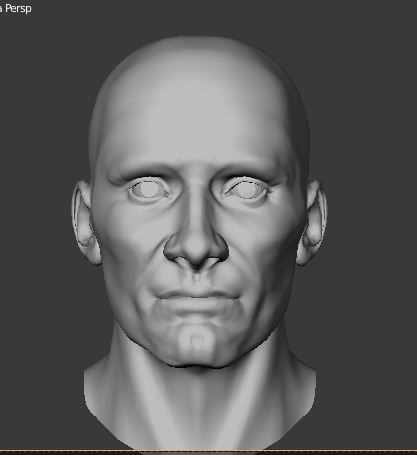
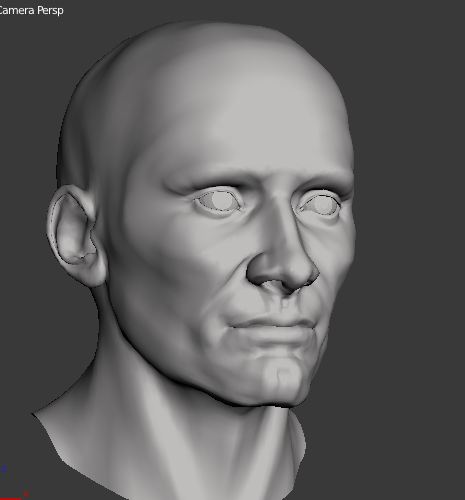
yes, yes, yes ! now put some little more flesh on the jaw, just a tad… and, for me is perfect if you just show me camera angle, i can read forms much better from this. are you not feeling how you now circle in to the exact point ??? to me, its very exciting, you are doing great. looking forward to the other changes, if you decide to do them that is (remember, i am only (!!!) making suggestions for where to look,you alone decide which of these you like and it will be a great portrait
Hell yeah. For me I’m starting to envision that the facial structure is definitely tracking in the right direction. I can see the eyes and nose more perceptively. And the jaw, of course. Yeah, it’s shaping up to be a great baseline mesh for more expressive stuff later.
I added some flesh around the jaw line
As well I worked on the nose some, recessing the entire nose into the face more and correcting the rake angle of the bridge of the nose.
For the camera I used 60mm to take the shots. Will that work, or should it go down to 50mm?
yes, again well done :-)…for portraits everything between 50-70mm is fine, for effect you can go even up to 85mm… 60 is very good… and a tip: its time for you now to make renders in cycles. just with the basic material on it, and a little specularity. you will notice quite some differences, and can more clearly see where you need work more and which areas are good already. the view port shading is not really good for modeling, would be great if we could model truetime under cycles…try a testrender now, to see what i mean. you dont need wait for all the grain disappear, just that the image is clear enough to see the forms.
Doris:
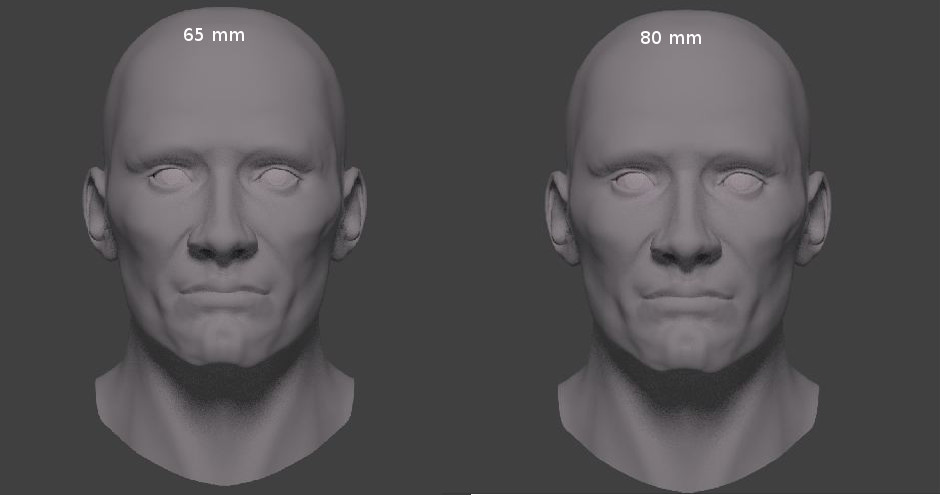
Cycles helps! Did some test renders and details and shapes stand out more accurately. I upped the camera to 80mm and played with that. I wasn’t certain some key face features might get diminished.
Got rid of the various tint captures.
Figured out how to: use the node setting for emission, which I upped to 400 and a 1000, which helped. But no real clue other than trial and error.
Learned how to import some of the SSS texture/materials to the scene. I have two of the SSS shaders for CYCLES but unclear whether I import my model to the texture or texture to mesh.
25 Oct, Edit add-on: i was experimenting with lighting and Ben Simmonds great three layer skin shader. (The node work is completely a realm of its own) And having a semi-realistic skin shader could “potentially” cut the learning curve and provides an already proven professional texture. I apologize to Ben for not citing it earlier, but I was getting punchy.
Figured out how to employ the SSS - I deleted all but one vert of SUZANNE then joined the two objects. Then I simply applied the existing texture.
But, although I reduced the specularity node there is still the shiny waxey look. But it was something new to try. Moreover, I’m not pressing in that direction as I have more to complete in the head mesh itself first.
Doris: I finally figured out the brightness/lighting issue. After this I’m back to modelling work
more detail to the face needs sculpted in
I need to get a better texture for the eyes.
And, hair, of course
PS: I had to delete the waxy looking head, it was a little … distracting
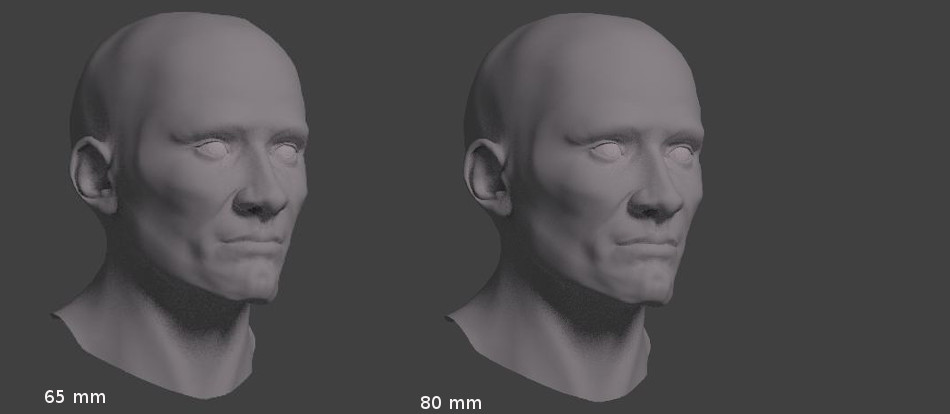
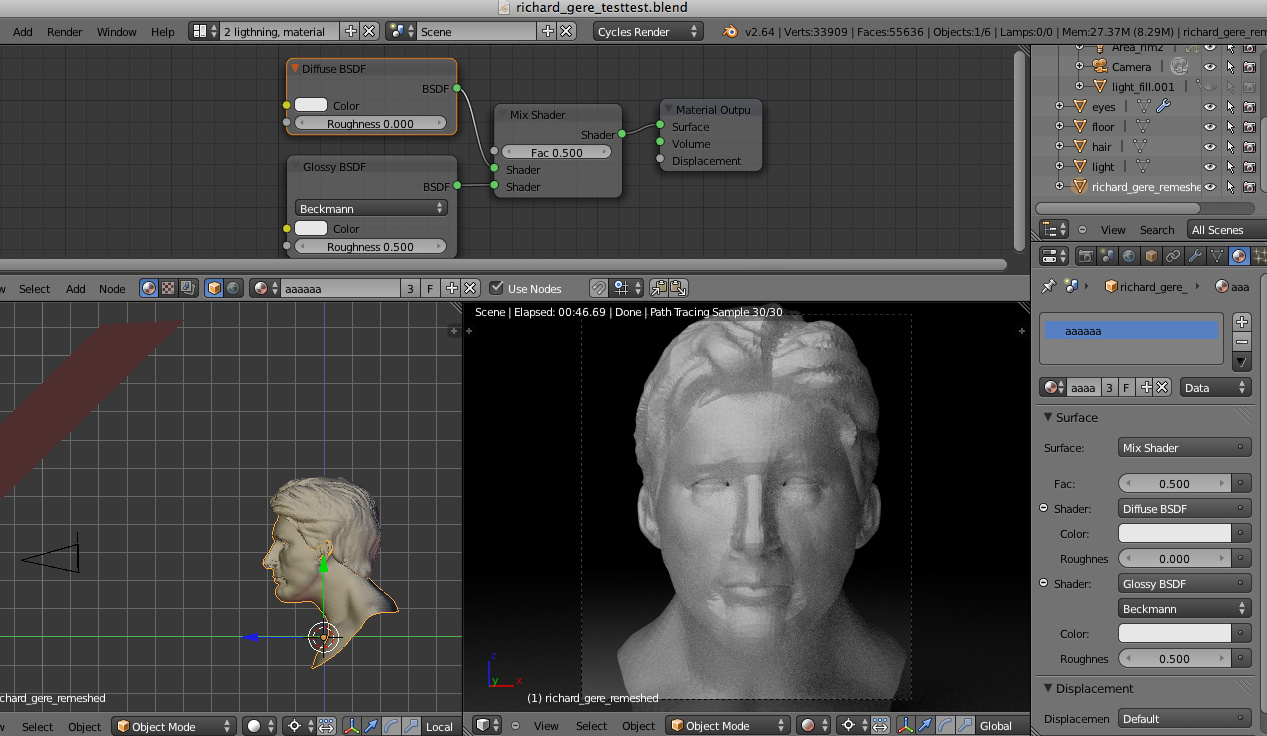
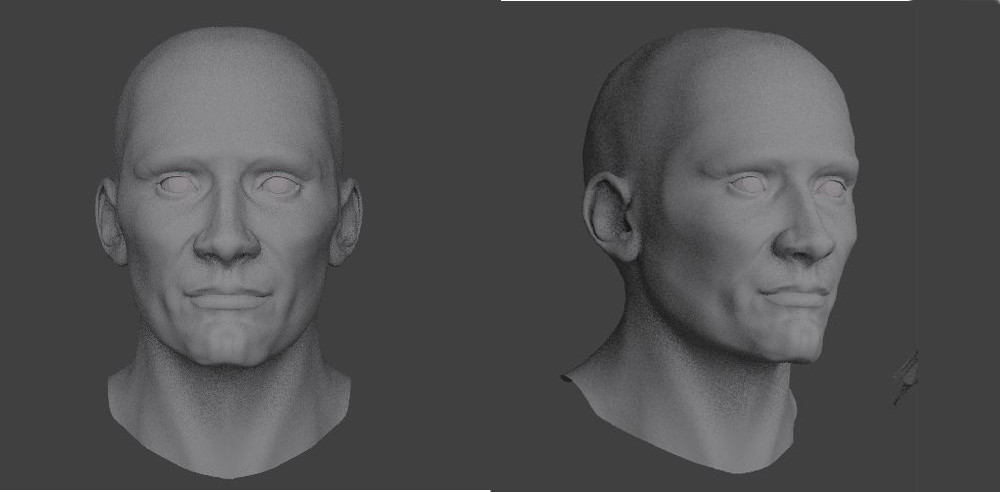
hi, i am very confused by your lightsettings for cycles, 400 and 1000 ? and still so dark ?.. i am using a simple plane, with material=emission set to about 2 or 3 to proper light in cycles (and take the world lighting off, so no ambient light to disturb my light)… i attach a screenshot of my set up, so you can compare… yes, framing the portrait like you did does show only very subtle differences in the camera angles 65 and 80 mm. the choice is made “by feeling” what is better
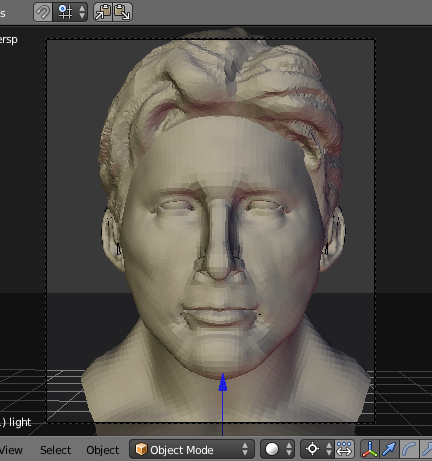
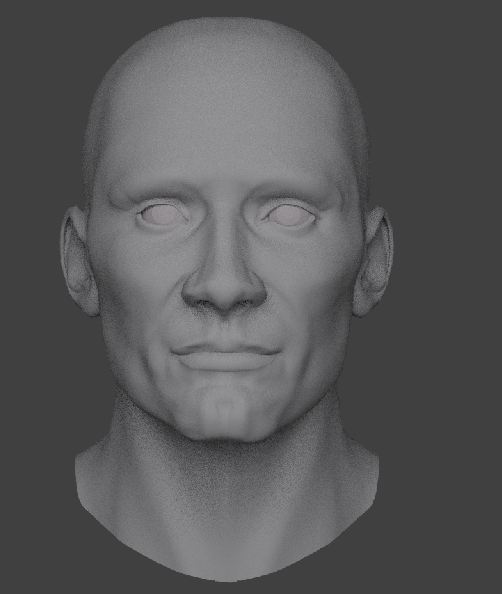
but maybe my advise of using cycles was not the wisest, as i now see you wish to use blender internals possibility to render sss and hair system. both you cannot do in cycles, nevertheless, cycles is very good for judging a model. see how in my attached first image cycles clearly displays that the eyebrow and temple area is very poor, the viewport image (the second one) lets us think the model is fine, but cycles reveals it is not, it is bad actually…
(i hope you not mind me putting images intoyour thread, if so i will remove them immedeately)
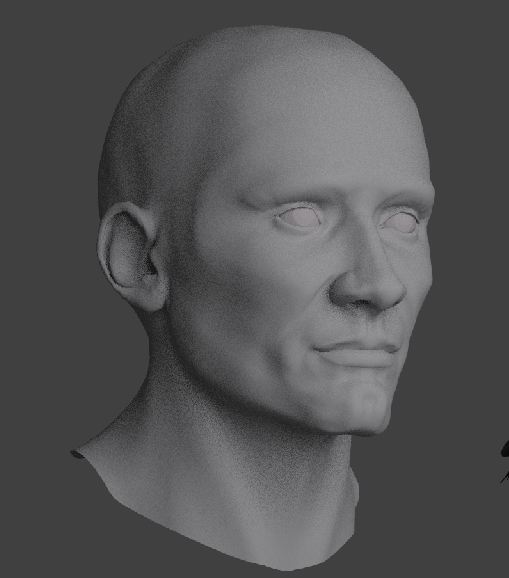
oh, i forgot to mentioned one thing i noticed only in your cycles renders… we spoke already about the problem with the line from upperlip to nose. but there is also a problem with the shapes in mouth corners. the lowerlip hides below the upperlip much in the corners of mouth, it creates a tighter curve around the teeth so to say. this creates an angled “donut” shape in the mouthcorners. i think, if you can put this, and the upplerlip curve, the likeness will increase much in moutharea…
Doris, thanks. Cycles does reveal better detail and shape. I used cycles cause you recommended it as a useful tool. It’s definitely a worthwhile asset/renderer. I never used the feature before.
The proof of it stood out in the ability to notice the lip correction.
Also, the light emitting plane is likely a simple illuminating technique which I’ll adopt. Another step saved.
Yeah, I’d like to create hair as well as semi photo-realistic color texturing later. Later, I’ll make mesh hair which could or could not potentially fill the bill.
His mouth is … quirky. I see how even in the bust head you used for reference - the downward overlap of the outer corners of the mouth. Actually, I think its quite close to Viggo’s.
yes, viggo is not so far, actually quite close… you know, you can tweak forever, but your sculpt is in a great state, you can move on, with texture, hair etc as you like… still you can change some areas later then… my experience is more with untextured busts, so i do not know how much you really need put into the sculpt. i have pushed you quite far, and am very happy you could use my sugesstions :-). … yes, glad you see what i meaned with cycles. even if you render otherwise, cycles lets you really “see” … i am looking forward to what you will do next
To me is also interesting to watch, what you chose to do, you know we are revealing a lot of ourself in a portrait we do. thanks for letting me be so close
The suggestions and recommendations you made saved much wasted hours and greatly helped flatten the learning curve. The assistance was greatly appreciated. And it wasn’t just the tips, it was the approach of how to tackle the project, how to take it down in chunks, and when to step away to another piece. Yeah, great lessons. Good style.
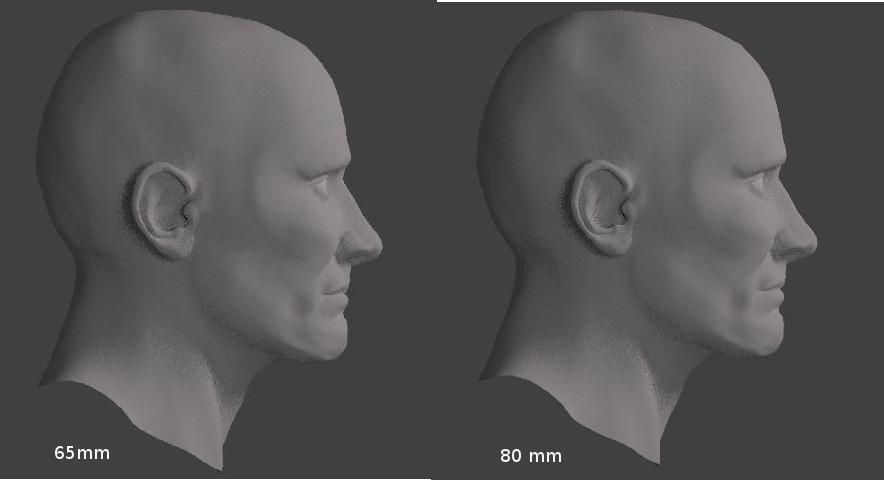
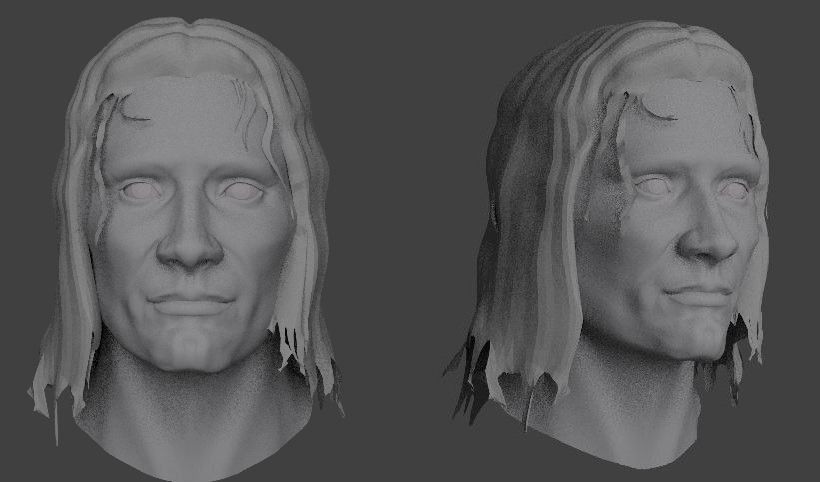
I’m adding two last tweaked shots before I shift to texture. Also they’re done in 65mm
I fattened and rounded the jawline. but I can see the chin is still slightly off.
not certain about the small doughnut thing in the corner of the mouth.
The second shot is with rough place set with poly hair for a test. The hair is ragged at the ends and can be improved, but the general shape isn’t bad.
All in all, again Doris, thanks tremendously for the help.
it was my big pleasure, you are welcome … the hair rough looks great, ah, i waited to see how the face goes with the hair !!! yes, yes, right way !!! …
i will be watching further, but now you are flying free, and it is wonderful to be able to be part of a development of a sculpture this way. thank you for allowing me to be that close now fly free my friend, you deserve it after all that hard work
Doris, With a team concept, development goes much faster. And that’s what this project became. You volunteered to assist at the right time, I’d say. You have a stellar eye for facial features and human form. Couldn’t have asked for a better coach.
As well I have a few other models, I’d need sanity checks on. But those are a month or two down the road. I’m taking this one to completion.
“I’m a peacock, Captain! You gotta let me Fly!!” line from Mark Walberg’s character in the cop movie “the Other Guys.”
Oh yeah, one last thing … in addition to Doris’ invaluable aid, this forum and the people who provided advice and critique were outstanding.
With that said, I gotta fly
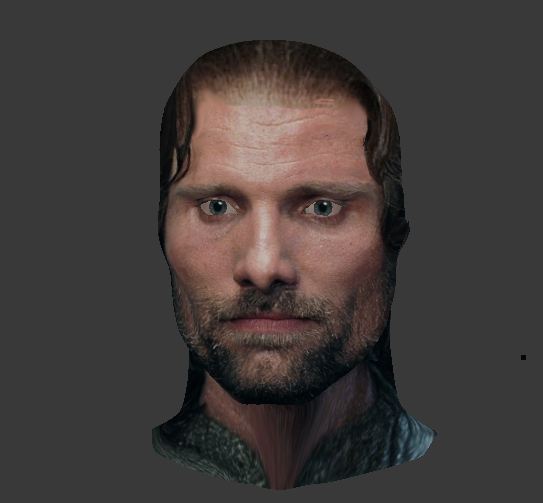
Finished the initial rough texture map on the Strider face version.
I trimmed away the excess polys from the face back, as the hair completely covers even the ears. I haven’t done any sculpting to build in creases and wrinkles yet. And I haven’t made any normal maps. That’s next. The face at this state is starting to look good. At this point the face is close to 4096 x 4096 which shows good detail. I’m not certain how much reduction I can do without losing that.
The eyes, the brows, and skin tone still need work. The photo mapped highlights are likely too bright and need to be damped. I’m uncertain how to do that.
The eyes are simply mapped off the initial face texture map. They don’t have a higher res map of their own yet.
The neck texture is terrible at this point. Its really just a placeholder underneath the head at this point. I have to create a map just for the neck.
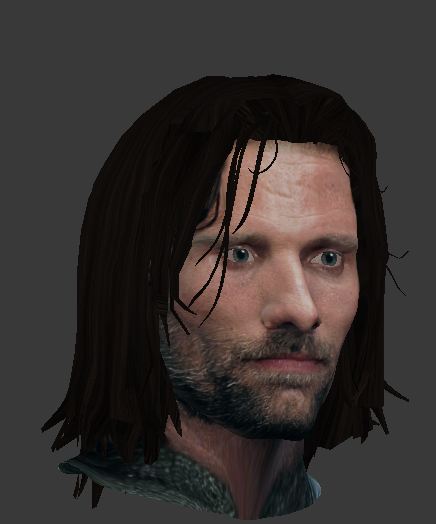
As to the hair, like any hair project that’s a labor of love all of its own. I’ve tried using my own polygon mesh with some elements from the hair factory. But what I think is really missing is a high res texture map for dark brown hair. The one I’m using now is an up-converted 1024 x 1024 to a 2048 x 2048 map.
Any thoughts on shaping hair or ideas are welcome. I’m not keen on particle hair unless that is the only probable solution.
At this point I think the face shape, jawline, and proportions are in there. I think the eye placement is accurate, and I think the mouthline is close. Not exact but close.
Also, I’ve tried using BProjection and its hit or miss at this point. It seemed like a panacea for whipping up facial maps, but … not so much. The paintbrush always seems to be off set quite a bit from the source image. And it’s a pain getting re=started once you let up on the mouse button. Which means I’m learning it but it’s not there yet.
Additionally I’m uncertain whether the 64 bit Celeron laptop I’m using even has the horsepower to use the tool.
All in all that’s it. Shred as desired. I’m taking a break and getting more coffee.
First off, tried Bprojection again and got it to work. My confusion was how to access the source image. The answer was simple but not really stressed in any tutorial. Simply go into object mode - put the 3d cursor on the source image plane - exactly where you want to begin copying from. Then the user has to transition back into texture paint mode and begin painting. That’s the overview. However, the potential and ease of painting a base texture really bodes to be a real time saver. It is an addictive tool that really has a “Wow” factor.
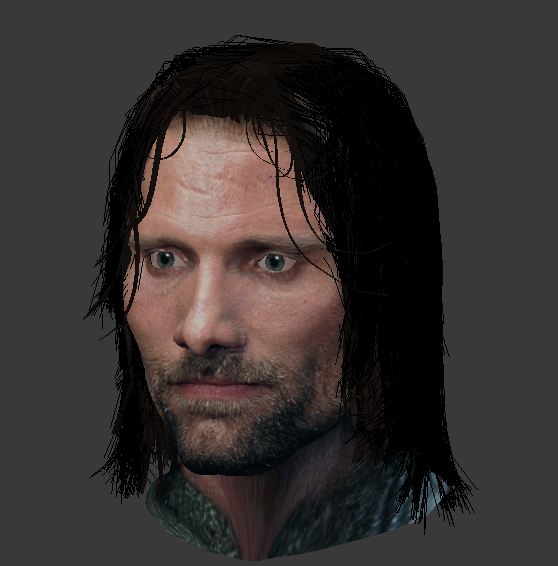
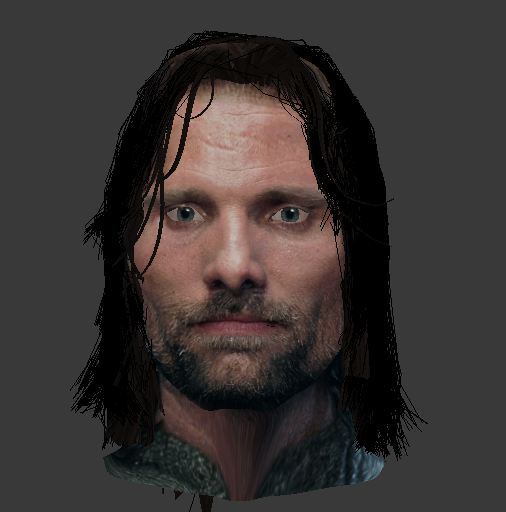
However back to my quest of digging up Viggo. As can be seen I’m working an Aragorn character look first. And after, Hildalgo.
I had planned several things, build a normal map, commence sculpting detail for a bump map, convert the textures to cycles. Uhh, didn’t happen yet.
What did happen was some facial tweaking mainly around the cheek bones, brows, and jaw plane. I also listened again to the Z brush class on head structure, and then I experimented with particle hair.
So I’m pasting two pics of hair tests. They are not in User perspective just for the simplicity of arranging the shot. I haven’t converted the textures over to cycles yet. I swear I will transition to cycles and take perspective shots after this.
Lastly, at this stage I am still trying to establish a base line, neutral emotional expression. Thereafter, I’ll add more emotive looks.