Thanks niebieski.
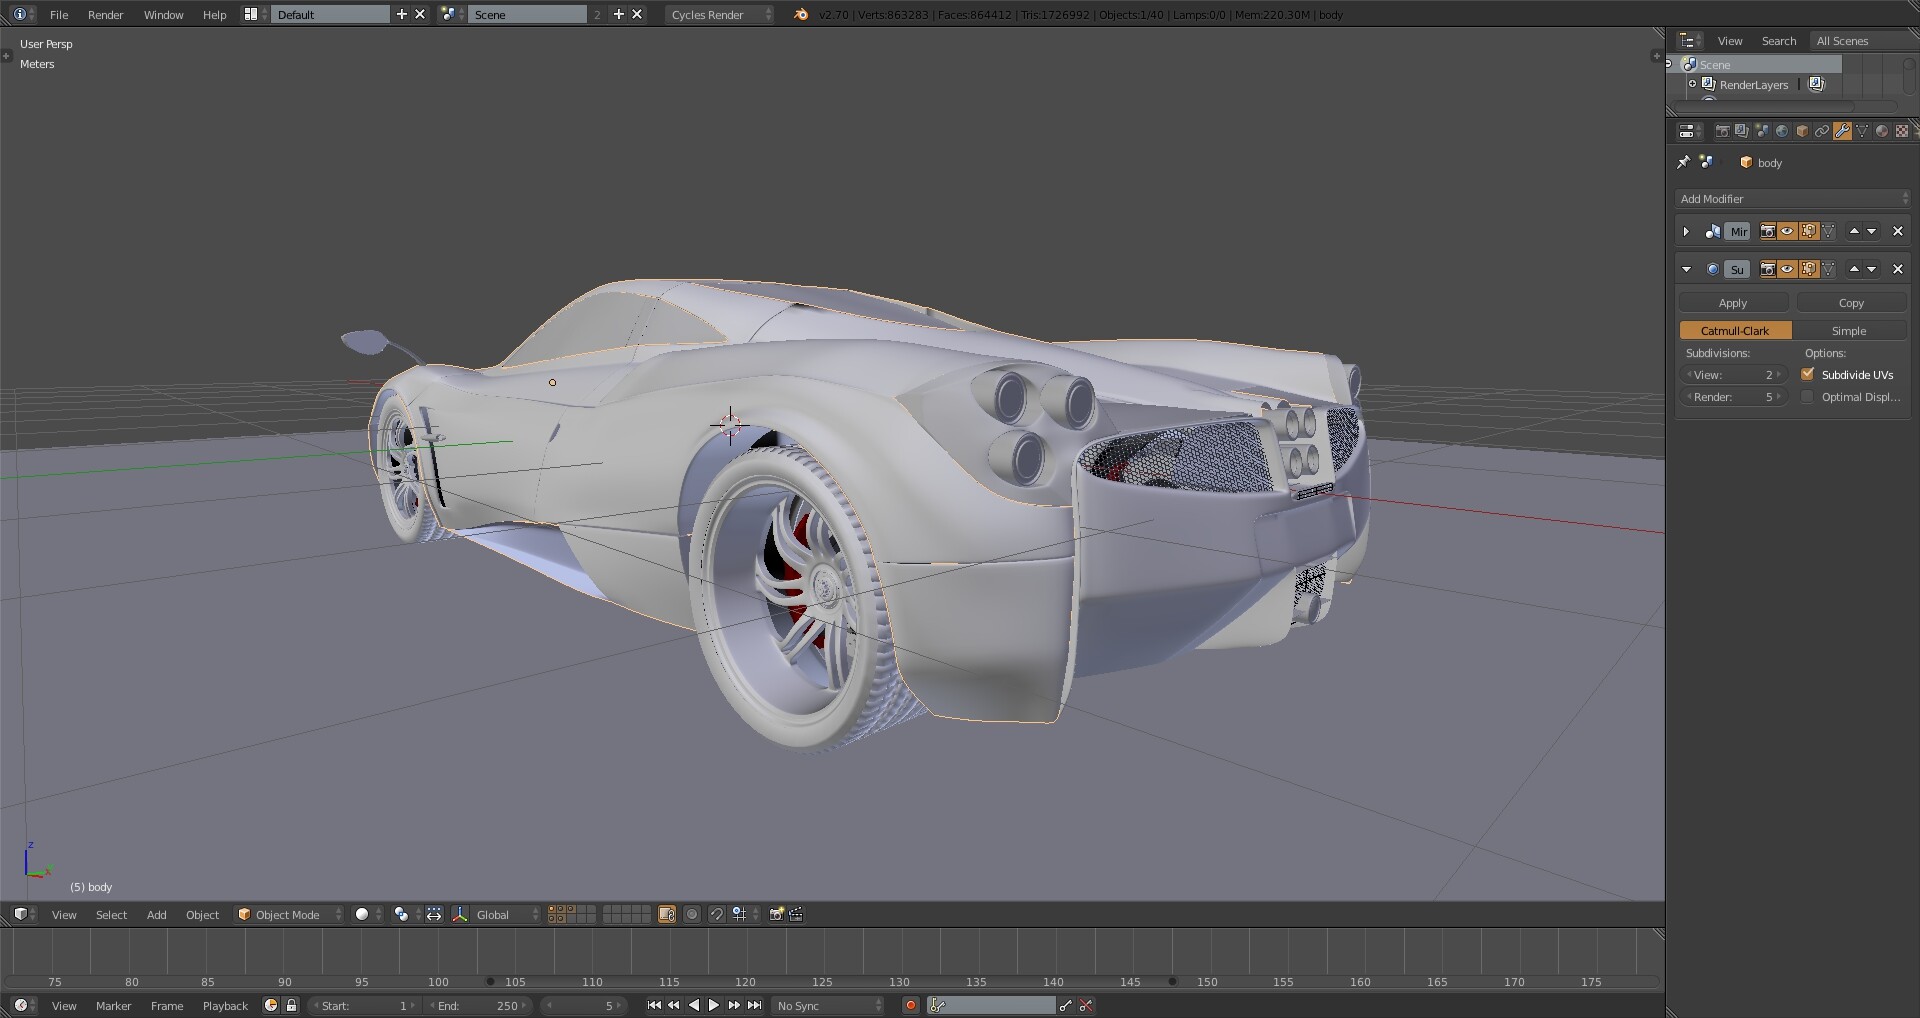
My Huayra is close to the end, exteriors are done, now I have to go on with interiors and it seems really hard, if you take a look in flick you’ll see what I mean.

yes. It can be found in the loop tools add on. Dont think of break calipers as a single model… think of them as 4 or 5 models lofted together. they are so industrial that if you dont use the fill or loop tool, you will be there all day wondering why its not working out the way you want. People go into modeling thinking they will have an organic ish shape but they just dont…
as far as the rotors, YOU REALLY NEED TO PICK A SPECIFIC SET OF BRAKES! it matters. If you are doing pegani prkaes look up pegani brake rotors on google, then look up pegani brake rotor specs. get the diameter in in/cm then for the mounts, model it around the bolts for the rim instead of seperatly, so the bolts line up and you dont make the mount too big.
hey, nice progress here ![]()
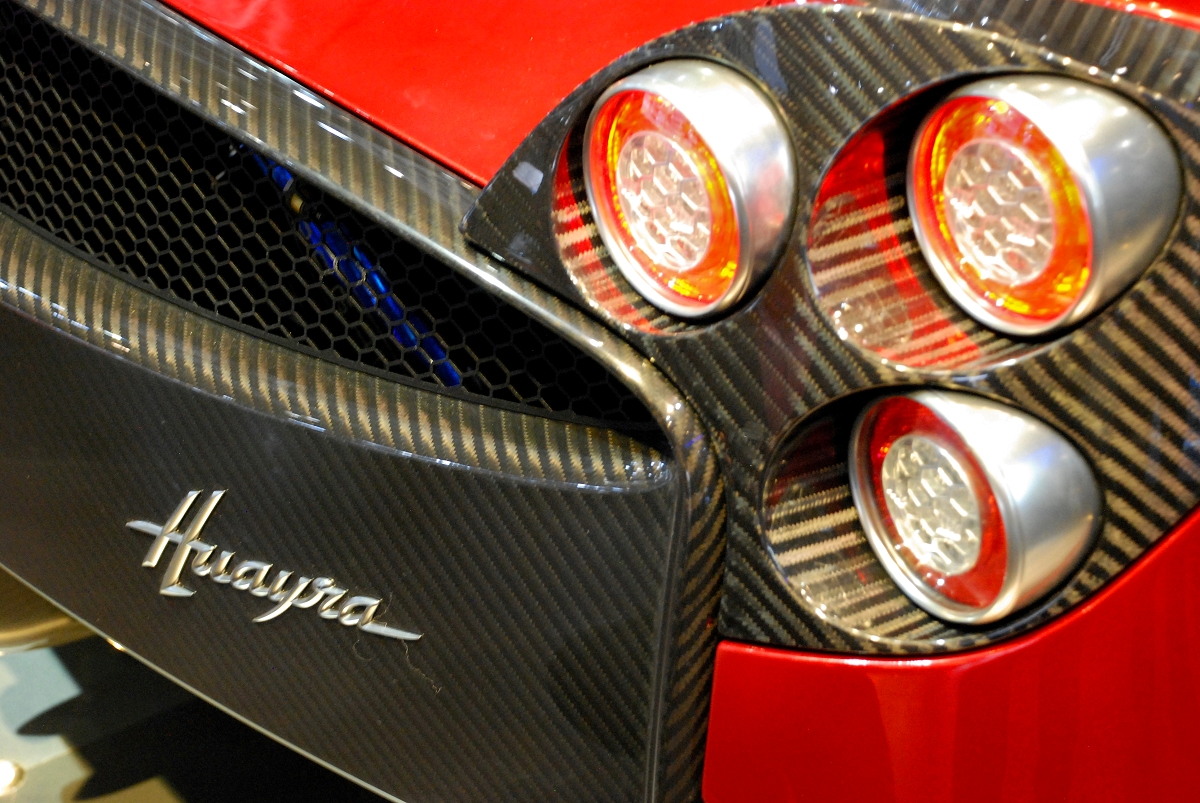
I would make a suggestion but Im not sure I understand the problem. if you go here https://drive.google.com/file/d/0B3XCeK6b2Q3ud09QTFoxZnFNZVE/edit?usp=sharing and download this shader, you can light the inside of the lamp without needing to model out a thousand LED bulbs. Just do no emission for the white and a very small amount of yellow emission in the red and make sure you use red glass.
It doesn’t work as I do, but I thought to use a texture mixed with an emission. I saw the Ghilas R8’s tail light and I guess it’s my case.
Here a exported .obj of the tail lights for who wanna play with materials, remember that’s not an homework!
https://docs.google.com/file/d/0B3lveazMluSwcWc2cDRGTUtvTzQ/edit
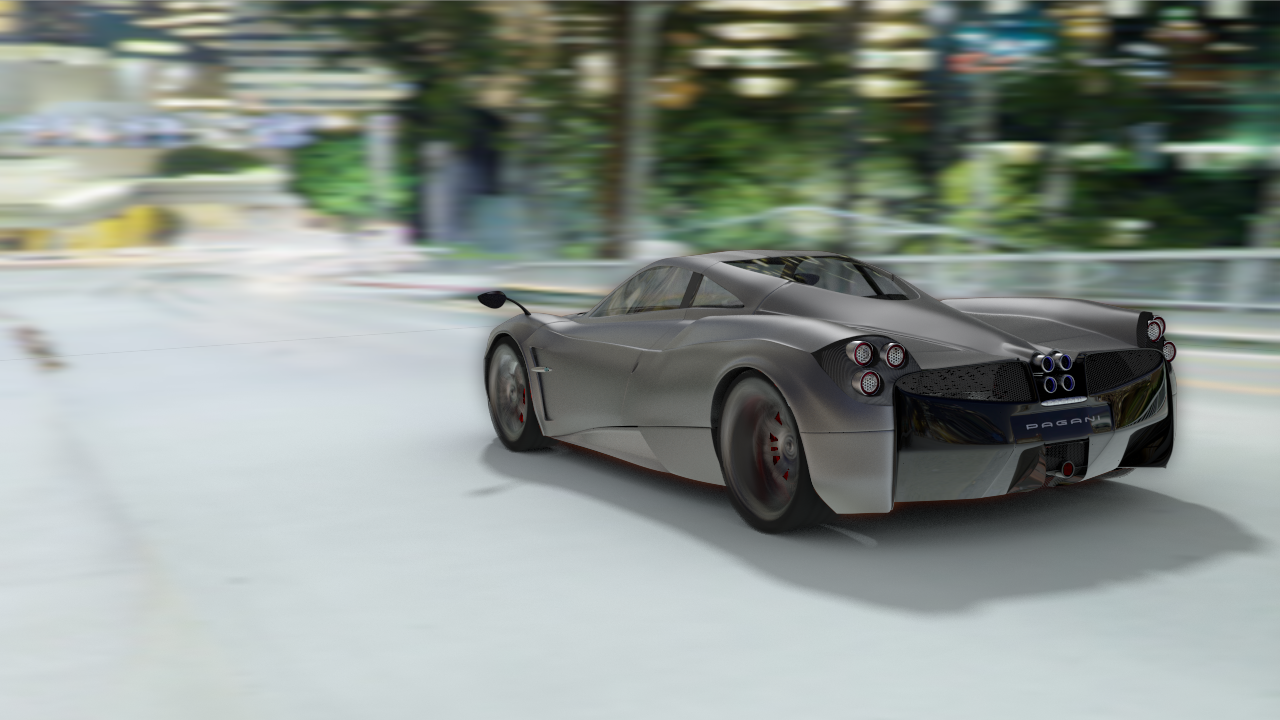
A simple rendering try. I have to fix out tail lights and other things. I can’t take dynamicity to my render as I want, some ideas?

Yep, i used a texture with an emission shader ;), it’s good if you don’t want to model that super extra detail on the tail lights ![]()
i think that the overall scene is too white, and the car is not well integrated to the picture, also more work on the car paint is worth it
that’s it ![]()
I agree. also, the wheels are turning wayyyyy too fast for where the HDRI depicts. maybe 70mph tops. The wheels above have to be in the 100+mph range. I can tell because motion blur starts to cool off right , till it looks like its not moving at all as the wheels RPM approaches the frame rate… so if the camera has a 1/27 shutter speed, then the wheels will appear to not be spinning at all when they are turning 27, 54, 81 (etc) mph. The blur on the car its self suggests that the person holding the camera could not keep up with the speed of the car. for a still shot they would loosen the radial rotation on a tripod and just move the handle to follow the car passing by. I would try killing some of the motion blur on the car. when animating the tires rotation, try to never be more than 10 frames off of the shutter speed/ frame rate so that the tires dont appear to be going super sonic speeds, and try using a scene that appears a little less urbanized OOORRRRR, or, try a major highway. (bugattis have their fun in L.A. around 3 am XD)
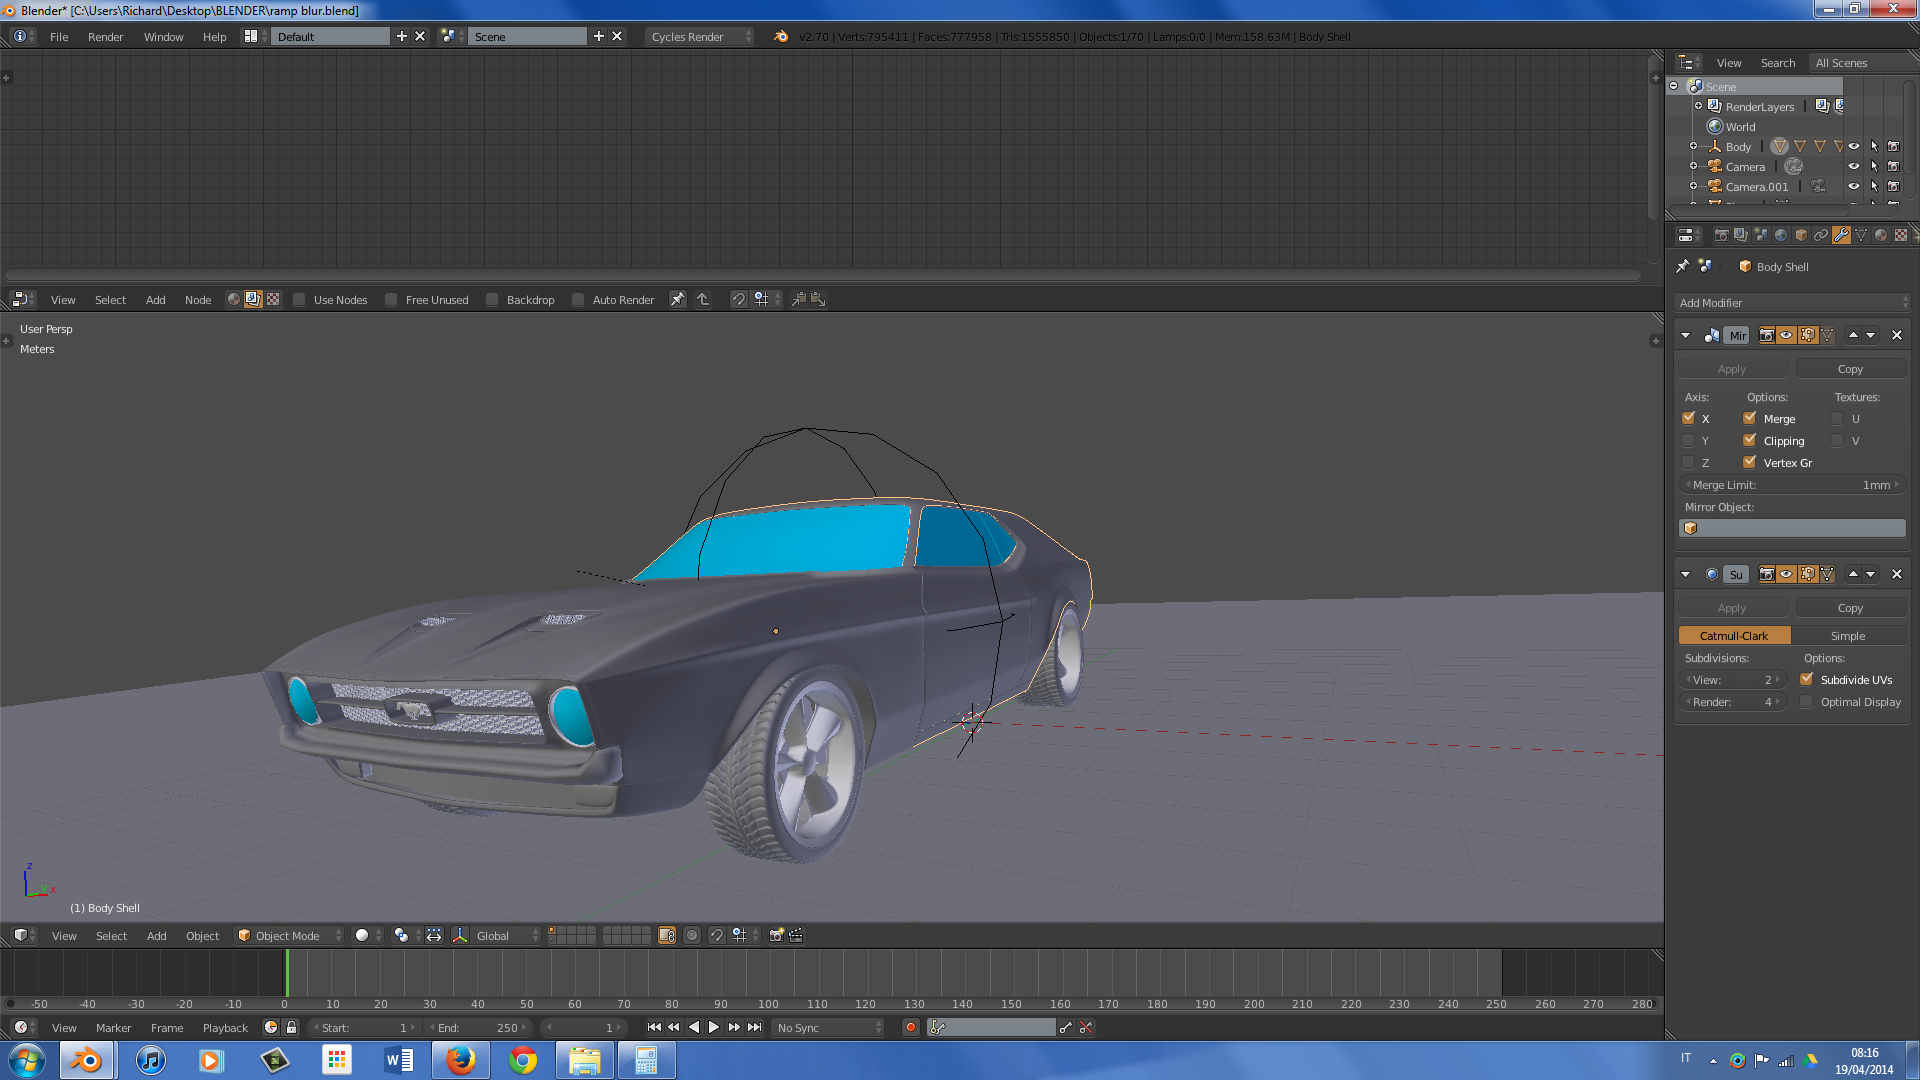
You’re right Thornton, I rotated wheels above 100 mph, 300Km/h (186mph), in a 24fps and I got too motion blur. I have an another problem: when starting rendering, BVH takes about 3minutes when doesn’t crash, I never seen something like this before and verts are 853896, not really far from my Cobra (774972) wich takes less than 10 seconds four BVH.
For testing the problem, I imported in a empty scene a Mustang (Shift-F1) and verts have grown up to 795411, whithout changing anything! Why that?

After fixed some issues, I decided to post the final result in finished project.