0rAngE, thanks again man :)…yep that’s me v3.0. 
hehe, didn’t know it was you.
James_Z, than you 
blenderAC, thank you
Cheers guys, glad you like my stuff !
-R
0rAngE, thanks again man :)…yep that’s me v3.0.
hehe, didn’t know it was you.
James_Z, than you
blenderAC, thank you
Cheers guys, glad you like my stuff !
-R
Hi guys,
I was thinking of giving him this kinda suite.
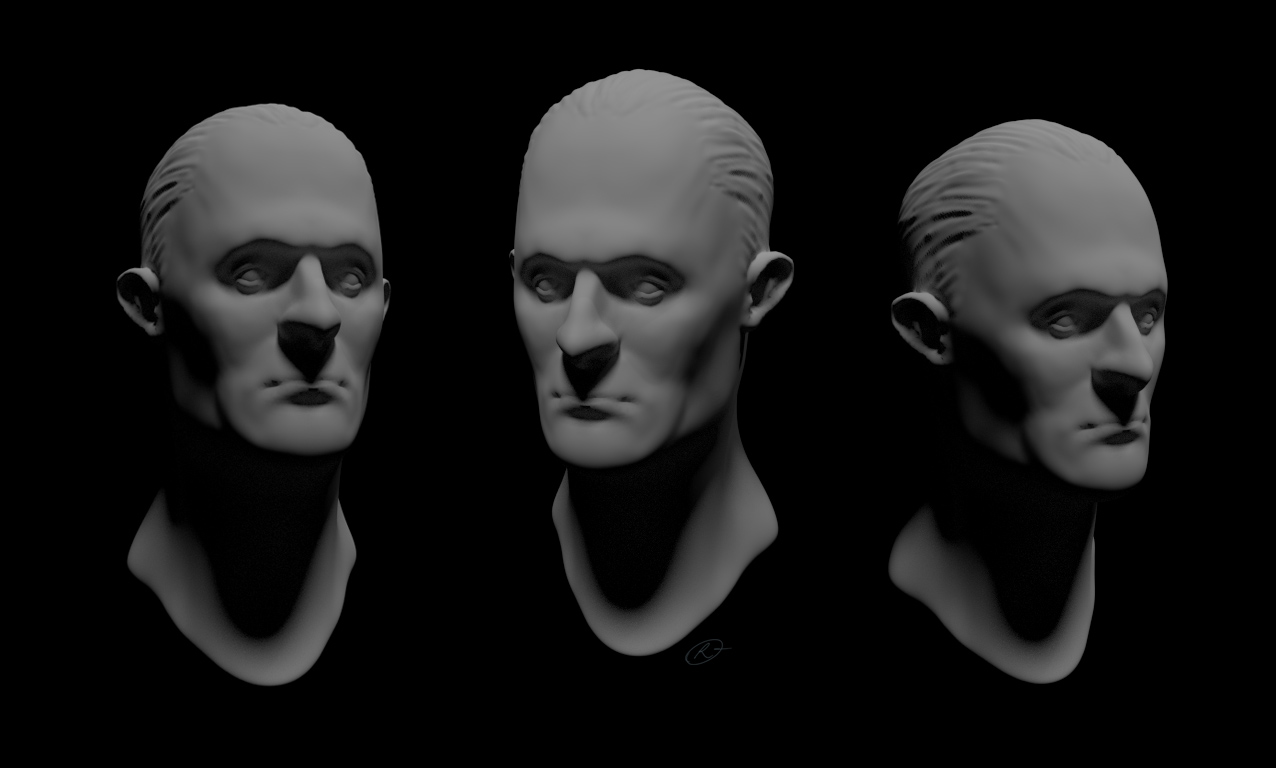
Zbrush screens.
edit: updated, more stuff :eek:
-R
Very very nice.
Interesting thread,
How I missed it? My…
Excellent posts.
Thank you very much Michalis
I’ve dropped the blender sculpt from my previous post into zbrush and remeshed the bust. Sculpt some more and did a 5-min polypaint.
Next I used the old GUV uv’s and then I used GOB to send it to blender.
Seems to work fine if you’re in a hurry.
Hope you like him so far.
No post this time.
-R
Great stuff!!
Excellent posts, especially the last one.
Great sculpts, I also really like your textures, subtle but effective. That suit design is quite original, awesome idea!
Milk-…-Man, Michalis and suboptimal, thanks you !
Cheers
-R
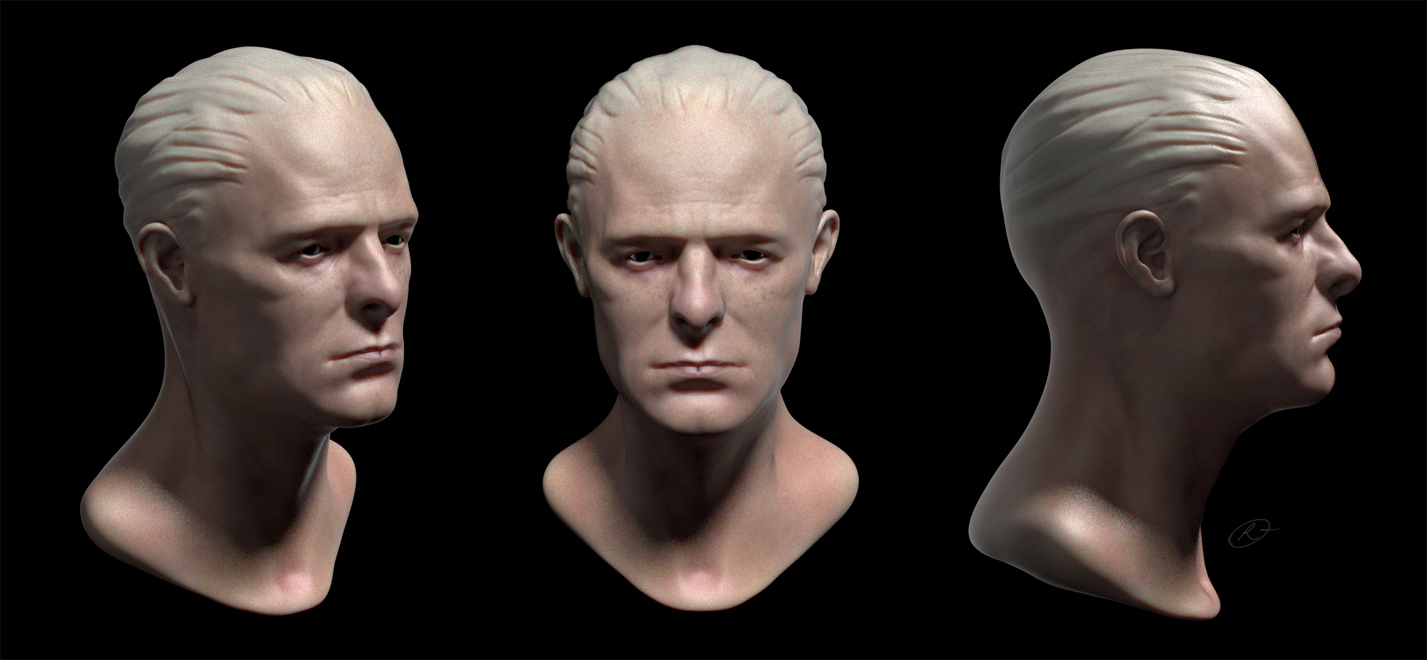
2 testrenders @ 500 samples: first layer of skinbreakup. These are the untouched cycles renders (scaled them dow na little).
Hope you like the update.
-R
Wow! Amazing!
Love it. So subtle, just right.
The skin breakup layer, is that a sculpt (zbrush), or a painted bump map?
Brilliant work, I love the look of your characters, Ranquin! For a sketchbook thread, your models look very polished; you must work very quickly!
I especially like how lifelike your sculpts are. Their imperfections and textures make them very interesting to look at, and your skin shading looks amazing!
Orange, Thank you Raden 
The mesh is has 400.000 polys at this point. I’m still figuring out how to get high frequency detail into cycles.
The render below is decimated to 150.000 tris I believe…
So it’s real geometry, no maps, only one texture painted in zbrush with polypaint. I must say that I’m kinda surprised myself…blender keeps amazing me.
James Candy, thanks man !
Glad you like them The skinshader is almost the same as Kent Tramell explains in his awesome tutorial at Blendercookie.
I’ve just started working with the hair/styling tutorial/…/too
-R
Awesome! I hope to do something like that one day.
naitt, thank you , you’re to kind
-R
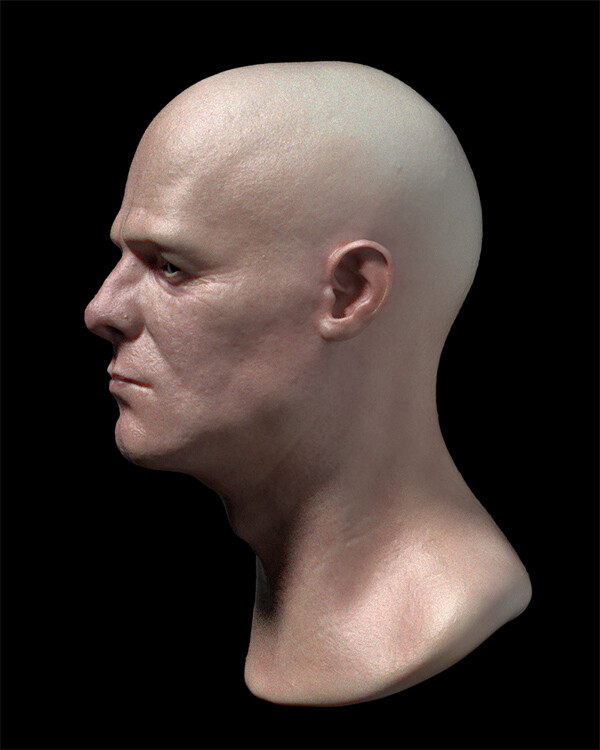
Small update (I added a hdri )
Hair is (clearly ;)) a paintover and the render has some levels adjusted.
edit: I’ve decided to remove the paintover
edit #2: brought back some paint and some fun.
-R
Hi guys,
EDIT: haha just figured it out… I was using the wrong shortcut al the time alt+rightclick and should have used ctrl + mm.
I’m having this navigation issue that drives me crazy.
When I zoom in ortho view the viewport always jumps into perspective. Panning works fine.
I have -auto perspective- enabled in the preferences.
How do I stay in ortho when zooming ? (following a BC tut)
Thanks
-R