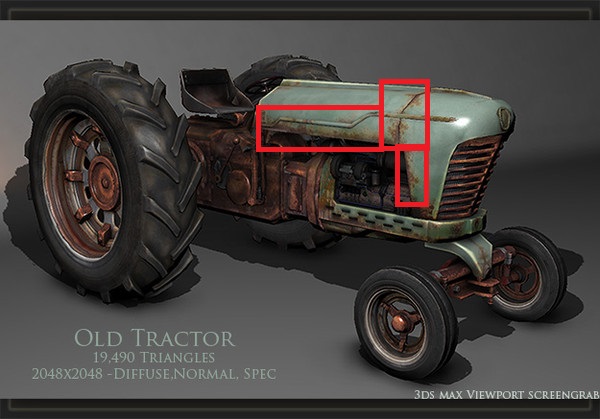
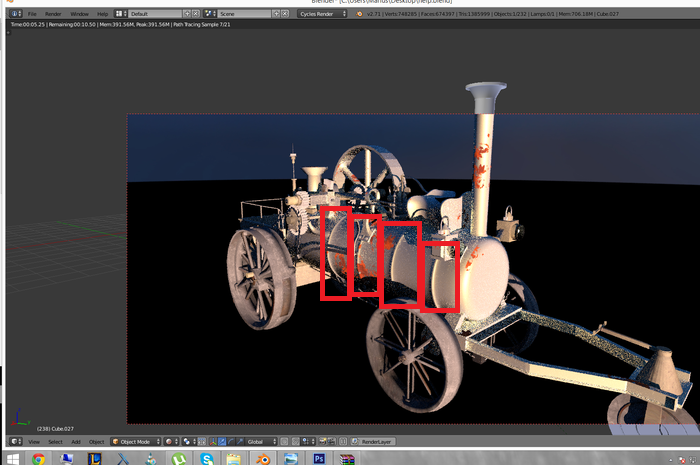
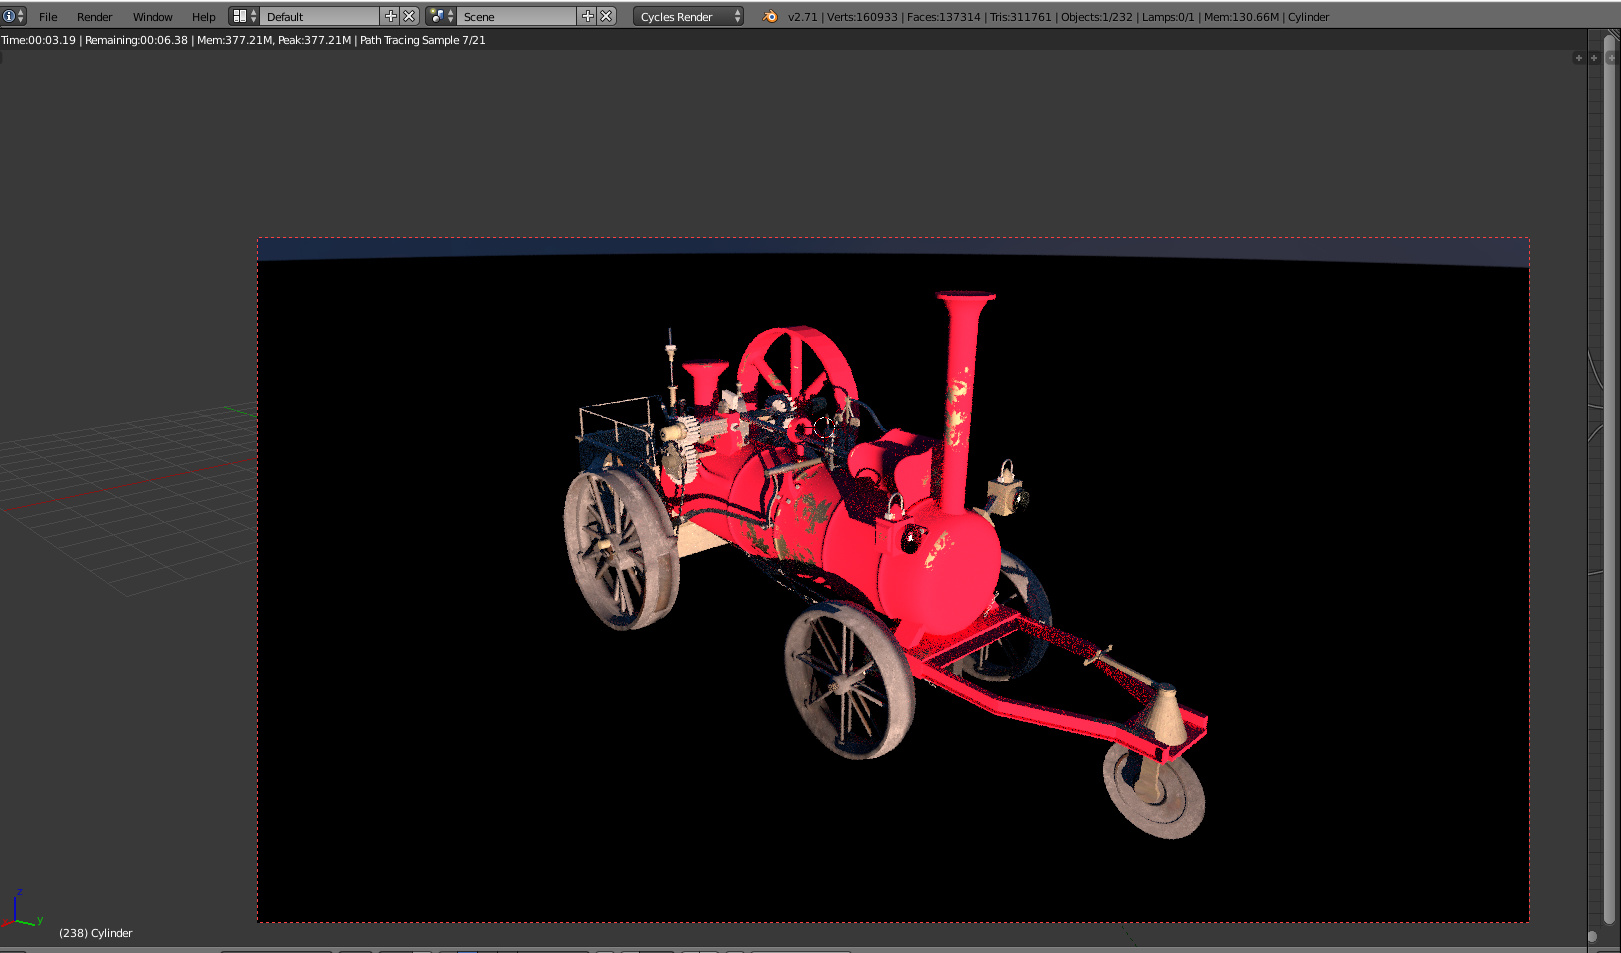
Right now my main focus is to achieve this rust realisim. I now managed to paint out the uv map with texture paint to make the rust where i want (highlited in red) But i want to achieve the realism of the texture as the first picture. Becouse as you can see on my image even thought im using a painted texture etc, its not looking good at all.
Edit: Solved this problem. By switching them around.
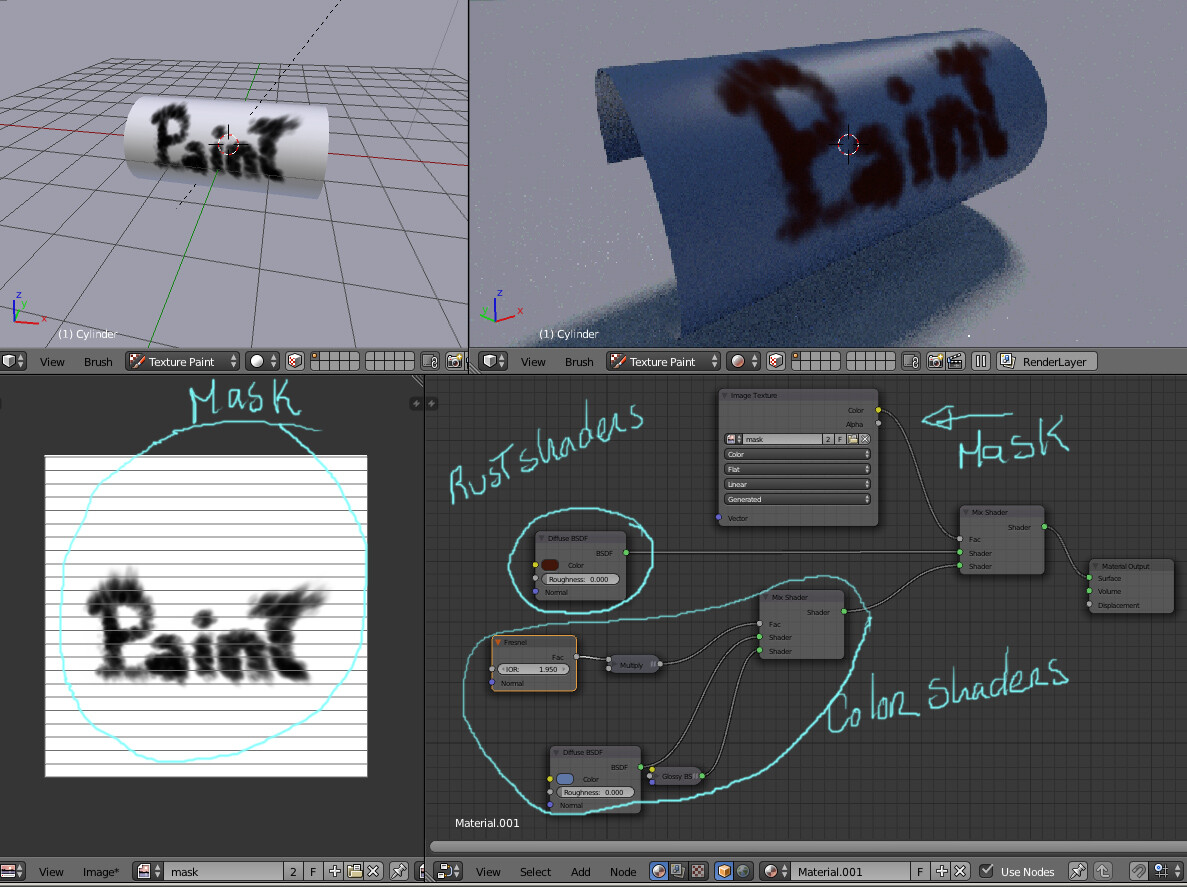
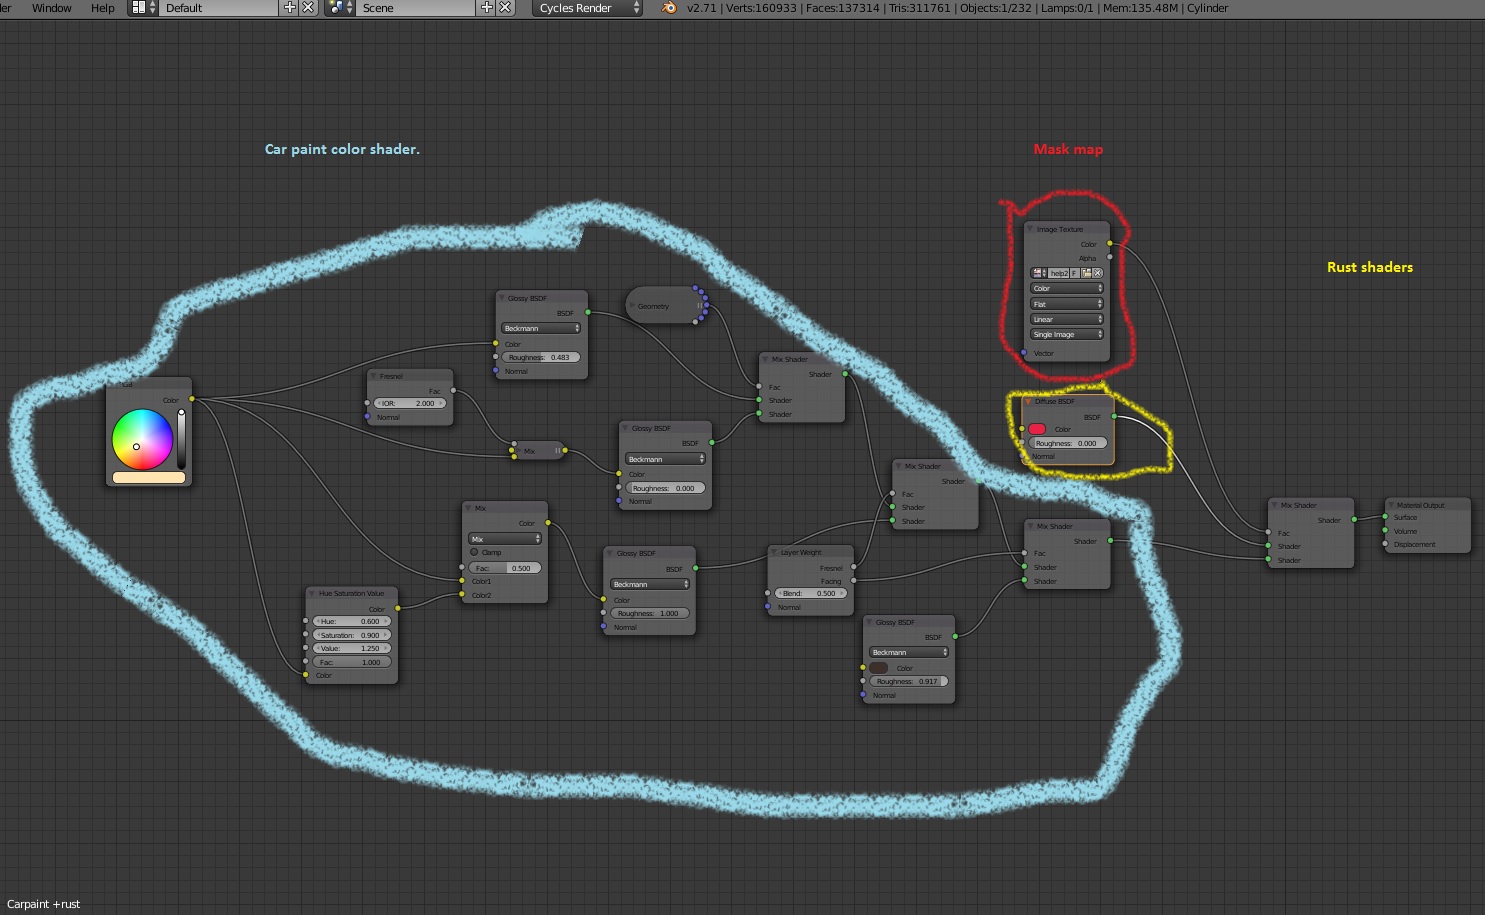
So i tryed your way without andrews tutorial i already had a carpaint shader that wokrs if connected to material output> surface. But when i tryed doing it all with a mix shader thats what i got. What could be the problem? Also before this i tryed combining andrew prices tutorial rust with my car paint and the mask ofcourse, but i failed to find a way becouse in his tutorial the main base paint is an image texture and what im using here is car paint, so i cant connect those 2.
just switch the inputs of the last mix. The Mask is interpretaded as: Black will become the top input (where you have red), and the White will be the bottom one ( your car shader.) if your mask is inverted, you can simply connect your rust to the bottom input and the car paint to the top input.
Yeah i figured that out it helped thanks. Right now im facing other problems will upload a pic soon.
EDit:
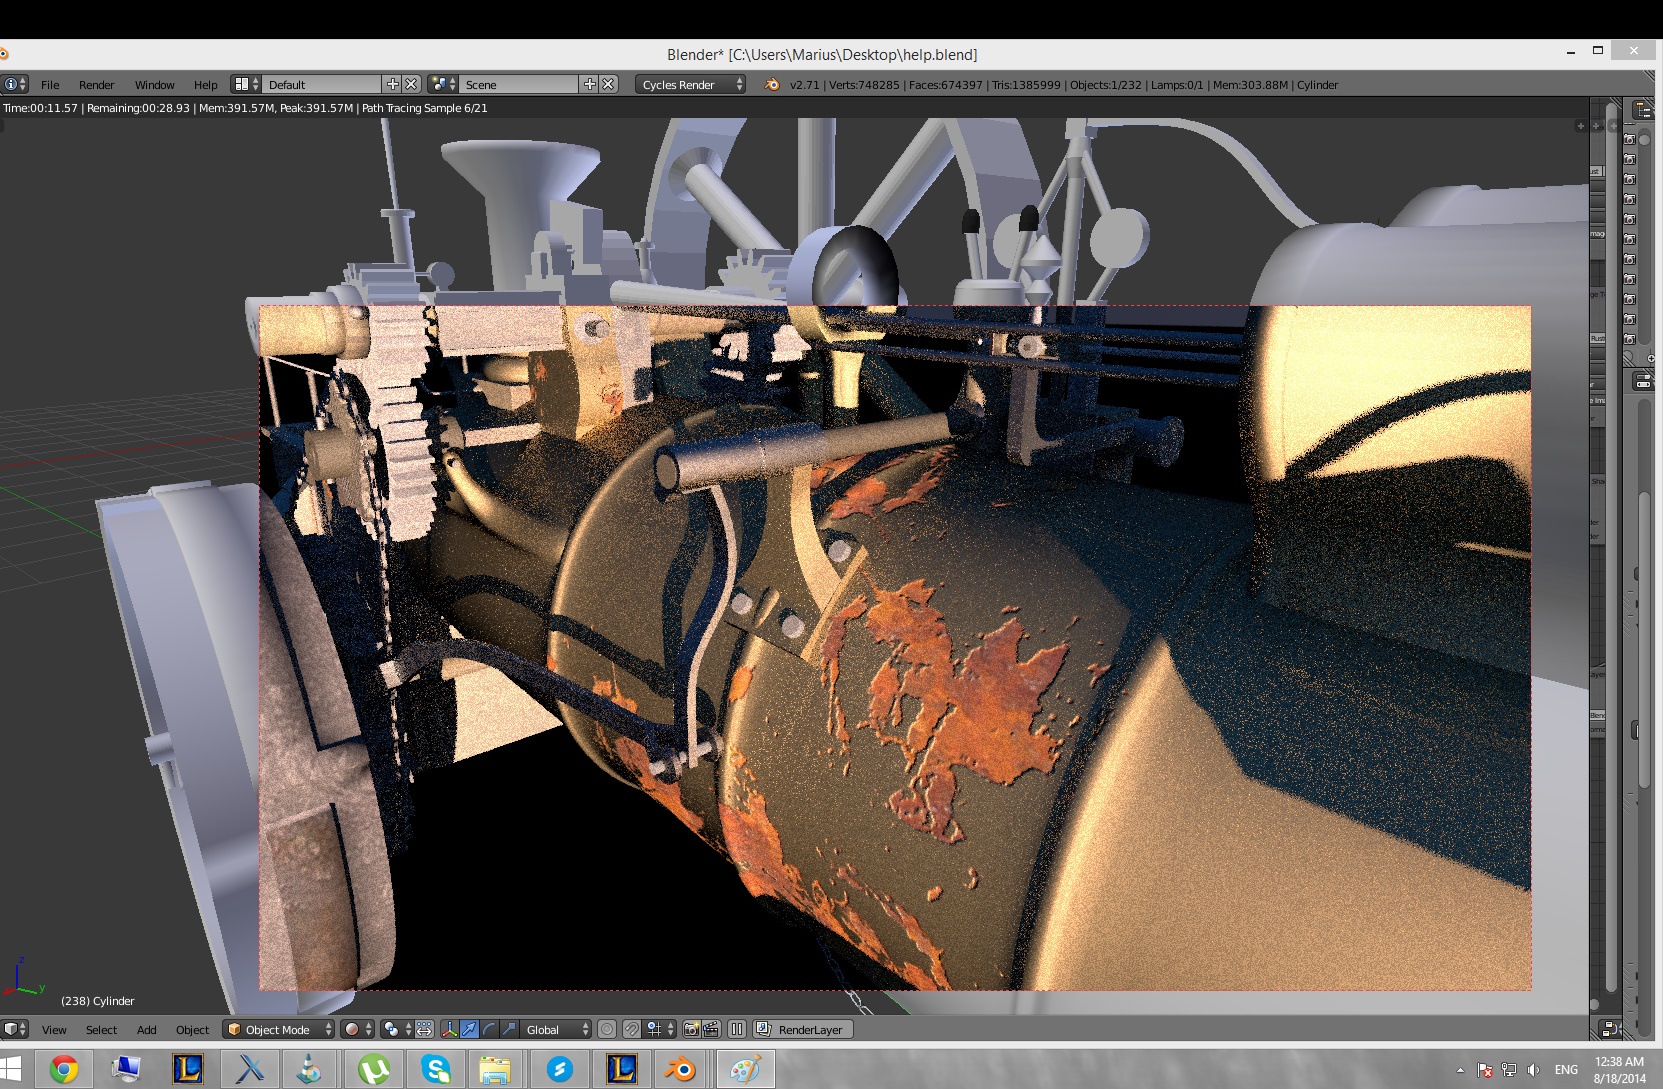
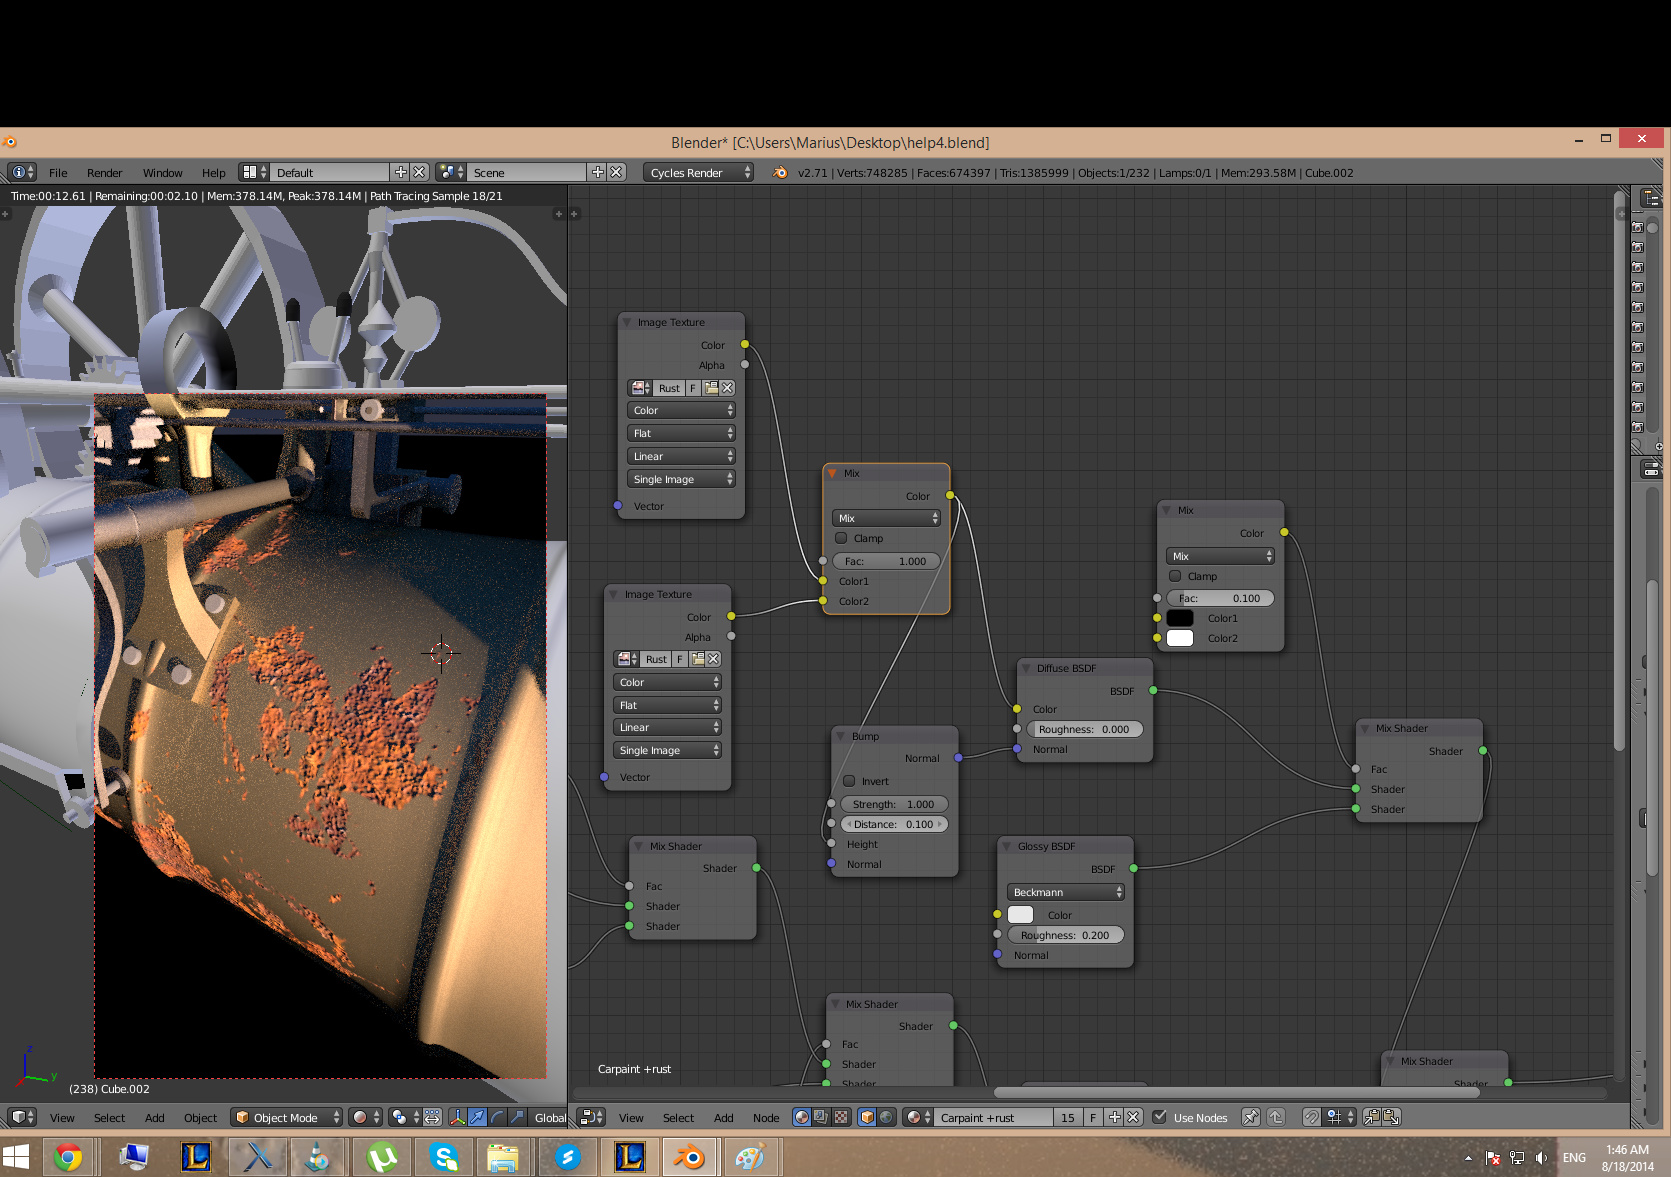
Okay so the main problem is i fallowed andrews tutorial etc, if doing everything like he does the result is quite okay(When not using a car paint material and using everything in rust like he did). But Since now im using a mask, displacement only works for the part of the mask. And as you can see the result is a bit off. I tryed using diffrent rust textures but not sure it looks good. Any ideas on how could i improve the rust? Or am i doing something worng. Im gonna also supply my blend file if it is needed. https://www.sendspace.com/file/0e74hr
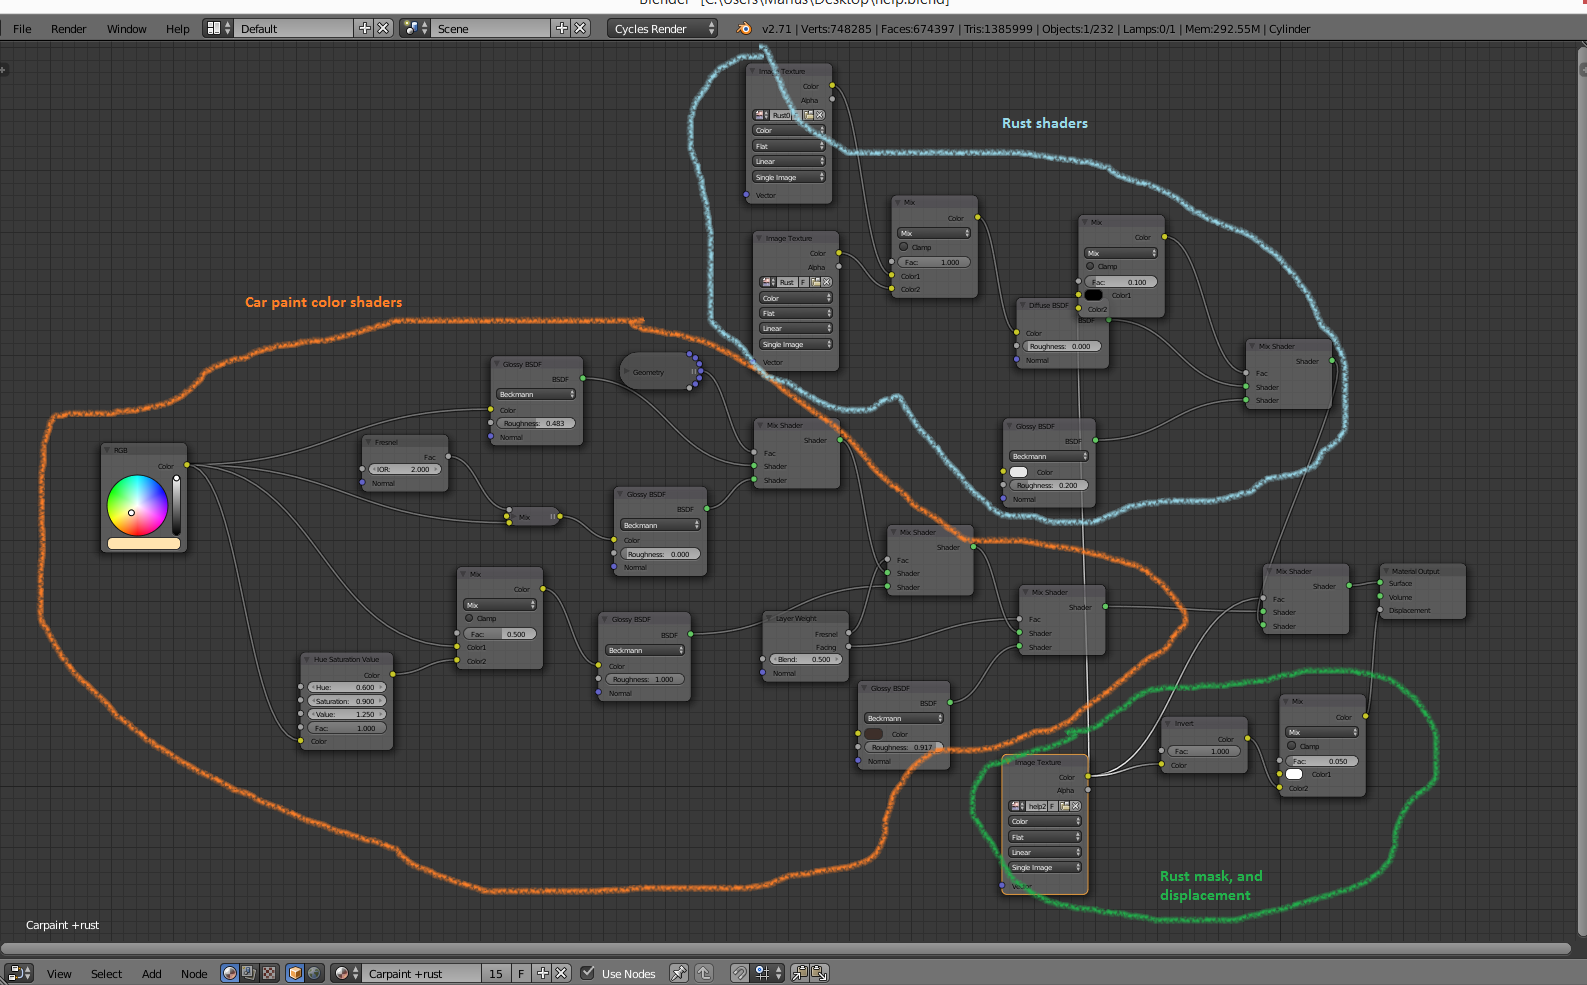
if you connect the texture in the ‘displacement’ slot of ‘Material Output’ then the texture will affect ALL the material… this means all the shaders that are in your material.
you can use the bump node and connect the texture to the ‘normal’ slot of each shader that you want the texture to affect.
Sorry but i dont quite follow here where should i place it? Becouse whenever i tryed placing it the result is the same.
Im gonna also supply the blend file of my project https://www.sendspace.com/file/0e74hr in case you need to see anything. ( I have never used bump ndoes before) and still this is my first blender project so im sorry for the stupid questions im giving.

EDIT 2:
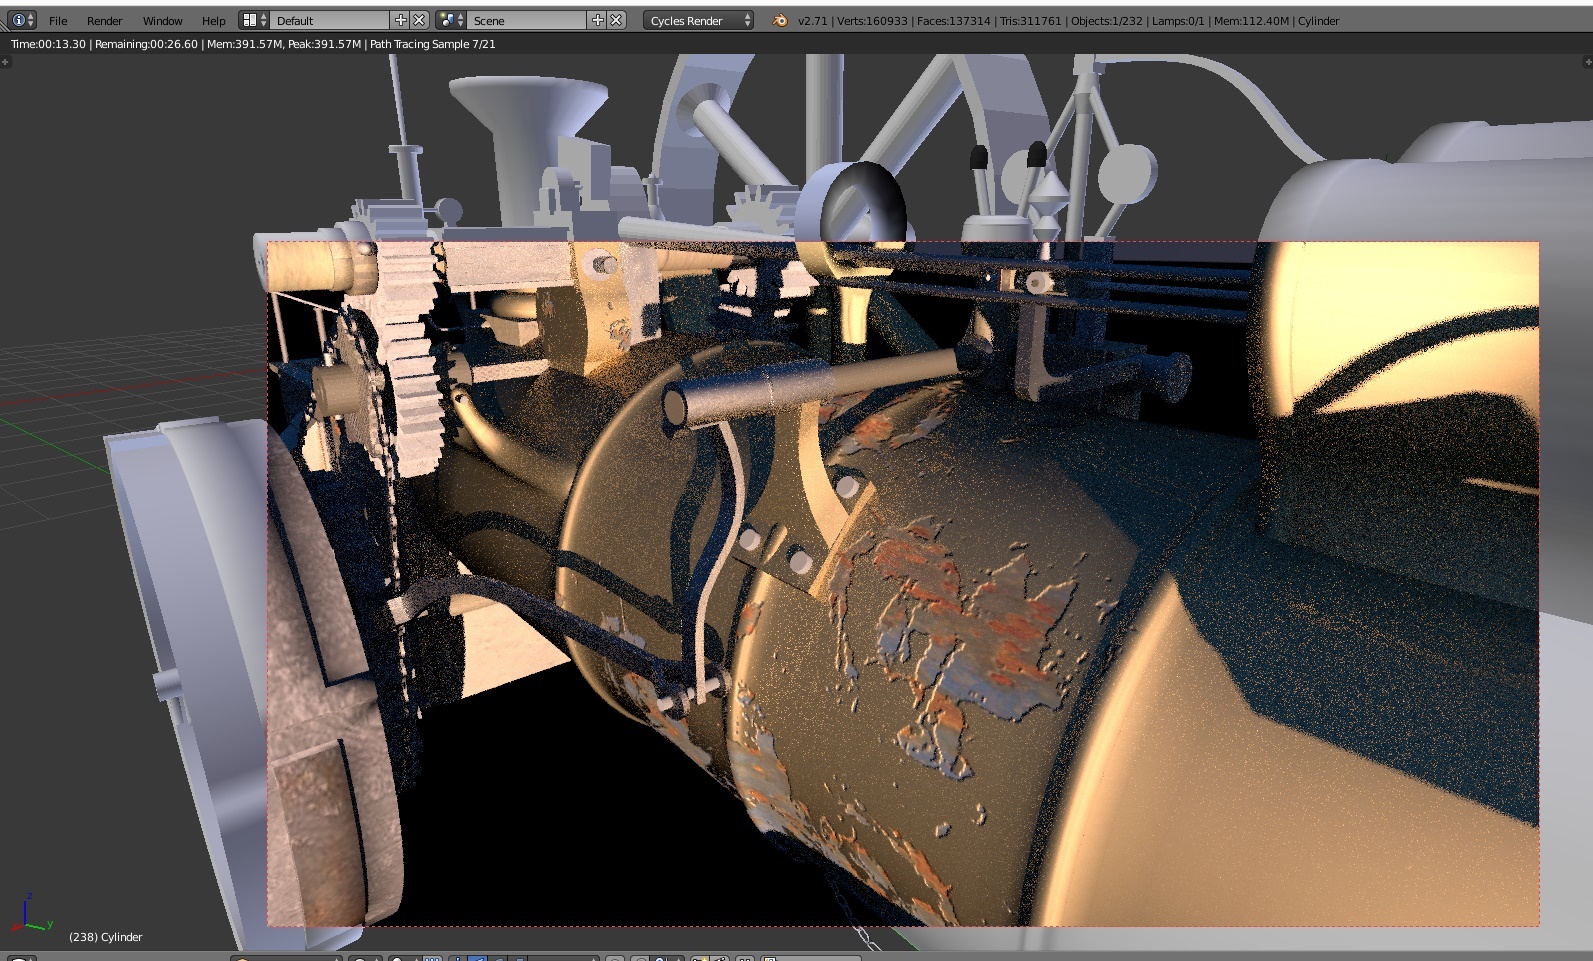
This is the only result i managed to make but its kinda wierd
you can lower the strenght in the Bump node, if you want. And make experiments, and read the documentation of each node. Bump Nodes are quite important in every shader, and knowing how they work its allways a good thing.
I’ll look to the file tomorrow, as here is allready late.
Same as here and once again thank you for your time and help and sorry that i trouble you so much with this scene. I really wanna learn these kind of things for the future of my blender experience. As this is the first ever texturing ive done in blender ever. Thank you really very much once again for all this help you are doing.