My hair is emitting from the head object origin not the mesh. Like out of the center of the head.
hair.blend (738 KB)
This is an incredible script! I really like how much easier it is to create hairstyles!
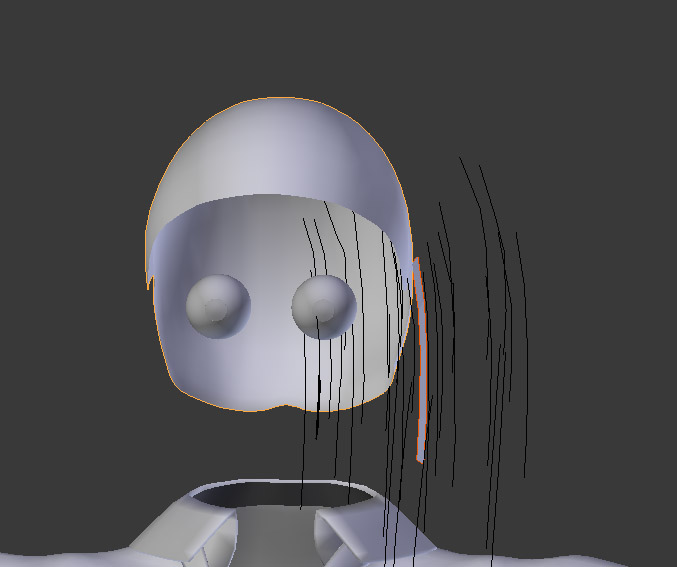
I started experimenting with the addon today, and I noticed that sometimes, the hair particles would follow the guides if they were sheets, but when I tried using curves, the particles wouldn’t follow the guides correctly. I have the origins of both the head and the curves at the center of the viewport, but I can’t figure out what’s wrong.
I think I may be having an issue similar to kazinger.
[ATTACH=CONFIG]250709[/ATTACH]
This is a really amazing script and I can’t wait to see it develop even more!
Hey folks, here are a couple things I’ve picked up when working with “hair from curves”.
-
create a Bezier curve and “pose” it as desired.
-
enter edit mode and select the curve vertex nearest the target object, then click the “Set First Points” button to assign it as the “root” starting point of the hair.
-
next, be sure to apply location, rotation and scale for the curve or else the hairs will appear in the wrong place.
-
run the script, select the curve, then a target object and then add a hair system.
Note:
currently the script doesn’t create a unique name for “hair from curves”, so you should change the name of a newly created hair system.
Once you have renamed the newly created hair system you’ll have to generate a second, temporary hair system so that the first system will ‘anchor’ itself to the target object. When you generate the second system, you’ll see the first hair system move to the surface of the target object - now that first system will honor interpolated children.
Delete the second, temporary system for it’s no longer needed.
have fun
I just put my object origins ( head and hair) in the same spot but I could not think of that the other day. But it is strange it emits from the origin and not the mesh. This is adon great as I am not good with a comb tool.
is the link to the mesh permanent? I’m curious whether we coudl animate the mesh and whether the hair will follow… so rather than using hair dynamics i coudl rig using an armature, shapekeys, a lattice, a cloth system, whatever…
or do teh hairs get generated than they’re just like any other hair system??
really curious because i find i can style hair in particle edit ok (though I;m sure this addon will be cool for complicated styles…
I must look at teh api and see what can be scripted with hair particles I guess!!
kazinger: The position data given to the hair system does not account for and object’s location so any movement or rotation you do while in object mode will be ignored by the addon. A lot of plugins and some internal functions behave this way. I’m sure it’s possible to account for object-mode transformations but results tend to be more predictable when done on objects that have no object-mode transformations on them. Using Ctrl-A to apply transformations will reset rotation, location and scale data while keeping your mesh in the same place.
Blender Jax: From the image you posted I will guess that the curve object has been positioned, not the curve points. If you apply transformations to the curve object, it should put hair in the right place.
jdcookie2010: Thanks for posting that information. i may be able to use that “Set first points” command to help the script determine where the hairs’ roots are.
After you mentioned it, I noticed that hair systems don’t don’t correctly anchor (as you said) to the target object. They do seem to render correctly, however. In addition to creating a dummy hair system, removing a hair system from the object will also ‘convince’ the hairs to draw properly. Going into edit mode to ‘touch’ all the hairs, also seems to get hair particles to draw properly.
I’m curious about the naming problem you mentioned. The script is written so that hair systems get a unique name when they are created but if you click the “create hair” button again it will “reuse” a hair system. I made a simple hair system from curves as a test and it seems to create a unique name for the particle system the way I intended. It seems to me that it’s working properly but if you think it’s missing something I’d like to hear more about it.
Micheal W: The hair’s link to the mesh is not permanent. Making hair is a one-shot operation but the addon can preserve some data between operations. I don’t know for sure but I think I would have to make a branch of Blender to make a permanent link between hair and mesh data. But it may be possible to copy keyframe data from a mesh to a hair system.
?? to technical for me. All I know is with no rotation or scale my hair emits from the center of the emitter not a face. I just moved the mesh in edit mode so the emitter and the hair object origin mesh was in the same spot and the mesh was where I needed it. there was never any rotation or scale on the object.
Really good !
It is possible to use curves insted of polygons ?
It’s fort exporting in other softs like guerilla, maya etc.
That would be AMAZING!
peoplein this thread have beveled curves and had success i think.
Very funny way to generating hairs … thx !
Dear Jandals,
I’d really like to second what Michael W said about the possibility of animating hair by animating the mesh - I think that would fill a hole in Blender’s current functionality. After I designed the hair in my project using HairNet, I tried all kinds of ways to get it to animate via an armature etc (curve guides controlled by a lattice deformer controlled by an armature etc, converting the hair to edges, then to beveled curves, then to a mesh and animating that…). none of them worked successfully. I eventually used polygon hair with a shader that kind of fakes the specular reflection of the hair using a fine level wood based texture - not ideal either.
Anyway, the point is that animating the hair caused me a big headache, and if you could get particle hair to animate via a mesh, that would be even more awesome than the ‘static’ HairNet!
Hi, I am having troubles using this plugin. I am using blender 2.68a. When I try to add hair from sheets it gives me an error about Mesh Guides having different lengths, while clicking on add from Fibers or Curves return a track ball error.
How could I fix this? Thanks a lot in advance! 
Bernardo, I have never seen a “Track Ball” error so I don’t know where that’s coming from. I’ll have to see if I can track that down.
The “different lengths” error is supposed to come up when the sheet(s) you’re trying to use are not rectangular. In order for the plugin to create the hair system, the mesh sheet needs to be a simple grid that you’ve bent into the shape you want. And if you use more than one mesh sheet, they all need to have the same number of rows (along the length of the hairs). The wiki page shows how it needs to be set-up but not very clearly.
Blenderocks, I hear ya. The trouble you had animating particle hair is exactly the kind of problem I’d like to see HairNet solve. The sad part is that I don’t think it can be done through an addon. As I learn about it, I am becoming more convinced that I would have to make my own version of Blender and change how some of the data is handled.
Pitiwazou, I didn’t account for exporting a hair system to another program so I don’t have any help to offer.
Thank you Jandals! Probably my meshes were not perfectly rectangular. I will try again as soon as I can. About the trackball error if there is something I could do about it let me know.
This looks awesome but i’m having probs getting it to work. i’m using V2.68 and HairNet 0.4.5.
i’ve duped part of my head to be a scalp and added a few planes, equally divided, marked the seam etc. in Obj Mode, i click the planes then the head, click “add hair from sheets” but i can’t see anything. If i go into Particle Edit, my Render View window shows a cloudy/glow halo around the head (which looks off-centre to the head), but i can’t see any hair strands anywhere.
i tried pulling the seams away from the scalp incase that was affecting it (they were slightly under the surface, the way you do poly hair modelling). the scalp has a MIrror and Subsurf on it.
any ideas?
TIA
EDIT : My fault, found my scalp origin wasn’t at 0 0 0 . have new issues to make up for it though 
firstly, the hair is widely spaced around the plane, meaning it’s well inside the scalp. also, when i go into particle mode to click the verts as per your vid, there’s no particle showing :-/
any thoughts?
TIA.
It would be awesome this script works with Blender’s NURBS curve tools!
I… don’t suppose this works for the GE right?
+1 I don’t have find how to use curves instead of poly.
The way I see that will be to create a first hair system, paint curves then add some children children.
Convert that in curve and create a new hair system with thes curves.
Like that we will won lot of time and it will be possible to have bether result.
Someone has a link to the script?