Real life has prevented me from doing much with this the last couple days. Work continues, though.
Now, I have been starting with the pipeline for creating the 3D models that will become the dynamic sprites.
Sprites will be pretty low-res (more so than the place-holder ettins in the videos). For now, the standard is 64x80 pixels for a sprite.
By using the internal renderer, disabling anti-aliasing, and using the freestyle outline, I can get some good SVGA-era looking results. Also, this means that the source models and their textures can be very low detail, and therefore quick to produce.
A bpy script should allow me to automate the ‘baking’ process. Render an image, save with appropriate file name, rotate the creature 45 degrees, and repeat 7 more times.
From there, it may be a GIMP script to stitch all the renders into a spritesheet. I’m not certain how I’m going to do that yet. It might even be more viable to keep each sprite as its own image? Something tells me this isn’t the case, however.
I will post some pics once I get a couple of critters fleshed out a little more.
@BPR: I already have 8-directional angles for sprites. This might not be too apparent in the videos, but it’s in there. It takes the angle facing of the source object (the ‘real’ creature is an invisible hitbox which rotates/moves normally, the sprite is a child of that) and the angle of the camera, and rounds that value to ‘snap’ it to one of eight orientations, which is then translated into a mesh-replace argument.
I could post a small demo .blend showcasing the system, if you guys want. It really is a cool bit of code (thanks once again to SmokingMirror!).
There is no ‘over-and-under’ angles though (are you talking like Wing Commander style?)
But this is because these are not needed in my game. Everything is on a level plane, so you shouldn’t ever be considerably ‘above’ or ‘below’ another sprite.
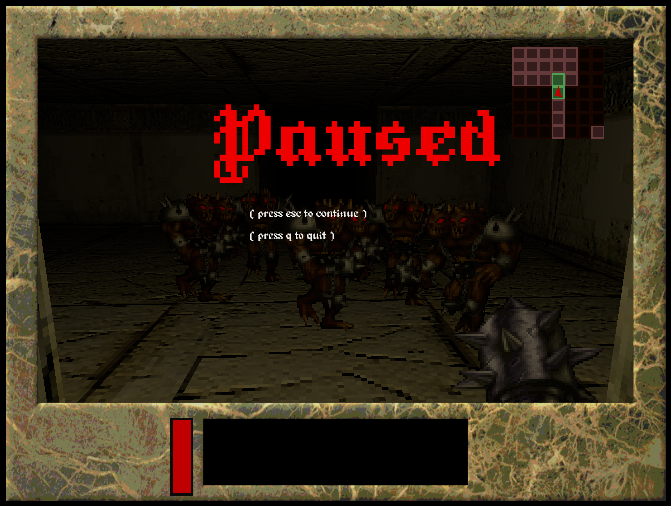
I have been tinkering with putting a frame/border up on the HUD, to more emulate the old-school look, and give a good clean space to display HUD elements
but without restricting the player’s view too much.
I have gotten into posterizing the texture images down to around 8-12 colors, to give the suggestion that it’s all working on a 256 color palette, or something like that.
A blue bar will go on the right side for mana/magic points, and the black box in the middle will hold a scrolling message log (ol’ TextWrapper should be useful there). Other info will go into that frame as well; inventory, current weapon/ammo count, player / dungeon / game stats, a compass, and so on.
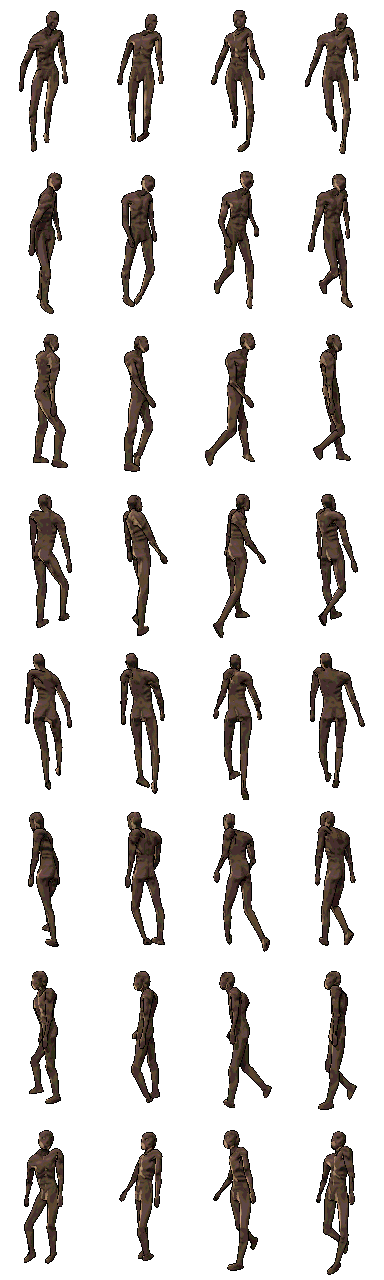
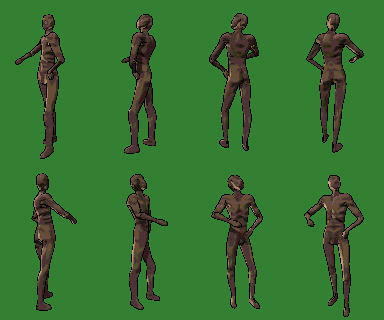
Here we have a test sheet for a generic humanoid; modeled, textured, rigged, and sprite-ified.
(first image is ‘true color’, the last image is after color correction (posterizing).
Dimensions of the sprite are now 96x160. 64x80 is just too small (unless it’s a small object like a potion, or a rat), unless I want to hand-draw all my sprites, which I don’t.
I use PIL the python imaging library to stitch all my sprites, but it may be possible to do something in blender with bpy and texture baking, it would be good to investigate one of the texture atlas (light baking) add ons to find the right code for that…
on my phone I can’t see the difference between the full color and banded color images. It may make more difference with a monster with more than one main color…
You could try choosing a specific 256 color palette and use that for all your sprites, and levels. That would help you to keep a unified color scheme throughout your project. I’ve seen some really good pixel art that does this, the end result can be much more unified and coherent as well as looking nicely old school.
This looks cool, but I’m utterly confused on how that is supposed to work. Running it in the text editor (Run Script button) is the only way I know how to use bpy at the moment, and doing that with that script give no result…
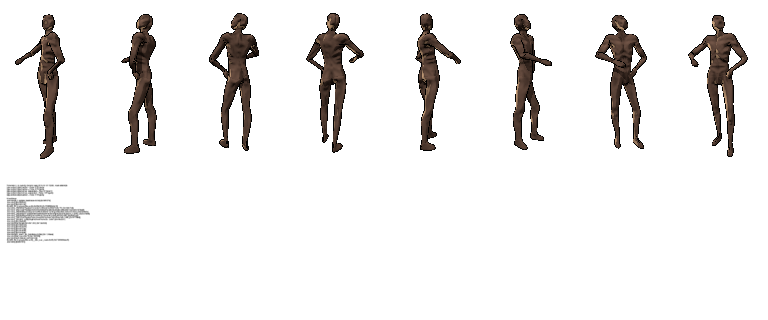
Generated with spritify with zero issues. That is some kind of image magick
(I’m not sure what the document-looking thing is in the corner though…)
Now, to get a script working that will automate the animation process, as that still requires the grunt work of rotate, key frame, advance frame, repeat…
And elegantly working in the actual animation (walk/attack cycles and such). It just needs the key frames to render, but it would probably be a good idea to set it up so the asset creator can still animate it ‘traditionally’, as to make sure it has the right look/feel/timing.
So a script that will go through each key frame in the rig’s animation, and render a spritesheet row (that frame of animation in each of the 8 directions).
Stitch each of those rows together to form a grid-shaped spritesheet. The PIL solution could work for this, if spritify can’t do something similar (it looks like it only does rows or columns, not both?).
Then, Smoking’s mesh-creator script to rip the spritesheet down into meshes. Then perhaps put those meshes into a group, ready for linking into the game.
All of this set up in an Assets Workshop blend, with camera/lighting/scripts/etc all set up, so one only needs to model, texture, animate, and click the Make Game button
So here is a very small demo showcasing the basic FPS rig, as well as the directional sprites.
WASD+mouse to look/move. Hold left shift to walk.
I have worked in some footstep sounds, and a new set of textures for the wall/floor/ceiling. I don’t know how much I like them yet…they need work.
This is just a basic room (no dungeon generator). I put the actual model used for baking the sprites in the center, mostly because why not.
I have decided against using normal maps for anything. This just eliminates a few extra steps in the asset creation process, and doesn’t hurt the visuals much (not to mention a healthy performance boost in the long-run). Most materials will be simple diffusion textures, with an emit map where needed (I gotta have those glowing eyes )
Yes, the “make a game button”. My favorite button.
Looking good, I’m always happy to hear people talking about processes and workflow. Art is 1% inspiration and 99% process. Though I guess talent is in there some where too…^^
Things got hectic today, and not enough was done to warrent a video update (soon…).
I did, however, get the zombie spritesheet easily ripped down and plugged into the game. The only thing I had to tweak in Smoking’s mesh-maker script is the order of directions (all future spritesheets should be following this standard).
The walking animation looks nice. It’s not great, but it’s good enough. It should be painless enough to put together an attack & death spritesheet and incorporate those as well. With that, my sprite scripts should be much tighter and applicable for general use.
I am having a strange problem of output from the spritify script getting into my spritesheet as an extra row of sprites at the end of the normal animation (see about four posts above). For now, I have to crop those out in Gimp. I would like to be able to not have to, though…
Death animations may take a hand-painted touch, as far as doing the blood/gore/etc. I imagine trying to model/simulate that stuff on the 3D model might be more work than it’s worth. This would restrict death sprites to 1-direction (trying to do hand-painting on all 8 directions would be too much to handle). We can assume that most of the time, when a creature dies, they’re doing so while facing the player, so most of the time it wont be noticed (many 2.5D games did the same, probably for similar reasons).
I have fond memories of creating big animated gifs of stick people murdering each other in ridiculous, gruesome ways, always with the most attention to detail spent on the blood (mind you, this was before we had internet access, and before the ‘stickman fight’ thing was a thing). Getting back into that should prove to be fun
A new gameplay video. Not a lot of new stuff to show, but it’s big new stuff
With the right combination of Free Time and Motivation, I have finally got the foundation for the animated sprite-entity relationship.
One animation I forgot to consider is the ‘pain’ animation (when an entity receives damage), so that will have to be shoe-horned in there…
It still needs a lot of fine-tuning and optimization, but at least it’s working. I am about to the point now where I can start cementing the sprite creation pipeline, and start pumping out more assets with confidence that they will be working in the long-run.
As it stands, the zombie consists of 76 frames (4x8 walking frames, 4x8 striking frames, 12 death frames). The dimensions on those are 384x1280, 448x1280, and 336x640. Those sound like some funny numbers, but they should all be multiples of 16.
Next, I will throw together some new monsters and props to add some diversity and really prove the function flexibility of these systems (in other words, work out tons more bugs, I’m sure). I also have some ideas for implementing a more interesting AI, which can wander around more and act a little more natural.
The number of animation frames could certainly be higher, but I think I want to design a bit of ‘choppiness’ into the look of things. The sprite animation system though, will take any number of frames at any frame rate, so there wouldn’t be anything wrong with some monsters having more frames in their animations than others.
And yeah, the player weapon is still just a cheap place-holder. The image I got the frames from had other weapons along with it, and the bottom of one of those got clipped into one of the frames of the mace. I just never bothered cleaning it up. But as it stands, that is the only ‘borrowed’ set of graphics I am still using, so those are due to be replaced very soon.


 )
)