tell us what your planning is then we can help you
when working in 3D you always have to do a minimum of planning it is good practice
makes it much easier afterward !
happy cl
tell us what your planning is then we can help you
when working in 3D you always have to do a minimum of planning it is good practice
makes it much easier afterward !
happy cl
I’m going to remake my UVs, so I need to consider how to make it better.
I would definatly like to see a tutorial on how to do those dirt splatters!
OK, I’m ready now. But first I want to notice that I’m not a Blender-pro, and my workflow might not be as efficient as someone else’s. I’m still learning, so you can give me advice in the process.
So… Let’s start, shall we?
STEP 1: Creating main UV
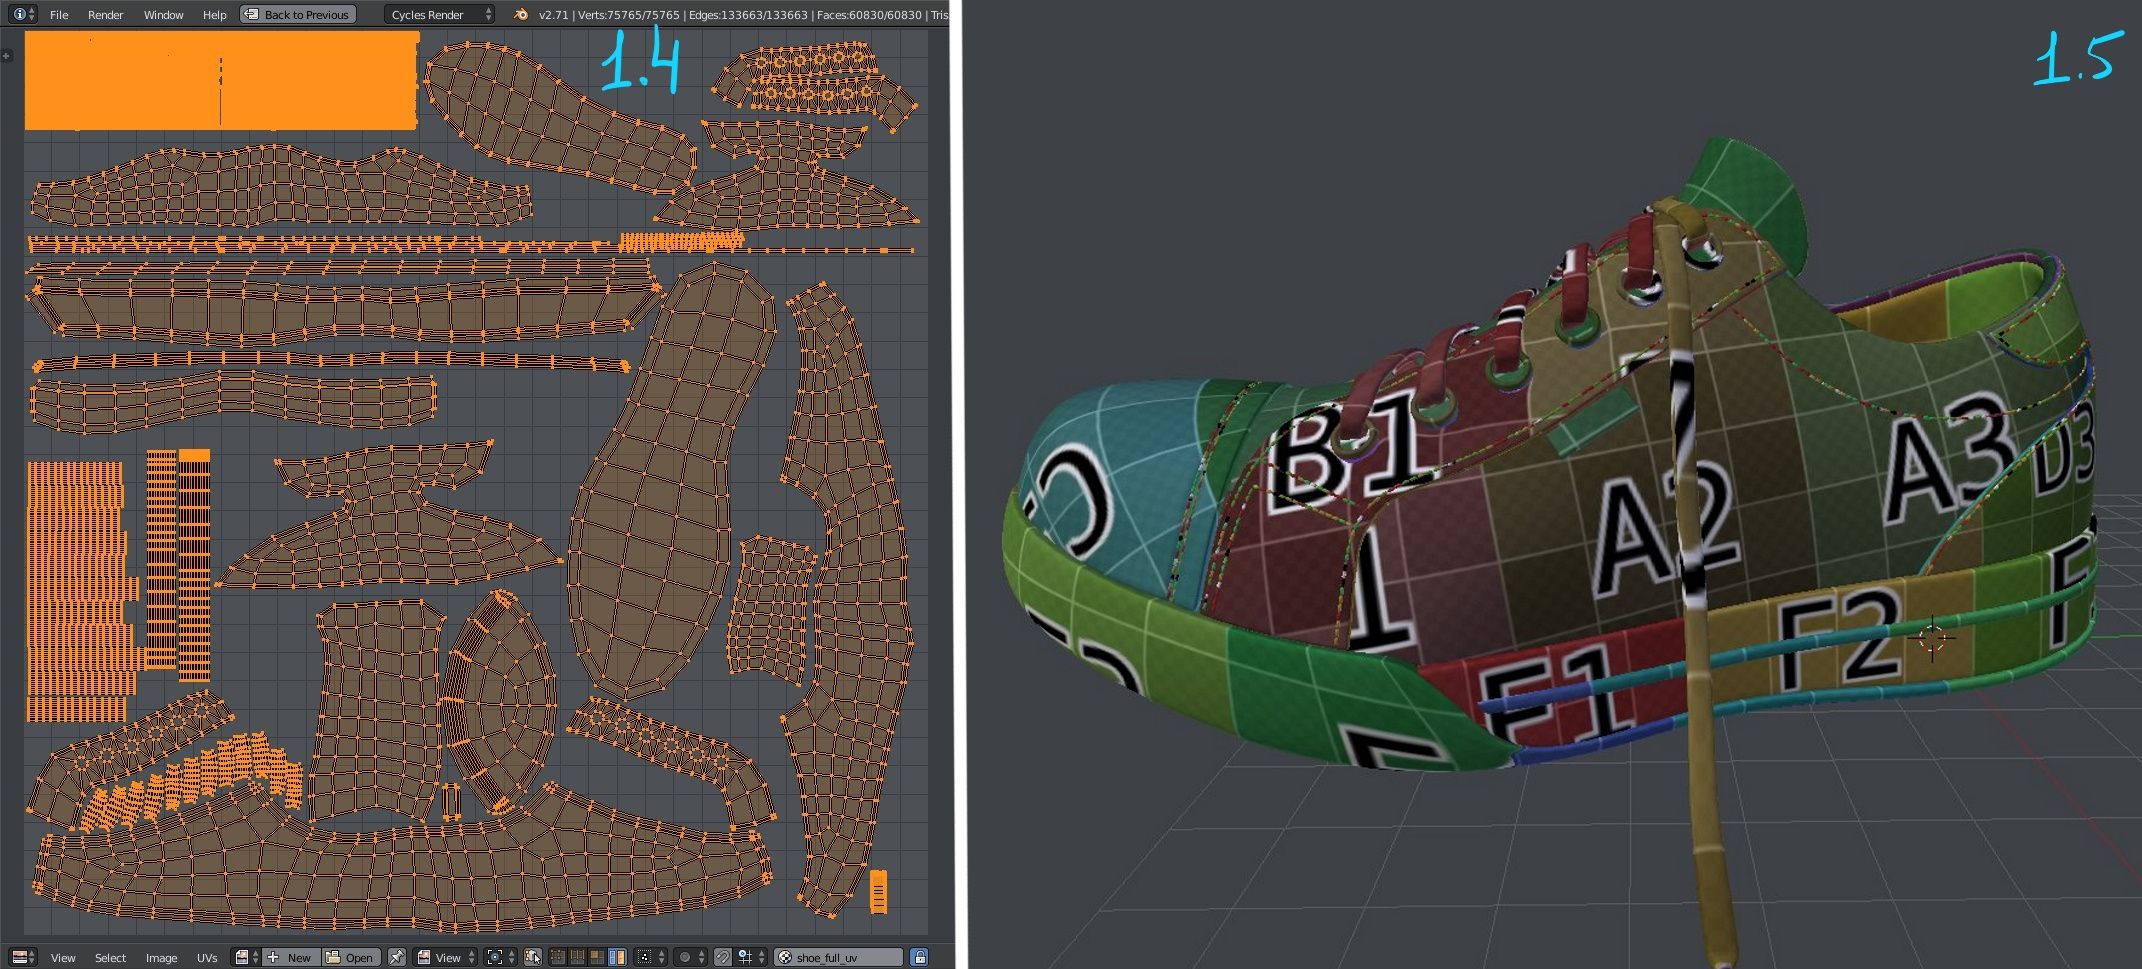
So, I have modelled a shoe (1.1). First I need to create a main UV, which I will use for painting splatters (I’ll create some more UVs further down the line). As you can see, the shoe consists of 3 separate objects (1.2), therefore I used the ‘Texture Atlas’ addon (1.3). I belive, it is bundled with official Blender release, so you don’t have to download it manually.
In the end I got something like this (1.4 and 1.5). It is the most tedious part of texturing this shoe, but also one of the most important one (since I will use parts of this UV in other UVs).
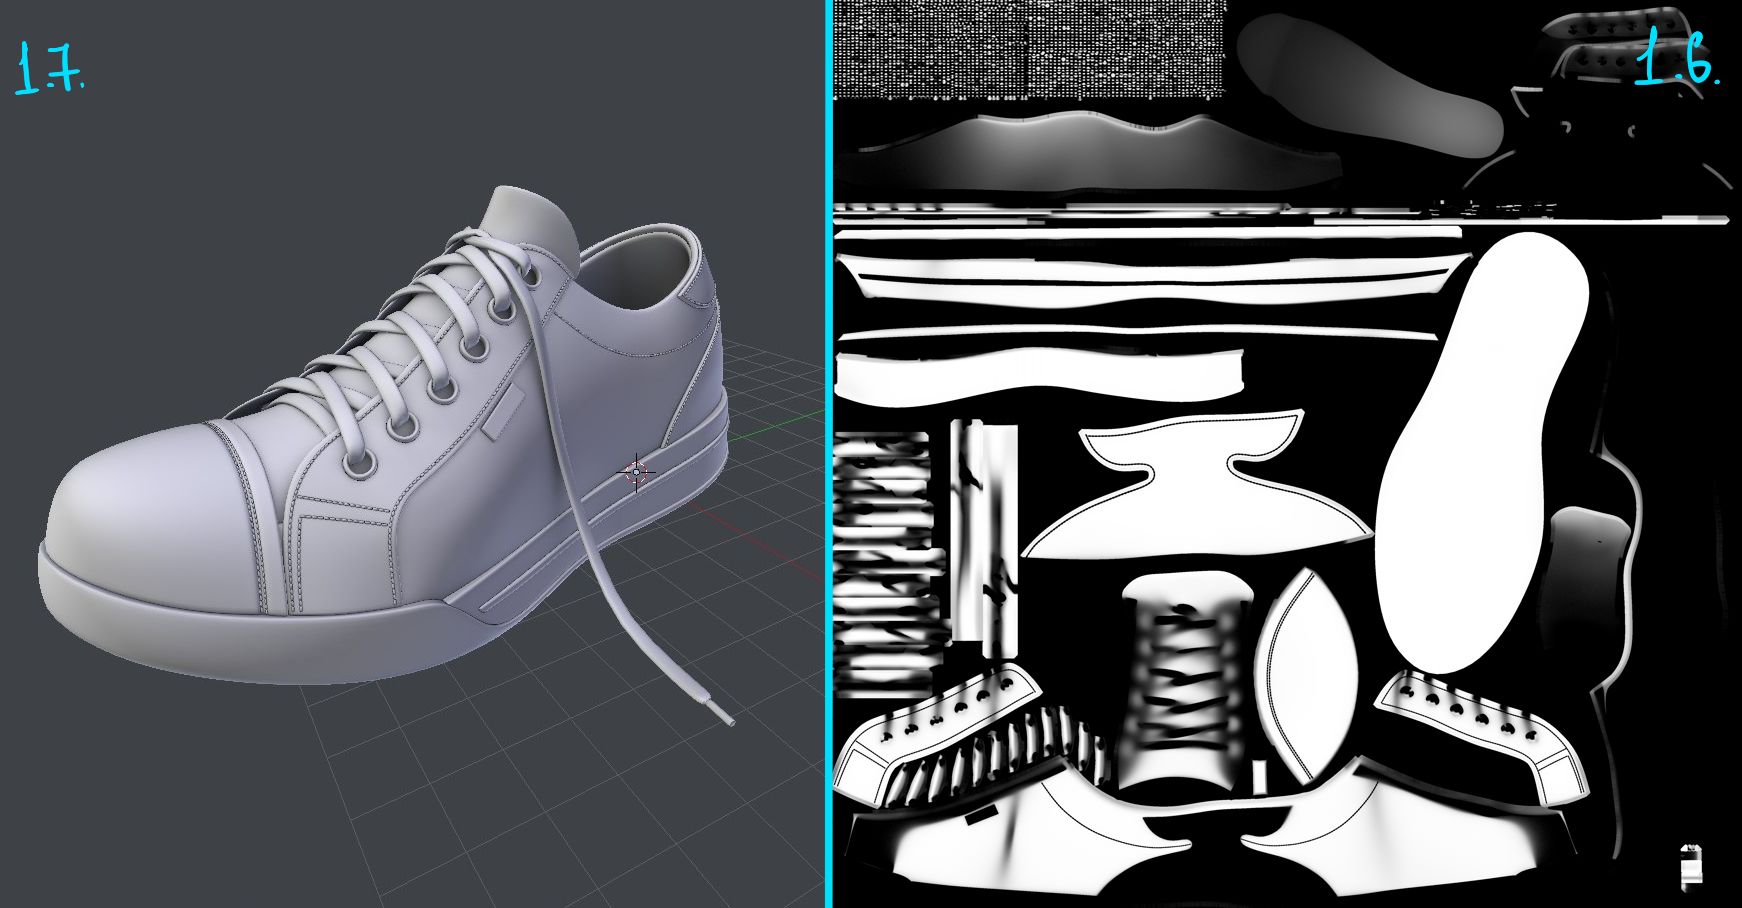
And since I don’t intend to animate this shoe, I’ve baked an Ambient Occlusion map (1.6) for using in materials later. (1.7 - the shoe with AO overlayed).
To be continued.
Elaborate a little !
show the 3 part objects
The Texture atlas addon : Addon for baking UV Maps
Features:
Can you explain how the unwrap is done with this script
is it simple UV unwrap or Smart unwrap ?
Also what do you bake give list of files !
Happy bl
To unwrap with ‘Texture Atlas’ you should:
As to baking, I assigned one material (with active texture to bake to) to all three objects, selected all of them, chose ‘Ambient Occlusion’ from the Bake type drop-down menu and hit ‘Bake’. By the way Cycles baking also works with multiple materials: you just need to have similar Image Texture node in each material. And it must be active (i.e. selected).
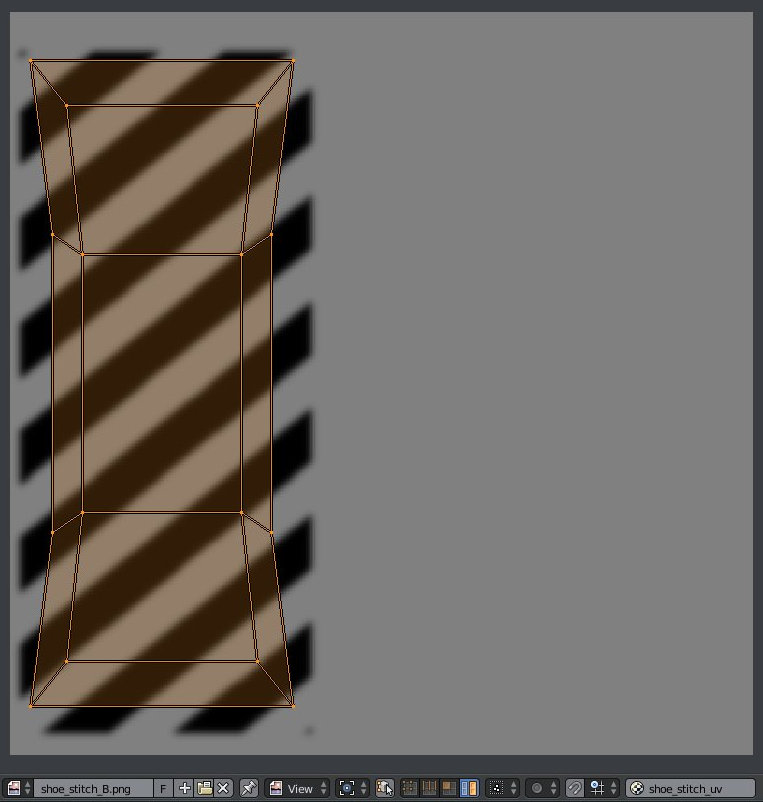
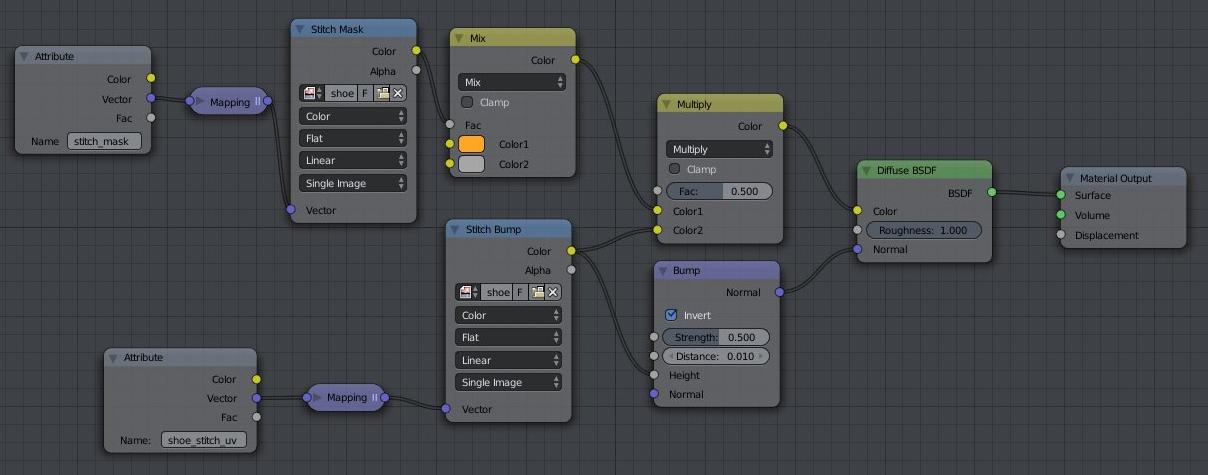
STEP 2: Lace texture
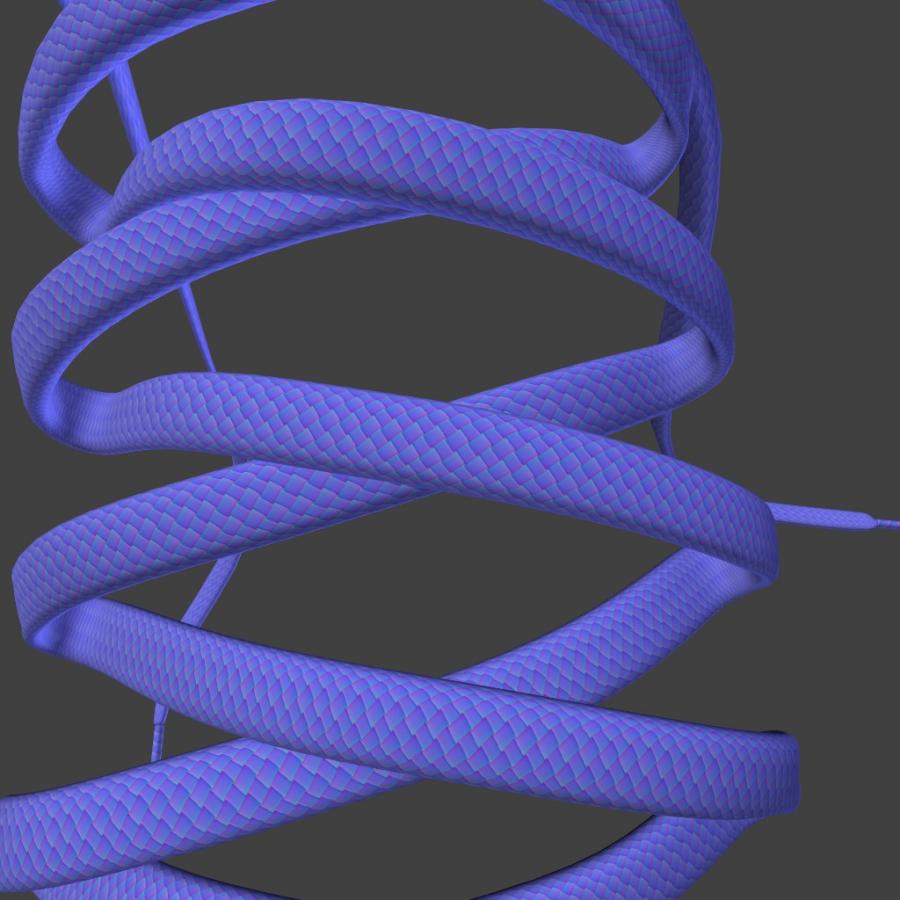
Next I created an additional continuos uv for the lace and scaled it so that it occupied the UV-space by height (2.1). It is necessary for creating a thread pattern effect.
For the thread pattern texture I made a simple object with Arrays modifiers (2.3), and baked textures from it to simple square plane (2.4 - normals, 2.5 - AO (just in case)). I also tried to make those textures seamless.
STEP 3: Inkscape textures
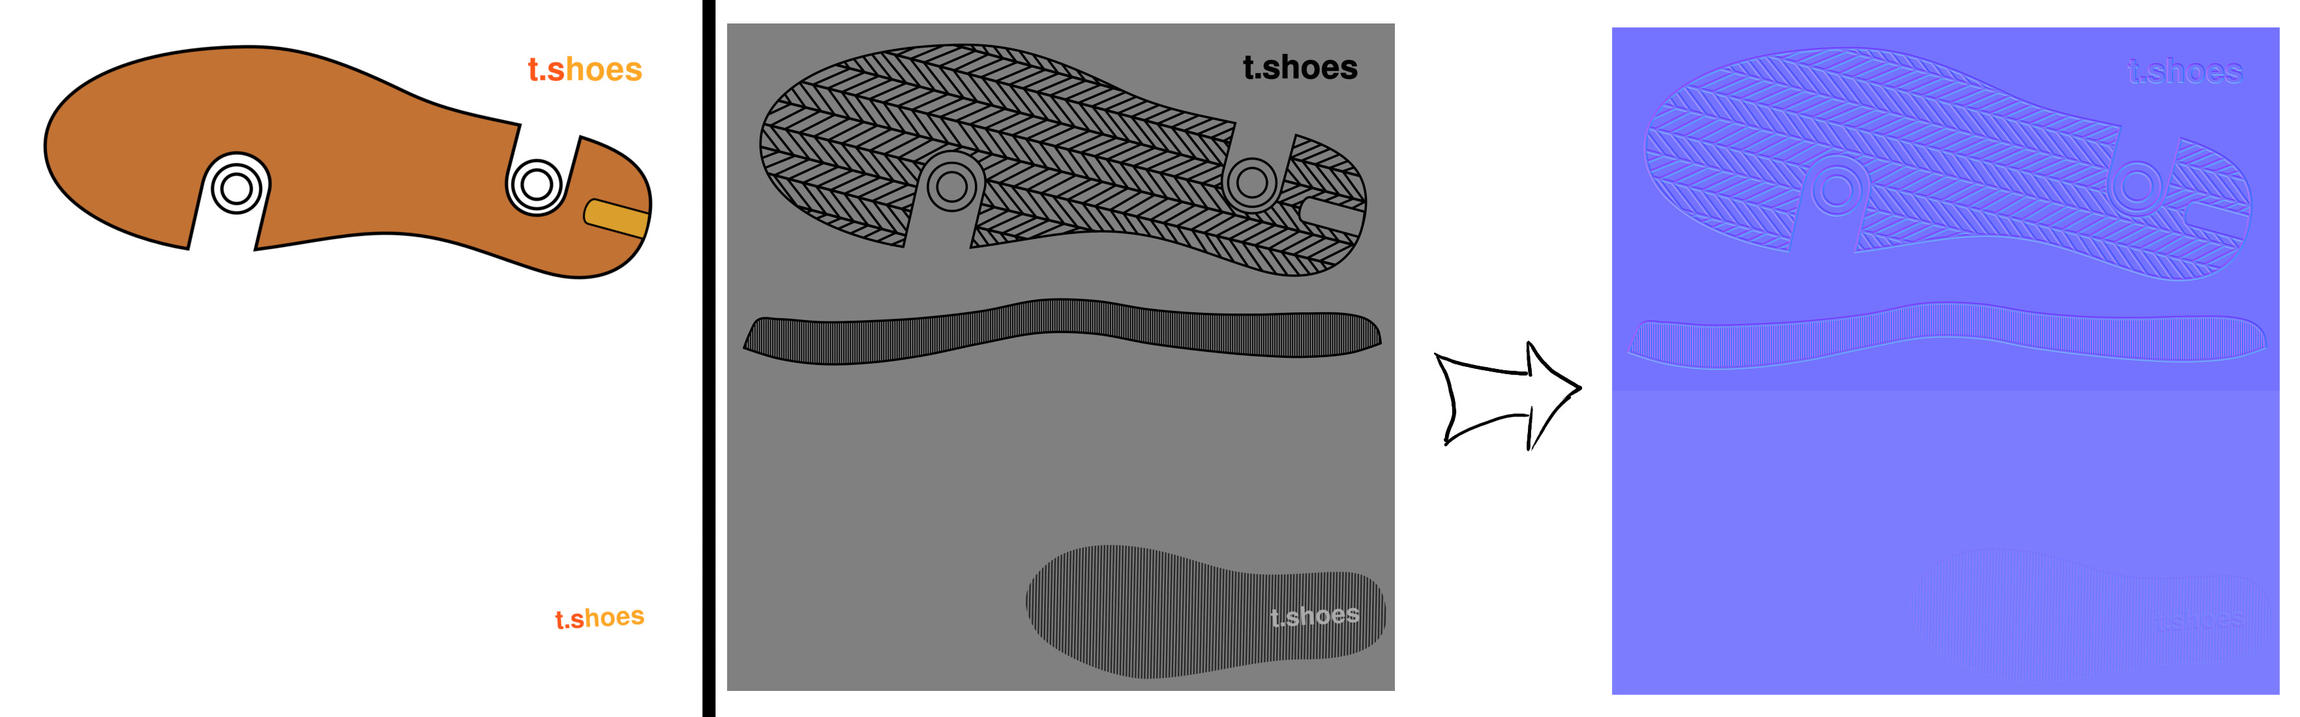
Now it’s time to create another UV, which I’ll use for “special” colour and normal map textures.
And while I was still in Blender, I painted quick RGB-mask (I’ll use it for a colour variation in the rubber material later on).
Next I exported the new uv-map as a .svg file and opened it in Inkscape. And using this uv-map as an outline I created 2 maps (one for colour and second for normals).
Then I opened grayscale “normal” map in Gimp, added a little bit of blur and turned it into real normal map with NormalMap-plugin.
STEP 4: Image textures
This step was very easy. I downloaded a couple of textures from the Internet, made them seamless and desaturated in Gimp (I’ll use them as bump textures).
And I created very simple bump texture for the stitches (with separate UV).
STEP 5: Preparation for painting dirt
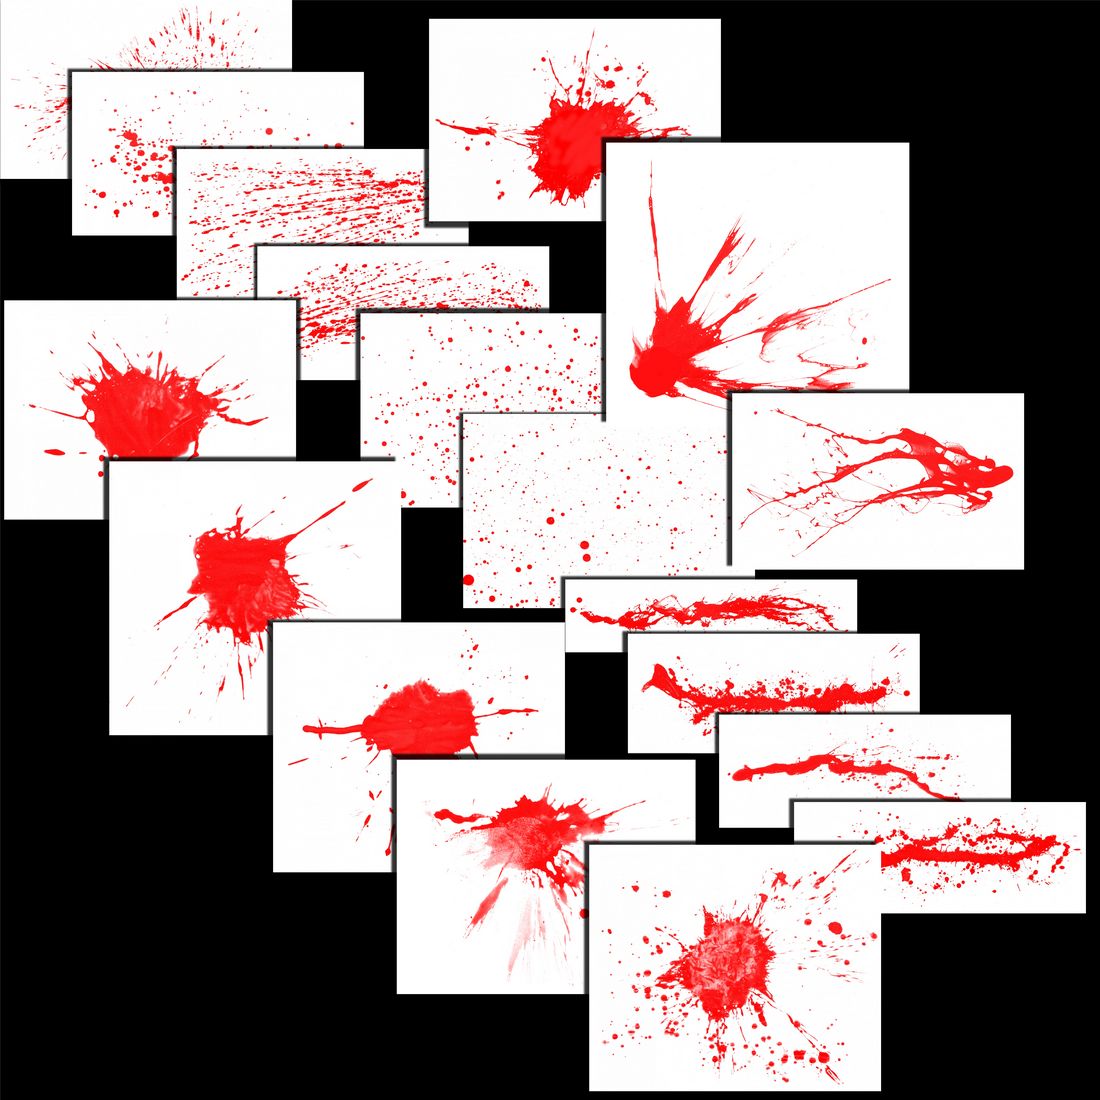
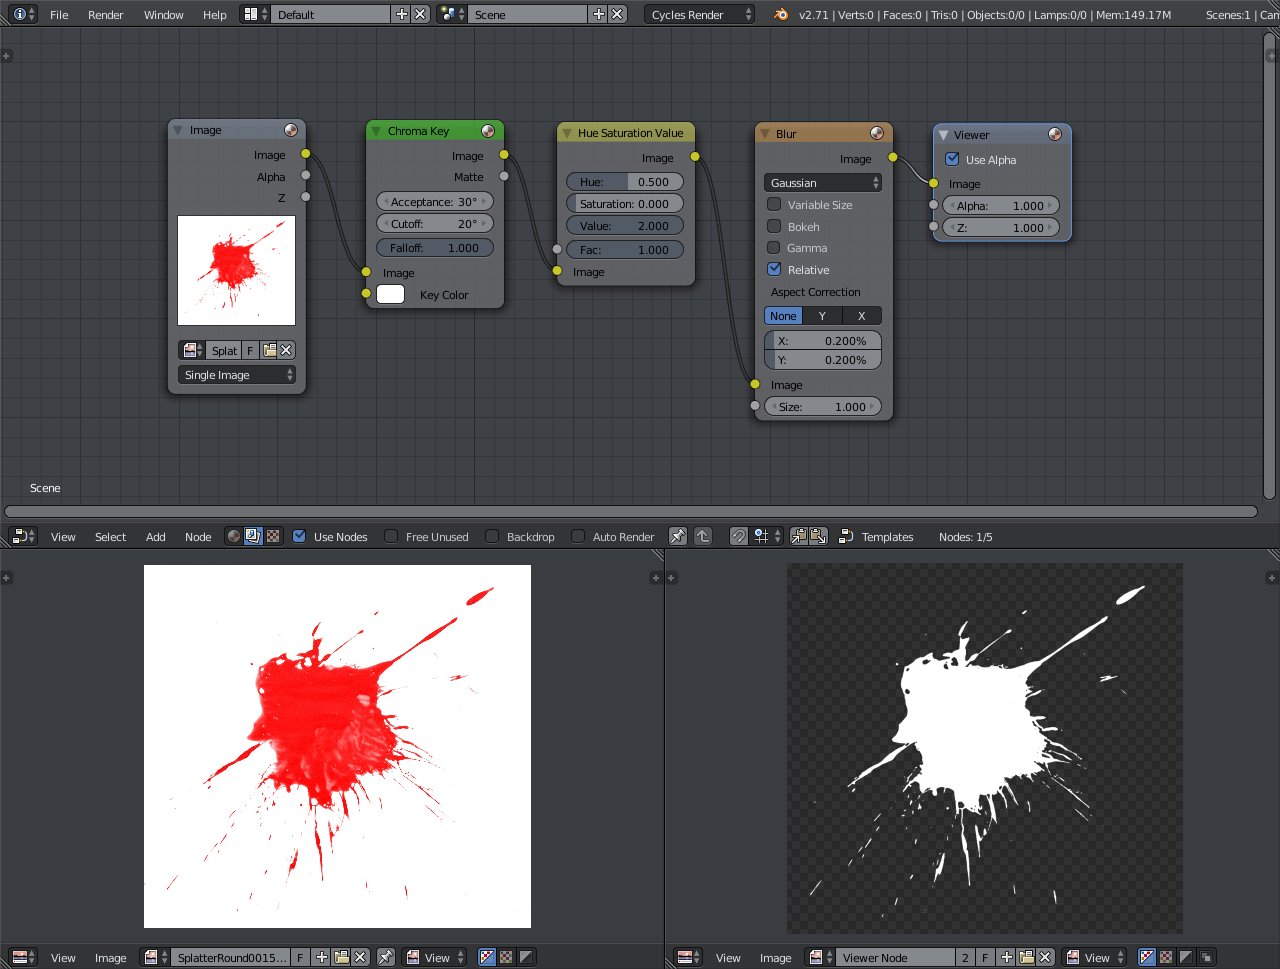
Before painting dirt I needed to make some preparation. I downloaded from CG Textures a bunch of splatters images.
Since those images don’t have an alpha channel, I had to make it myself. And I made it with this simple setup:
And now, at last, to the fun part.
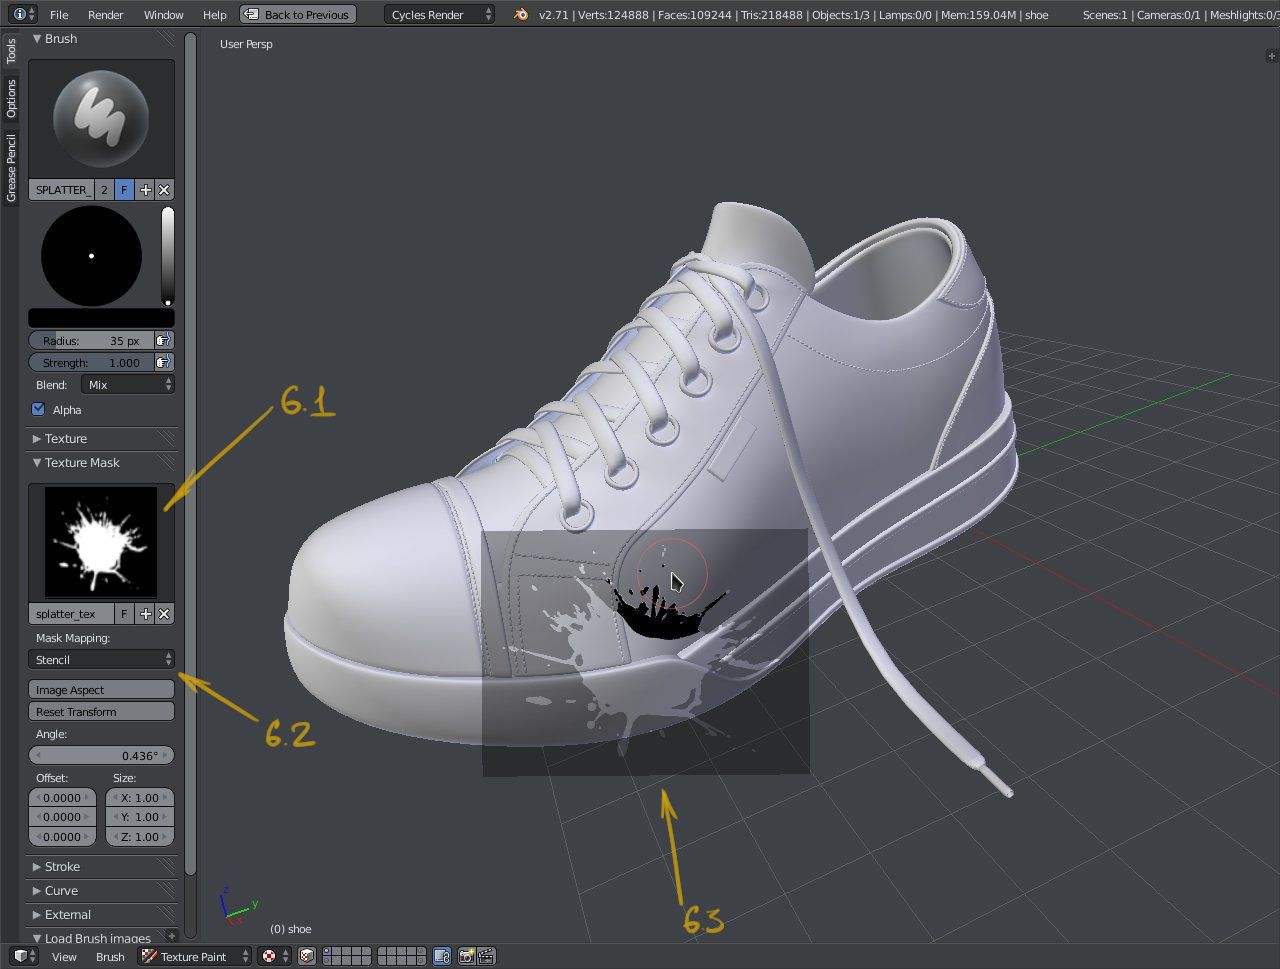
STEP 6: Painting the dirt
I inserted one of the splatters into the Texture Mask slot (6.1), and set Mapping to Stencil (6.2). And then all that remained was (6.3) painting the dirt (changing splatter mask from time to time). After that I created another empty texture, lowered brush strength, enabled pressure sensitivity, and painted 2nd layer of dirt.
This is what I’ve got in the end.
That’s it. All the textures are done, and I only need to set up materials for my shoe (only, huh?).
Timo,
Since I last posted I have been following tuts on Vertex Painting, where you can emboss those alphas you are using for mud splats. It is an alternative. Might want to check it out. Ahh Never mind, looks like you used it in the last post there… Well in case someone else is looking…
http://www.youtube.com/watch?v=7FobUOuISak
Netcommercial, I’ve already seen this video, but thanks anyway.
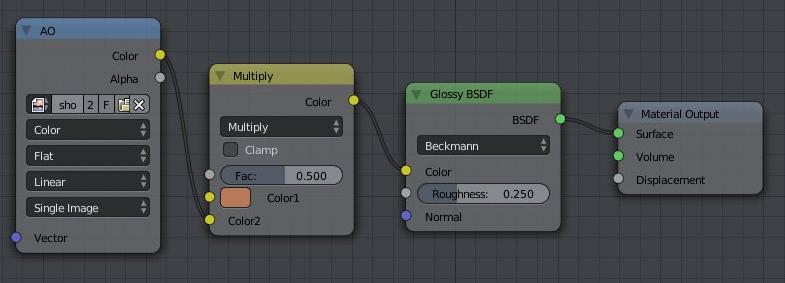
So… Let’s try to set up materials. (I’d like to notice, though, that I’m very new to materials myself, so everything below is pure experimenting)
RUBBER
I decided to start on rubber. Let’s call it Rubber ver.1.0, because I have a few strange artifacts here, and I’ll try to figure out how to get rid of them.
You might want to mix the glossy in the metal with a diffuse. Nothing is completely diffused or glossy.
The workflow breakdown you did on this is really helpful and interesting, thanks for taking the time to post it.
Don’t worry at all, your English is just fine.