Some handpainted textures
These swords are from a concept (and great tutorial) at 3dmotive.com
handpainted sword by bryantenorio on Sketchfab
Sword03 by bryantenorio on Sketchfab
A barrel.
Barrel by bryantenorio on Sketchfab
Some handpainted textures
These swords are from a concept (and great tutorial) at 3dmotive.com
handpainted sword by bryantenorio on Sketchfab
Sword03 by bryantenorio on Sketchfab
A barrel.
Barrel by bryantenorio on Sketchfab
More attempts at cartoony game assets.
concept
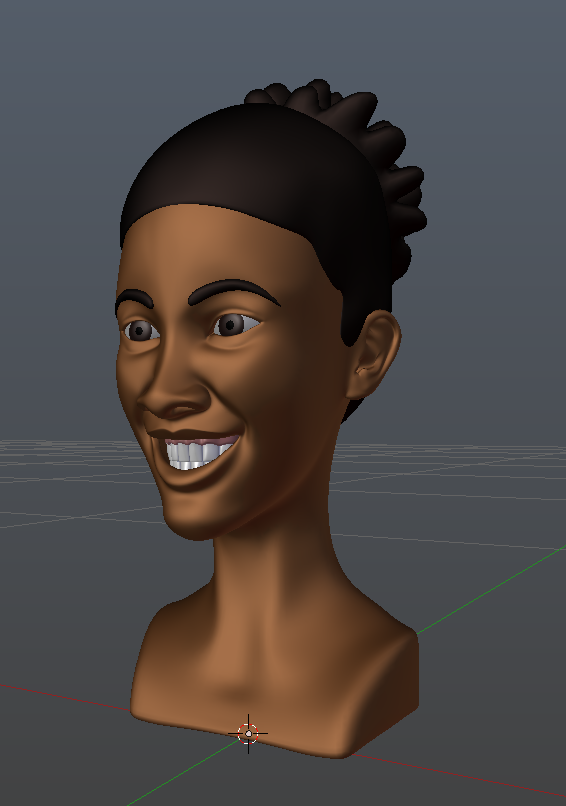
woah, these characters are pretty impressive! you did great on the cartoon man in post #40
smiles are pretty hard to nail, and even harder to describe or teach  but you’re almost there… perhaps you should spend some hours just looking at references. When you return to your character, you’ll be more likely figure out what’s making it look odd.
the toon swords and barrel are pretty amazing too! I gotta check out 3dmotive 
the cactus needs some texture on its skin to add some roughness.
Thank you khalibloo. I’m surprised how their faces turned out. bodies I have trouble with though. I don’t do enough concept art, so I don’t really know what to do for the bodies. For the smile I sat in front of the mirror for quite a while! But again, my smile is a bit weird and forced, so maybe I should look at other people’s smiles for reference. /’
Man, the 3d motive tutorial was about $40, but totally worth it! It answered so many questions I had about handpainted low poly style.
Here is another go at my the cactus. I modeled each piece, and Uv’ed them all as well. (the backside is the same as the frontsides of the pads) I didn’t do to much with the needles here, but I think I did right by having the whole model be one mesh, and painting each pad separately.
Here is a game treasure chest I have been working on the past couple days in Unity.
I’ve noticed that I don’t finish projects. I keep jumping to new things, because I think it will be better. I think that mentality might be holding me back.
woah! that’s some mighty fine work! i love every bit of that chest. it’s amazing :yes:
i’m curious, what texturing programs or methods did you use?
Thanks Khalibloo. I just used Photoshop for the textures. After messing around with Unity 5 and seeing their new “physically based shading” system I’m actually kind of digging it. Instead of the regular diffuse, normal, and specularity channels, there is now diffuse, normal, metalness, roughness, and Ambient Occlusion. Then I found out that SketchFab can support the same type of textures (it turns out that Unity has the roughness backwards so I have to invert my map)
Physically Based Shading (PBS) or Physically Based Rendering (PBR) They seem to be used interchangeably. I’m still new to this way of shading game models. So far I like it. The metalness map defines if a part of your model is made of metal or not. It shades it more like a metal with darker reflections and stronger highlights. This method of shading seems to handle reflections pretty nicely too from either the skymap, or a reflection probe in Unity. (HDR background in Sketchfab)
I used photoshop for the chest, but this past week I downloaded the 30 day trial of Substance Designer 5. I might have to buy it once my trial is up. It is so cool! Everything is node based, and applied to your model in real time. There are loads of procedurals as well, with all kinds of parameters to adjust. You can even bake position maps and curvature maps for your models. You can then use these maps as masks for edgeware, or even drips running down your model (this is where the position map comes in, as your UV’s can be in any direction, as long as you bake your position map) Its kind of like Cycles, but for game textures. Then when you are done, you can import your Substance File in your game engine to change textures on the fly ( to add variation) or you can export all your maps. Diffuse, normal, metalness, roughness, AO, Height…
Here is one of the default metal shaders from Substance Designer with some Rust that I made on it.
Rust Test by bryantenorio on Sketchfab
Right now I’m working on some modular Road assets for use in Unity.
photoshop? i’ve always wondered how people do that does it support direct painting on a 3d model or do you just paint on uv maps?
i totally agree, the new shading in unity 5 is very impressive! and the best part is that i didn’t notice any change in game performance when i upgraded. the reflections and GI work really well too, but i haven’t started making textures for PBS yet. still trying to find the best way to go at it.
I saw substance designer in action on some of their youtube videos, and i’m really impressed by it. i hope i never have to model game environments, but if that day comes, i think i might have to buy substance designer/painter too. so far there doesn’t seem to be any real alternative to it, since quixel only works in photoshop, and doesn’t allow one to paint on the 3d model itself.
thanks for all the info
I’ve heard that Photoshop supports 3D painting, and I was actually able to open up one of my sword models. I couldn’t figure out how painting works though as I only fiddled with it for a few minutes. I should look up some tutorials for it. I would love to paint directly on my model, but I can’t figure out Blender’s painting that good. I haven’t been able to figure out how to do layers in Blender paint.
Oh man, Unity 5 is amazing! I love those reflection probes!
One thing I noticed about Substance designer, is that it eats up a lot of ram if I use a lot of 4K texture nodes.
Here is an update on some of the stuff I’m working on.
The car I modeled in Lightwave a few years ago, but I threw it in the scene for now as a placeholder. I will redo my car model (retopo) to have fewer polygons, as this car was originally intended for pre rendered.
i’ve seen photoshop’s 3d painting. i wasn’t impressed, to be honest. the brush is a flat projection (like blender’s). and you have to frequently switch between painting tools and 3d rotation/panning/zooming tools. the viewport is primitive. it’s nowhere near even blender. but maybe they’ve got plugins that do a better job at it, who knows?
3d coat will be getting PBR support and smart materials soon, so i might not need substance designer and painter after all.
the reflections on the cars gives the scene some life already. i agree, adding flat grass might not look very good considering the shallow camera angle. but the distance is in your favor, it might be worth a try. think FIFA! their grass looks great. besides, the cost of adding thousands of tiny grasses might be overwhelming.
I should check out 3d Coat. I’ve always heard good things about it. Man, the Grass on FIFA looks great! I need to figure out how they did it!
Man, I often feel like progress is going so slow! I’ve been working on this thing for over a month, and I thought I would be further. To be fair, I am giving myself until September 1st to finish the neighborhood set pieces, and it has been a few years since I’ve done game assets. I’m wanting to start selling game assets. I’ve been wondering if I should go for lots of objects to decorate the scene to look detailed, or if I should take my time on each object to make it the best it can be. I’m leaning towards the later. This approach can lead to some empty/bare scenes, but the items that are there will be of quality.
Here is some progress. I made a trashcan, and adjusted the bush texture.
The bushes I am going to have to redo the model, as it falls apart at some angles. I just took an alpha mapped bush segment, and used it as a hair system on a sphere. I need to play around with that more to give it more shape, and not be so flat at some angles. I’m liking the shading so far. It has 2 AO maps. One on the leaf texture to make it darker towards the bottom, and then on a 2nd UV set, I cheated Unity’s Detail map, to add a 2nd AO map that encompasses the entire object ( Smart UV projection to give every leaf its own UV space) then I baked my AO map. to work with Unity’s Detail map, I had to turn the white part to 127 grey, as the detail map works by brightening lights, and darkening darks. mid grey 127 causes no difference in the texture. I think abusing this detail map will really help push these objects.
Would you believe me if I told you that I found a way to have a full yard of grass with individual strands, using less than 5,000 triangles?
what? how?? even billboards shouldn’t be able to work that magic. that looks awesome, man! i gotta know
Its a trick! I used 20 planes with alpha mapped dots. Doing this gives the illusion of strands with thickness. I put a displacement modifier on the X and Y location to make the strands go off a bit so they are not straight up. Then on a seperate UV set, I positioned the planes top to bottom, and put a gradient over the detail map in Unity to make the strands darker at the bottom. I’s a cheat, but it works great! Man, this grass looks so cool in game. I’m walking around on the yard with the First Person controller, and everytime I look down the grass looks real. no more obvious flat billboards!
I know if I use more than 20 planes it should get smoother, but you have to get really close at a low angle for it to break the illusion.
I kind of want to make a proper tutorial once I figure out the best way to do normal maps.
I just found a problem with my method.
In Unity when I have it set to Fade, the grass looks great, but it has no shadows.
So currently, we have the choice if great looking shadowless grass, and OK looking grass with shadows. There has to be a workaround.
wow, i’d read about a similar method in a paper related to directx when i was still in my blender diapers. i never thought i’d see it in action. this is very amazing!
i guess there’s always a trade-off with these magic tricks
I got the idea from playing Shadow of The Colossus on Ps2 a few years ago. I noticed that is how they did the fur and grass for their game. I just remembered it, and thought it would be a good thing to try doing in Blender and Unity. I wonder if there is a way to write a custom shader for unity to give shadows to semi transparent objects.
I’m trying to make better assets than I have been doing. This will mean I will have less, but they should be much better quality. I spent all day trying to fix the normals on this Fire hydrant I modeled. putting beveled edges in a normal map for the game model is what is really going to make it look good. I also need to do some amazing texturing. I just downloaded the 30 day trial of Substance Painter. We’ll see how that goes!
After seeing the Kickstarter for Yooka-Laylee, I realized what it is about games that I liked when I was a kid, and why I haven’t been as excited about many current games. The old 3D platformers were a big deal to me back in the day, and I miss that magic. I’m so happy that Yooka-Laylee, as well as A Hat In Time, are being made. So much so, that I have been inspired to do my own.
I did a couple of C# tutorials in Unity, and threw in one of my old models.
Concept for possible game
A drawing I did
A friend and I made a game over 4th of July Weekend for the Epic Game Jam
You can play the game here
While asking programming questions on the Unity Forums I teamed up with a programmer to do a little game demo. Here is one of the animations.
More turtle animations.
I worked on this horse over a year ago. I was going to render it with fur, give it armor, put a big scary rider with a warhammer on it. The full 9 yards. It became another abandoned project. I was digging through my hard drive, and rediscovered this model. I think the topology of the horse is pretty good, so I thought I would upload it so people can download.
You can download a .fbx from Sketchfab, or you can download a .blend from blendswap.