I was using an environment image recently in cycles and wanted the environment image to throw more light on the scene. Dialling up the strength of the background shader certainly increases the light coming from the Env image but unfortunately it also brightens the env image itself in the picture. So I was sometimes finding that when I got it throwing enough light to light the scene it was blowing out the light parts of the env image in the render.
After a bit of hunting about I came upon a node group by Greg Zaal that aimed to provide control in such a circumstance.
It worked but ( and excuse my presumption!) but I thought I could improve it possibly. In particular I found that the management of the light path information was a) incomplete and b) not as clear in its logic as I thought it could be.
I think I may have found an improved version of that node group so Im showing it here .
My other reason for posting is that I couldn’t find a specific Bender Artists thread about this topic. So Ill post my node group and its logic. You can all tear it apart and if you have better approaches then please post them.
Ok to business.
My node group is basically the same in its general outline as the one at http://blender.stackexchange.com/questions/518/how-to-make-a-model-cast-shadows-onto-the-world-texture-background/26686#26686
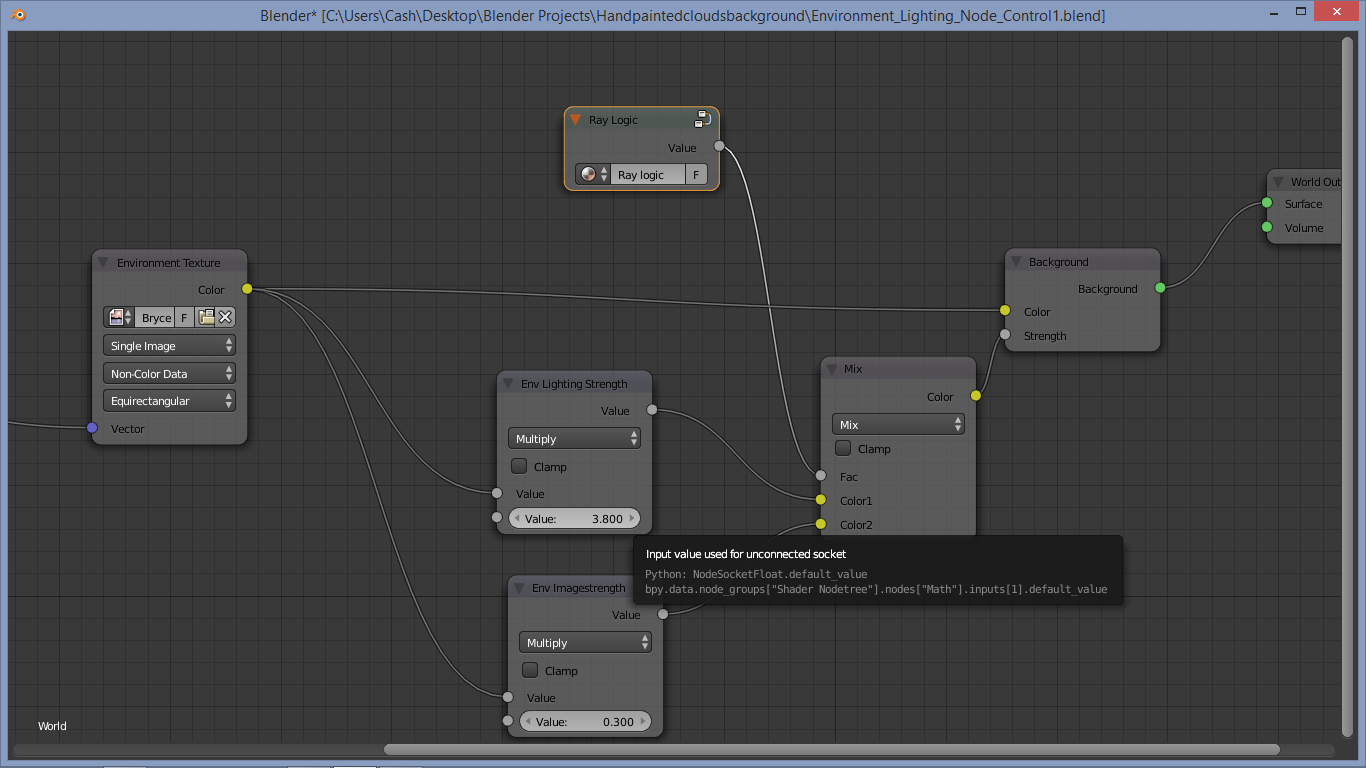
Here is the node group. I have grouped the nodes handling the light paths because that’s the main bit I want to concentrate on.
the basic noodle:
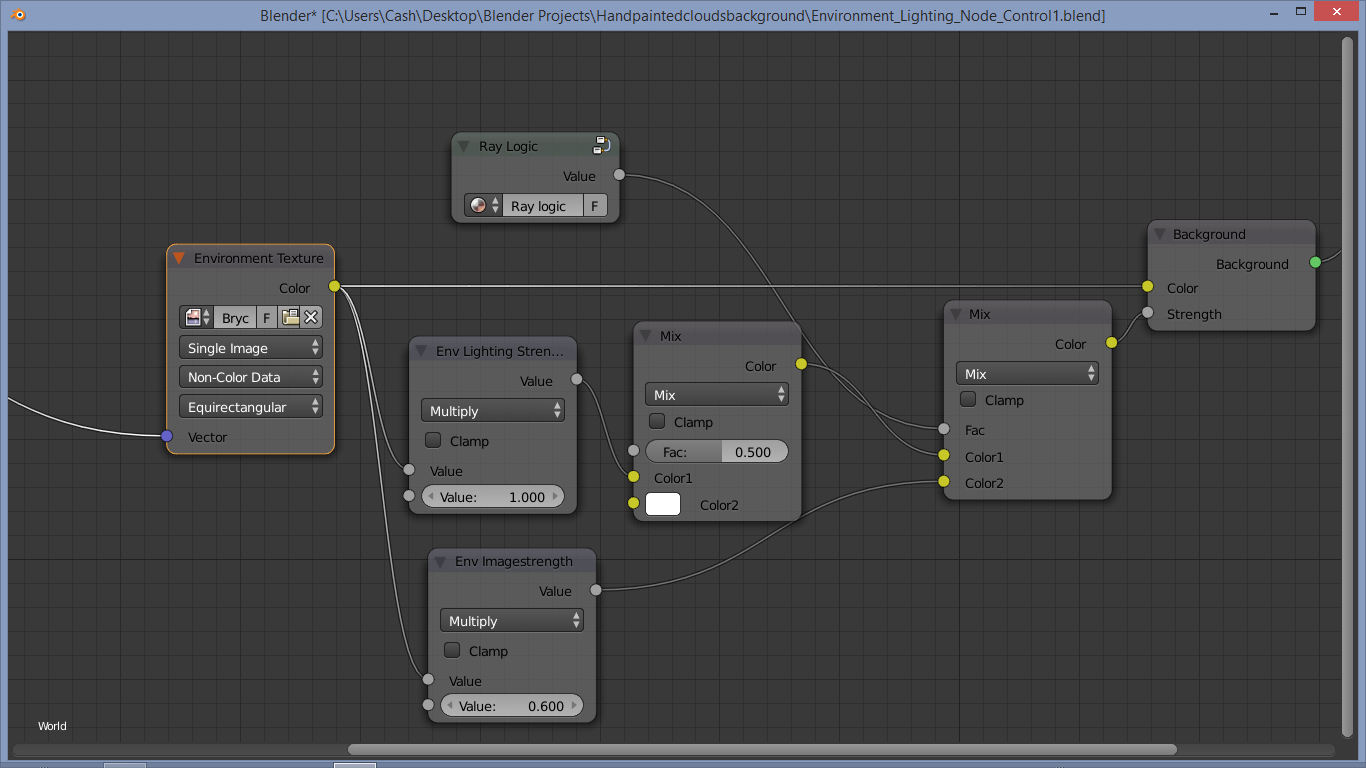
Nothing startling here. Its basically the same node group that I gave the link for but with an additional control that allows you to control how bright the env image is in the rendered image. Env Lighting Strength adjusts the amount of light thrown to the scene by the env map and env image strength controls how bright the env image is in the render.
The color mix on the right is essentially a switch which detrmines which noodle path calculates the strength. If Fac is 1 on the color mix on the right then the bottom noodle path is used, if its 0 then the other path is used.
The trick is to switch which path is used depending on the type of ray being calculated. The color mix on the right needs to use the bottom path (ie be Fac 1) if its a camera ray and use the other path ( with the env light strength) if its another type of ray. That way we can use a different strength for the env image depending on what ray is being handled.
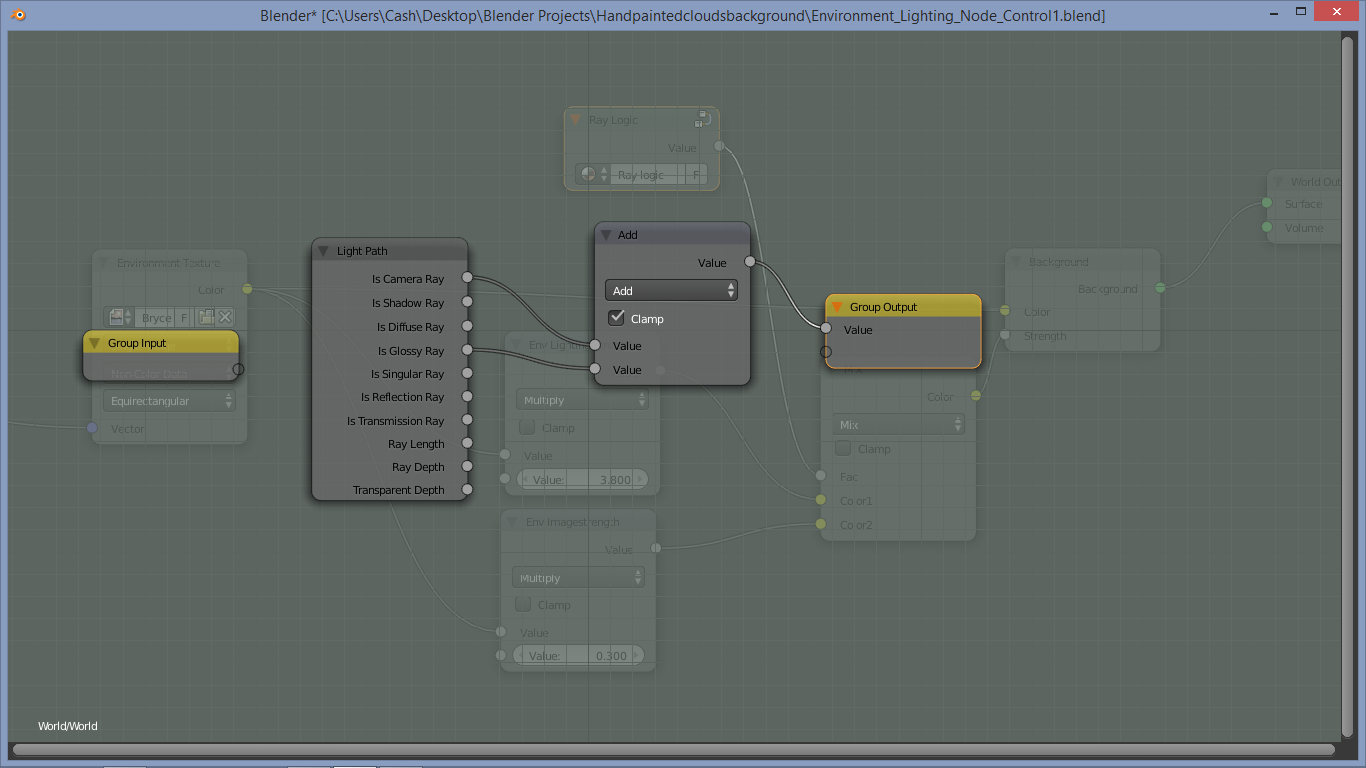
What we need then is a bit of a noddle that will handle that logic for us. Thats were the light Path Logic node group comes in.
Ill post this now and continue in a further post.