I am working on a CGI ghost for a live action film project. The ghost would be all-black, with a dark gray fog surrounding all parts of its body, no matter what pose it is in. Here is an example image, where the gray is the fog, and the black is the physical 3D model of the character:
Me, I think I’d find a way to rotoscope it “in post.”
Lessee … maybe an armature with a bunch of buckyballs on it, real big ones. The same animated armature that the character uses, so now you have this “big ugly blob-thing.” But, in post, you: reduce that to black-and-white, run it through a gigantic blur, maybe also a vector-blur. Drop the alpha way down, tint it so it’s some bluish glow, and maybe modulate the alpha with a noise texture, say Voroni. If you’re feeling adventurous, coincide this with another copy of itself, offset by a couple frames and maybe tinted a slightly different color. How about, in another track, seriously blurring a copy of an existing render of “the character only,” treating it similarly, and overlaying that, so that we get a slightly more distinct blurry-fog that is closely wrapped to the character. If offset back by a few frames the mist will appear to follow him.
Obviously, what I am particularly trying to avoid here is any sort of particle system, since particles are expensive. I’m trying to get really creative “in post,” because that’s cheap no matter what you do there. You do need to have a “MultiLayer OpenEXR” source that includes most layers including vector.
I’m also trying to avoid rotoscoping.
Also, you might need to tweak close-up shots differently from longer ones. You can get away with a lot of stuff in a quick, passing, medium or long shot that won’t pass muster in an extreme close-up of a key dramatic moment. Conversely, you don’t need to devote the loving-care needed by a pivotal-moment ECU upon a long shot.
First use this to create id mask : http://blender.stackexchange.com/questions/3423/how-to-use-an-object-as-a-mask
Use this pass as input for blur node, substract original (non-blurred from blurred) with math or mix node to cut it out (you don’t want to have a white film on top of your character iiuc), add alpha (plug into combine rgba with .5 multiplier or so in between to make it less opaque to your liking) then add this on top of your original image (mix node or alpha over node).
This is from memory since I have a broken hand and using my left just to type this took me three years !
Now it is tricky because if you have objects in front of the ghost, the id mask will be cut and will behave badly. Maybe you can isolate the ghost on a layer, render it separately, do the blur ghost thing then use z pass (or better, object index with all foreground objects on it because z is not antialiased) of regular render layer to composite the foreground over it.
No-brainer solution would be using volume shading but it is super slow. You could fake cutout by using camera vector and all in all would probably be better if you have a renderfarm at hand.
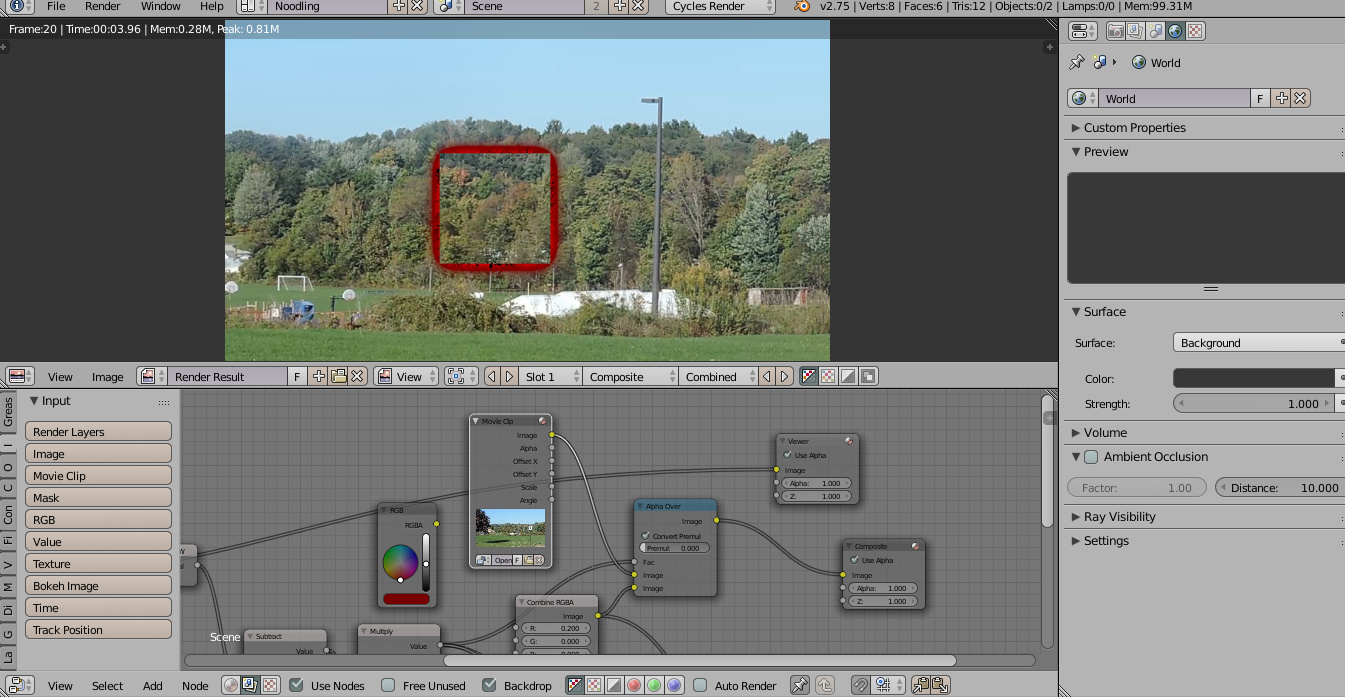
I don’t have to worry about objects in front because I’m pretty much overlaying the 3D ghost over a video file I took with a camera. I took a look at your example file (in 2.75) and it won’t render because apparently there’s no render output node… how would I add this in so the final result is correct?
Well doh ! Sorry. Just add a composite node after the alpha over on the right hand side. Then try clicking on the two viewer nodes on top to switch between ghost/no ghost. Also you can change the ghost colour inside the combine rgba (currently 1, 1, 1 is white).
OK, I figured it out now. Only two questions remain: How do I make objects shadeless in Cycles? I want the ghost to be a big black figure, so it’d be shadeless. Also, how would I add a movie clip node to this setup so that behind everything else is a video file?
Using a black emission shader would do the trick. 2. Same as before, using alpha over will overlay your ghost on top of anything, say a movie clip / img sequence. I guess you could also do that in sequencer but not sure. Never really used it.
I changed the shader in my file to black emission and it seems to work, black figure with ghostly outline : http://www.pasteall.org/blend/38607 Does it work for you ?
I also changed the noodle a bit, assuming it’s always in foreground… and we get also rid of the jagged edges.
Heh, also forgot to check premult in the alpha over node. Corrected.
Okay, so now I have it figured out. Who knew that switching from Cycles to Blender’s internal renderer could save so much trouble, while keeping the same effect… Thank you for your help!