My character needs to carry a couple things. Will they need to be part of the same armature, with a bone maybe?
Thanks guys,
JDL
My character needs to carry a couple things. Will they need to be part of the same armature, with a bone maybe?
Thanks guys,
JDL
btw, my character won’t need to release these things.
But it would be good to know anyway how this needs to be set up in case he needs to release them too.
The way I would do it, would be to create a separate armature for the “things”, and create a bone for each “thing”. Then constrain those bones to your character’s hand bone(s) (for example).
That way you could just move the hand and the constrained bone from the other armature would follow, like a briefcase for example.
Thanks so much for the suggestion MT 
I’ll give it a try.
JDL
I am trying it now, except I am no longer using Rigify (at least for now). I guess your suggestion still applies, right?
Also, to be more specific of what I need to do. The additional armature will be used for not just a couple boxes my character is carrying. But also for her hair, ear-rings and necklace. What do you think?
J
The easiest way to make a character “carry” something is to give the “thing” a Child Of constraint with say one hand bone as the target. You can then have two Child Of constraints with the other hand as the second target. You can then set the influence of the first constraint to 1 - this is then in operation, at the second to 0, i.e not in operation. To pass the object from one hand to another, simply reverse the influence of the two constraints. There is no limit to the number of Child Of constraints you can have, You can have a remote target some way off so your character can throw a ball for example, gradually change the influences over many frames and the object passes from one target to the next.
Cheers, Clock.
iPhone Postie!
This is working great! ![]()
Thank you so much Clock!
A bit of a side question…
I noticed it is advised to have a root bone, to move the whole character around.
Can’t we do the same by going in Obj mode and moving it as a whole, as well?
I suppose there’s an advantage, is there?
Thanks,
JDL
Don’t move the rig or mesh in object mode, that will just cause problems. Always use pose mode for that.
If I could see your rig, I’d be able to better explain how to go about it. But if it’s rigged properly already, your root bone would be your char’s pelvis bone. Are you using IK ?

Initially I was using Rigify, but after finding it to be rather finicky I manually rigged it with this tutorial.
I suppose the equivalent bone to the pelvis would be the hips.
When I pull it by the hips the arms and legs don’t follow as they are using IK.
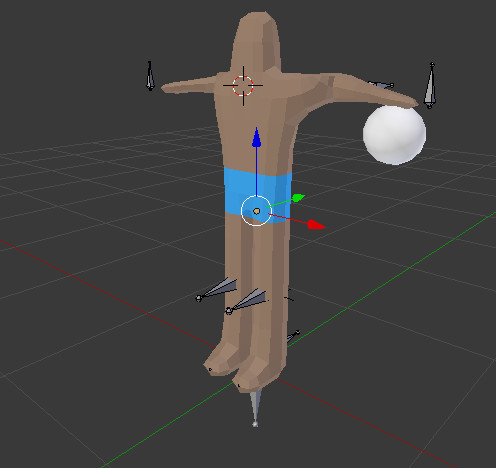
You can inspect my blend file if you want. Simple_man_rigged.blend (819 KB)
Thanks MT 
refresh this post if you’ve already read it since I edited it heavily
Since you already have separate IK bones, just set their parent to the root bone you created. Though, you created your root bone on a different armature. Create it in the same rig. In edit mode on your rig, press Shift+C to center the cursor at 0,0,0 then press Shift+A to add the new bone.
But you’ll also need to create a duplicate bone for the pelvis, and set its parent to the new root bone. And then add a ‘Copy Transforms’ constraint on the original pelvis pointing to the new pelvis.
It’s helpful to use separate bone layers to do this. One layer should be your original armature, and the other(s) are the IK bones or any other bones you actually animate. It reduces clutter and makes it easier to work.
PS. With your rig selected look on the Armature tab in the properties list, under ‘Display’ you can tick ‘X-Ray’ … this will make it easier to see your rig through your mesh.
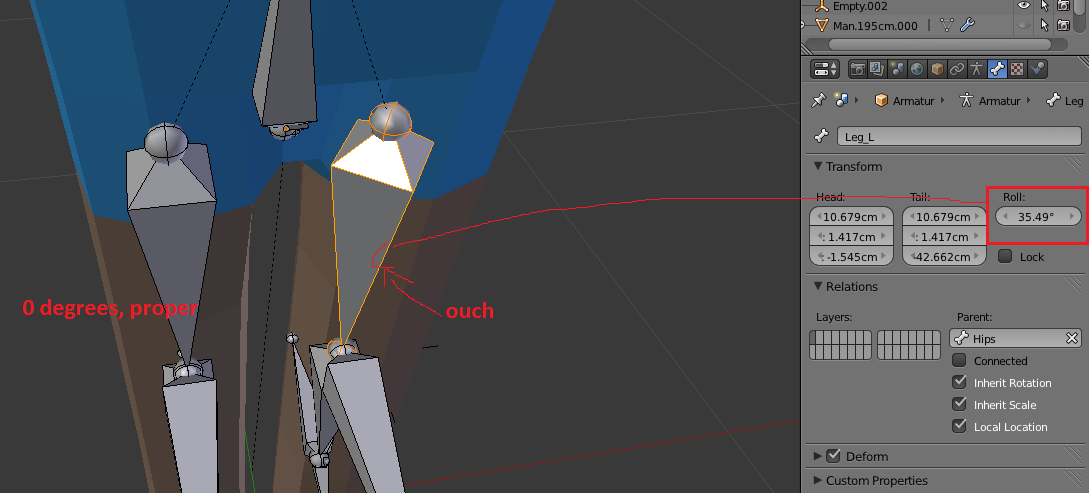
PPS. The bone roll on your leg bones are incorrect, they are at 45* angles. It should be 0 for this mesh.
Simple_man_rigged__edited.blend (879 KB)
double post sorry .
This is great!
This will keep me going!
I suppose the pelvis will be equivalent to the shoulders (in 2 parts, R & L), in terms of functionality, and position (in respect to the hips).
So far I had been duplicating bones with Shift D, I hope it won’t cause much of a problem.
I don’t mean to be critical, just to be sure we’re talking about the same thing, as for “Bone layers”, I imagine you mean: “Armature visibility layers”
“Bone roll”, is that also what in the tutorial is referred to as “target bone”? The one sticking out.
You say the one in the legs should be 0 degrees. You mean this one?

Thanks a bunch MT
just to be sure we’re talking about the same thing, as for “Bone layers”, I imagine you mean: “Armature visibility layers”
Yes. Select the bones and press M, then select a layer to move them to. Then you can easily hide unwanted bones by using a different layer.
“Bone roll”, is that also what in the tutorial is referred to as “target bone”? The one sticking out. You say the one in the legs should be 0 degrees. You mean this one?
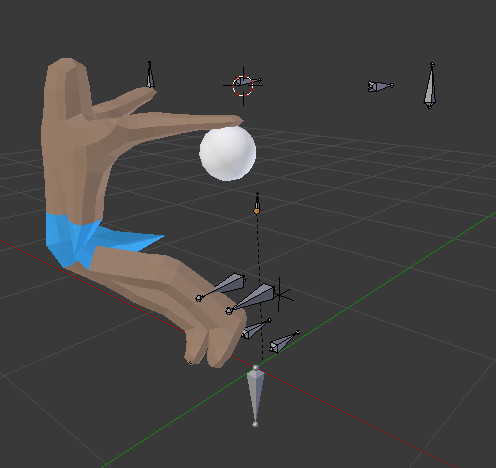
No. Bone roll is for the local rotation axis of a bone in pose mode, so in the screenshot below-- his left knee will bend from the side… which sounds painful. Think of how your joints bend, the bone’s roll needs to match this. You need to be in edit mode on the armature to change the roll.
Now (for example) if the mesh you were working with had knees that slightly pointed outwards, you’d have to adjust the roll for this. It’s which way the knee will properly bend (or any joint) … in this case, on its local X axis.
You can turn on a view that will give you a visual helper of the Axis of the roll, it’s in the same menu as X-Ray.
Boy! Do I have enough to chew now!
I’ll get into this asap.
Thank you very much MT
P.S. I miss T.O, I lived there for 3 years. It’s a great city.
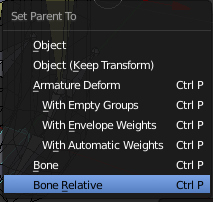
Just so everyone else can benefit from this thread too, it’s worth noting that when parenting the controlling bones to the root bone, you got to be in Edit Mode, as opposed to Pose Mode. Otherwise you’ll get a whole different set of choices when invoking the same action. Also go for “Keep Off set”. While at that, include the pelvis or hips bone too.
This is great!
I’ll take it from here!
I already know how to Weight-paint fortunately, so that shall not be a problem
Thanks a million MT !!!
Actually, wait a sec!
This is not quite what I thought it was.
This is a different procedure. I didn’t know you could use an Armature Modifier!
Do you mind going over this one, in a different way? Maybe breaking up the steps in their expected sequence. I am somewhat confused.
I am ok with the Vertex groups, creating them, using them, etc.
I already have the hair mesh.
“…and then you’d add the head vertex group to its group list”, this is the part I could use some clarification.
When you say the “Head vertex group”, you mean the one in the Man’s mesh I suppose. What if I use the one existing in its list already?
“…to its group list”, here you mean the group list of the Hair mesh, right?
What I’ve done is:
With all the vertices selected in the Hair mesh I created a Vertex group called hair.
Then I went to the Man’s mesh and added a new vertex group to its list called, hair.
Added the Armature modifier to the hair mesh. In the Armature Mod, I selected the Man’s mesh armature under Object, and selected the hair v.g. in the armature mod too.
But somehow I don’t think this is the way…
A vertex group points to an armature bone with the same name.
You only need to modify the hair mesh’s vertex groups, as the man and hair are two separate objects but using the same armature. The two separate meshes (body and hair) don’t interact with each other, they only interact with the armature.
The steps you listed-- you don’t need to do anything to the man’s vertex groups as I’ve explained above.
All you need to do:
That’s it.