I’m trying to create a final rendered animation with indirect lighting and a shadow pass with an alpha layer for compositing later with different software (Kdenlive if you care) but I’m getting stuck just getting the shadow and indirect lighting to accept an alpha layer properly.
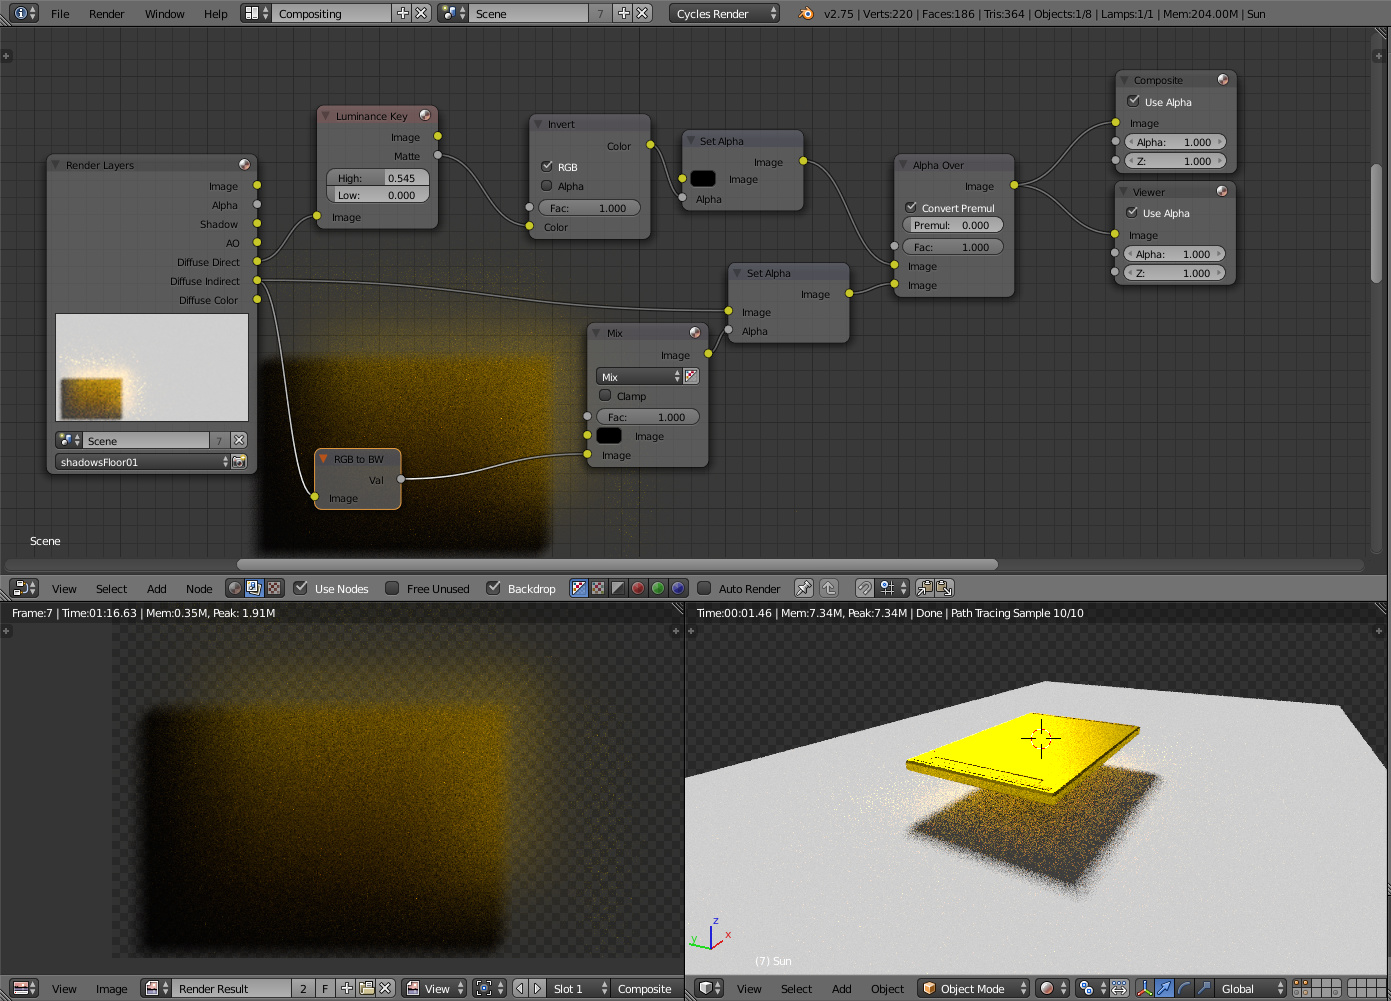
Here is the best noodle I came up with (used on a render layer without the object itself):
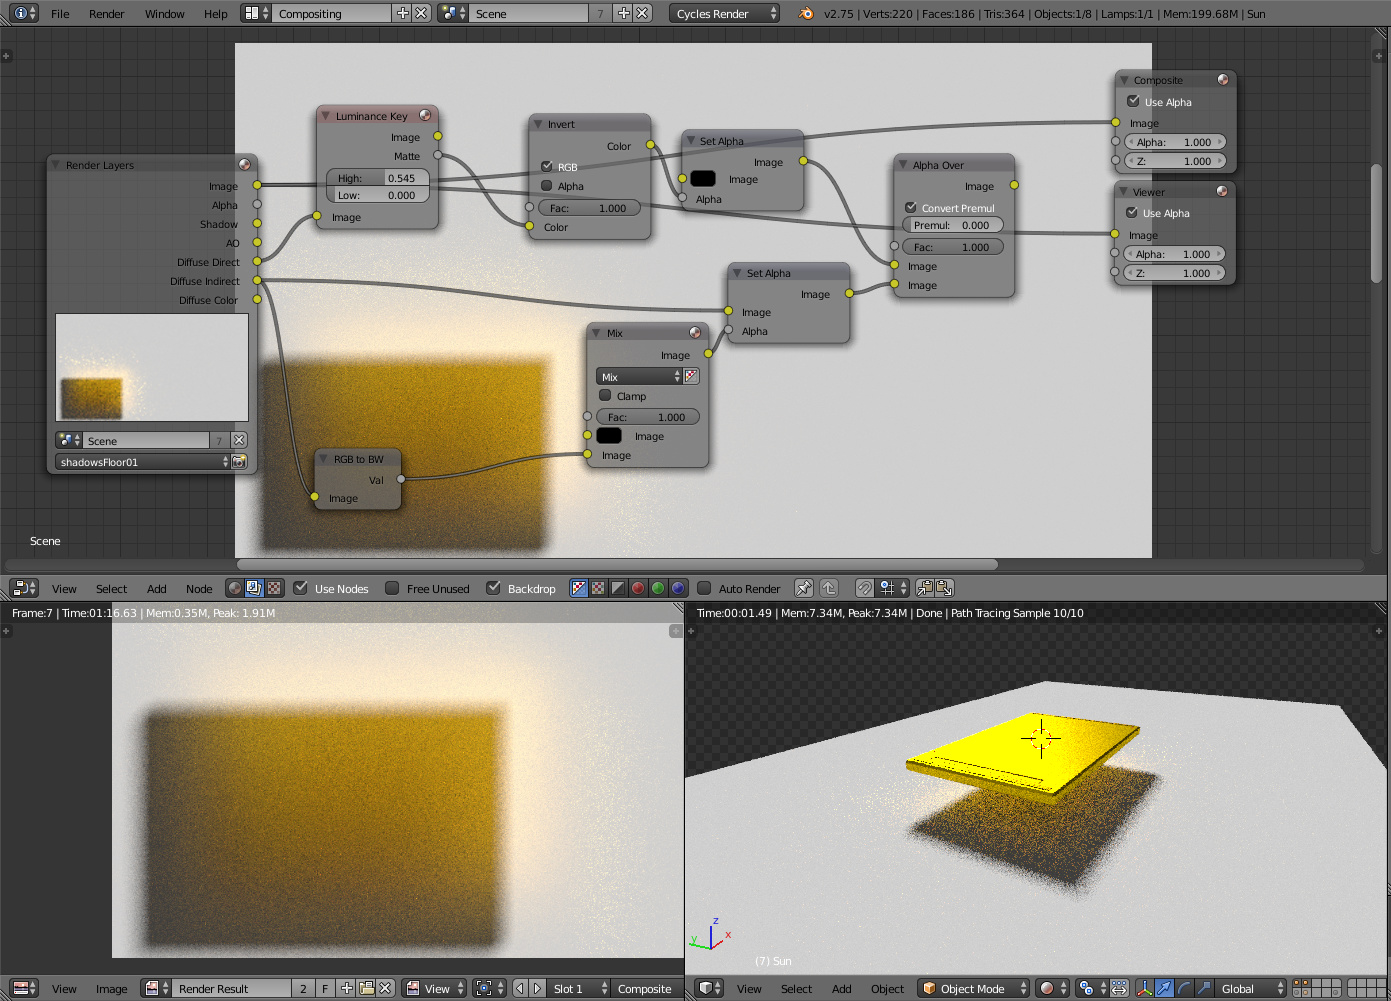
But to test it I compared the standard output (Image) of the render layer with the result of the noodle composited over a light grey background sampled from the standard output of the render layer. There is a big difference:
Is it possible to get a better result than this? Any ideas would be appreciated.
(Just FYI: the final intent is to composite the object casting the shadow/indirect over this result for quick compositing using Kdenlive without having to worry about compositing multiple layers in that program.)
(checking “convert premult” on the alpha over node with the grey looks worse; it seems to remove the indirect light outside of the shadow entirely.)
(*You will notice that I’m using the Diffuse Direct pass instead of the Shadow pass to get the shadows. The reason is the Diffuse Direct pass gives partial transparency in sections of the shadow [that I think looks better] that the Shadow pass does not. This method seems to work except converting the grey floor plane to white with the Luminance Key node seems like a terrible way of doing it. If anyone has another recommendation for doing that I’d appreciate that too.)
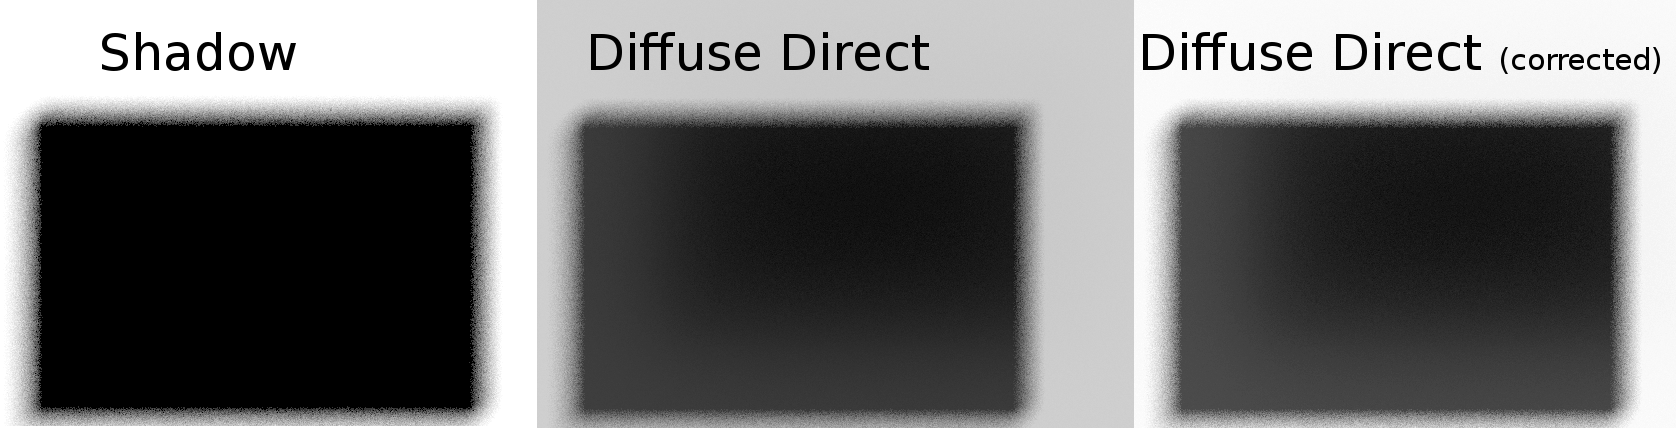
Thank you for the reply Ace Dragon. Sorry, I can see how I didn’t make that part clear. It’s not that the shadow pass isn’t working; it does output a shadow pass (I’m not using any mesh lights) and it would work, but as I tried to explain there’s a noticeable difference in the results. The diffuse direct has ramping increase in transparency (or grey) in parts of the shadow that look very natural and much better to me, whereas the shadow pass gives a much more even black result. Here’s an example:
My only complaint about that part of my noodle was that using the Luminence Key seemed like a bad way of correcting (like in the example “corrected” vs the regular diffuse direct) the Diffuse Direct, but it works fine, so it’s really not worth worrying about unless there’s an obvious better way.
Getting back to the base problem, I would like to emphasize that I’m looking for any ideas for getting a “better result” than the one in my third screenshot while stilling being able to use alpha layer-based compositing in either Kdenlive or Blender; I realize that I probably won’t get it to look exactly like the standard output with an Alpha Over composite because (I think) I would need to use something like an Mix:Add node for just the indirect pass which is more complicated than I’d like the Kdenlive end of things to be. Does that make any sense? If the answer is “no” or “no it can’t be any better” that’s still an answer I’d like to know so I can move on and stop searching for a better solution that doesn’t exist. Thank you!
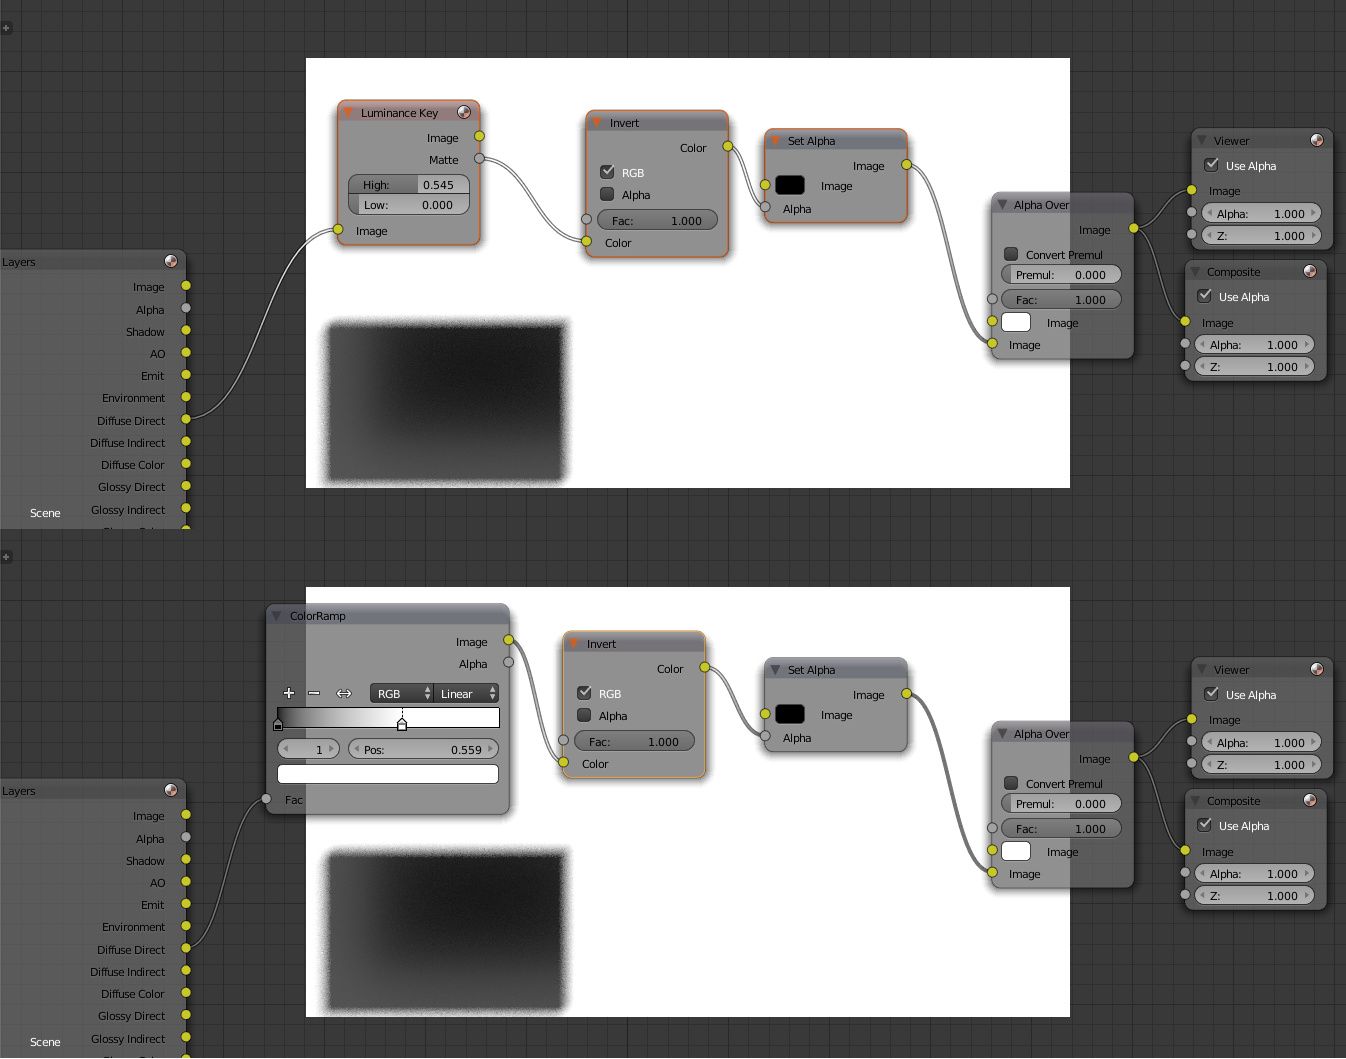
What you can do then is invert the greyscale data of the shadow pass and use it to establish the alpha of your ‘pass’ (plugging it into the ‘alpha’ output of the composite or viewer node or making use of the alpha channel value using a color-ramp node).
Yay! Thank you Ace Dragon! You were right, for making the Diffuse Direct pass into a “balanced/corrected” pass for using as a shadow pass the ColorRamp node was exactly what I needed! It works much better than the Luminence Key I had been using:
But regarding the rest of my question: unfortunately I think I solved it myself (I HATE it when that happens RIGHT after I post in the forum!)
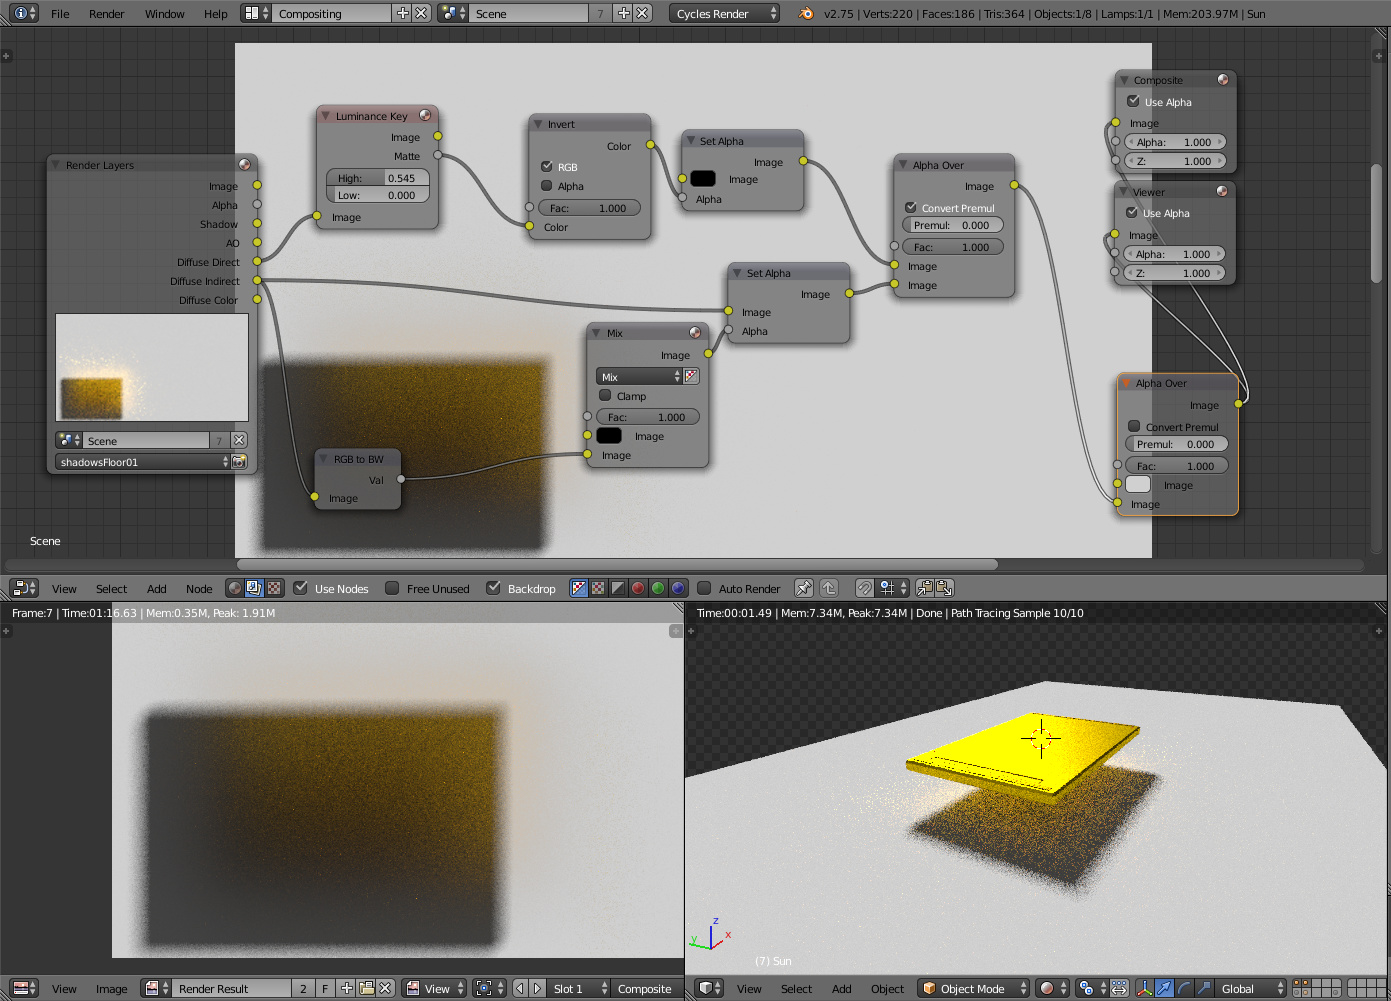
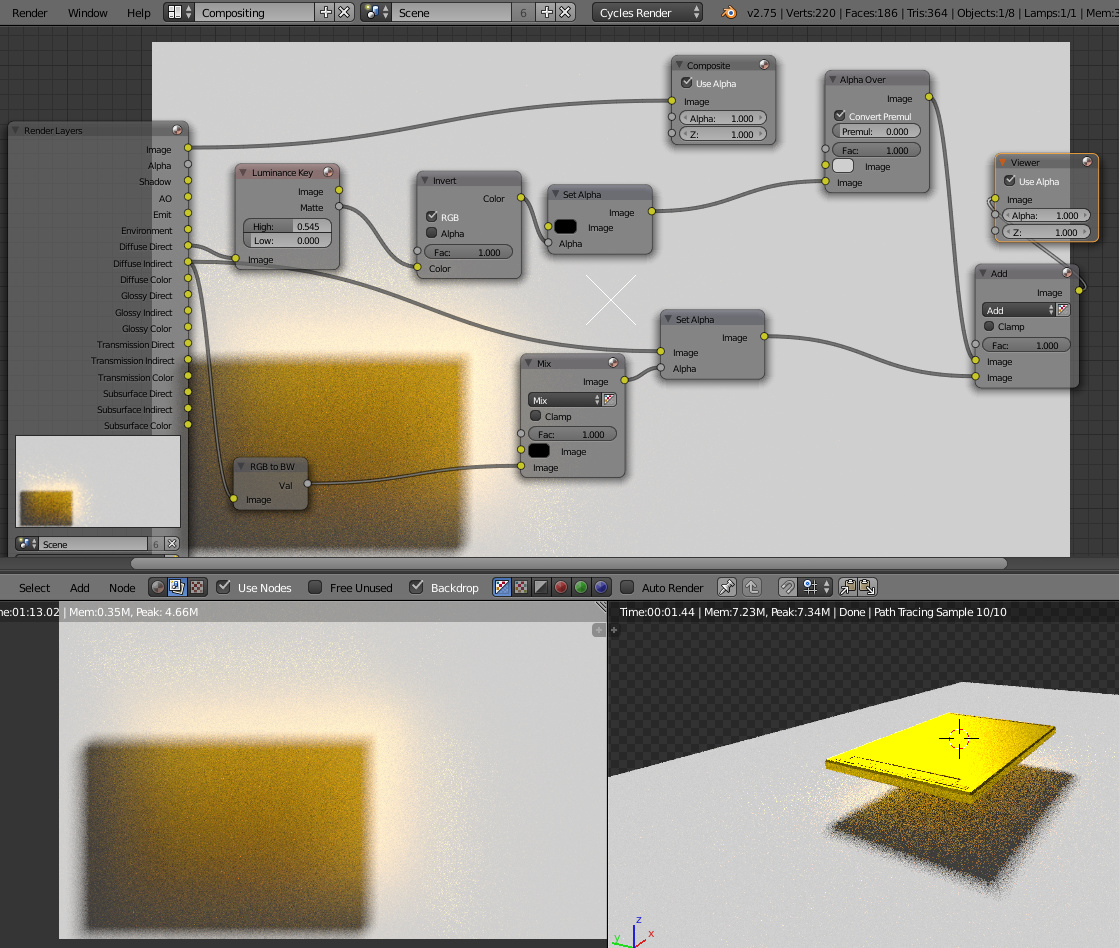
I thought the problem was with how I was making the alpha layers, but it looks like there’s nothing wrong with the way I was adding alpha channels to the Indirect and Shadow (Diffuse Direct), the problem was just the compositing method for the Indirect. If I switch just the Indirect compositing to Mix:Add and compare it to the standard output of the render layer (Image) it looks almost identical: (I have the noodle plugged into viewer, and the standard output [Image] plugged into Composite)
So if the alpha wasn’t the problem it seems like I probably won’t be able to make a straight Alpha Over composite for the Indirect lighting look any better than the one I posted in the starter post. Oh well. I guess I’ll have to live with that result or make a second pass with just the indirect to composite on its own in Kdenlive. Thank you again for working with me Ace Dragon.