I want to shatter an object. This object is water-proof (well-closed).
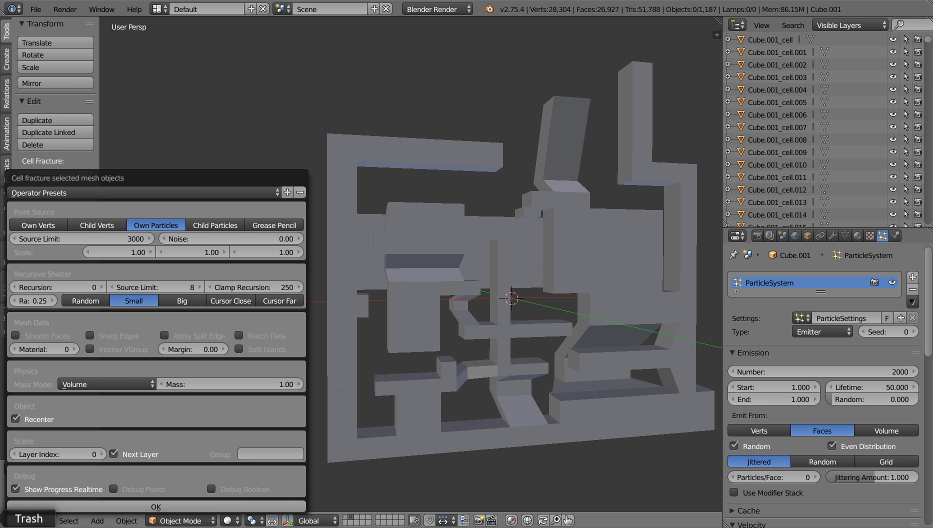
I used the famous “cell fracture” add-on with setting “margin”=0 but the result still has many ugly gaps/cracks (marked as red circle). How do I remove it?
I have to get the shattered objects without any gap to import into an external render engine that gradually remove each fragment piece by piece (like a glass being deleted bit by bit). Therefore, I can’t use the technique that set “cracked objects” invisible (or move to another layer) before the shattering happen.
Do I have to change addon/tool? Do I have to change the “cell fracture” setting? or… do I have to code myself :spin: ?
Please help. Thanks
Edit 01: (24 hours later) None can answer, or none meet this problem before, or the solution is too obvious?
Edit 02: (a week later) Thank to Rambo’s solution, I can eliminate some crack but the cell fracture result is not very stable. Therefore, I use Scorpion’s fracture modifier instead.
Hi. Unfortunately I am unaware of a method of doing what you need… the cell fracture addon will ALWAYS show the unsightly seams in a “pre cracked” mesh , typically the best way to do this would be to have another version of the object without breaks, and switch to it as the shatter happens…
however I can see that this will not suffice for your scenario.
Rambo, may you screenshot your cell fracture setting, please? Will it be still correct if I want about 1000 pieces? And may you describe why your setting works OK while mine is not?
I tried to change setting “Own Vertex” and “Own Particle” with margin = 0, and try a lot combination around “Sharp Edges” & “Apply Split Edge” & “Smooth Faces”, still no luck.
It’s not all about the settings in the cell fracture.
What I did with you scene was to center everything, cursor, object origin, and the object itself.
Make it a habit to keep everything nice and tidy.
I scaled the object down.
It failed to get a clean fracture. So scaled it down a little bit more and it fractured good.
In this case object size plays a role in how it gets fractured.
Thank, rambo. I am really appreciated your kindness. How do you know you have to scale it? e.g. what resources did you read or you just know it?, so I will be able to solve future problems by myself.
I know this is an old topic, but it seems the problem with weird cracks is still happening. I’ve found out, that if the object is too small, You can get messy edges no matter what You do. To solve this, scale up the object, apply the scale and refracture again. This might take some time to get the best result, but i think it’s worth the effort. Maybe this will help someone.
This is definitely a working solution, but to add on to it you might want to adjust the Clip Start/End of the camera to fully hide the seams. The Seams fully disappear for me at a 1m Clip Start length.