I am trying to light a table top and was using an area lamp set up above it to provide additional light… But I am using some chrome like materials and the area light is reflecting off the chrome and looking ugly.
I need this area light to light the glossy chrome pieces on the table, but I do NOT want the reflections from the area light. I have many other things that it will reflect.
I was thinking about that light path node… If it is possible to do it using that node… maybe someone who knows how could post a screen grab of your node set up.
I’m actually not sure if I understand you problem: Could you post a screenshot?
You don’t want the highlights from the area light, correct? But if you take those away, what else is the light to do to illuminate the glossy components other than doing indirectly by increased brightness in reflected surrounding diffuse components?
All I can think of is that you can isolate direct bounces using a ray depth/greater than combo. It will eliminate any direct lighting from the area lighting. Is this what you’re looking for? The nodes shown are for the area light, not the sphere.
Notice the area light directly above the table. Also notice many other different lights plus the environment that can provide reflections to my new fancy candleholder Now look at those ugly blown out reflections showing on the base and top of the candleholder. Those are from that area light directly above.
This area light did seem to make everything (including the candleholder brighter… which I wanted) … what I don’t want are those reflections from that 1 area light.
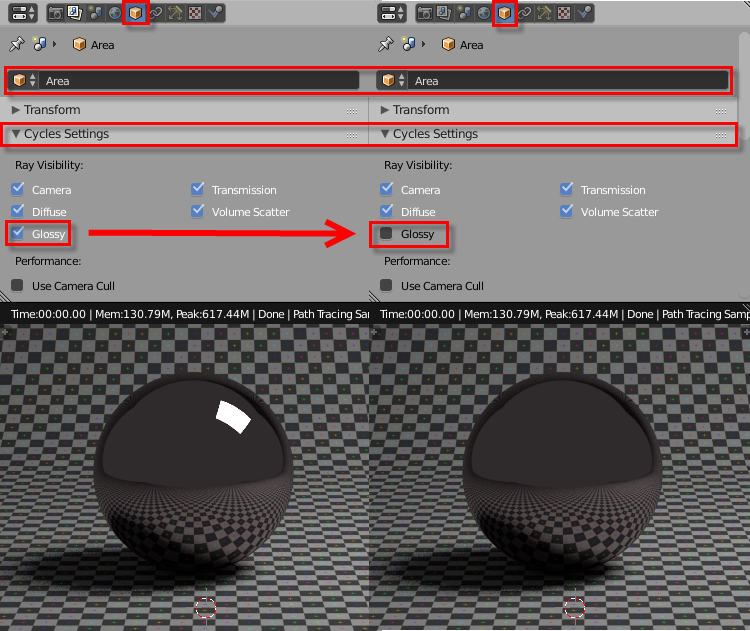
All the now bright, “highlighted” parts of the candleholder are in fact reflections of the area light above. And in a way glossy is all about reflection. If you disable the visibility to reflection rays for the area light, you will indeed disable all reflection highlighting on the candle holder from that light.
Can you move/tilt the area light, so that it still reflects in the rounded upper parts, but not in the base?
Time for us to see a .blend file then…
Delete everything from that file except the glasses and the light sources, save under a new name (Obviously!) and upload it somewhere for us to have a look.
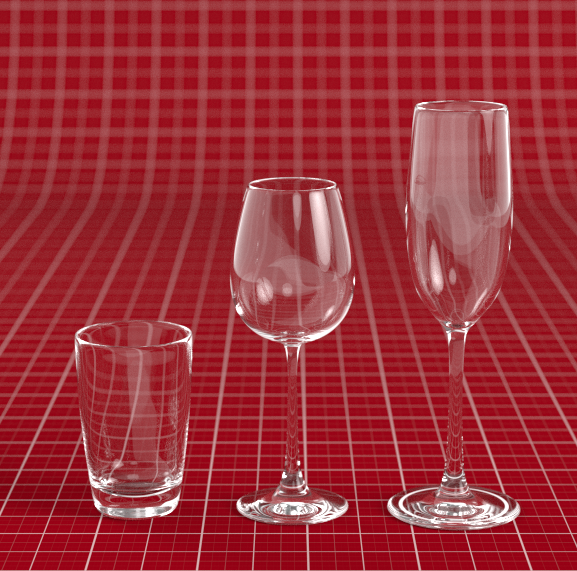
The glasses look weird. I seem to recall that they are not physically plausible (no thickness)? There may be other mesh glitches as well, that don’t play nicely with refractive shaders.
@photox, thanks for the test, but that really isn’t what I’m going after.
@IkariShinji I think I am going to hold off uploading the blend file right now. I’m going to first remodel the glasses being used from scratch. If that doesn’t work than I’ll upload something. A couple quick questions
The glasses on the table are group instances, Could this be playing into the problem?
-On the material tab for the glass, under settings there is an option for transparant shadows … should this be checked or unchecked?
On the wine glasses, it’s pretty obvious that they have no thickness and are acting like a big marble. I think you’ll just need to model them with thickness. To get a brighter feel overall, without the highlights (And without compositing, just up the bounces some and throw some more light sources in off to the sides. Looks really good so far.
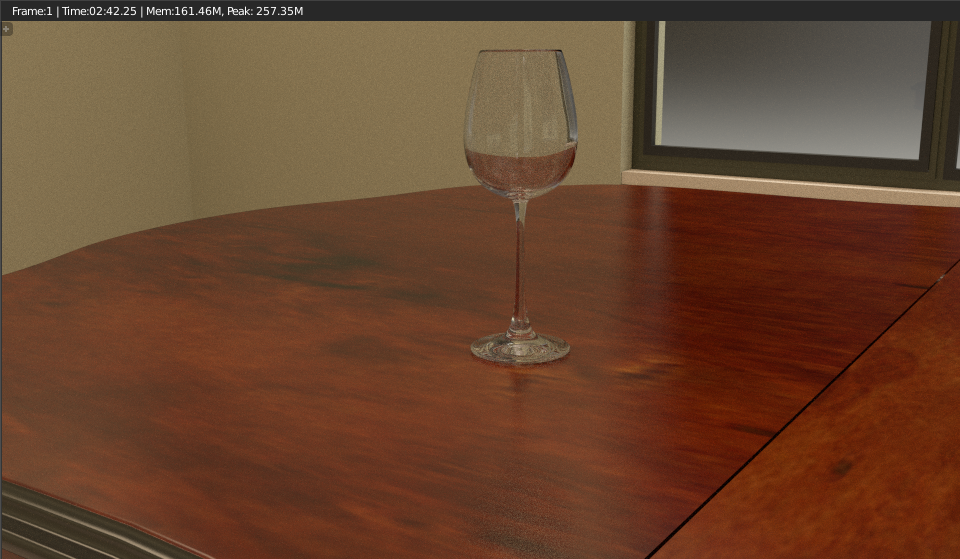
Here is a blend that clearly illustrates the problem of not using thickness when using refraction BRDFs.
Feel free to use included CustomGlassMaterial in your project, or rip it apart to suit your needs. It handles shadows and fake caustics. Caustics will loose energy over distance, and will react to IOR but energy will be the same for IOR (haven’t gotten to it yet). Controls to tweak shadow density and caustics. I wish real caustics were this fast The blend: http://www.pasteall.org/blend/37400
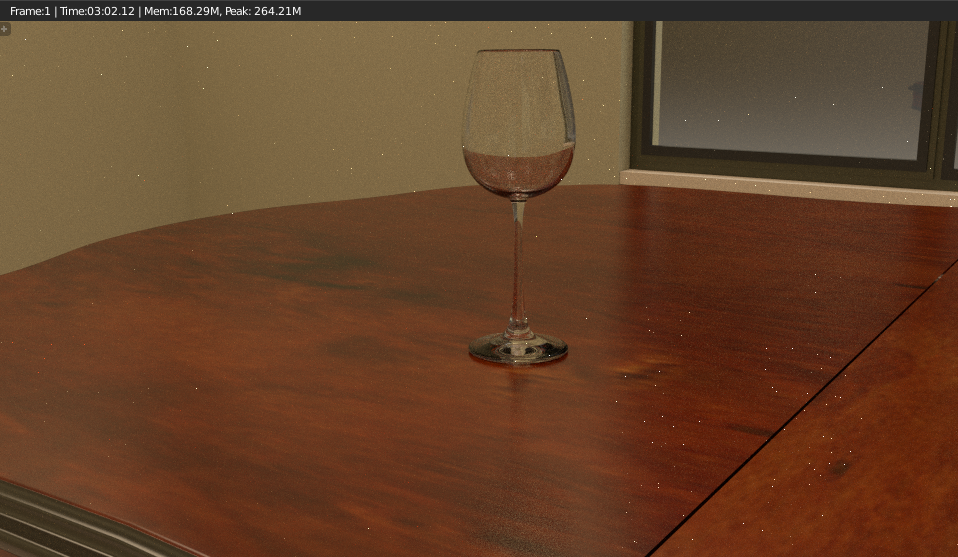
Hmmm. From the look of this it indeed seems there’s still something wrong with the way the glasses are created:
The normals on the foot of the glasses seem to be flipped (hence the almost mirror like appearance) and the shaft looks hollow. How did you create thickness on the glasses - by adding a Solidify modifier? That will imho not result in a physically plausible glass. And is this still a refractive shader?
My offer still stands to have a closer look at the glass meshes, if you are willing to share a .blend (just the glasses will do). Quick and dirty test with correctly constructed glass meshes, default glass shader and (more or less) default render settings:
My offer still stands to have a closer look at the glass meshes
Yea… I must be completely modeling these glasses wrong. Did you use a solidifier modifier in this example? I redid the sherry glass and actually modeled the inner walls, but I really think I did the modeling wrong.
I’m confused on how you close off where the liquid would be, yet still have an inner wall on the stem.
Since mine are obviously modeled wrong, Is there anyway you can upload the blend file for your scene in this example? I would like to first study how your modeling these (because they look great) but also I would like to place one of them into my scene and see how they look.
Yeah, those normals doesn’t look normal See bottom of this page. I think that or similar problem if you have manifold issues, like the bottom faces (with normals pointing downwards) intersecting the mesh and is the first the camera sees (would now have normals in the wrong direction).
@Ikari Well I appended your glass as is. Yours is the one to the left of the wine glass with the napkin in it. When I looked closely at yours it seems you modeled it almost identical to the ones I had done previously. Starting at the inside upper lip you modeled the interior of the glass down to where the wine would go. Then starting at the bottom, you extruded in a little bit and then closed off the bottom. Just like mine, your stem is single faced I believe.
Now as you can see your wine glass looks exactly as mine did, prior to me switching to Minoribus glass material. You get that blackness at the base. Now I should mention that this is a group instance of your glass, I am going to try and bring the real geometry into the scene, but when I did it with my glass, it did not make a difference.
If the same glass renders fine in my scene, but not in yours, there must be something odd with your render settings or your lighting setup, wouldn’t you agree?
And that’s exactly why I keep asking for a stripped down version of your file (light sources / glasses), as all those said settings would come with it…
And btw, providing us with a file would also finally break this trial and error routine, caused by us being forced to blindly guess what might be wrong. Rendering is always scene dependent and many render issues just can’t be diagnosed without.
@Ikari Please find a file with all lighting / and your glass. It makes absolutely no sense to test without enabling the walls, floor and ceiling. The camera is also set up in the scene. Ill not change any of those outer lights because no matter what they are going to stay as they are. But feel free to change and mess around with the 2 lights above the table. I forgot to set up the render settings… but reference post 19 and you will see them there.
These lights are IES lights… you select the cage , press N and at the bottom of the N windows you will see a strength and color.
Let me know your thoughts once you get a chance to look at it.
Just have time for a quick glimpse tonight…
First thing I noticed is that you’ll need much more glossy bounces. The light tends to get “caught” between glass surfaces. The light ray bounces back and forth between the glossy surfaces and is simply terminated when the maximum number of bouces is reached - which results in blackness.
Secondly I’m not sure the IES lights work as reliably as “normal” lights… From my understanding the whole IES light system in Blender is a bit of a hack and IES lights are merely used for the occasional interesting pattern on floor and walls here and there. But in your case a whole number of them is more or less the only light source in the room. It’s just a feeling, but I think this is not a recommended way of lighting an interior scene, which per se is not exactly Cycles’ forte to begin with.


 Now look at those ugly blown out reflections showing on the base and top of the candleholder. Those are from that area light directly above.
 The blend: