I’m realizing that I was posting my finished image in my WIP thread… But I should post them here, now that my base model is done and that the WIP is over.
So here’s an image I finished yesterday.
Hope you’ll like it.
The body sculpt is done with Zbrush, the whole scene created in Blender and rendered with Cycles.
Looking amazing, so much details. But I really don’t like the face, I got gross understanding what does this look mean. But zbrush has really done its job.
I see no problem with the face. To me this expression indicates that he is about to attack a dangerous opponent that will give him a hard fight. And he knows it will hurt.
What seems a bit odd is his pose. The shift between the upper and lower body looks unnatural. The second thing is that the cloth indicates a strong wind while he does not look like he is moving that fast (if at all, it seems to be standing) and the vegetation does not look like there is a storm. So when you look at the scene it does not really make sense. A third thing is the tip of the spear. It simply does not look like i could throw it into a rhinoceros without breaking the connection between the stick and the blade. But the material of the blade looks cool. I think he made it of some volcano glass that is sharp and almost unbreakable.
I also like the jungle environment and the lighting.
Very interesting to see the derivations of your base mesh, Alex! The scene you’ve placed him in is quite nice as well. It reminds me a bit of the work of Timothy Albee (which I just this moment learned is actually the pen name of a woman named Amadhia Albee), specifically the film “Kaze, Ghost Warrior”. Have you seen it, or read the BTS production book?
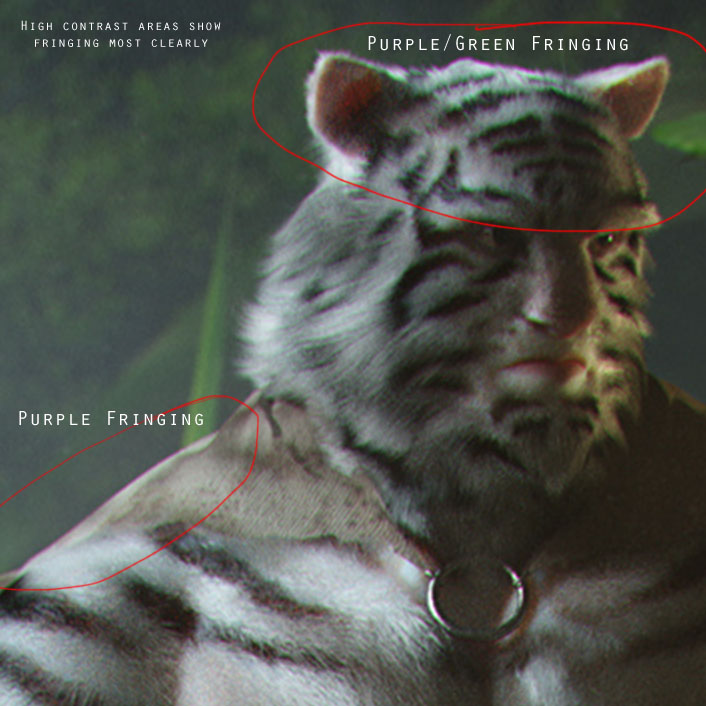
Oh, and one other question! How do you create the subtle purple/green CA in your renders? I’ve never found a useful way to create that look in Blender, only the more common red/blue variety.
Sternmull, you’re right for the wind… Basically, I added the clothes at the end of the creation of the image. He was supposed to be naked. And as I wanted the lioncloath not to hide too much, I added some wind… That’s why you don’t feel the wind anywhere else.
The pose is a little bit exagerated, I know… But I like those lassive pose.
I’m working on a live-action/CG composite, and have footage with this same colouring of purple (or magenta) and green fringing. Since I only know how to add the more common red/blue chromatic aberration in Blender, I’d love to learn more about the technique you use to create it. Even looking up Photoshop tutorials, I have found nothing helpful.
Oooook, sorry for the CA. I was not used to that abbreviation.
So, here’s my settings in photoshop. In “Filters”, you’ll find the “correction de l’objectif” filter (must be something like ‘lens correction’ in english)
In the “personalized” tab, you’ll find the settings for the CA.
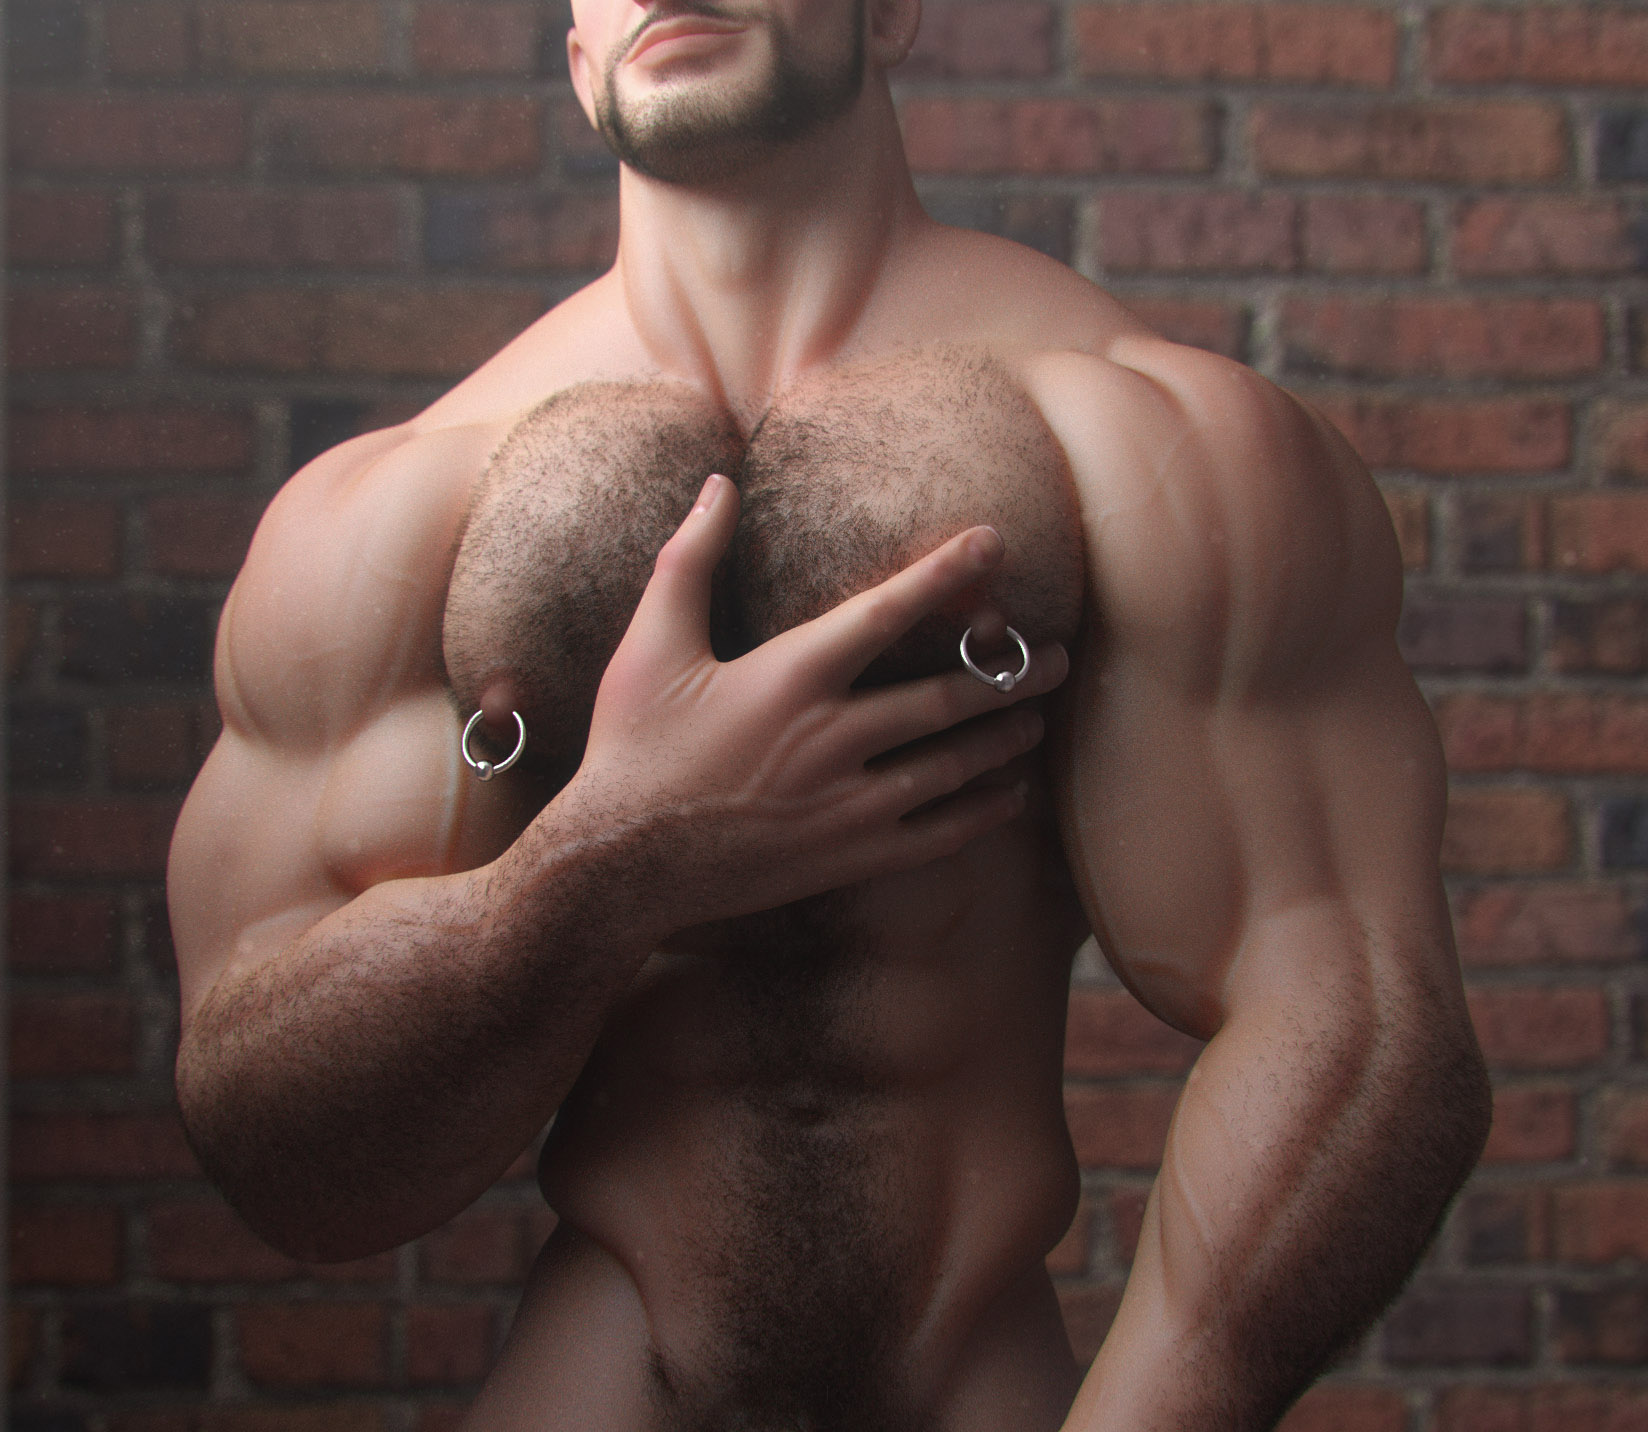
I’m not a specialist of that matter (far from that) but I did that montage to show you how you get that purple fringing.
But from what I saw, if you have it in one corner, the other corner will be the opposite color… I attached also the whole image of the male torso I used as example.
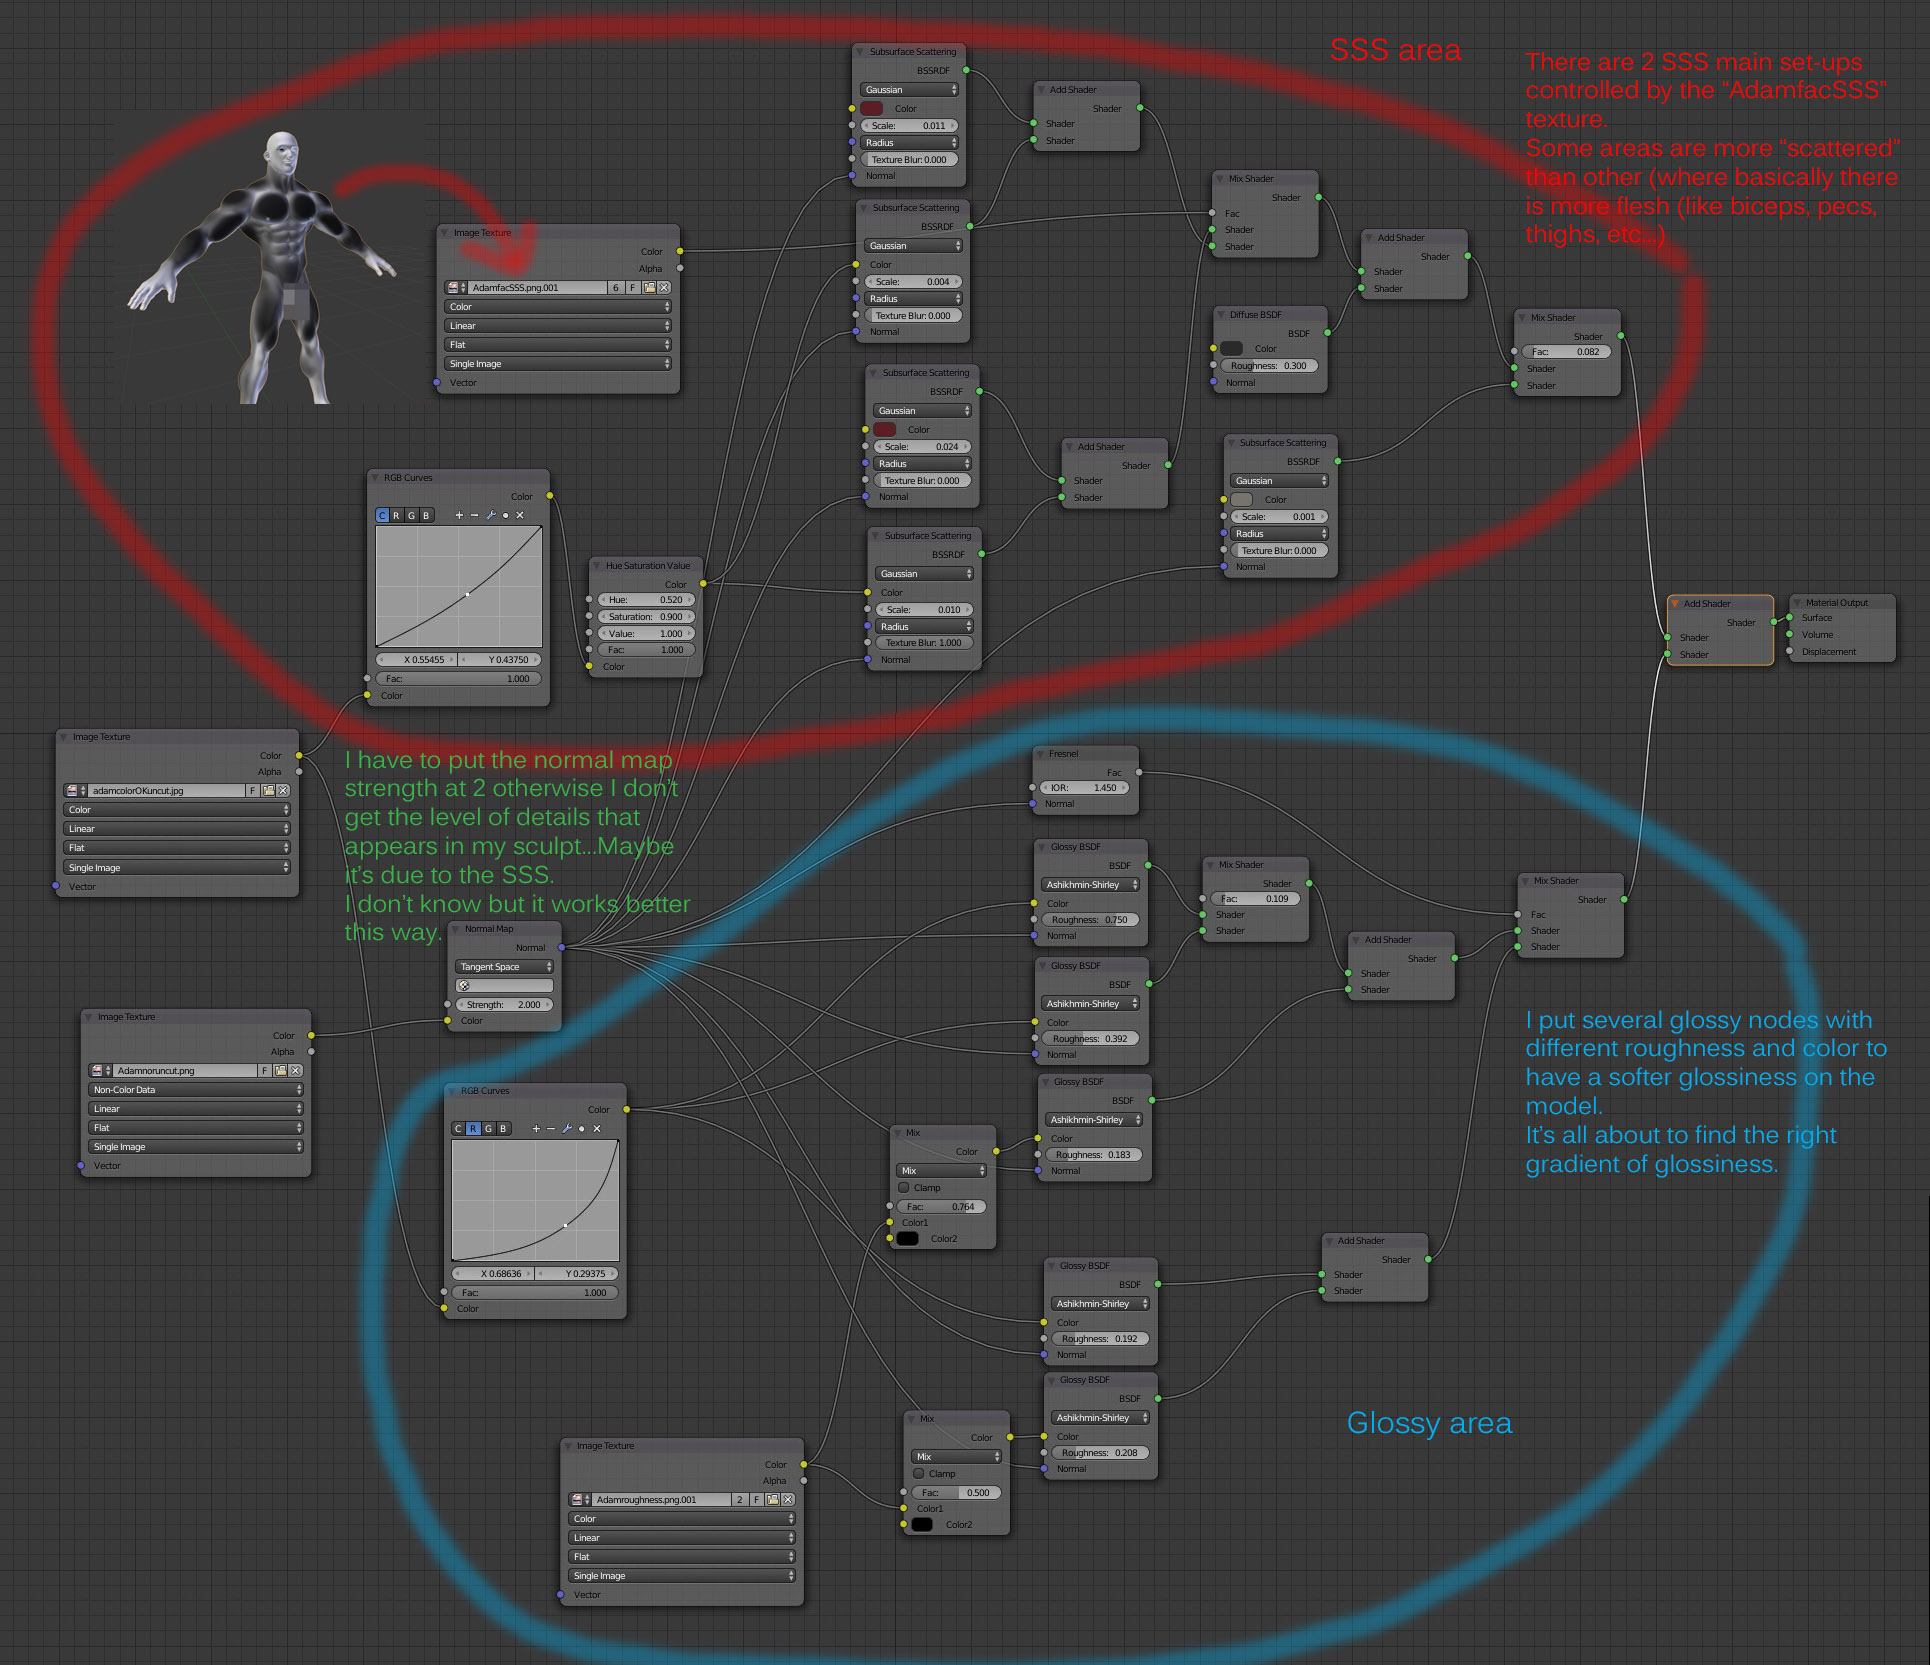
And I post here also the setting for my SSS shader. If it can help people, it’s cool.
Ah, so that’s how you achieved the look. Thank you for your detailed explanation! I’ll try this out on my project. Thanks as well for the skin material nodes; I have a Hulk video that might be helpful on one day. I’m sure they’ll be helpful for others, too!


 I was not used to that abbreviation.