Greetings. This is my first post, but aside from that, I was wondering how to achieve the Equirectangular Camera in the Blender Internal engine? Cycles is a handy tool and all, but the amount of rendering time that it consumes is unbearable for me when it comes to animations, otherwise I’d have to deal with tremendous amounts of grain. I am aware that Blender has discontinued the development if the Internal engine, so is there any way to mimic this effect?
(Note: I am asking this so I can accomplish a 360° render for YouTube.)
actually you don’t have to mimic anything. Just set the Render mode to Panoramic and change the focal length to about 5mm or something. (you might have to experiment with this value a bit)
That’s it…
Thanks for the info, but when I tried to do so, I achieved a somewhat accurate image of what I wanted, but it didn’t fit the 360° format. It must render with those precise manipulations, otherwise it wouldn’t work.
I did a little research and found out that Panoramic rendering in BI just covers one Axis.
There is a way of baking a Texture off the Reflections of a Perfectly Mirrored Sphere. This is one acceptable workaround.
However I don’t think that you can Bake frame by frame automatically in an Animation. Bummer…
Apparently there is an Ad on now that is called Animated Render Baker. Just activate it in the User Settings, then an Animated Bake Button will appear in the Bake Panel + Entry’s for Frame Range.
I tested it out. It works great. It produces single Images that can easily put together in the Video Editor.
P.S. In the Tutorial that I saw, (the one with the Reflective Sphere) an UV Sphere is used. This makes creating the UV Layout unnecessary Difficult.
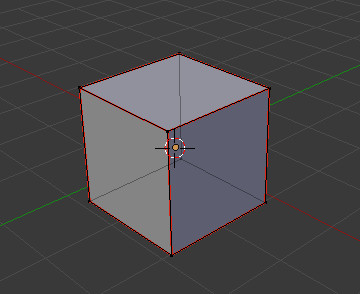
My Tip is to subdivide a Cube once, and mark a Seam like this:
then go into Front Orthographic View and Unwrap with Cylinder Projection.
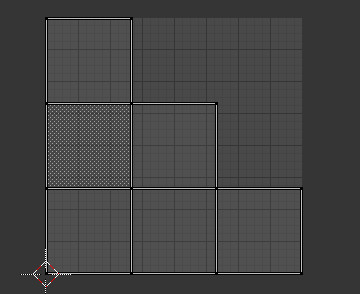
This should give you a UV-Layout like this:
Don’t Mind the Lines that stick out to the Sides, they won’t affect the Baking at all.
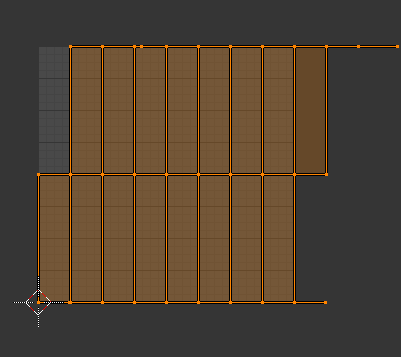
If the Faces are Offset like this:
Just switch to Side View and Unwrap again. This should solve this issue.
Then Subdivide the Cube twice more, and use the To Sphere modifier on it.
Set the Shading to Smooth, and give it a Material. Make it Shadeless and turn
Reflectivity to 1. Under Options uncheck Traceable. This will avoid Shadows
and Reflections from this Sphere. This will not affect baking.
The Image that you use for Baking should be in a 2:1 Ratio.
Bake one Single Frame like you would usually, and save the Resulting Image in
a Foler of your Choice. The Name you give this Image will be the Template for
Naming the Frame.
Set the Frame Range in the Bake Panel and Hit Animated Bake.
Unfortunately this Script will not give you live Feedback. Thus you might consider
opening Blender With a Terminal. Then you will be able to see what’s going on.
That’s it! You find all the Images in the Folder you saved the Template to.
Have Fun!
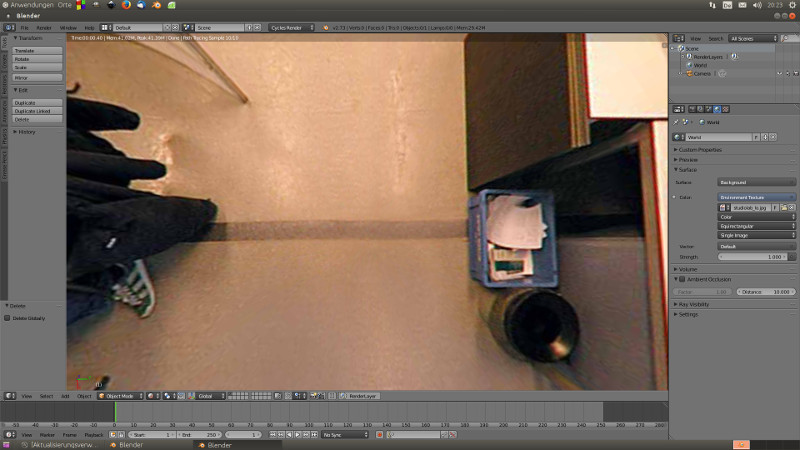
I tried this out, and I got very minor accurate results, as is shown below. Your concept looks like it should have worked, so I’m fairly certain that it did something wrong. Any suggestions?
The Problem is that Cylindrical Projection does exactly that. It Projects from a Cylinder, thus all top and bottom Faces are compressed to a line in the UV Layout. I know I said it won’t affect Baking, but I couldn’t be more wrong.
I tried different Edge Setups, but without Success.
The UV-Sphere Method seam to work pretty good thou.
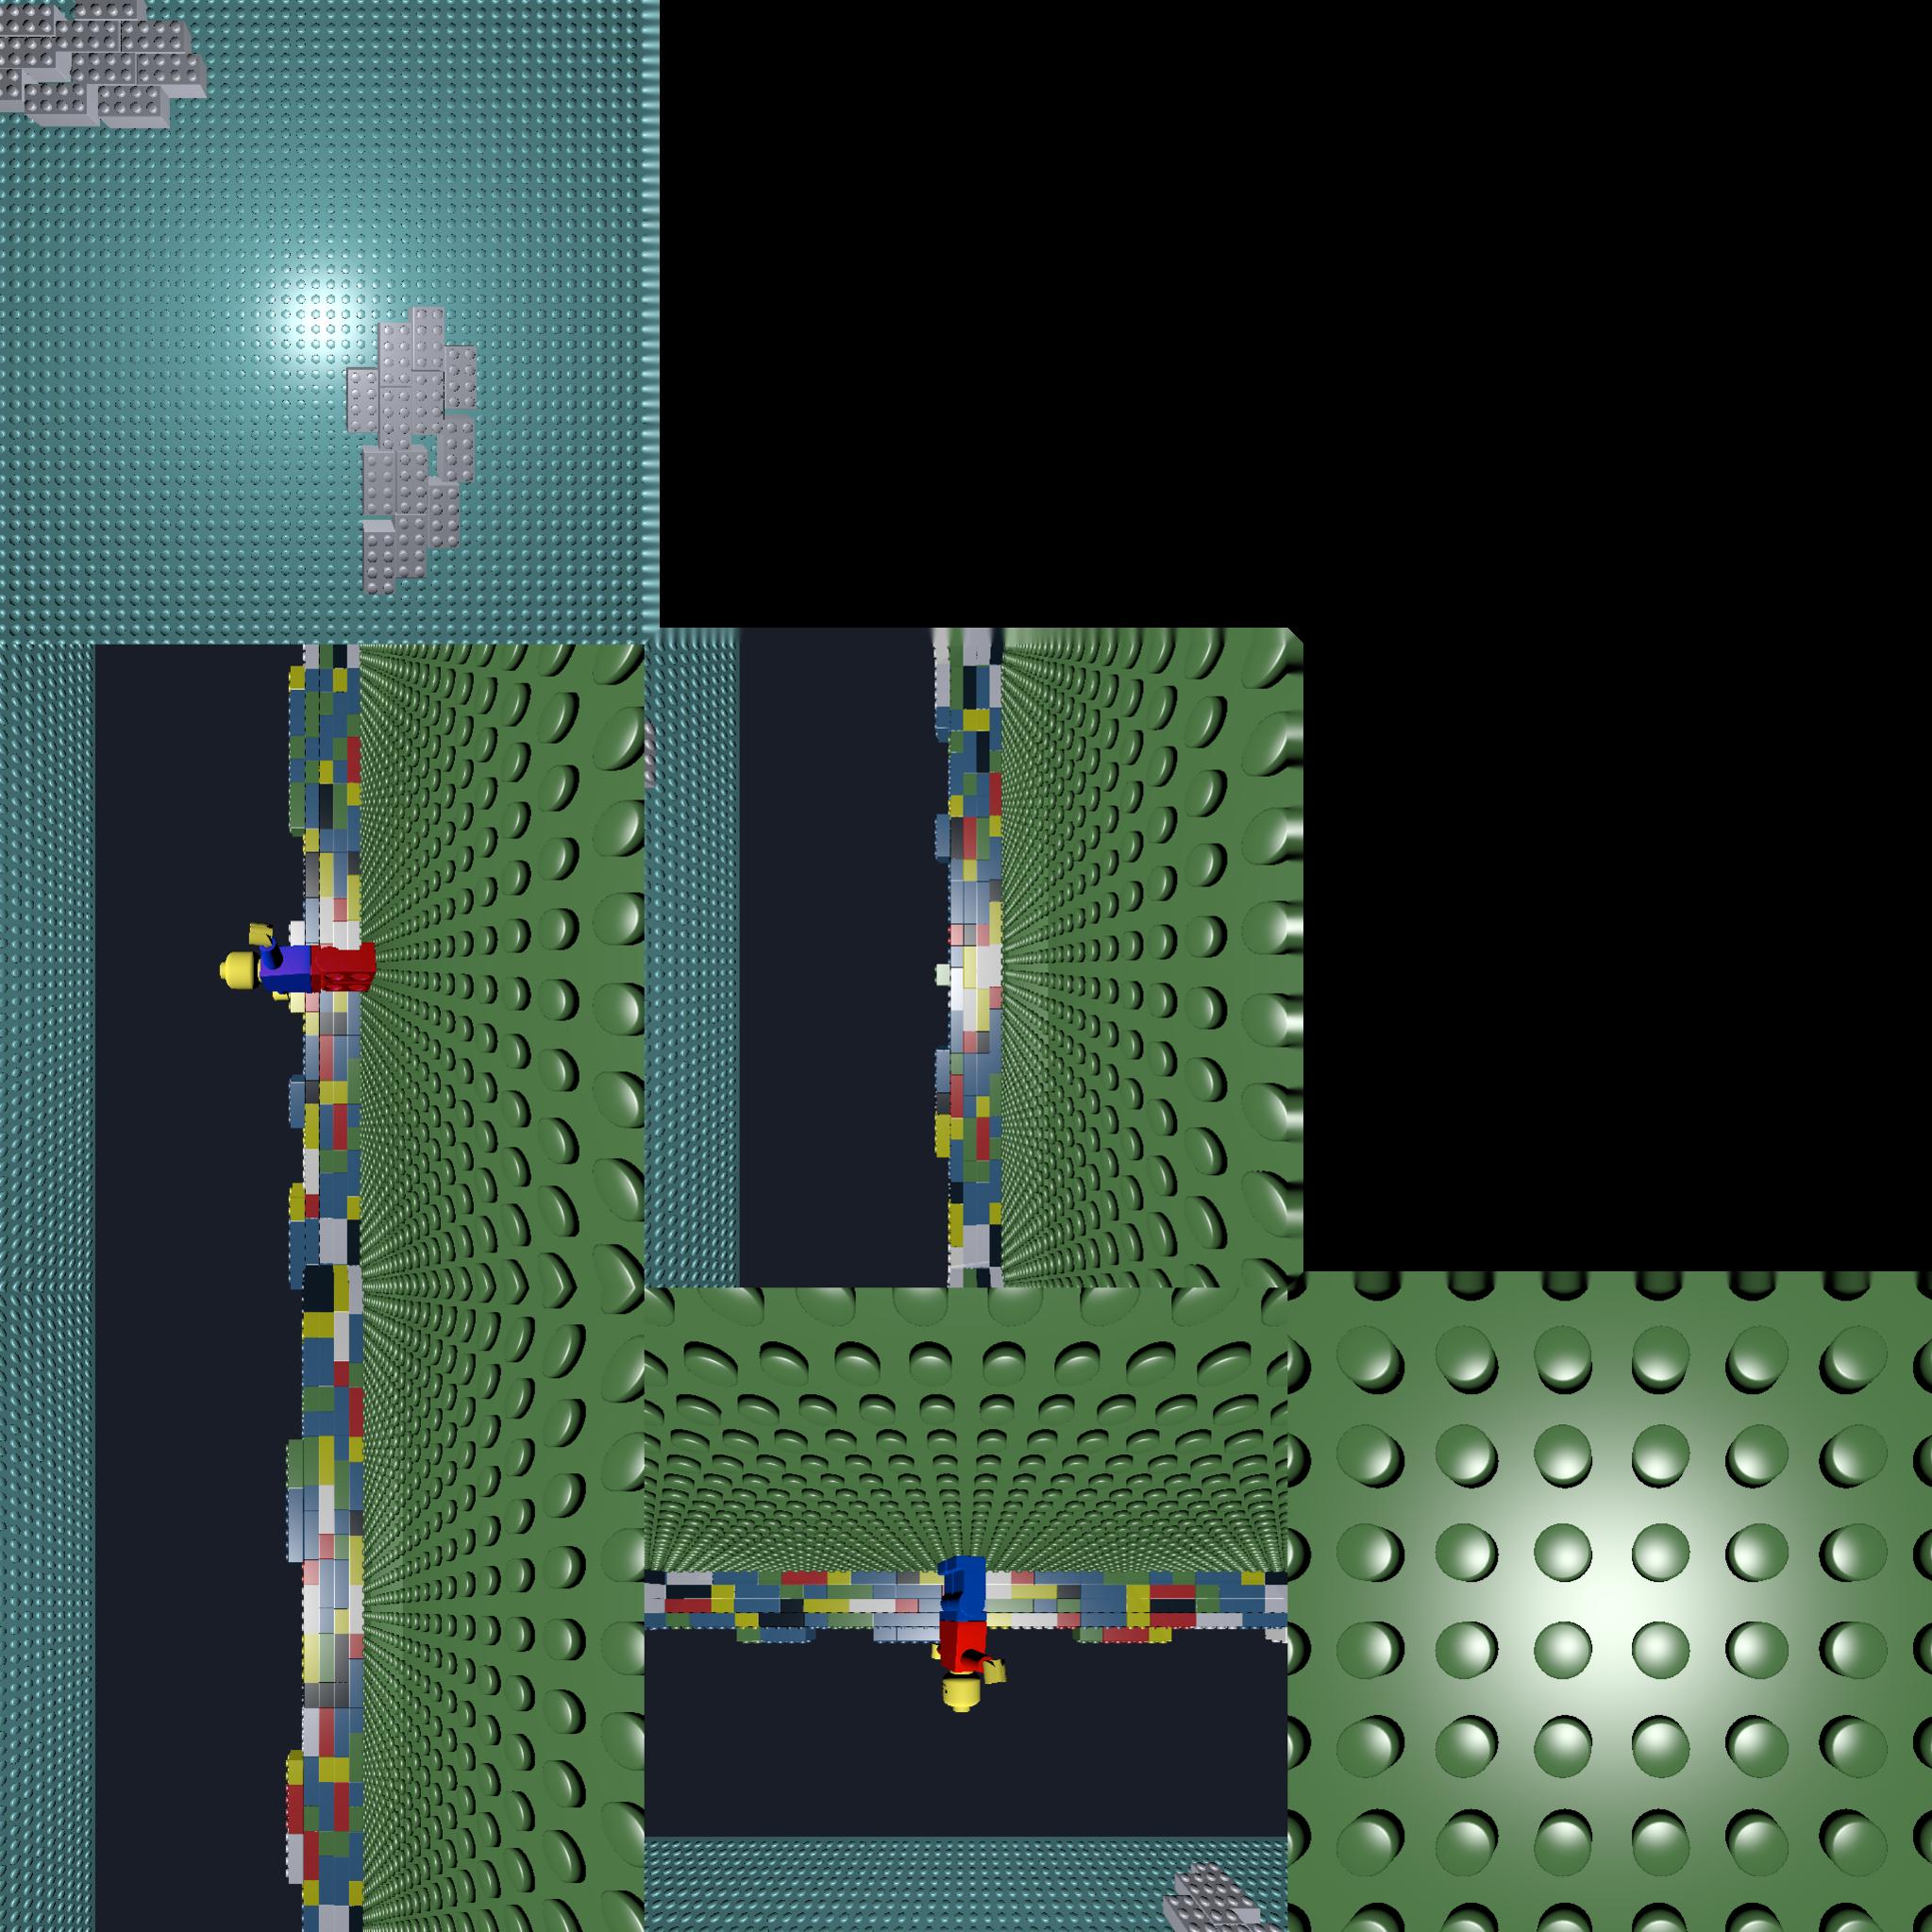
I set up a little Test Scene without any objects in it. Just an Equirectangular Environment Map.
My goal was to Bake an Image as close to the Original as possible.
The Field of view was always a little different, no matter what I tried. But otherwise it turned out well.
To check if the Map will work, I set up a Cycles Scene, and used the Baked Equirectangular Map for World Color.
In Render Mode you can Check the Map for Seams then. Horizontally it was perfect with the UV-Sphere Method, but
I couldn’t get rid of some Pinching at the Top and Bottom.
If you can live with those rather small Pinches, then you have a Solution.
If you are interested I can attach the Blend Files, one for Baking in BI, and the Cycles Scene for Seam Testing.
Will probably be a good starting point for further Experiments.
[QUOTE=0BackBONE0;2905301]The Problem is that Cylindrical Projection does exactly that. It Projects from a Cylinder, thus all top and bottom Faces are compressed to a line in the UV Layout. I know I said it won’t affect Baking, but I couldn’t be more wrong.
<snip>
[QUOTE]
Is this answer official, though? I was actually hoping to not get the little pinches on the bottom.
Spherical Projection doesn’t mean that you have to use a Sphere. I am Convinced that it is possible to get a clean Map if one only can find the right way
to place seams on the right mesh.
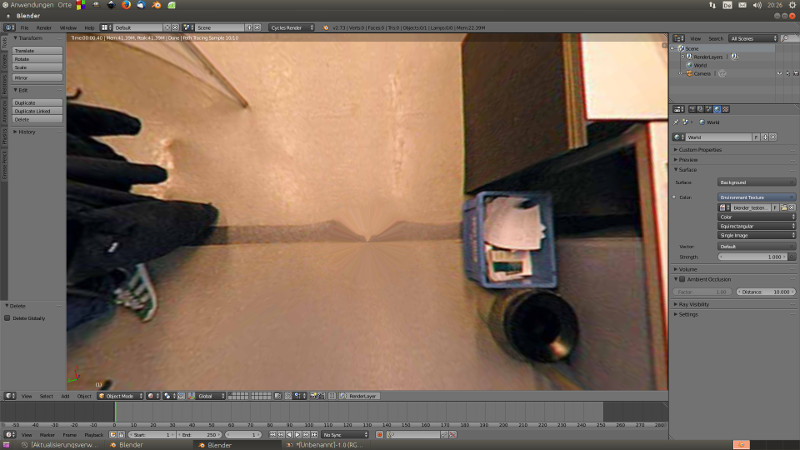
Here is a comparison between the Original and the Baked version with the UV-Sphere.
Maybe the Pinch can be a little smaller if Subdivisions on the Top and Bottom of the Sphere are greater, but I don’t think that you can get completely rid of it by using a UV-Sphere.
Edit: I found a way, but it is a two part process.
First you bake a Cubemap in BI, and the second step is to put a Panoramic Camera inside the Cube in Cycles. This will give you an highly accurate Equirectangular map. I’ll give you some details later…
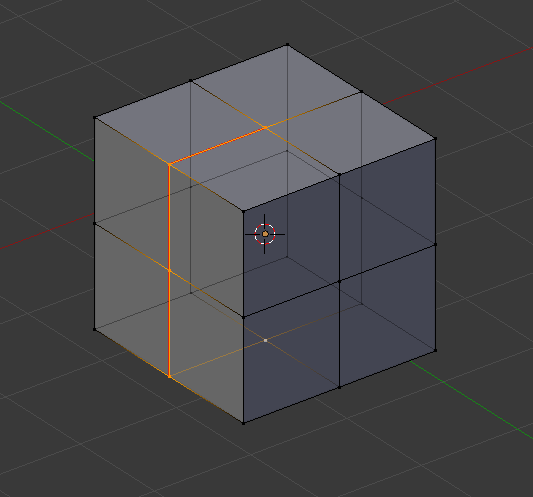
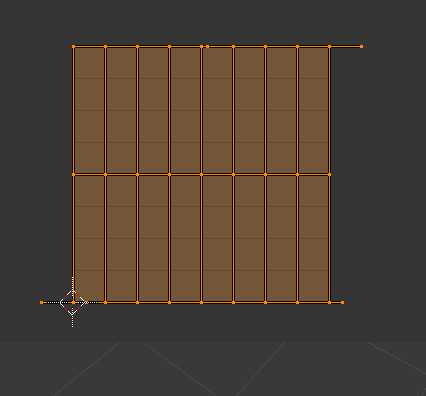
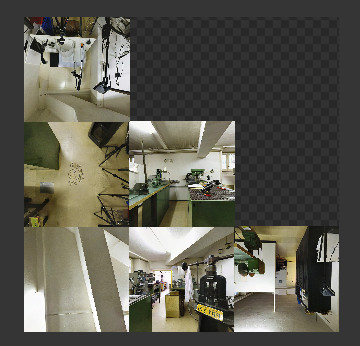
Go into orthogonal front view and Unwrap the cube.
This should give you a UV Layout like this:
Set the usual shadeless fully reflective material, as you would on the UV-Sphere.
Important: Set Shading to smooth, otherwise every face will just have one colour.
Create a new Image, and Bake it. (as we did on the UV-Sphere)
This should give you something like this:
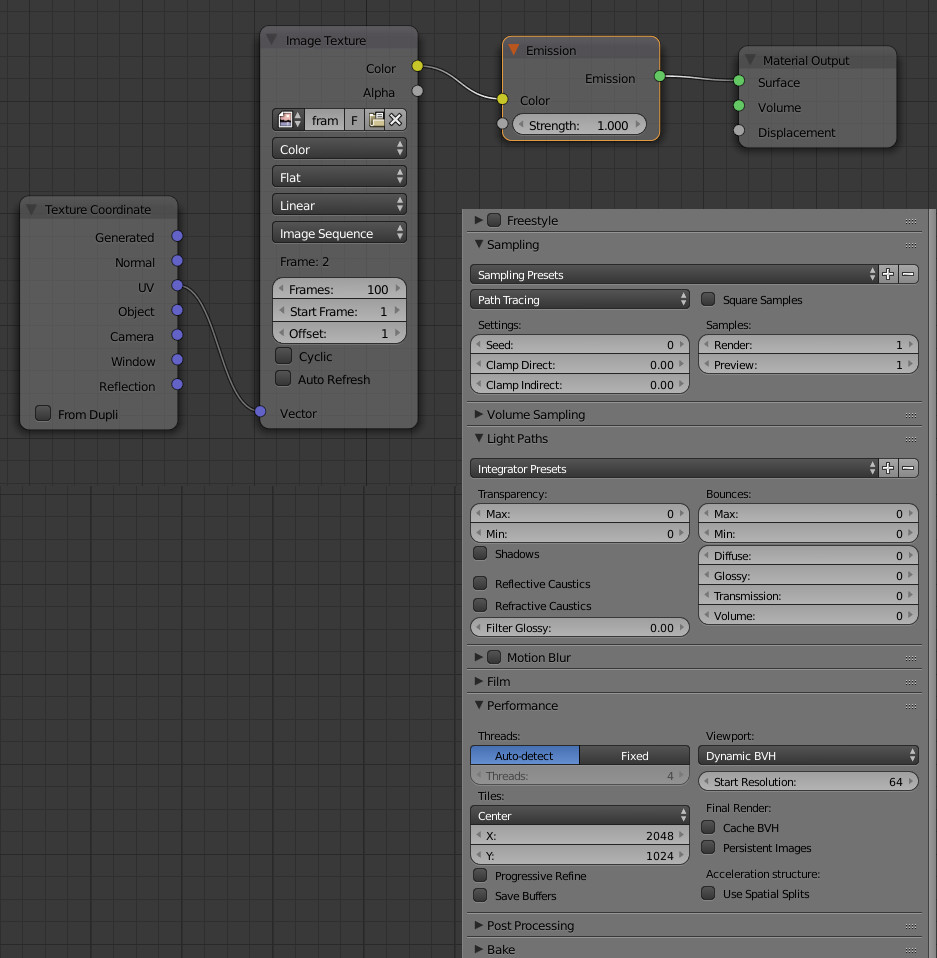
Now switch to Cycles
Give the Cube a Emisive Material. Set the Baked Image as Colour, and the Vector to UV.
Put the Camera to the Centre of the Cube. Reset its Rotation, and rotate it that it lays horizontally.
To keep the Rendertime as low as Possible you can set everything in the Light Path Panel to zero, uncheck Caustics and Shadows,
and set the Cycles under Sampling to 1.
In the Performance Tab, set the Tile-size to the Size of the desired Output-Image-Size. (of course you have to set the Camera to the same size).
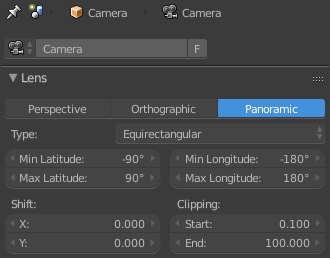
All that is left to do now is to make the Camera Panoramic, and Equirectangular. It might help to scale the Cube up a little. (this probably make no difference but anyway ;-))
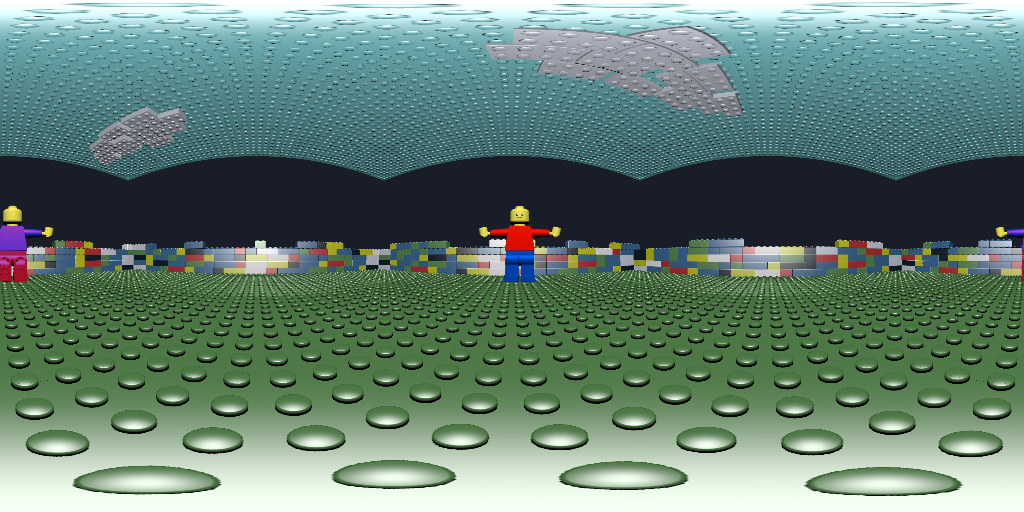
Now you can render it out. And there you have it. A perfect Panorama.
Cause we can set Cycles to 1 and Bounces to 0, Shadows and Caustics off, Rendering will be very fast.
It is more like converting a Video. (what it practically is…)
If you get wired results make sure the UV Set up of the Cube in BI and in the Cycles Scene are the Same.
If you have trouble unwraping to the same Layout, append the Cube that you used for baking.
Hope that makes everything clear.
Have Fun!
A bit of a bump here, but I recently tried this and it worked great! I managed to slightly erase the bottom and top errors, due to the UV sphere mesh, by adding black circles!
Works great, and would recommend this for all users!