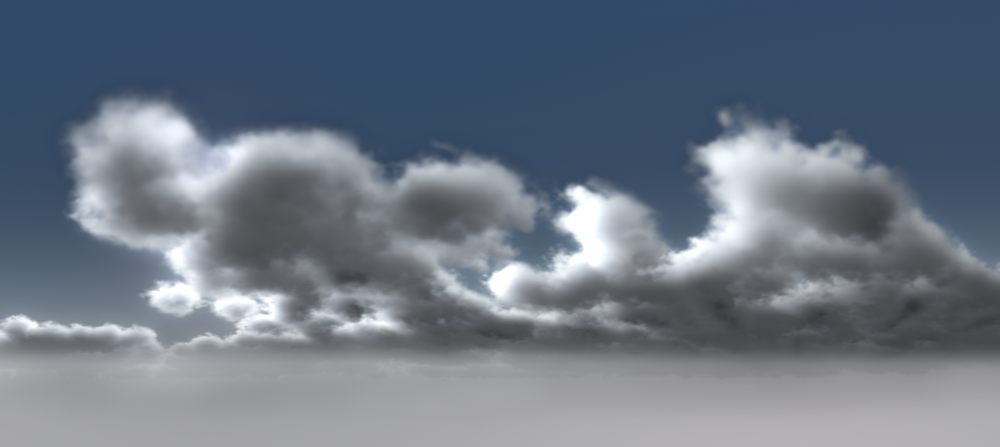
I am wondering how to create and render clouds that looks very similar to what’s on the images below.
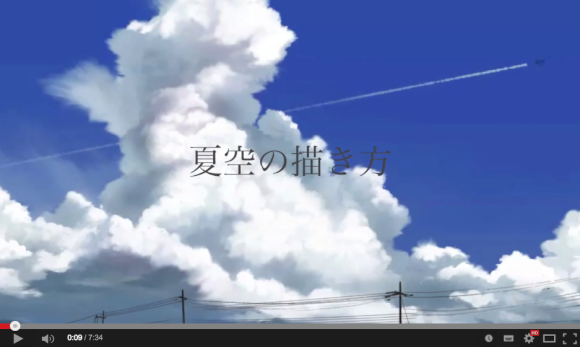
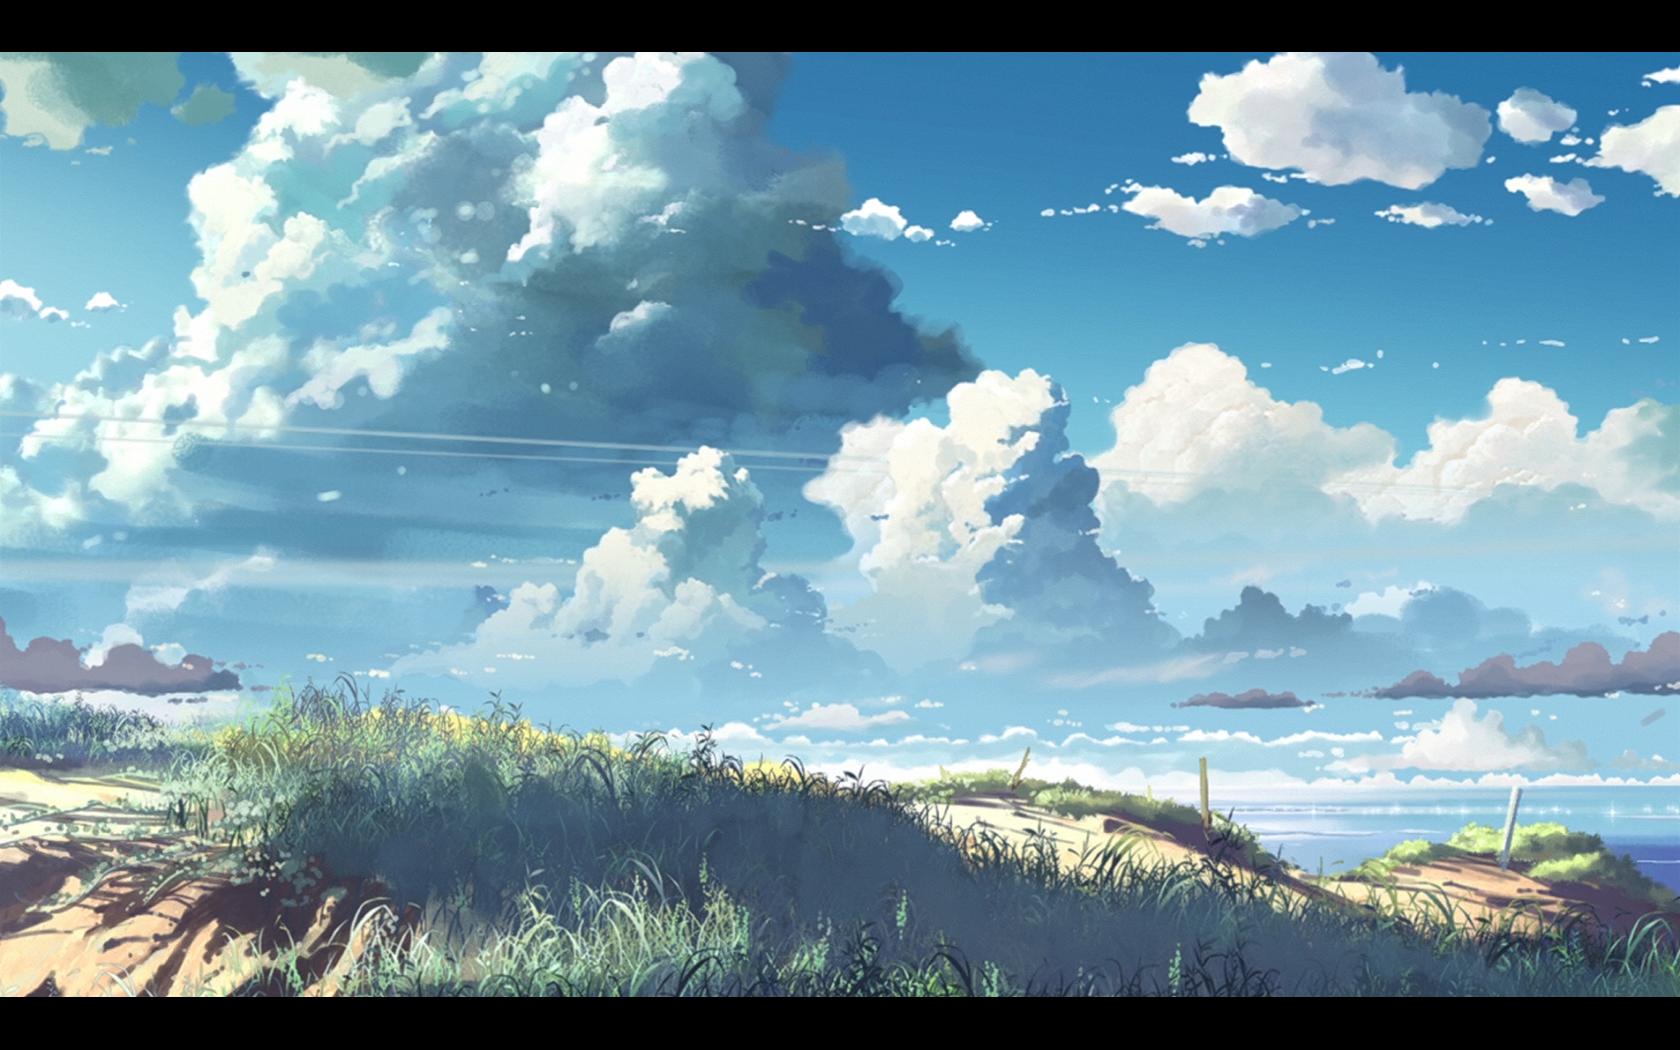
It can’t be a 2D image because I need to setup a 3D scene and render a skybox for a game engine.
Thanks!
I am wondering how to create and render clouds that looks very similar to what’s on the images below.
It can’t be a 2D image because I need to setup a 3D scene and render a skybox for a game engine.
Thanks!
They could be textured planes, like WoW does. Look at the skies of Nagrand: they are made of a gradient background and tons of hand-painted planes.
I am specifically trying to avoid painting since I am not that great in 2D.
Couldn’t you just do a “normal” cloudscape in Blender, render out your skybox and apply some kind of oilpaint (or whatever) filter on that afterwards in any image editor of your choice? Why does it have to be “pure Blender”?
Well, I take it as Blender no good for artistic looks ![]()
There might be artifacts present after post processing panorama, so that when I convert into skybox, seams might be visible. I am not 100% it will happen, but it might.
Even if I go that route, I still need to render clouds with toon’ish shading / SSS / rim lighting and run some Van Gogh or oil filter in GIMP over it to add that painterly texture look.
You could achieve something similar with particle billboards of textured planes but the SSS effect is hard to attain. Really best to render a volumetric cloud then apply some post processing in the compositor.
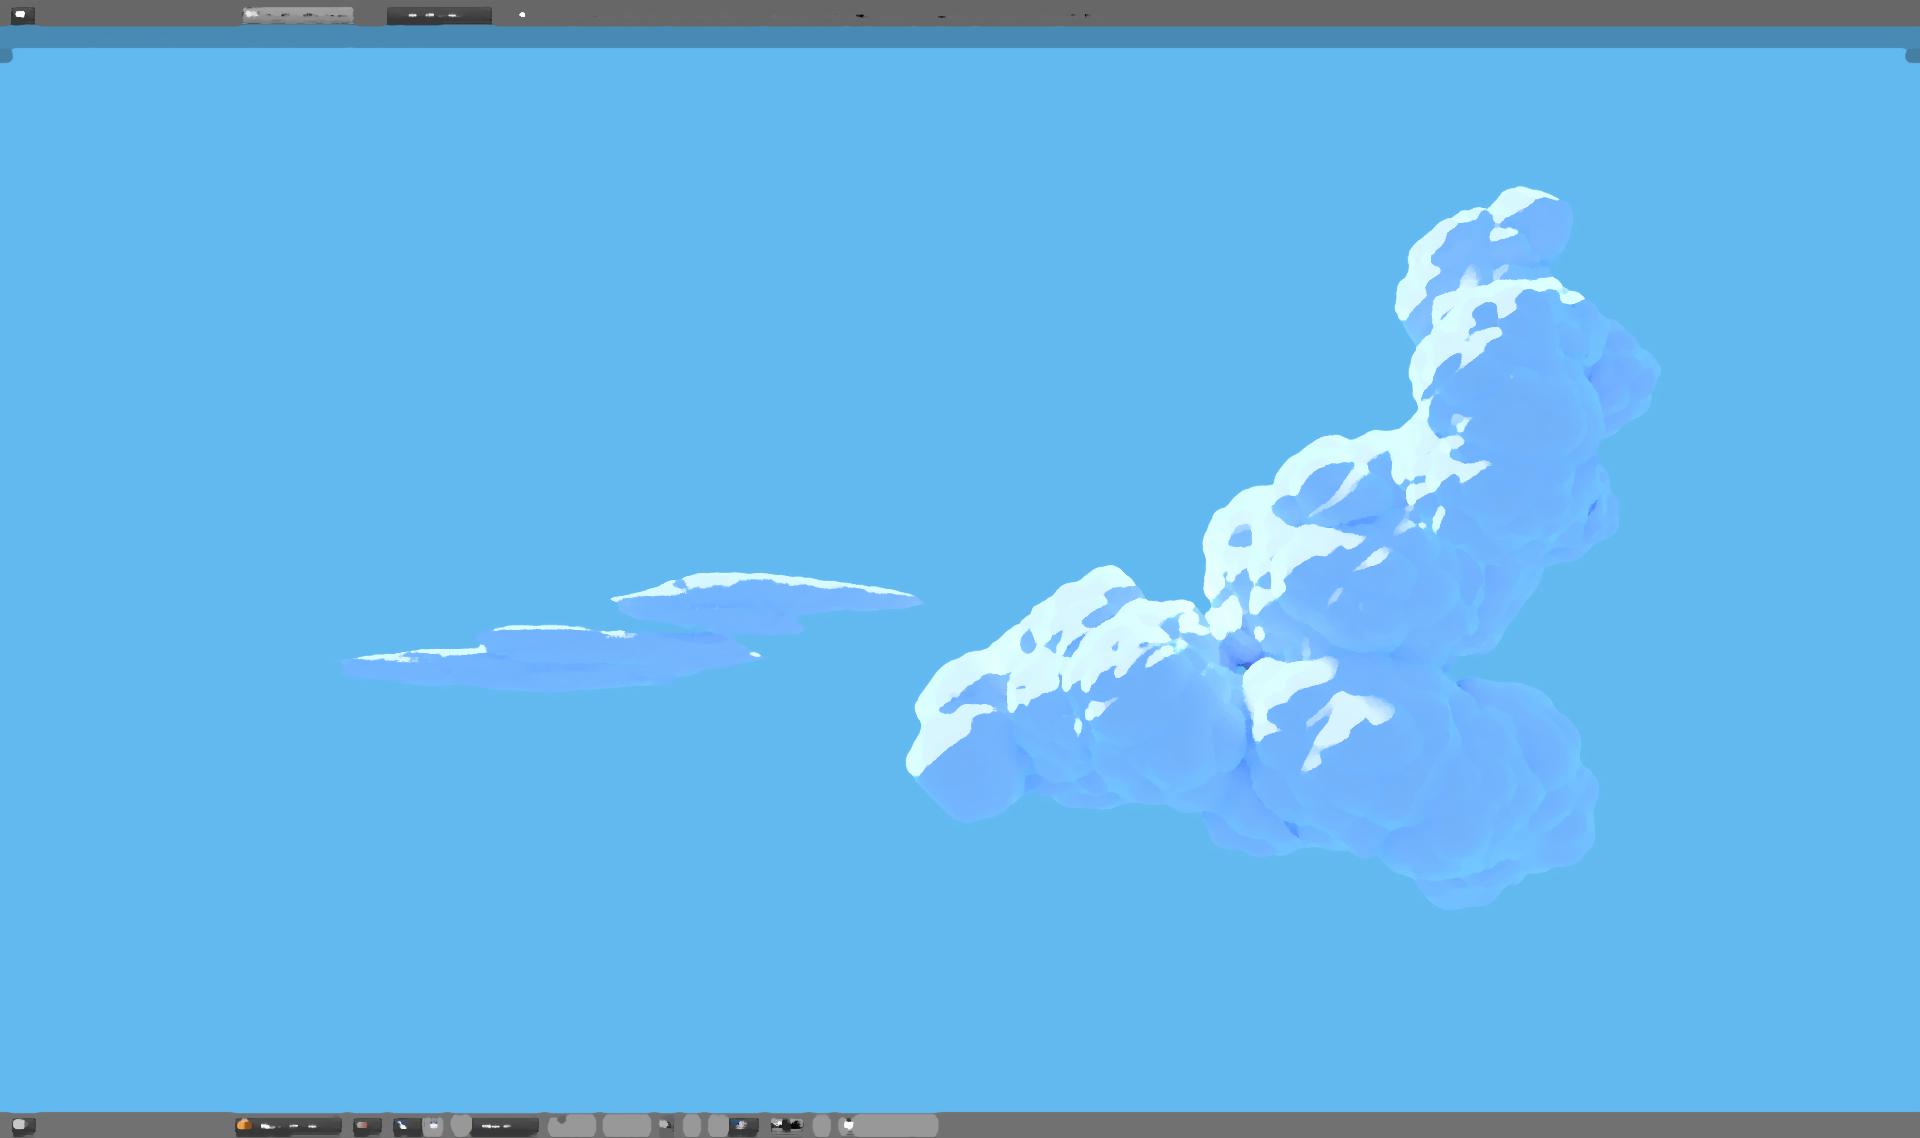
Modeling cloud would be a better way. I don’t think smoke sim will ever provide shapes like seen on the example image. It’s designed to produce photorealistic clouds. It might be possible to achieve something similar, but I don’t have in-house render farm to be able to find those settings ![]()
Thats a really nice start motorsep! But how can you get the backface colours or internal illumination to come through? Apart from solid edges, the nature of the shading makes it seem to solid.
Also I had some success painting shapes with particles and the remesher addon. The effect is similar to metaballs but much lighter on system resources.
This isn’t metaballs - it’s just good ol’ displacement 
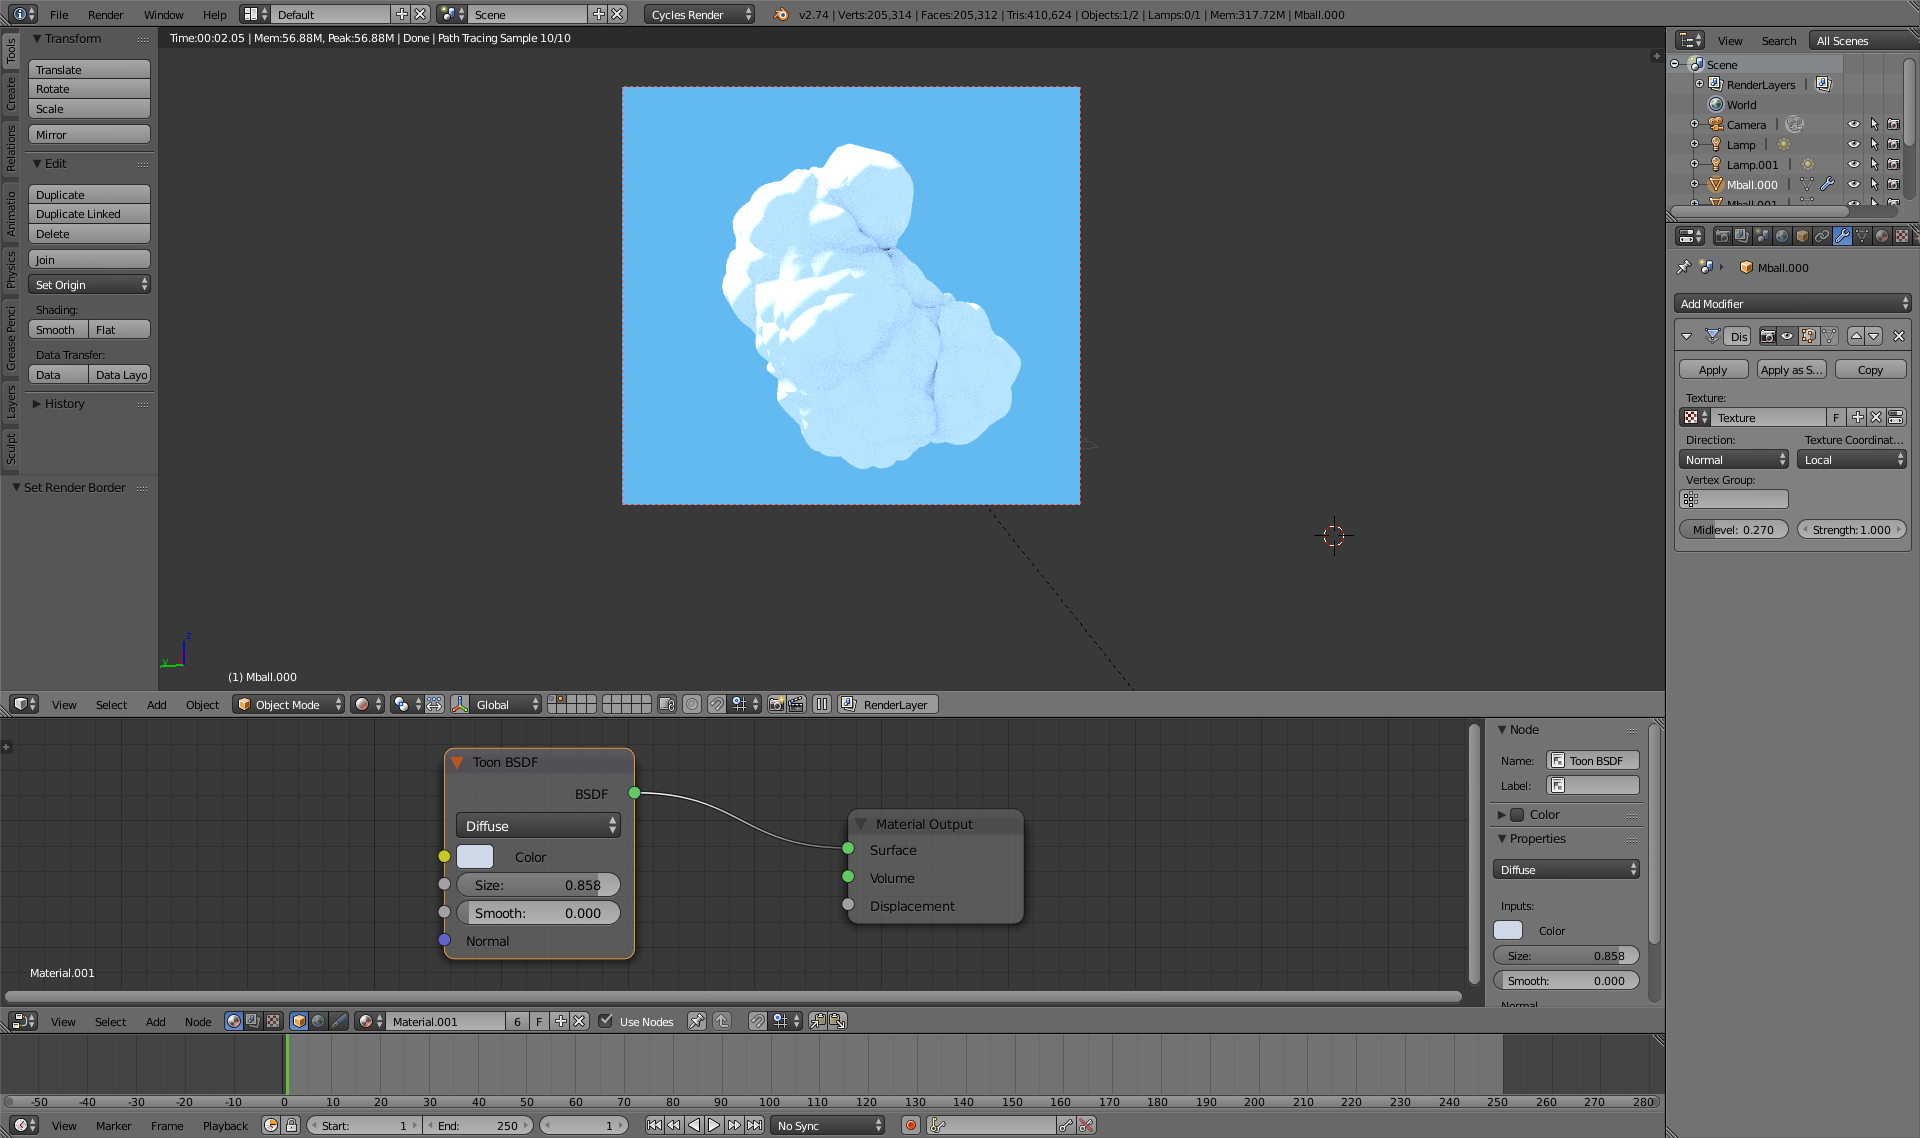
Anime clouds are solid. There isn’t really any SSS, but I figured it would look a bit better with SSS.
I think Cycles is really crappy for NPR rendering  I have no idea how to have stepping from shadow to light. It’s only 1 step - darker back side and bright highlight. And there is no info about it online. As if Toon Shader was thrown into Cycles for a check mark, and forgotten.
Nothing prevents you from using as many toon shaders as needed in a single material though.
That’s one the nice things about node-based material building.
You’ll also need a lot of displacement as well to finish the shape.
The volumetric scattering effect on colours results in blues that differ from the sky’s blue. Yours seems a little like a reflective hue.
Before attempting SSS, I’d like to have several steps of shade on the dark side. It seems that no matter what I do, there is always only two steps - lit side and shadow side.
On the other hand, maybe SSS will give me that effect?
I think people only use Cycles for arch and photo real rendering, since I don’t get whole a lot of responses and tips neither here nor on #blender
Volumetric cloud material for BI here.
Render result:
One Photoshop action later:
Needs further refinement of course, but I stand behind my opinion that this is the fastest and most painless way to achieve the look you’re after. CG is imho all about the pipeline. Why waste countless hours to get a result directly out of the renderer, if an external image editor can do the job in a few seconds?
Well, it doesn’t look anywhere near to the reference, even after Photoshopping. Plus I don’t have Photoshop.
My cloud took only a few seconds to render. So it will not take countless hours to render whole scene once material for mesh clouds is established. I bet true volumetric cloud, as in your example, render a way slower than a mesh with material over it. Of course once I add SSS, it might be all different render time wise 
I think I mentioned (maybe I did in #blender) that after post processing, skybox (6 images) might show seams/mismatching parts.
Btw, I noticed that Google doesn’t return too much of results about the subject. I guess it’s a mystery art of making anime clouds :eyebrowlift2:
I think I am giving up on Cycles - too complex/technical to set up 
Here is the latest results:
I tried SSS, but setup is so horrible (and there aren’t whole a lot of tutorials for non-skin SSS shader setup and mixing with Diffuse) that it looked like turd afterward 
Oh well, might as well just figure out how to paint over without causing seams on skybox.
EDIT: Here is the same image after GIMP’s filter:
Also the base of the cloud needs a bit of boolean subtraction to flatten the base. As clouds sit on a temperature layer. And they tend towards darker at the base as they absorb the sunlight coming down.
Although not exactly anime-like, I think your clouds are getting quite nice and non-photo. Will you share the technique when you are happy with the results?