Followed this tutorial:
Given that it was a completely different software,
I was feeling pretty good about my progress, until
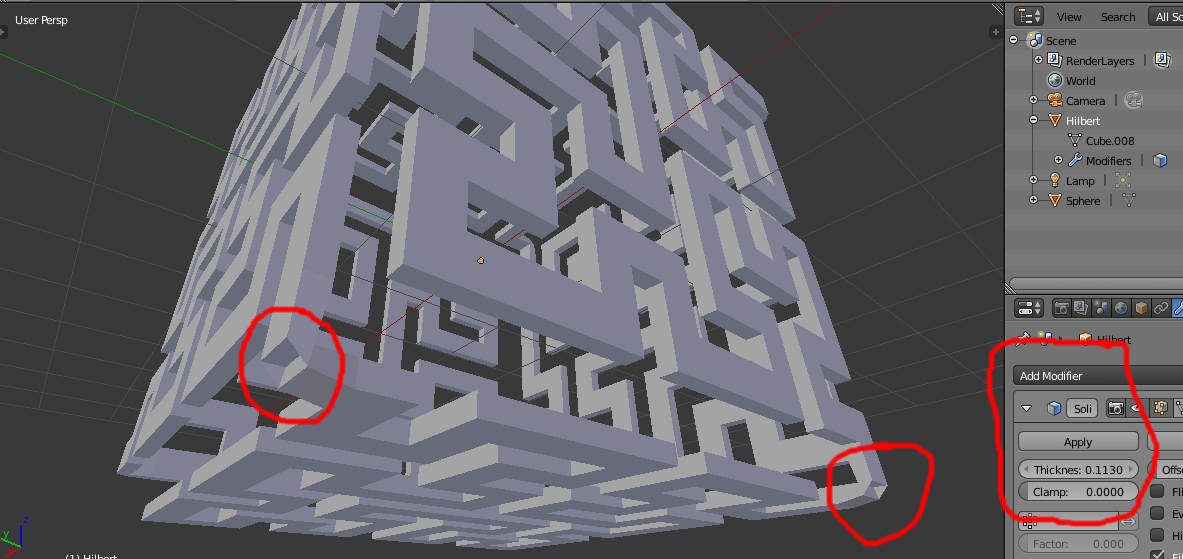
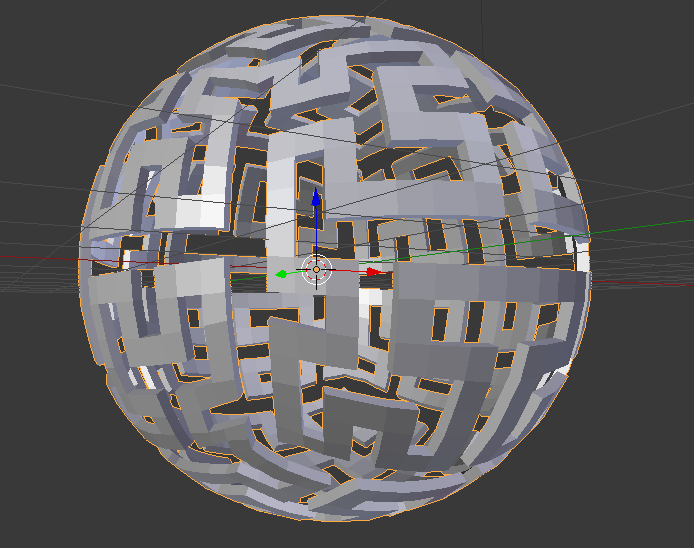
I tried applying the Solidify modifier. Then it went
south.
Being as it begins with planes (of a sort) and their
precise alignment. I’m guessing that’s where things
went wrong.
I’ve tried the Precise Align addon as well as the
“Scale X 0” trick and I’ve tried deleting edges and
recreating the faces as well as removing doubles.
I’ve also tried flipping the normals to see if that
made a difference. So far, still screwed up.
So, what exactly is wrong and how best to fix it?
Thanx
hilbert_16x16_fixit.blend (729 KB)