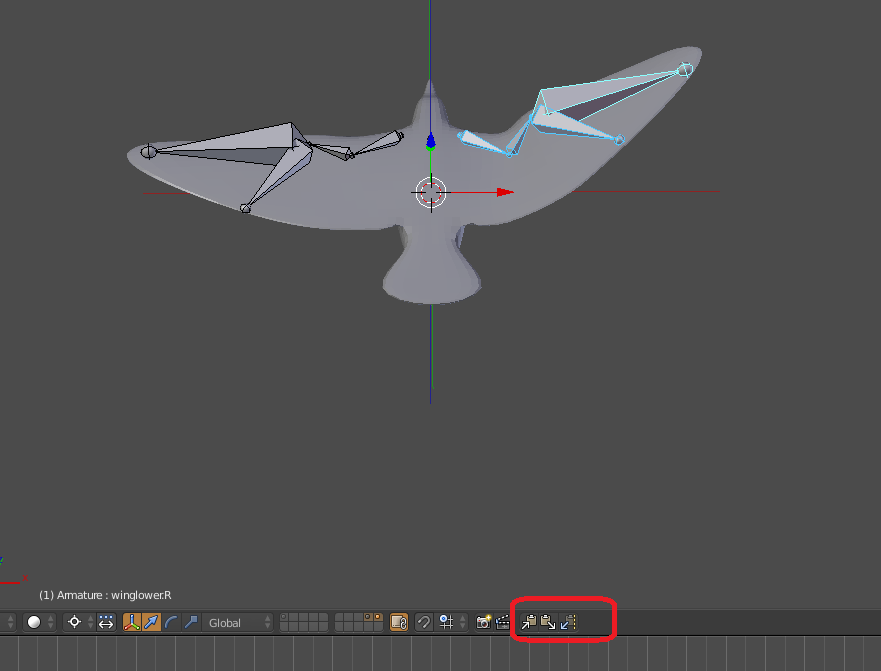
I have designed a bird and for the last 3 weeks have tried to just create an animation of it flapping its wings in a relatively realistic motion (not just up and down but deforming correctly). I am losing my mind with this relatively simple task. I would really appreciate any help anyone can give as I am a total novice at this.
Ok.
What am I doing wrong?
First of all I tried creating groups of vertices of different areas of the wing (a group for the whole of the wing, a group for the tip of the wing etc etc) then used these vertex groups to deform the mesh to create a flapping motion and inserting keyframes along the way. Problem is that when I try animating like this by installing a keyframe nothing happens. The keyframe registers on the timeline (a little yellow line appears) but the mesh doesn’t deform. This seems like the most basic and intuitive way of animating so am hoping it is me that is missing something out rather than Blender being unable to work like this…
Because I couldn’t do the above I tried to animate using shape keys. Shape keys seem useless as for this however as each shape key is affected by the shape key ahead of it and also must be moulded fresh from the ‘basis’ shape’ rather than just being able to deform the mesh of the key ahead of it. If that description is confusing you trust me it isn’t a patch on how I feel.
After that failure I tried armature modelling but found the armature never weights correctly to the mesh when I pair them. When I try to adjust the weight using the weight paint the mesh then appears very jagged when I deform it where it isn’t feathering smoothly. I have also tried pairing the mesh and armature using empty groups then manually attaching vertices to the bones but the transition in weight between the red affected areas and blue unaffected areas is too sharp and not smooth enough. Again when I try using weight paint to adjust this I still can’t create a smooth graduation.
I enjoy manually moving groups of vertices, the mesh seems to mold well into the shapes that I want but why, when applying bones does the mesh get jagged when I deform it and why, after applying subdivision to the mesh, does is also get jagged and lumpy instead of the smooth deformation before subdivision is applied but is still visible.
I know that all sounds stupid and is probably unintelligible from the way I’ve described it but please, any help would be very gratefully received…
In fact follow the tutorial with a very simple model and then try it on your own. Have you used the sub-division modifier correctly? You may well find that you don’t have enough vertices to produce a decent animation.
You cannot animate vertex groups unless you assign them to bones and animate the bones. Animations do not function in Edit mode.
Beyond that we will need to see a blend file posted here.
Learning a light touch when weight painting is a skill you’ll need to pick up if you intend to rig and skin your own characters. Turn down the intensity of the weight painting stroke. Now, turn it down some more. Learn to position the model so you don’t accidentally paint something you don’t want to paint (hiding parts of the mesh helps here). Be patient. Weight painting something properly takes a while.
Once you get your wings flapping, and, sooner or later, you will, remember that a bird flies through the air, and rises and falls with each stroke of its wings. It also surges ahead on the power stroke and looses a bit of velocity on the back stroke. Not much, but just a bit of this can make the difference between an animation looking like a real bird or an amusement park ride on invisible rails.
Thanks for the optimistic words and good advice about the forces exerted on the bird, ill bear them in mind. I think I also managed to solve what was causing the weeks of pain, I had the sub-div above the armature.
I am not actually sure why or how this causes issues however, hah, but I read something online that said the order of things can affect results. I really am flying blind with this thing.
Ill try to get a file up so people can check it out.
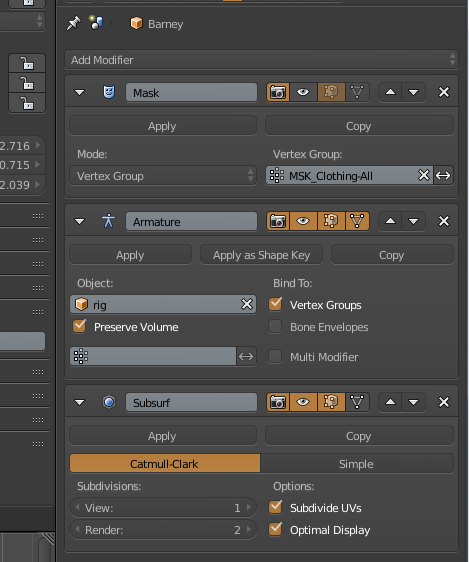
Hmm. I can’t agree with your order of modifiers, clockmender. You want the armature modifier first in the stack. This way, the armature modifier is moving a non-subdivided mesh. It’s easier on your computer. I always add subdivision last if possible. There are only two modifiers I use before an armature mod, Mask and Mirror.
The mask mod will reduce the vertices that the armature must move and the mirror must be placed before the armature mod so right and left vertex groups are available for the armature to use.
Thanks Dan - I will play with this, I thought that the computer still had to process the total number of vertices when animating anyway and it did not matter where the sub-div was, it all had to be processed. I am grateful for your words of wisdom. I have to admit that I am a bit spoilt for processor capability - 4.6GHz Quad Core AMD on my server and 2.3GHz I7 on my MacBook. Maybe this trick will make things even faster!
The important thing to remember is the modifier stack and the constraint stack work in the same way. The fist mod or constraint will be evaluated first, then the next, and so on down the stack. The exception to the rule is the IK constraint. It always is evaluated last regardless of it’s position. This is because the IK constraint affects multiple bones.
I really appreciate you all taking the time to answer and give hints etc. Am really starting to enjoy playing about with the application.
Thanks everyone for clarifying the sub-div issue. I noticed the mesh stopped ‘tearing’ after I changed the order of the modifiers. Im running the application on a similar powered macbook as you clockmender, is a 2.2ghx i7. Strange how it affects me and not you. Damn knew i should have invested in that .1 of a GHZ when i bought it. Hah.
Anyway, I’ve taken onboard everything everyone has suggested and have made significant inroads. Im now however a bit stuck with something else.
Im trying to get the wings to mirror each others poses so that when doing the animation I only need to pose one wing and the other will copy it. Not sure if its possible however but feel it would give tidier results if it was rather than animating each wing individually. Im going to upload the file. Would be very great if someone could have a look at it to give me the heads up as to how to do it and also have a quick scan to see what else I’ve screwed up and any potential minefields I’m walking into.
Thanks
mibh
(Hope the file has attached itself, all I’m seeing is a blue question mark below this writing…)
Amazing. Thanks very much. Have been away from the comp for a week or so and would have replied earlier but you’ve just saved me hours of frustrations.