I have started using Blender about 2 years-ish ago, but I still consider myself quite the newbie. During these two years, I have been working on my very first project: a Chevrolet Camaro (I know, so cliché! ;P). I have finally finished modeling the whole car now, and would like to ask you for some feedback (ideas for improvements, etc.)
I have planned on making it sort of studio-renderish ('cuz I can’t work with HDRIs for the sake of my life XP), and I don’t know which color I should take for the Camaro! Suggestions would be greatly appreciated!
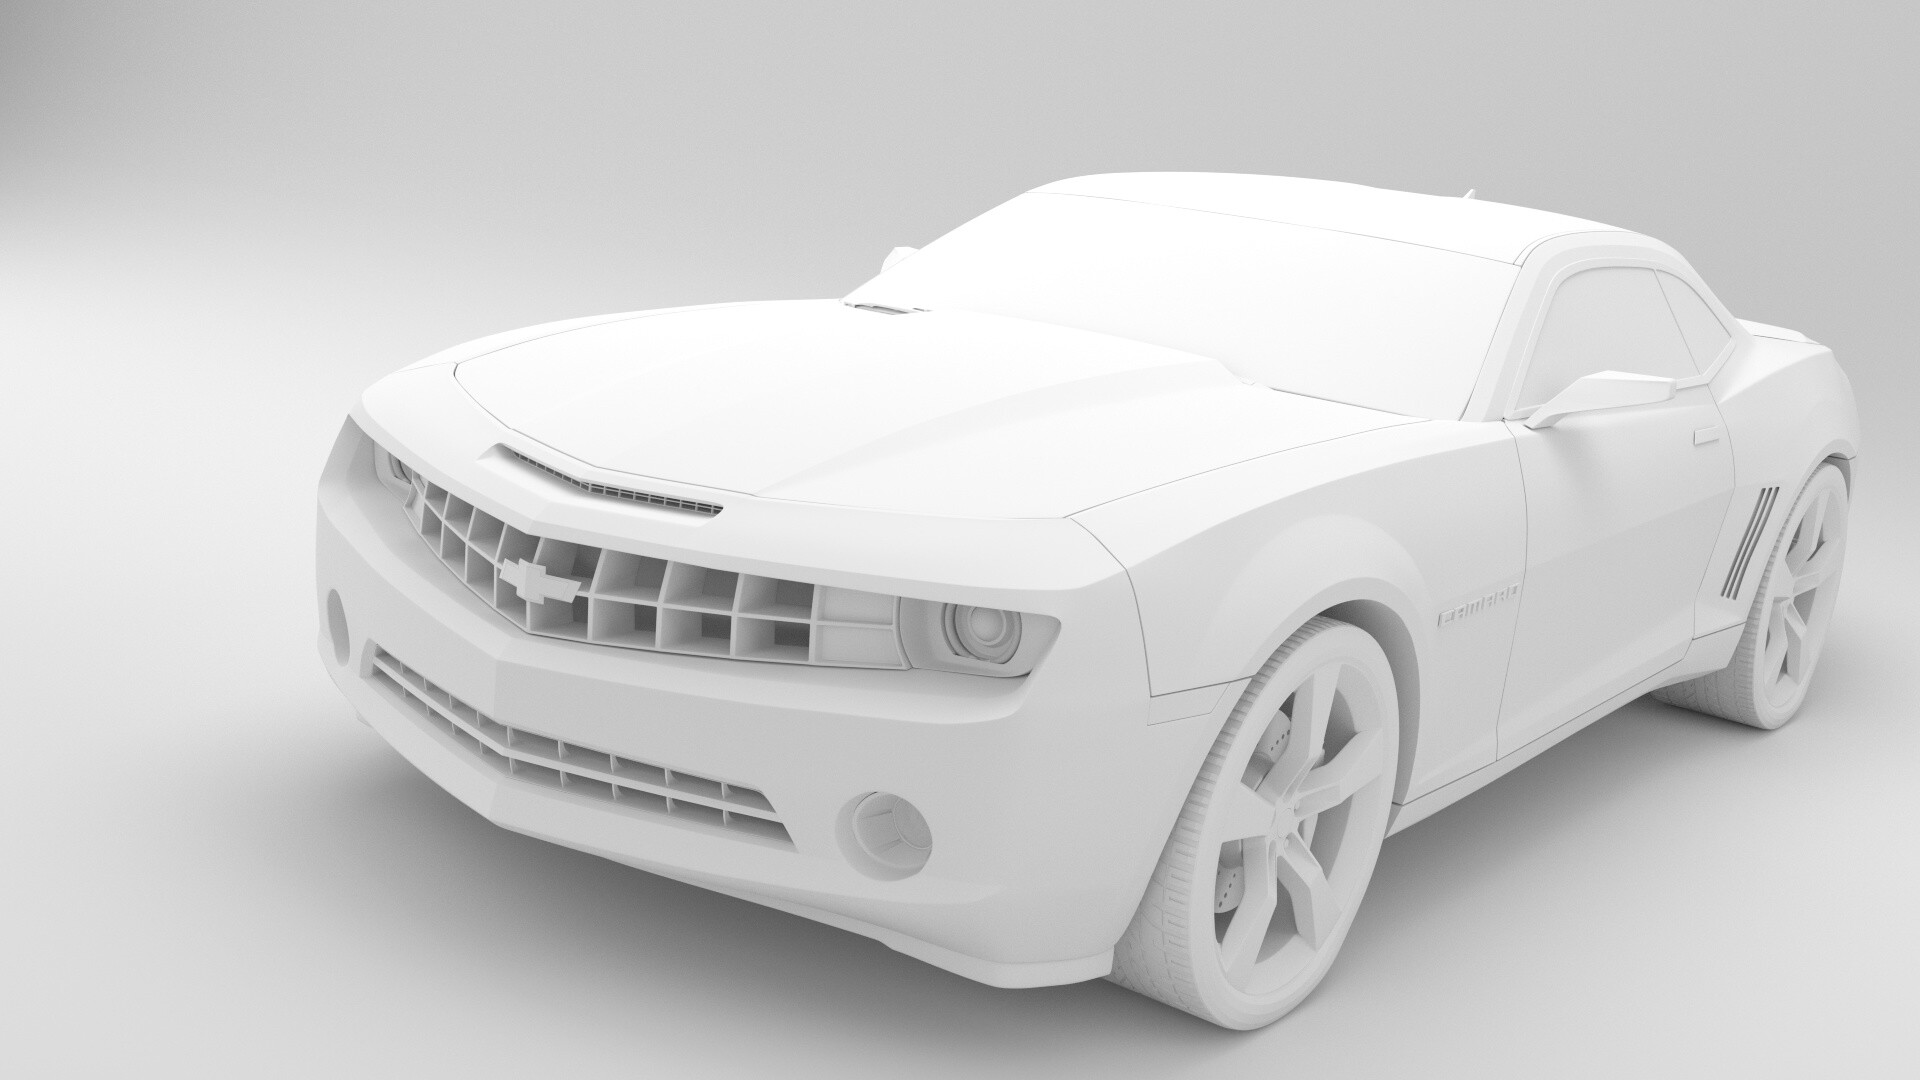
Here are two clayrenders of my progress up to now (I tried wireframe, I really did, but my GPU just noped at me :c, so if you like to see the wireframe, I would have to upload some screenshots ^_^; )
This looks really nice Kha’jay. The lines in the body work all match up really nicely and the level of detail is great.
For some constructive criticism maybe angle the front wheels a little to the left when you do a 3/4 view like that. It’d just show off the face of the tyre and give a better view of the brakes too (which look pretty nice as well).
For colour choice Bumblebee Yellow is always nice but personally I’ve always been a fan of the Hot Wheels Special Edition that Chevrolet made. I know it’s a different model to yours but still a nice paintscheme that’s a little different to the ones you see often.
I will definitely follow your advice concerning the wheels for the 3/4 still, I just left them like this because I plan to create a short ad-like animation which requires them to be straight.
I was actually contemplating the BBB yellow, but couldn’t decide between it and white or red. The animation is supposed to take place during the night (on a highway) - do you think the yellow would suit that purpose too?
In that case, I think yellow would probably work best. It would provide the nicest amount of contrast between the darkness of the night sky and the darkness of the road. White might be a little too bright and bold while red doesn’t show up very nicely at night. Unless of course you placed the car directly under an intense street light or something like that.
perhaps using a spherical hdri background would resolve the issue with having too short of a background image. HDRI lighting can also have an effect on the reflections.
@Nicholiathan Thank you for your advice! I have already considered that, but finding decent free HDRIs is already hard enough and I am too stupid to get them look realistic. XP I however found an image which is large enough to let the Camaro go 120 km/h, which I think is fast enough.
You don’t happen to know why the displacement on the front tire is so wrong though? :>
I’m not quite sure, are the lights on the car (they are supposed to be city lights) too strong?
Also, I don’t understand why the displacement on the front tires is so incredibly wrong! I have completely the same material and UV map and image and whatnot on the back tires and they are correct. :c (The orientation of the tires is like that due to the script I mentioned earlier. Gotta work on that still.)
Something still bugs me though… the lamps and concrete barrier look just somehow… off.
TO-DO’s:
fix dem tires
add white rally stripes
figure out how to achieve the “tires-look-like-they’re-turning-backwards-at-high-speeds”-look
solve the script problem
darken the paint - but how?
desaturate and darken scene (probably in compositor)
@Words Huh, I don’t know, I haven’t heard about that yet ^^; For my renders, I am usually using PNG with RGBA (color depth of 16 and 15% compression). If that is not what you meant, I am sorry for not understanding and ask you to explain it for me
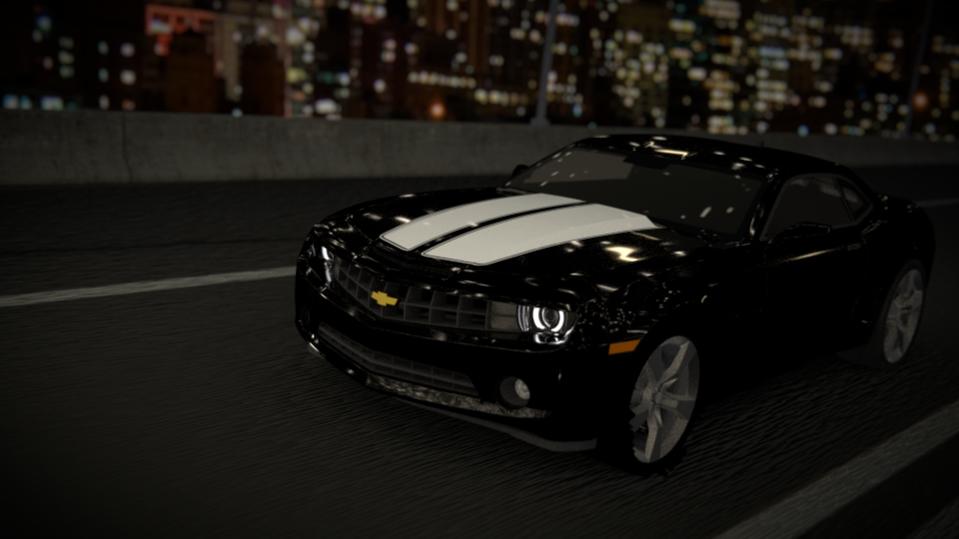
Alright, better lighting, materials and wheel position (though the front wheels still look awful. I thought it might be due to some flipped normals, but they are all clean). And rally stripes, for better contrast (and 'cuz they’re just plain cool).
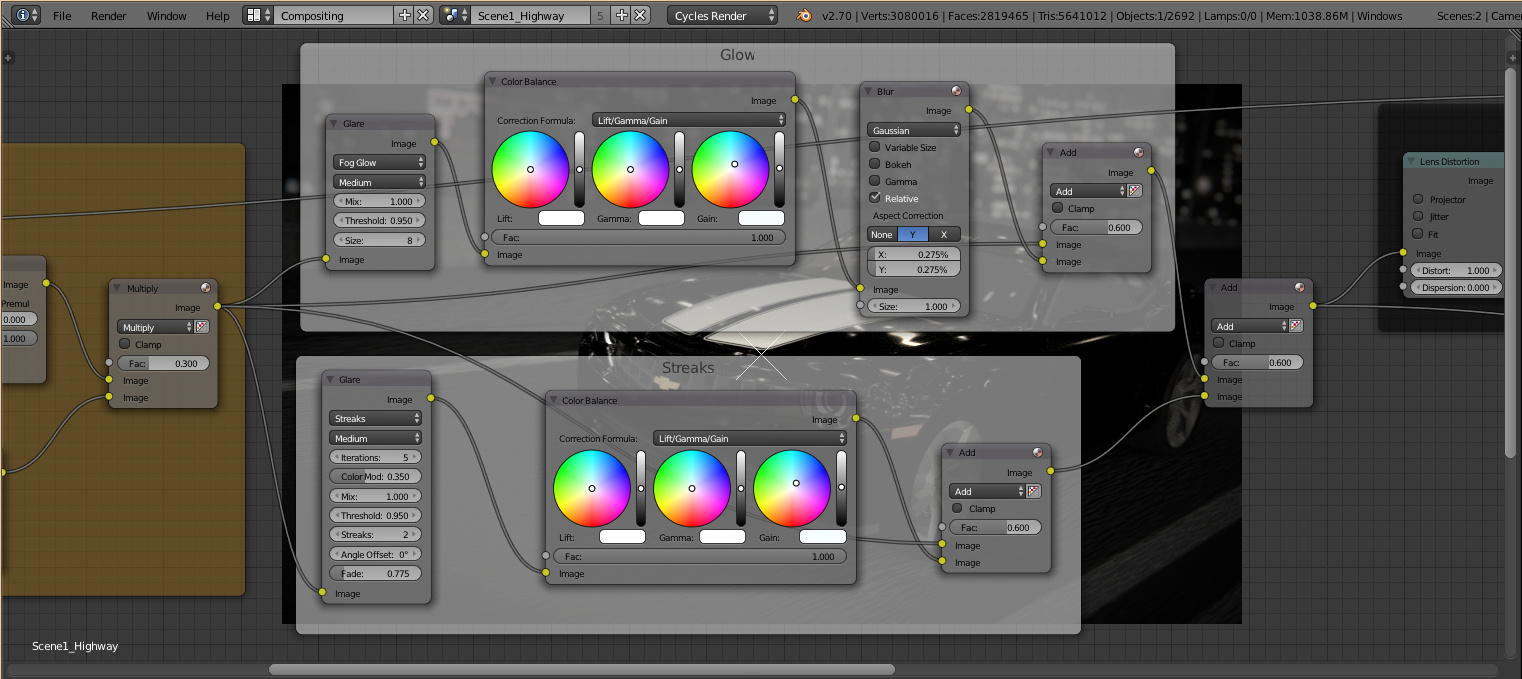
I still don’t know why the glare nodes don’t work. Threshold set to 0.95 or 0.5 makes no difference.
Maybe someone can figure it out from the screenshot:
EDIT: Fixed the tires by changing from Experimental to Supported. Don’t know what the problem was, but at least it works properly now.
Also: IMPORTANT QUESTION!!! I have made the experience that images look darker on other people’s screens than on mine. So, please tell me whether the image is too dark or not!
You did a great job - I was not able to view your animation yet - perhaps it is downloading. I own a ZL1 if ya need any close up areas to check your model just let me know.
The above link is the ZL1 in action - perhaps you will decide to animate different ways. Good job!
@Words: Alright, I think I understood it (…maybe) But nah, I’m not working in SRGB, so that’s fine.
@Subdural: Thank you very much and thank you too for your offer, if I need it I will let you know! That certainly is a nice way to put old tires to rest I’ll just refrain from using smoke because I have absolutely no experience with it
@domb3026: Thanks! Yeah, that was due to the rear wheels being slightly larger than the front ones, but since it looked rather odd I changed that now.
So, I rendered the main animation at 25% of the original size (1920x1080px) with 128 samples, took about 24h (524 frames, 25fps). Changed the size of the rear wheel, now all four wheels have the same size. Also, I added some camera jitter, wheel vibrations and car suspension to make it look more realistic… not sure though whether I accomplished that.
Crappy version on YouTube because of stupid YT resizing:


 The animation is supposed to take place during the night (on a highway) - do you think the yellow would suit that purpose too?


 I’ll just refrain from using smoke because I have absolutely no experience with it