You have two objects layers now. One with the cube, one with the blue face. Now you need the create two RENDER layers: one for the cube, and for the face. Render layers are what the compositor uses to separate the treatment of effects on objects. Render layers may consist of one or more object layers.
In the Properties palette, click the Render Layers button. (The resulting options will differ in this palette depending on the render engine you’re using, but the process is the same.)
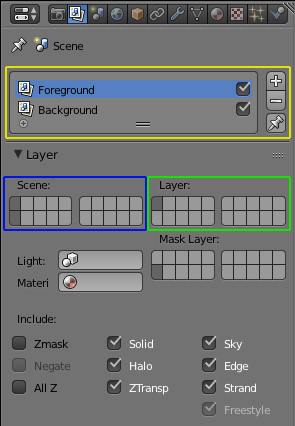
You will have an existing render layer in the render layers list (yellow rectangle) called ‘Scene’. By default, this operates on all object layers. Re-name this ‘Cube’.
In the Scene matrix (blue rectangle), select the object layer with the cube and the layer with the face.
In the Layer matrix (green rectangle), select only the object layer with the cube.
Back up top, click the ‘+’ button next to the render layers list to create another render layer under ‘Cube’. Re-name this new render layer ‘Red Face’.
The scene layers should not have changed: both the cube and the red face object layers should still be selected. In the layers matrix, select only the object layer with the red face.
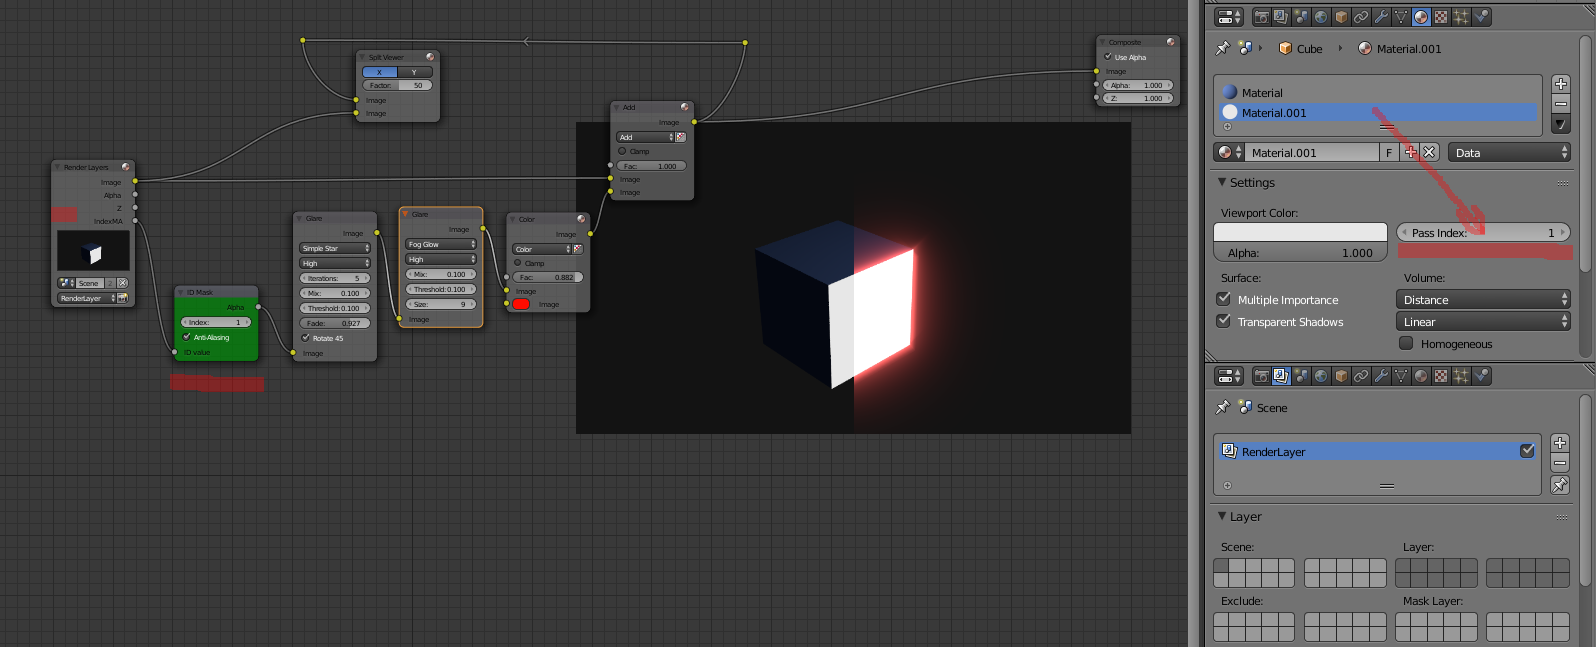
OK, you now have two render layers that the compositor can treat separately. The compositor’s Blender name is the Node Editor. From here on in, use the manual or search for tutorials, because compositing is… VAST.
Once you get your head around what nodes are, you do this: Click ‘Use Nodes’ and ‘View as Backdrop’ checkbxes in the Node Editor function bar. Create two renderLayer Input nodes: select Cube for one, Red Face for the other. Create a Mix node and route your route your render layer input nodes into it. Connect the output of your Mix node to two more different nodes: a Master Composite node and a View node.
Hit F12. Add more nodes and adjust them as you see fit.