Hello All!
Not only that I’m very new to Blender, unfortunately I had to stop practice and learn it while working on the last few weeks so now I’m trying to get back and remember the basics again, looking at some tutorials and what not.
Anyways, I want to do a short practice for myself:
I’ve already started modeling a base mesh of a head and shoulders, now I want to add multires modifier and sculpt over to get the details I want, and than! I would love to animate it, maybe moving the neck, the head, eyes, mouth I don’t know… but that’s the idea of my own practice & learning experience.
So, since I’m a noob… I don’t know what or how to get into the next step:
I have the base mesh ready to sculpt… But… if I will add for example level 6 or 7 of multires sculpt details it will take YEARS to render, right? so… I think there is a solution “baking” but not sure if that’s the term or the right thing to do.
And if it is… I have no idea how to do it or where should I start.
Am I doing the all thing in the right order? do I need to make UV from the very basic mesh or wait after I will finish the high-level sculpting using multires?
As you can see I’m very confused, a friendly step-by-step explanation will be very helpful.
Thanks ahead!
In general, a lighter mesh animates better than a heavy mesh. If you want to animate a sculpted mesh, after you sculpt, you’ll want to re-topologize your mesh to keep the shape but reduce the poly count. If there are fine sculpted details you want on your animation, then you need to bake the details into the texture you use to color the mesh.
Animation is one thing, sculpting detailed models is another, and combining the two is tricky and advanced work. I’d recommend you decide on one or the other to begin with, and get comfortable with that, before trying to combine it with the other.
It is common to use the multires modifer to sculpt up to a high level, usually more like 5 or 6, and then to bake a normal map from level 6 to a lower level, 0, 1 or 2 usually. You can then delete the higher multires level and have a mesh with a reasonable amount of vertices. You use that normal map in the material to fake the small details. Almost always you will use the armature at the top of the stack which will deform the low poly mesh only.
Since I know you come from a professional 2-d background, my feeling is that you may be going for a much different look and style than most people and that retopo may not apply to you, as much of your “details” will be hand painted onto a color map.
The “normal” workflow might go like this
Model the base mesh (With loops around eyes, and loops around mouth)
Unwrap the mesh and get a simple colormap for the skin
Sculpt with multires to level 5
Bake a normal map from 5 to 2
Delete all multires levels above 2.
Use the normal map with the color map
Rig the head, move the armature to the top of the stack
Shape keys, etc…
Rather than jump into the sculpting workflow I think you should show an example of the style you are going for. My gut feeling is that it is much different than what most people would assume. If you can link to youtube video showing a similar style it would be much easier to assess.
OMG it’s the famous Photox!!! How are you my friend? hope everything is well
I finally have a little break (until my next project at the studio) so I really want to use it for learning and practicing Blender.
Cool, so what you describe on the begining is more like what I thought is the “correct” way to work, that’s a good start for me as a noob to understand how the basics works before I actually try to make these things work.
Since I know you come from a professional 2-d background, my feeling is that you may be going for a much different look and style than most people and that retopo may not apply to you, as much of your “details” will be hand painted onto a color map.
Hehe you got me, well actually I didn’t think about the look yet, I just made this base mesh more like a buffed muscular man, I don’t think it will be a rounded cartoony style like in my YouTube because I already gave it a more “human-like” look but who knows
Maybe it’s already a mistake I should’ve start with a more simple cartoon-like shape but… challenge is a good thing for my practice.
I’m going to try and follow your helpful suggestion, here are a couple of questions:
Model the base mesh (With loops around eyes, and loops around mouth)
I wonder… what would you suggest on that stage?
When I get to the holes part after I get the basic loops with some “flesh” around of course, should I delete the faces that are on the back of the holes of the mouth, lips, or just leave them?
Unwrap the mesh and get a simple colormap for the skin
I don’t have much experience in this part, but I already know how to create seems… so I hope unwrap won’t be too hard (you already know how much I afraid form UV…) that is why I do this on a very simple mesh and not a full character, good for practice right?
Sculpt with multires to level 5
Bake a normal map from 5 to 2
Delete all multires levels above 2.
Use the normal map with the color map
Rig the head, move the armature to the top of the stack
Shape keys, etc…
First I’ll have to handle steps #1 and #2 …this will be update if I’ll pass the above hehe
Rather than jump into the sculpting workflow I think you should show an example of the style you are going for. My gut feeling is that it is much different than what most people would assume. If you can link to youtube video showing a similar style it would be much easier to assess.
Hmm… since I didn’t even think about it much, I will start working on it and show the update… I guess I’ll have more questions and problems as a noob, but I trust you to save the day my friend.
I think I’ll go for something basic, because I don’t want to work on it too much. it’s more important for me to learn the workflow so I can get better results in the future if I’ll be able to complete this one of course.
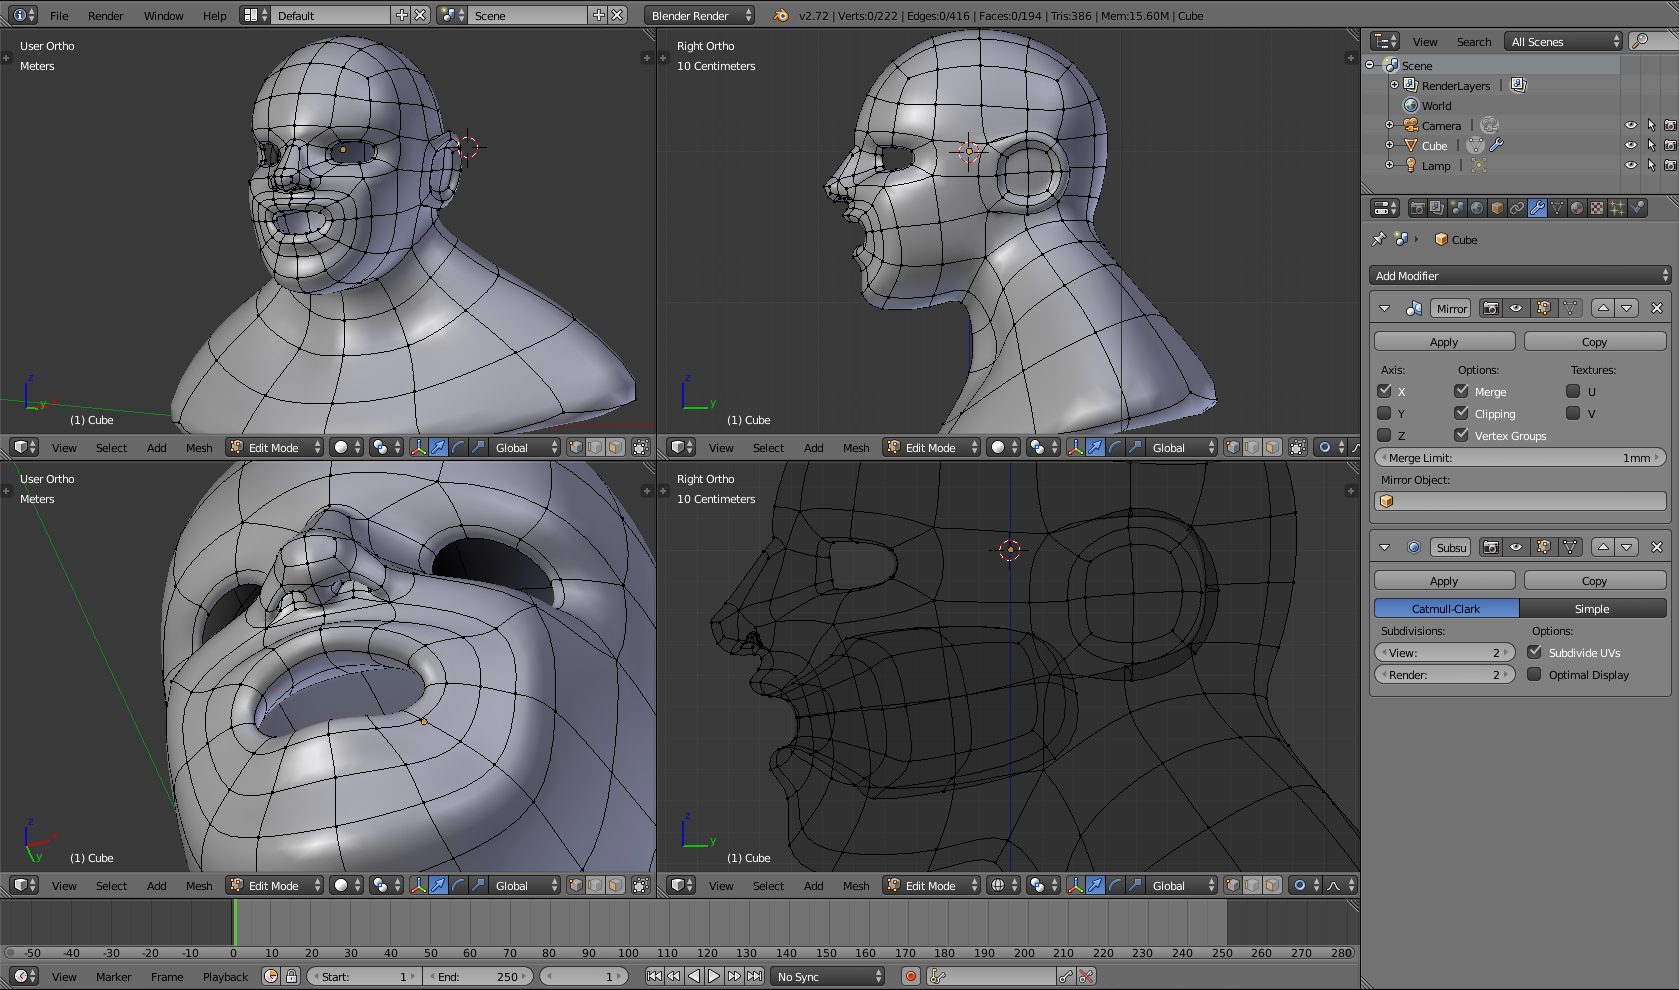
As for the inside the mouth, often a realistic style face will have a full manifold inside of the mouth, almost a sphere, it’s rarely visible but if you want to open up the mouth and scream “MOUSE!!” You should have something there. It’s more common to leave holes where the eyes will go, as you can’t open your eye holes (is that a real term?) like a mouth. That’s a medical fact!
That’s a great help, I’m going to tweak the model a bit more before I’ll get to the sculpting part and show the progress here… so I’m still on step #1: 1) Model the base mesh (With loops around eyes, and loops around mouth)
So much to do and I didn’t even start, challenging indeed!
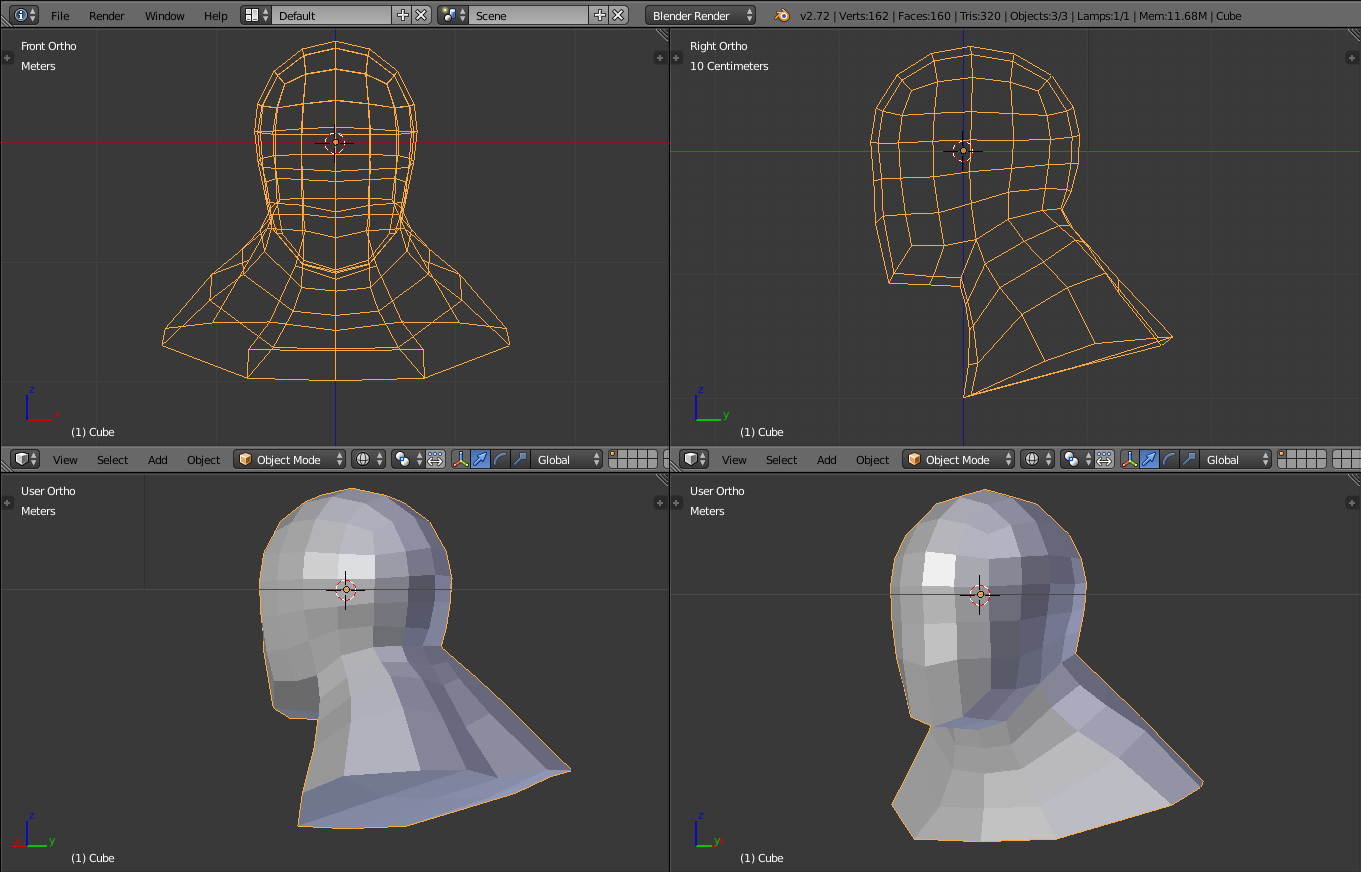
OK… I’ve added a subdivision surface modifier and I’m still tweaking on level 2.
It’s the very first head-model I actually do in Blender and it’s kind of look like… a face! (exciting from my results… oops)
BTW - Is this count “heavy” to animate? even level 3 ?
I’m aware that it’s not multi-res but still… I don’t know what is OK to animate with, and don’t want to make mistakes when possible.
I just hope that I won’t lose on the next steps… it should be UV I guess.
This is what you want if you plan on animating. The mouth is a little wide on the z axis, I would probably select a mouth loop and with proportional edit scale it on z ( S Z). But Maybe you want a wide mouth, I don’t know. For a semi toon model this will work.
You shouldn’t have any trouble animating that mesh. It isn’t really very heavy at all. You might want to make the area around the eye look more like the area around the mouth, so you don’t get too much texture stretching when the character closes his eyes.
Thanks Orinoco! yeah it looks light compare to the polygons from other things I used to subdivide so many times…
I’m curious about the all details and normal map over lower res like mine for example to animate but render with all the details of a sculpt and such… sounds very complicated but I will look around and see if I can somehow understand how it works. I’m starting to think that maybe this process is too advanced for me but we’ll see…