Hey guys, I’ve been staring at this for a long time, trying different ideas on how to model it properly. It is just this portion that is above a fireplace… any suggestions or recommendations would be appreciated.
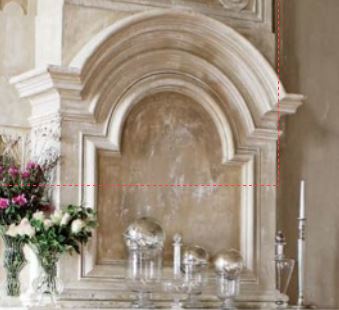
Hey guys, I’ve been staring at this for a long time, trying different ideas on how to model it properly. It is just this portion that is above a fireplace… any suggestions or recommendations would be appreciated.
make a profile and use spin for center part then extrude one ach side
or make curve profile as bevel and use curve with bevel
happy bl
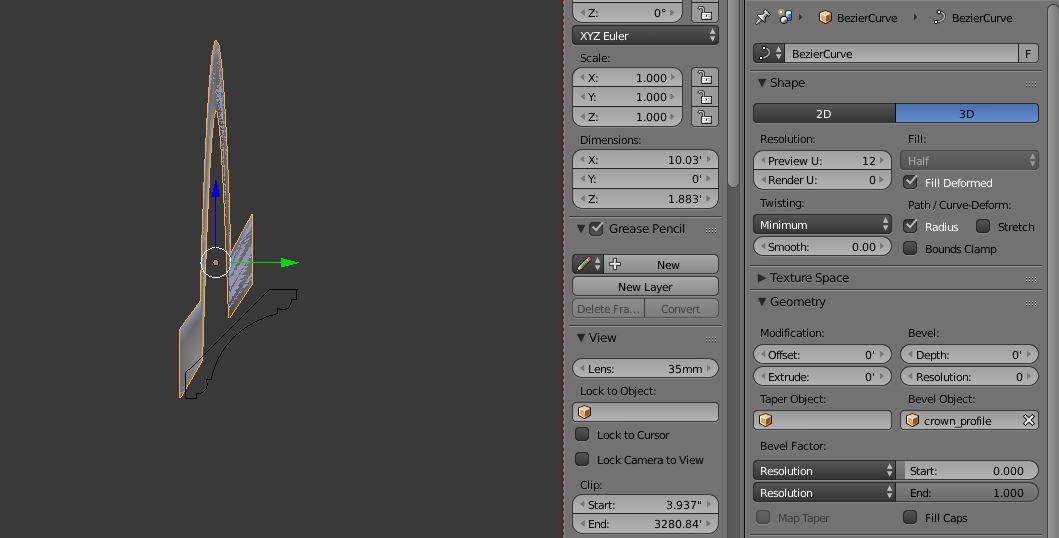
The way i would approach this would be to create a curve that approximates the profile of the molding, then a curve that matches the arch. Then use the first molding profile curve as the bevel object for the arch curve to get the curved molding effect. Once happy with the shape, Alt+ C > mesh from curve, then everything else should be basic poly modeling from there.
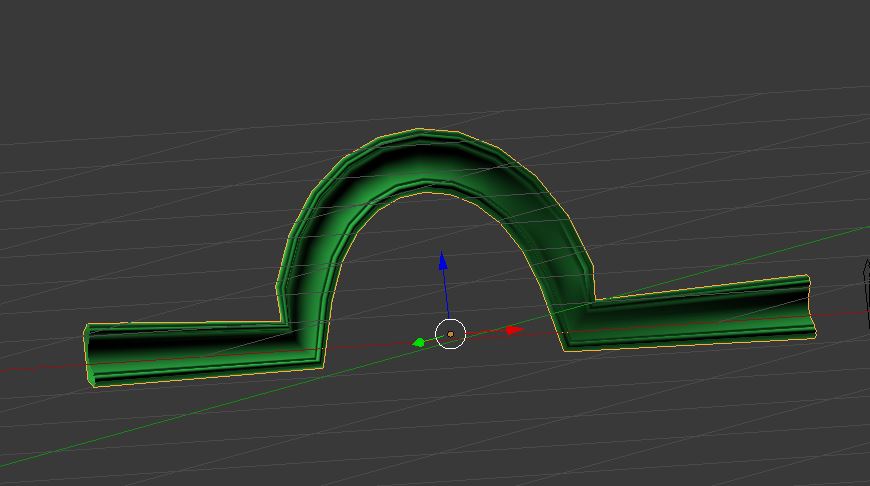
Well I tried to use Dave K procedure without success. Using the crown moulding profile as the bevel object for the curve … it does extrude it along the curve, but unfortunately it completely flattens the profile. I have made sure that rotation / scale were applied. Not sure why this is occurring.
redo it
and don’t apply Rot / scale in this case = exception when using curves!
happy bl
No…recreated both the curve and the moulding profile… I did not apply either rotation or scale. Same result … follows curve, but flattened out profile.
Where art thou Santuary 
Rotate the crown moulding profile in edit mode.
upload file so we can check it out
happy bl
IMO, inset tool is the best way to go.
It works great on ngons. It is also a generic method, can be applied in many different cases.
I like generic methods.
Inset for sure :yes:
LOL, I was faster, Vicky.
There is a con however. Not really but there is.
We all are aware of the Fletcher architecture history book. We have to deal with profiles there. Hmmm…
Anyway, I’ll go with inset tool anyway.
It creates the appropriate topology.
I’ve wasted so much damn time on this I’m ready to scrap it.
When you guys talk about the inset tool, I’m not sure what the workflow would be, or how to properly use it for this application.
Prior to seeing your posts I uploaded the profile curve and other curve that i was trying to get to work
http://www.pasteall.org/blend/33450
If either of you can post a blend doing it with the inset tool that would be great and maybe I could learn something. But right now I need to walk away from this for awhile because I am so pissed. I think I am just looking completely wrong at how to approach this thing.
@michalis: Haha! The story of my life…a day late, and a dollar short!
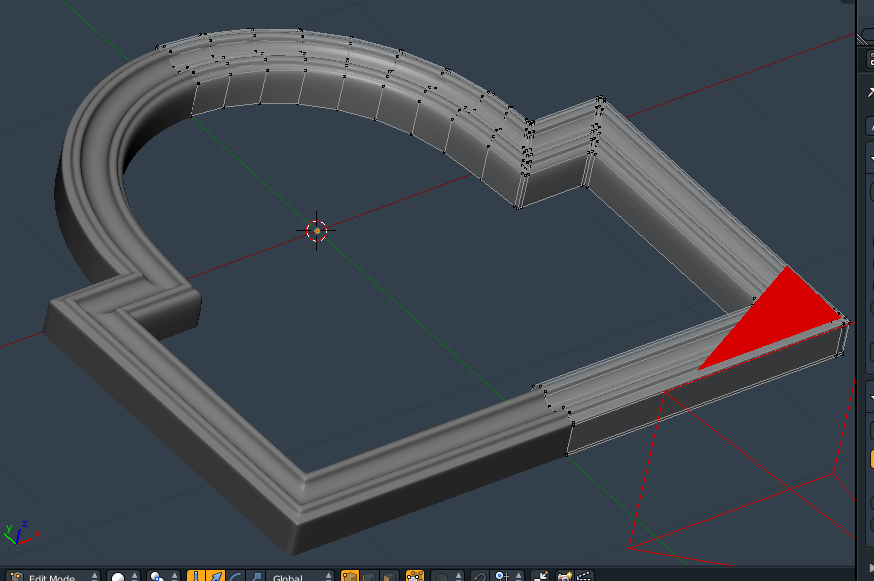
@harleynut97: Add Circle, delete bottom and one side, add Mirror Modifier, extrude the square part around from the bottom vertex. Apply the modifier, then make a huge Ngon in the middle with F, then keep insetting the center face.
like that or what ?
arch_moulding_blend2.blend (479 KB)
just rotated your bevel profile
if you want ends to be same size then make your curve as 2D
happy bl
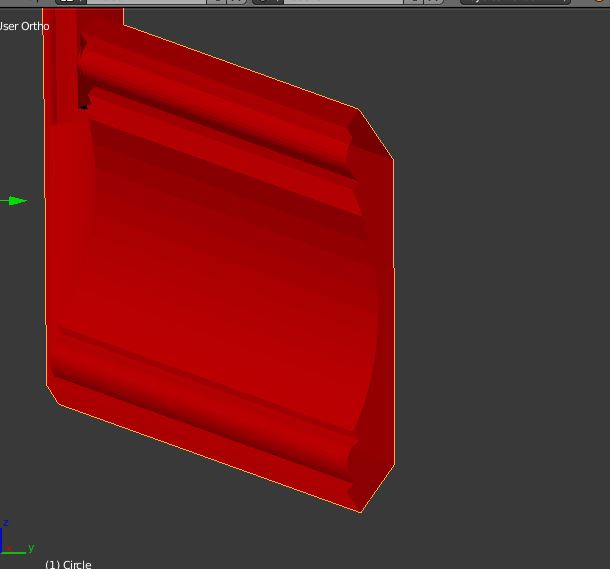
@ricky Well it’s better than what I had, but still not correct. If you look at that profile of crown moulding from a side view you would see how it should be… imagine those 2 very small edges that are flat … those would touch the wall on the lower edge and the ceiling on the top edge… I think the way Vicky has shown is the better way to go for me.
@vicky Just curious … did you start at the outer edge and work inwards? One problem I have had in the past using the offset feature on odd shapes like this is getting even distances all the way around the perimeter. But obviously it is something I am doing wrong. Thanks for posting the blend.
Curves - fail miserably, manually, well can be done but a bit lengthy. What works is zmj100 script which was broken for 2.73.
http://www.pasteall.org/pic/show.php?id=81488
Here’s the blend with working script included http://www.pasteall.org/blend/33456
Yes, I went from outside, in. I just did what I mentioned earlier, except in the screenshot I had re-added the mirror modifier, and extruded some faces. Had to loop cut the corners of course, so I would get all of your insets done first before doing that(or else it will get a bit funky, as the corners will be too tight).
@eppo Damn… I’m amazed by how nice that came out. It’s late here tonight, so I’m going to look at it closer tomorrow. I know I’ll probably have some questions. Is there a place I can go to download the addon?
When I opened up the file you posted (2.72b) a couple things appeared
first off my user preference box was opened up … not sure why that occured
I did see the script on the left side. But if I want to use the script in other files… I’m not sure what I am supposed to do.
Was there any tutorials that were made that I can learn how to properly use this script?
I really appreciate you taking the time to actually model that, it looks beautiful. I’m going to look at it closer tomorrow, but at first glance it is kind of confusing on how you actually did it.