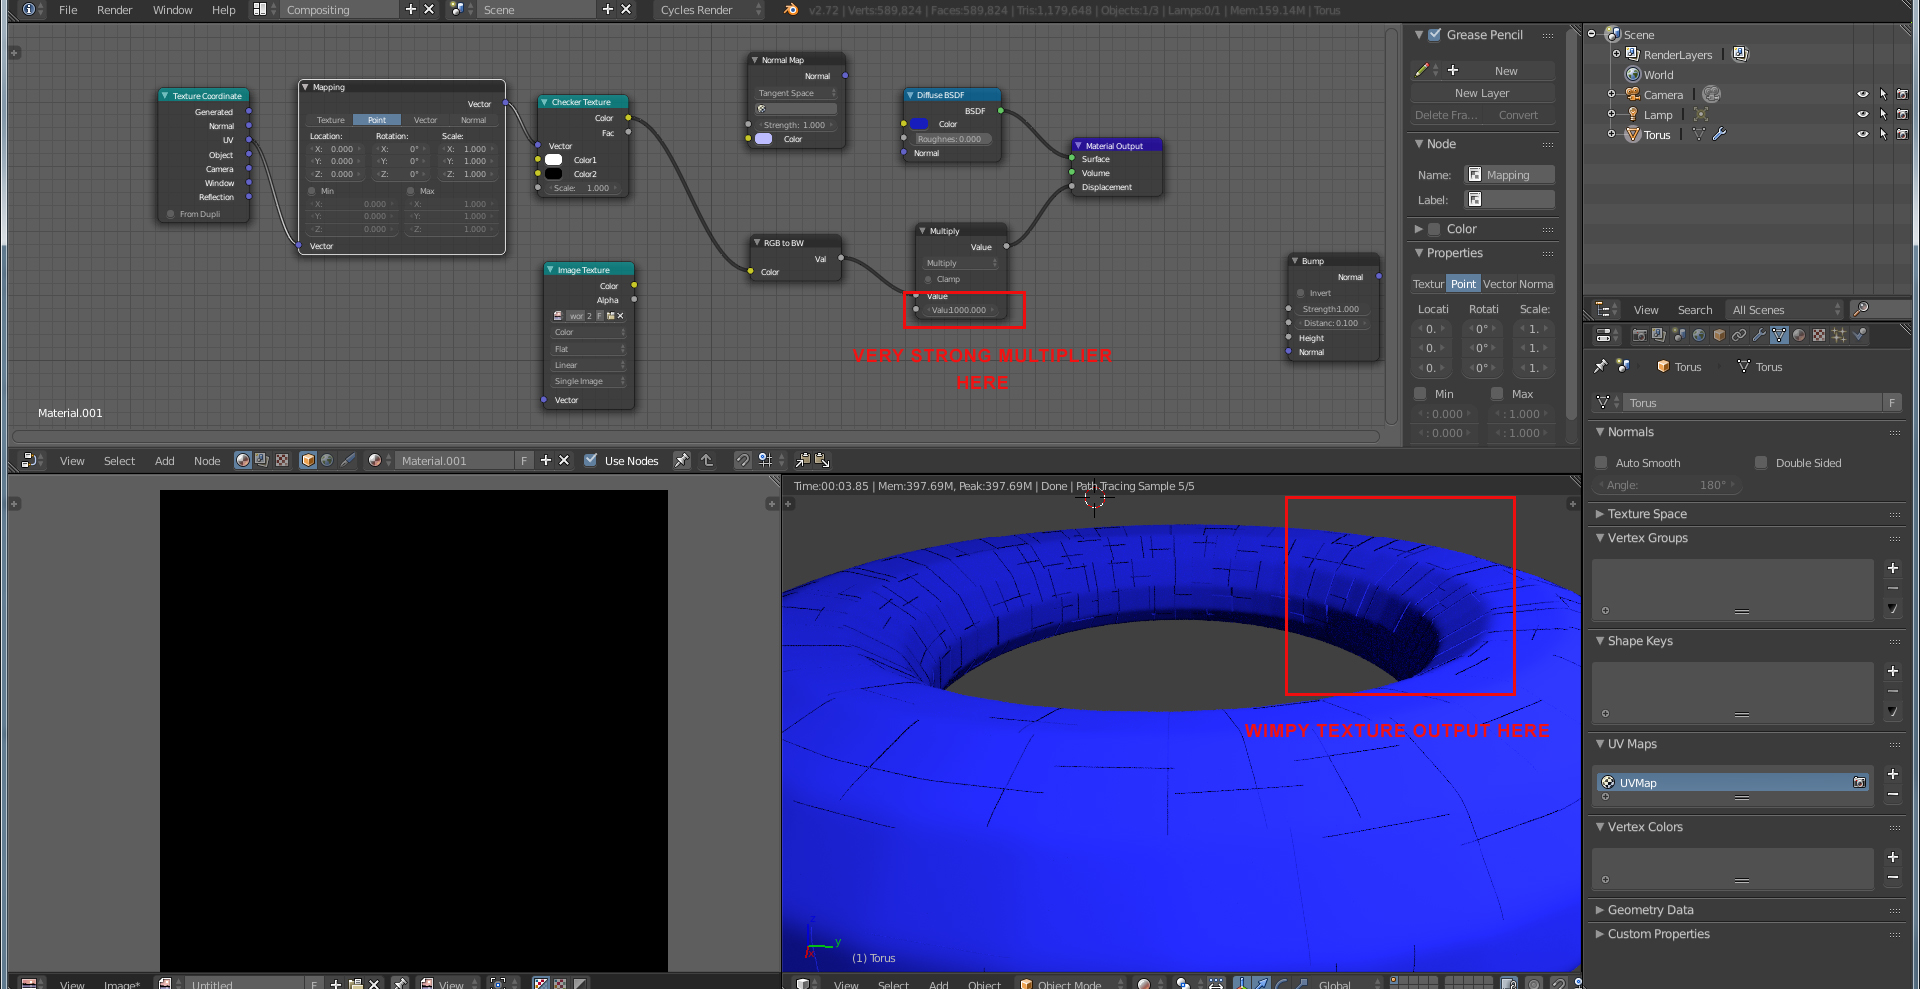
Attached is an image which describes the problem well. I’ve set up a bump map, in the way described here, but it does not have much intensity. When I alter the intensity with the multiply node, it does virtually nothing.
Also, how do I get the texture to tile seamlessly? Currently, it is on the object, but is scattered all over - not at all how I want it.
Note: The image is screen size - try clicking it twice to open it fully in the browser. The nodes should be readable (they are on my screen).
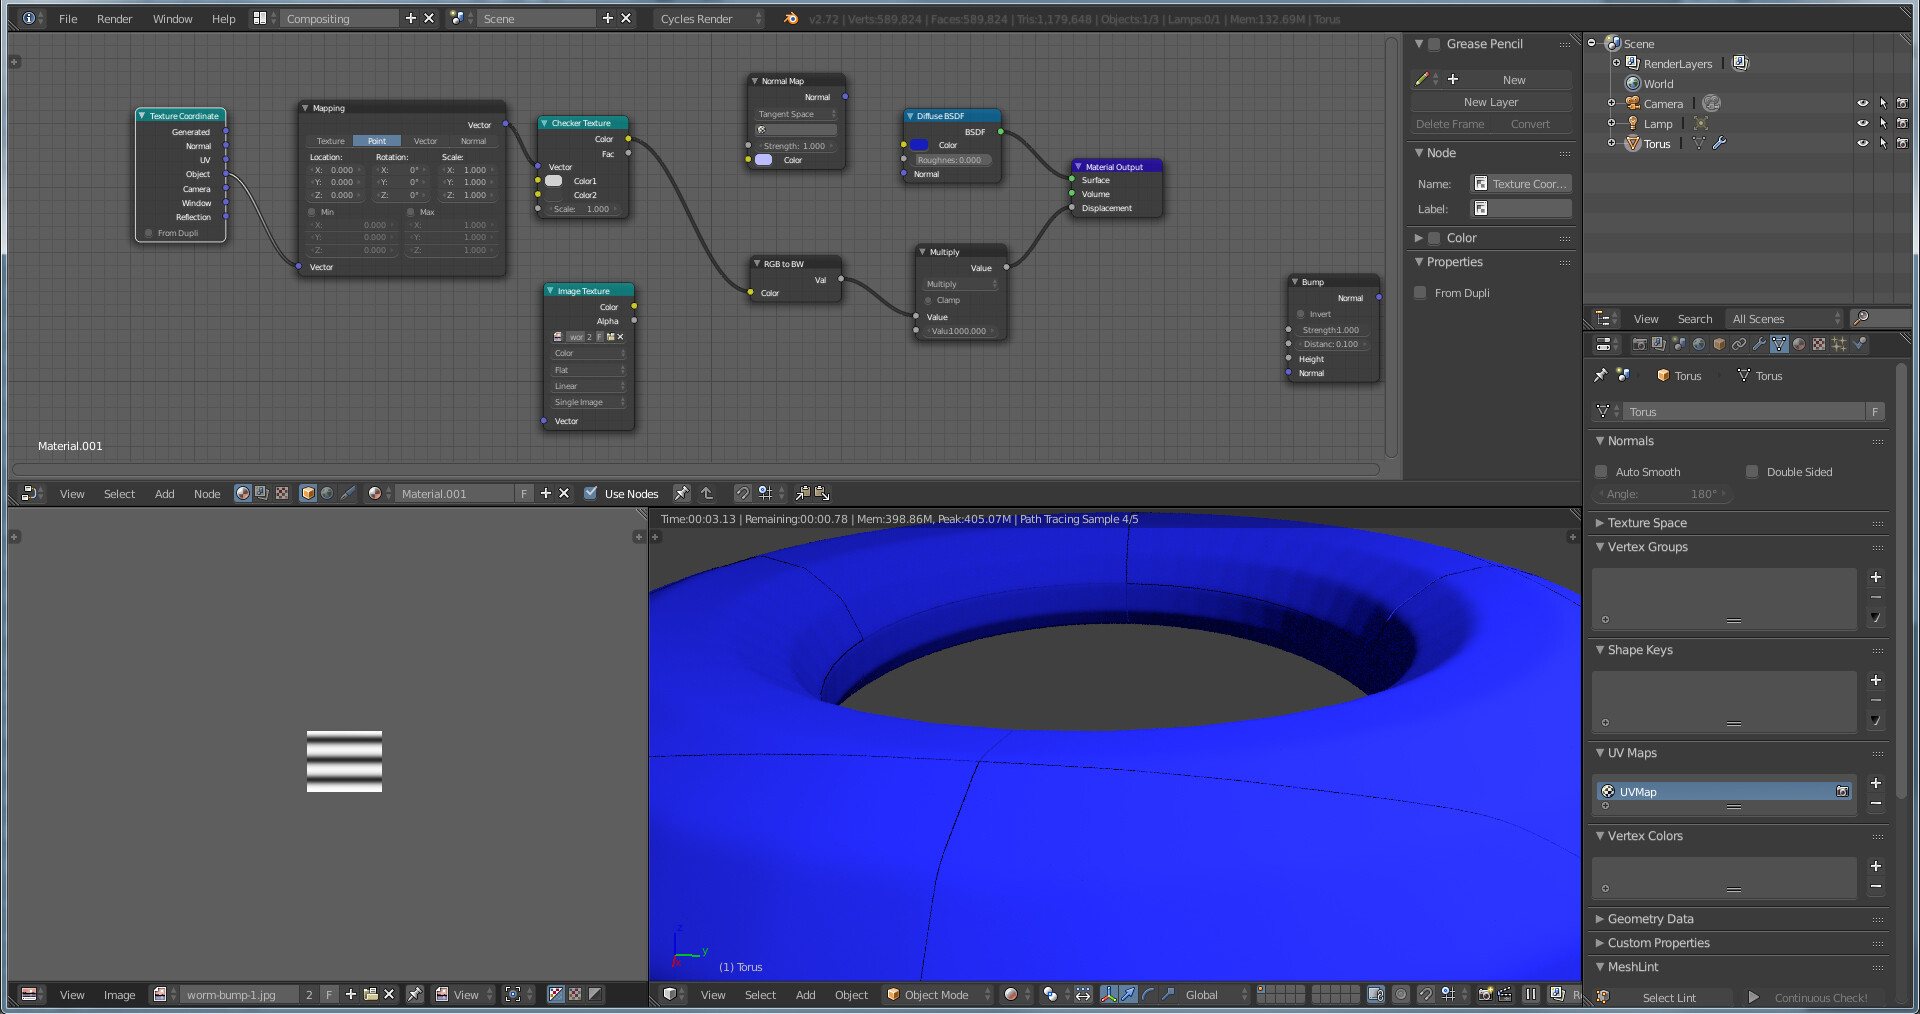
Ok I made some of the changes you suggested:
Changed to object input.
Changed checker to gray instead of b/w
The output is still very similar - with very little noticeable bump in the render…
I originally started with a UV image (found in the .blend file, called “worm texture”), but that is having the same problems the checker texture is having.
Remember, bump maps do not affect the silhouette, so to speak. They merely alter shading to mimic surface detail. There really isn’t any more it can do than what you see here. You need to use real displacement if you want more detail.
Btw, that tutorial is obsolete (note the date, 2011!). If you want bump mapping, use the bump node and attach it to the “normal” inputs on your BSDF nodes. Also, the RGB to BW node is unnecessary, Cycles will automatically perform that conversion when plugging a color/vector into a float (gray) input. The only reason that node is still around is for backward compatibility with scenes made before Cycles had that auto-conversion.
And in addition to that:
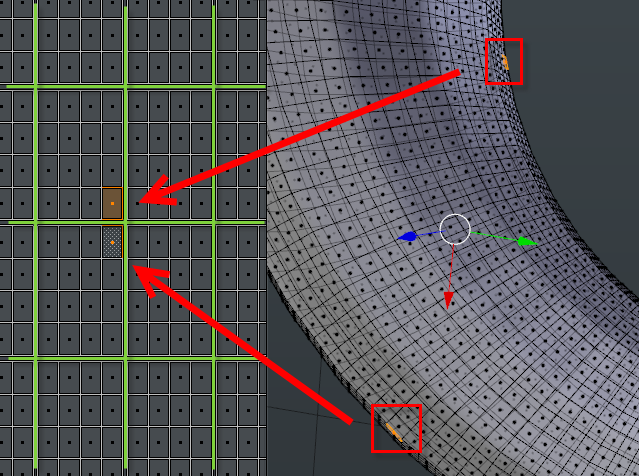
The distribution of your textures when using UV coordinates is erratic, because the UV unwrap is weird. There are gaps in the UV layout (green lines) and neighboring “UV polygons” are all over the place on the actual mesh…
Do a clean UV unwrap and at least the placement of the textures should “behave”.
OK what I think I’m trying to do is a displacement map. I haven’t found a good tutorial, but tried following this- again, with the displacement map not actually changing the topography. Does anyone know of a good tutorial for displacement in cycles?
Thanks so much for all the other replies as well. All very very helpful.
Displacement in cycles is still highly experimental, and not advised. you can use the displacement modifier which will work ok.
If your displacement map is based on nodes or procedural, than you should bake the map into a texture file and use it with the modifier.
There is the possibility to use the displacement from the material nodes, but you’ll need to turn on the experimental features from the cycles engine. (just don’t expect it will work 100%)
Eitherways, you’ll need to take carefull atention to your UVmap like IkariShinji pointed in post #6
(note that you need to workout the uvmap before making any baking, otherwise the baked texture will no longer fit the new uvmap)