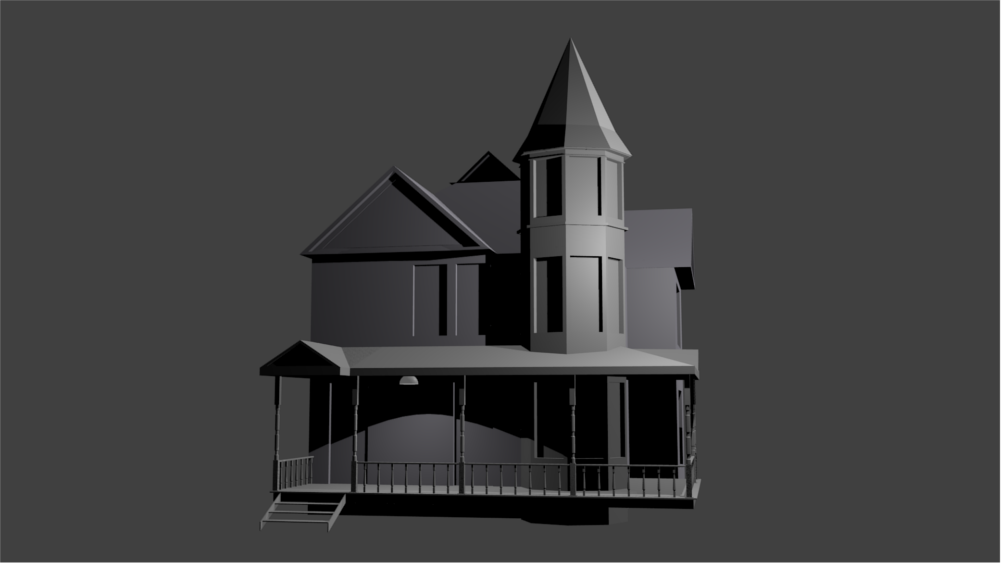
Hi all. I started this at the weekend, it’s from a reference image of a real house, and was actually quite stunned that I maged to get as far with it as I have. I’ve been using Blender for a couple of months and it looks as if some of the stuff I’ve learnt is finally clicking into place, long way to go and much to learn though.
Eventually I hope to use this as the main part of a haunted house scene.
Any thoughts and comments on this structure will be much appreciated as I want to make as good a job of it as I can.
I have added some window and door frames. Scaled out the roof a bit so that I can add fascia, soffit boards and guttering but I have now come across a bit of a problem.
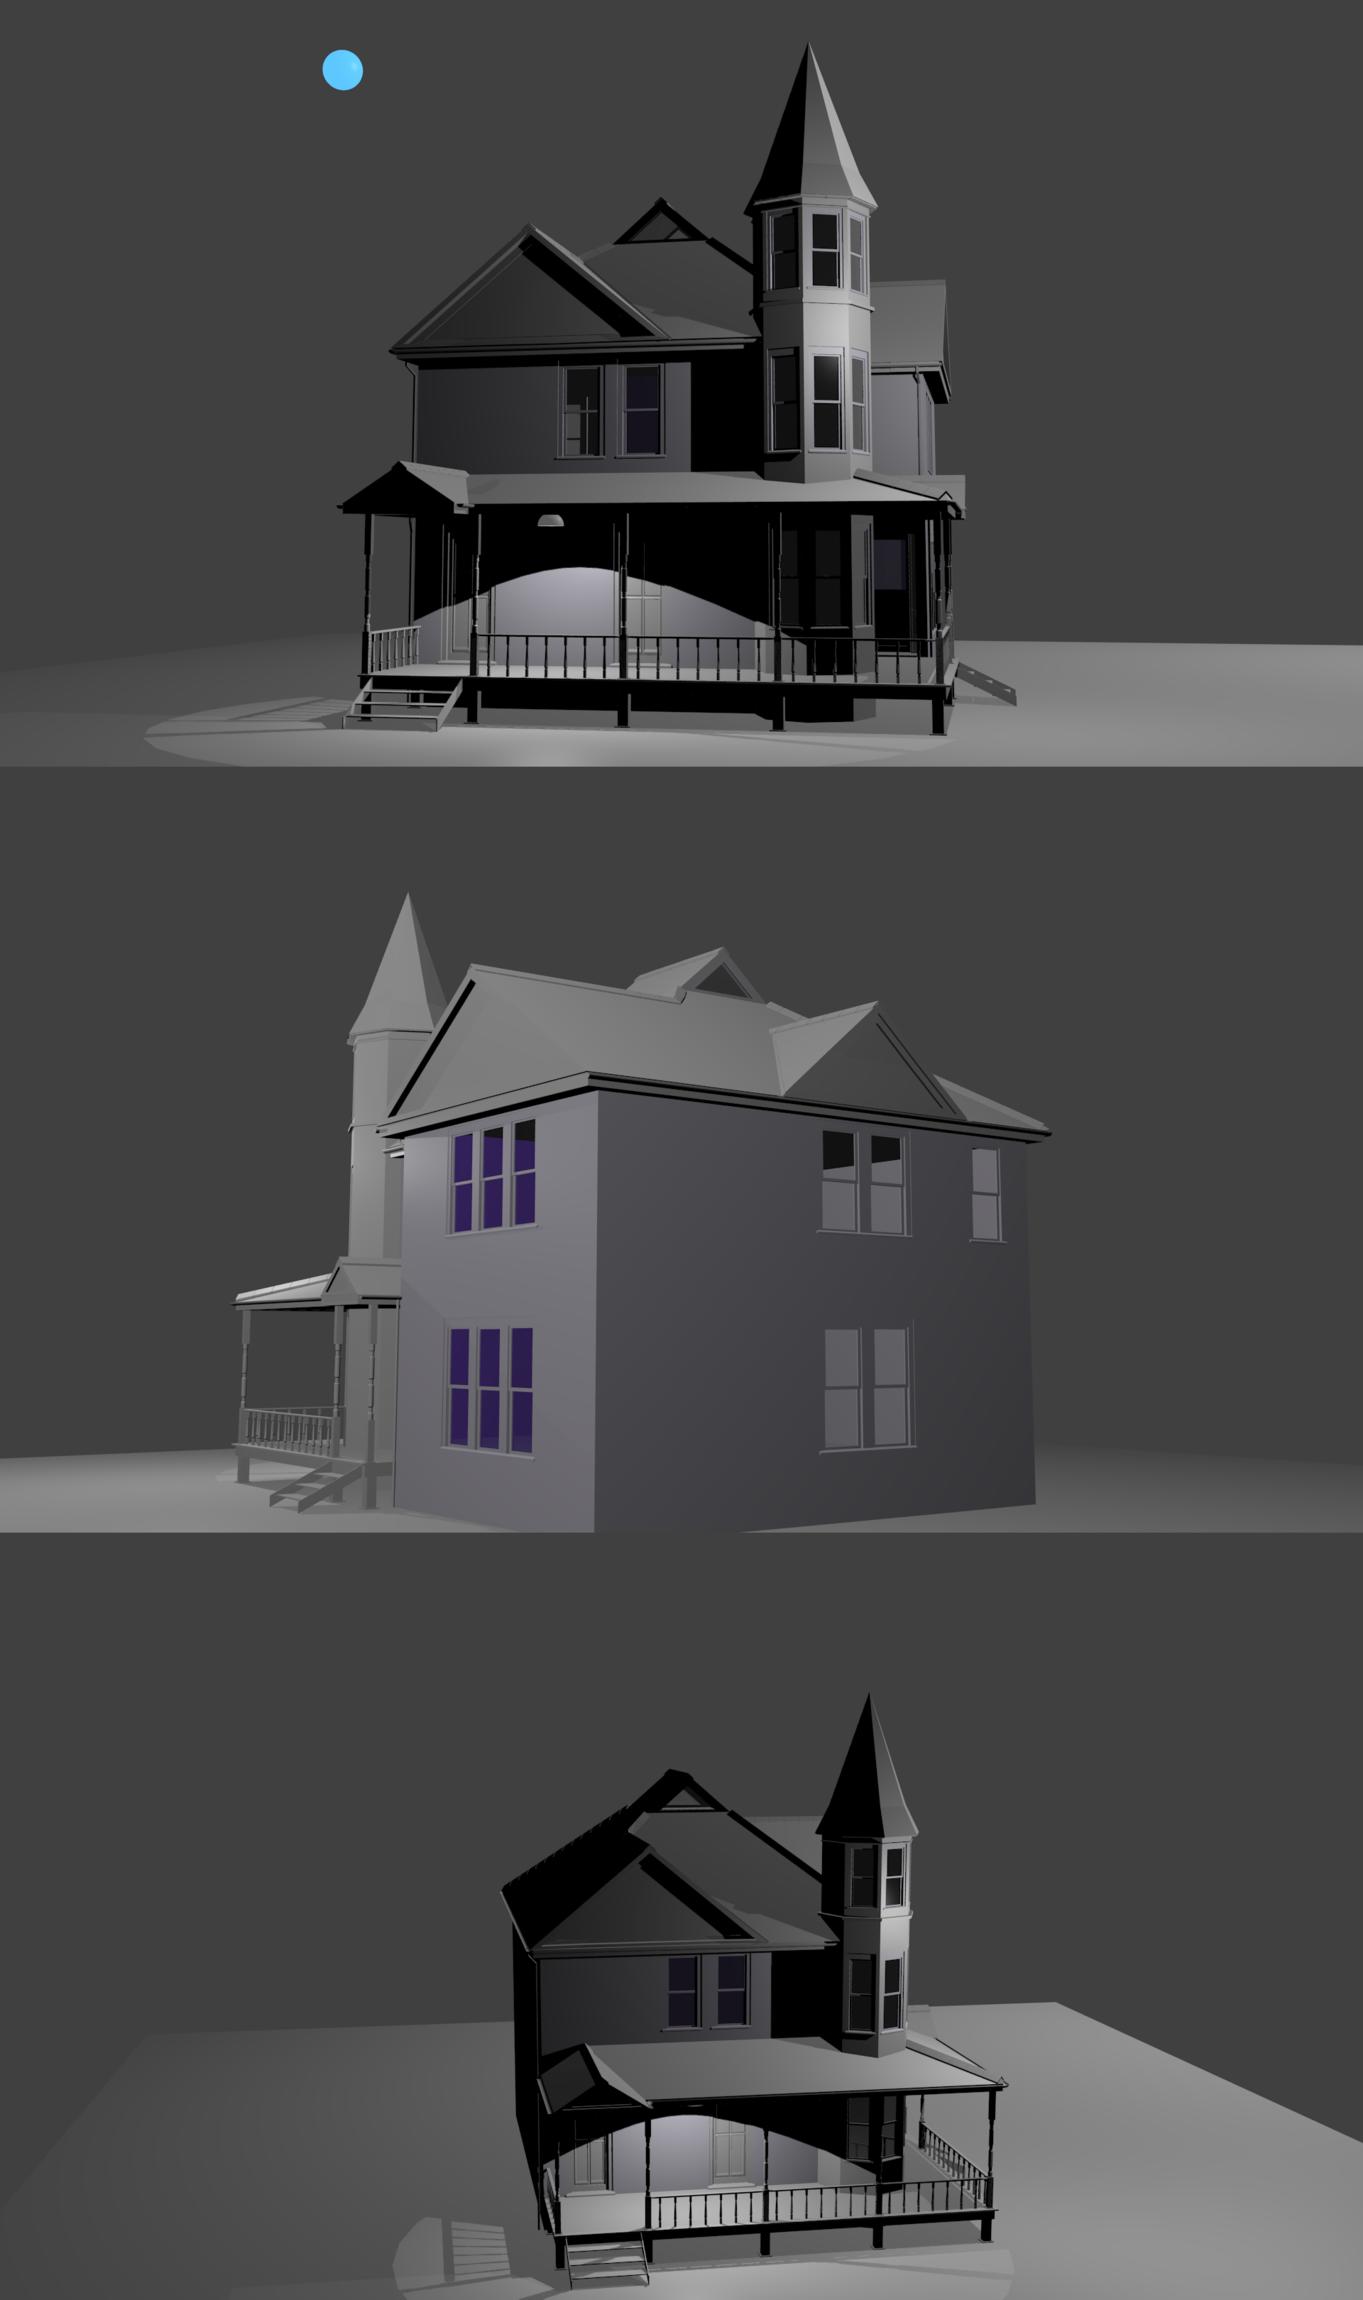
This is the house with all the objects on one layer.
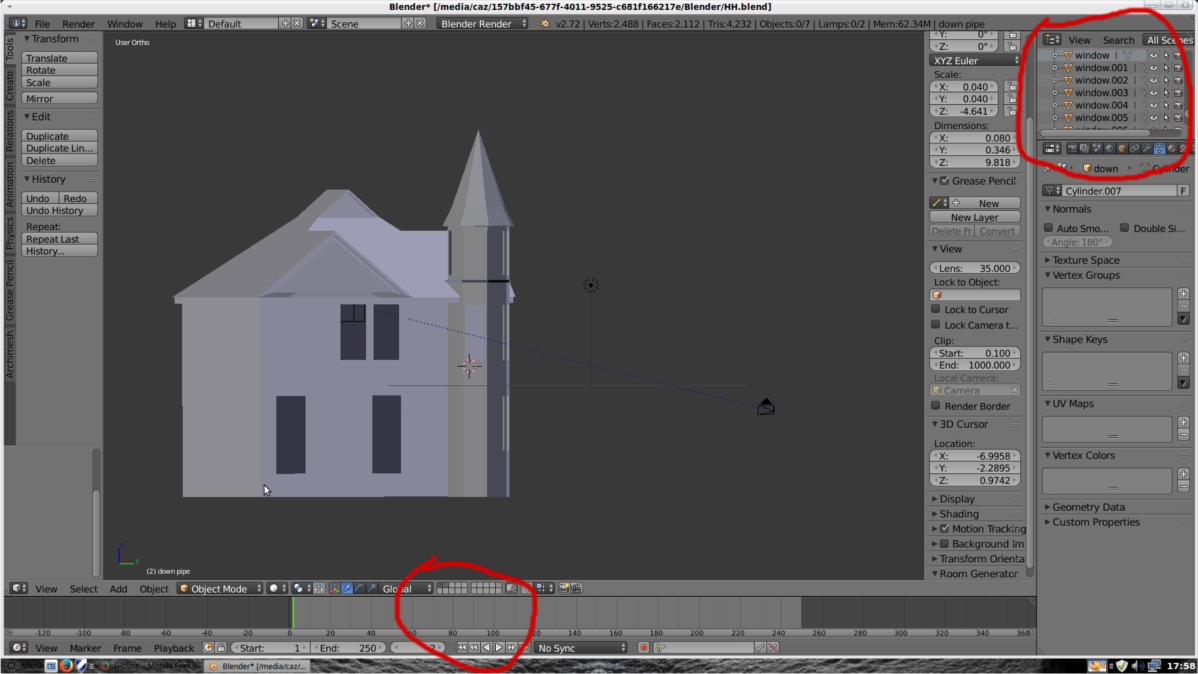
I haven’t counted them all but there’s at least twenty plus I guess. So what I want to do is start adding more objects but on a new layer. Trouble is when I add a new layer half of the building disappears, this is for the render view and in the default view., and probably ever other view as well but I haven’t tried them all yet.
Just wondering if anyone knows why this is happening and how to fix the problem.
Thanks.
Prospective type objects I’ve used in level- but I don’t, unless is prodicative to the ambient. Nice house do the bumps.
I’m Not sure if i fully understood you’re problem with object layers. But hopefully this will help you.
Attachments

Thanks Smokey and Jamie B for the comments and suggestions, I’m still a bit stuck though. What happens is, if I click on the toggle visible layers button, on the one that’s to the right of the first layer button, so that I have a second blank layer to add objects to, then half of the building vanishes after switching back to the first layer. If I shift click to select both of the layers there is still only half of the building displayed.
All of the objects that I made for the house, windows, doors, guttering and so on, are still listed on the top right hand side of the Blender window but they are not visible in the default view, 3D view or rendered view.
The only way I can get all of the different objects back is to shut Blender down and restart.
It’s not a massive problem, but I am starting to get a large number of objects for the house and I thought it might help to keep things manageable if I had some of them on different layers.
But to be honest I am still very new to Blender so maybe it just doesn’t work the way I think it does.
I see, That is strange. Not sure if i can think of a solution as of yet. I will get back to you if i come up with something.
Try this link from the blender wiki. It may help you find out whats going wrong.
http://wiki.blender.org/index.php/Doc:2.6/Manual/3D_interaction/Navigating/Layers
maybe the half of them are somehow parented to the other ones in the hierarchy?
Thank you Jamie B and The Jack. Your advice got me hunting around and probably more by luck than judgement I stumbled across the answer.
I’m not sure how it happened but the objects that keep disappearing when I add a new layer are already on their own seperate layer.
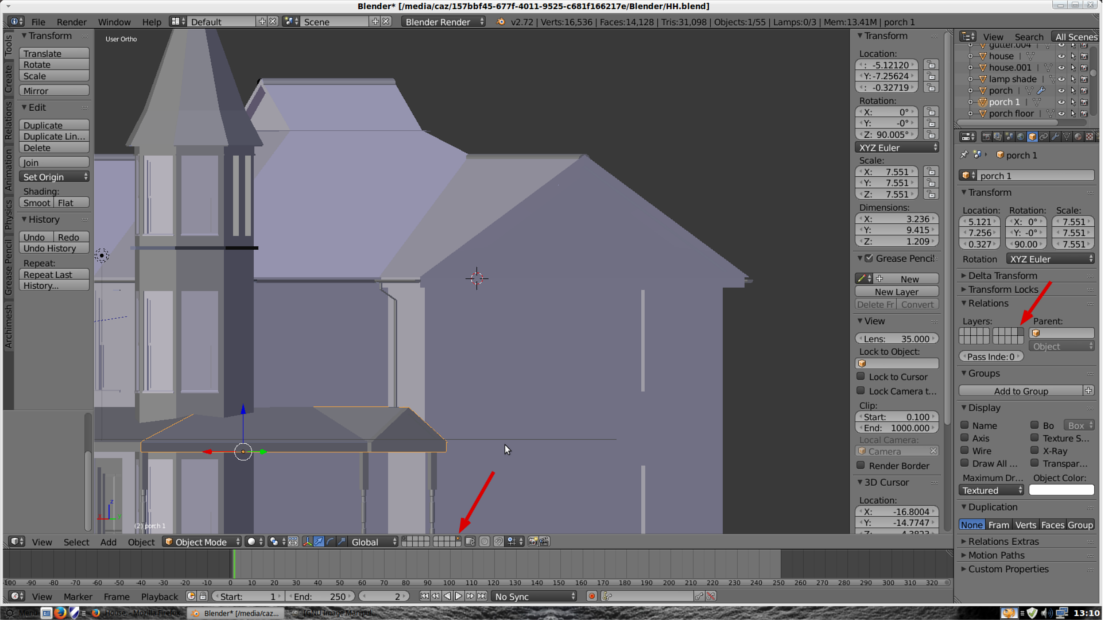
It’s on the top far right hand side of the layers lists and this is why I didn’t see it before, I just wasn’t looking there. All I need to do now if find out how to move the layer so that it sits next to the first layer. It just keeps things tidy for me that way.
Good job on finding the solution, and you can move objects that are selected,to another layer with ‘’‘m’, and then click the layer you want it to be moved to
Thank you. I selected all the objects then moved them all in one go using the m key, worked a charm.
You found the layer problem before I found the thread, but some other random tips:
You mentioned that you weren’t sure how many objects you had. Blender tells you on the top bar (55 in your last screen shot.) This is actually the number of objects in the current view, so it will depend on which layers you have selected.
In the top right where the list of objects are, there is a drop down that says “All Scenes”. When I have a lot of objects, I like to change this to “Visible Layers” so that it only lists the objects that I’m currently working on. Of course this is personal preference; I only mention it because I think lots of new users don’t notice that option.
Nice house. Looking forward to see it continue.
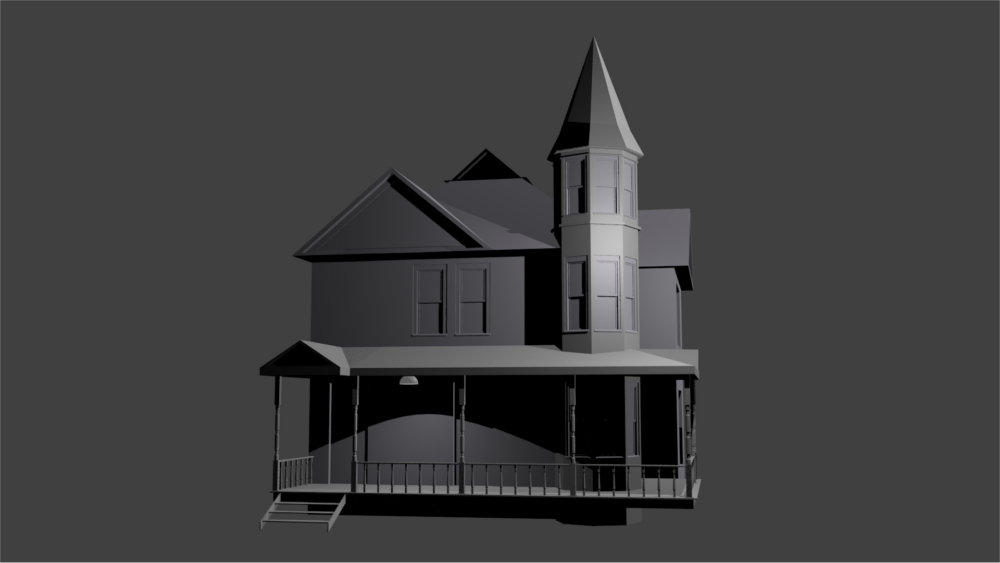
Thank you pscot752 for the comment and useful information. I had missed the info in the top bar about the amount of objects, up to 57 now. Doesn’t seem like much change but I deleted all the ridge tiles as I thought the curved ones were too modern looking and am replacing them with the angled type which look more in keeping with the style of the house, which of course has lead to more problems.
Easy enough to place the ridge tiles on the horizontal parts of the roof, but where two different roof pitches meet and sweep down at an angle that’s a different story. Can’t seem to get it right at the moment as none of the lines that the ridge tiles should follow are on the X, Y or Z axis .
I will keep searching for the answer, so much to learn.
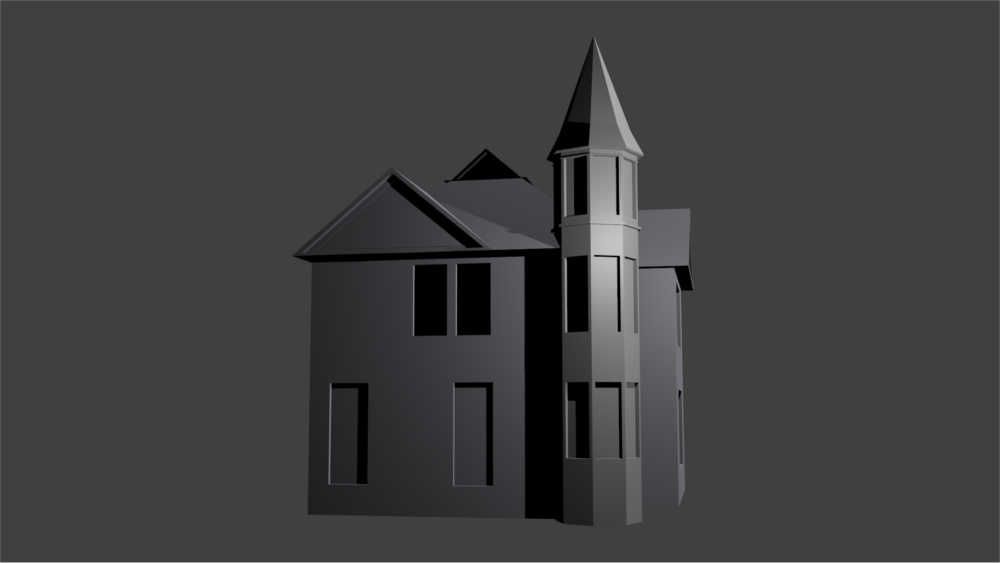
I think I’m done with the modelling now, had a fair bit of help from the other members here so thanks to all who advised me.
Here’s some updated images, all comments are welcome on how the model is looking.
Time to start on textures. I have had a little look at Blender render and how the materials and textures work there so I will probably head in that direction. I could try Cycles, but it’s all a bit of a mystery to me at the moment and I have yet to get cuda to work on my Linux Mint machine, which apparently cycles needs to work correctly.
Looking good, my only comment is the waterdrain must be a bitt wider
Thanks. I will sort out the gutter and downpipe.
I like the styling of your model, It looks like it could be the setting for some sort of horror movie.
Definatley looks like it’s haunted lol 
I’m glad to hear you solved the problem regarding object layers. I’m looking forward to your next update 
As for rendering, I would recommend using cycles. It is Superior to Blender Internal Render (In my opinion). If you have no knowledge of cyles materials try some of blender guru’s tutorials, they are what helped me get my head around cycles a few months back.
This is a good one - http://www.blenderguru.com/tutorials/create-realistic-materials-with-cycles/#.VLMPhHvEcU0
And you don’t need CUDA, It’s just recommended as it’s usually a lot faster. I render all my images using CPU rendering on cycles.
I second Jamie B’s suggestion: Cycles all the way, and you don’t NEED CUDA, but it is definitely nice to have. Personally, the node setup of cycles was a little confusing to me at first, but it’s easily a million times better than the setup I first learned with Blender’s 2.49 internal renderer. Just fiddle with some nodes and watch a few tutorials, and things will begin clicking.
Your house is progressing nicely by the way. I hope to see more when you’ve got it textured.
Thanks for the comments Jamie B and Rjakabapockets, they’re much appreciated.
I will go with cycles for the rendering, the majority use and recommend it so it must be the way to go. I have downloaded a PDF called “Blender 2.6 materials and texture cookbook” so I will work my way through that and hopefully learn a few things along the way. Also going to check out blenderguru and some of the other good videos.
I will be going for the haunted house look on this one.
Cheers.
Looking forward to your next update mate
Glad to hear you’re going for the haunted house look. It definatley fits the style of the design.
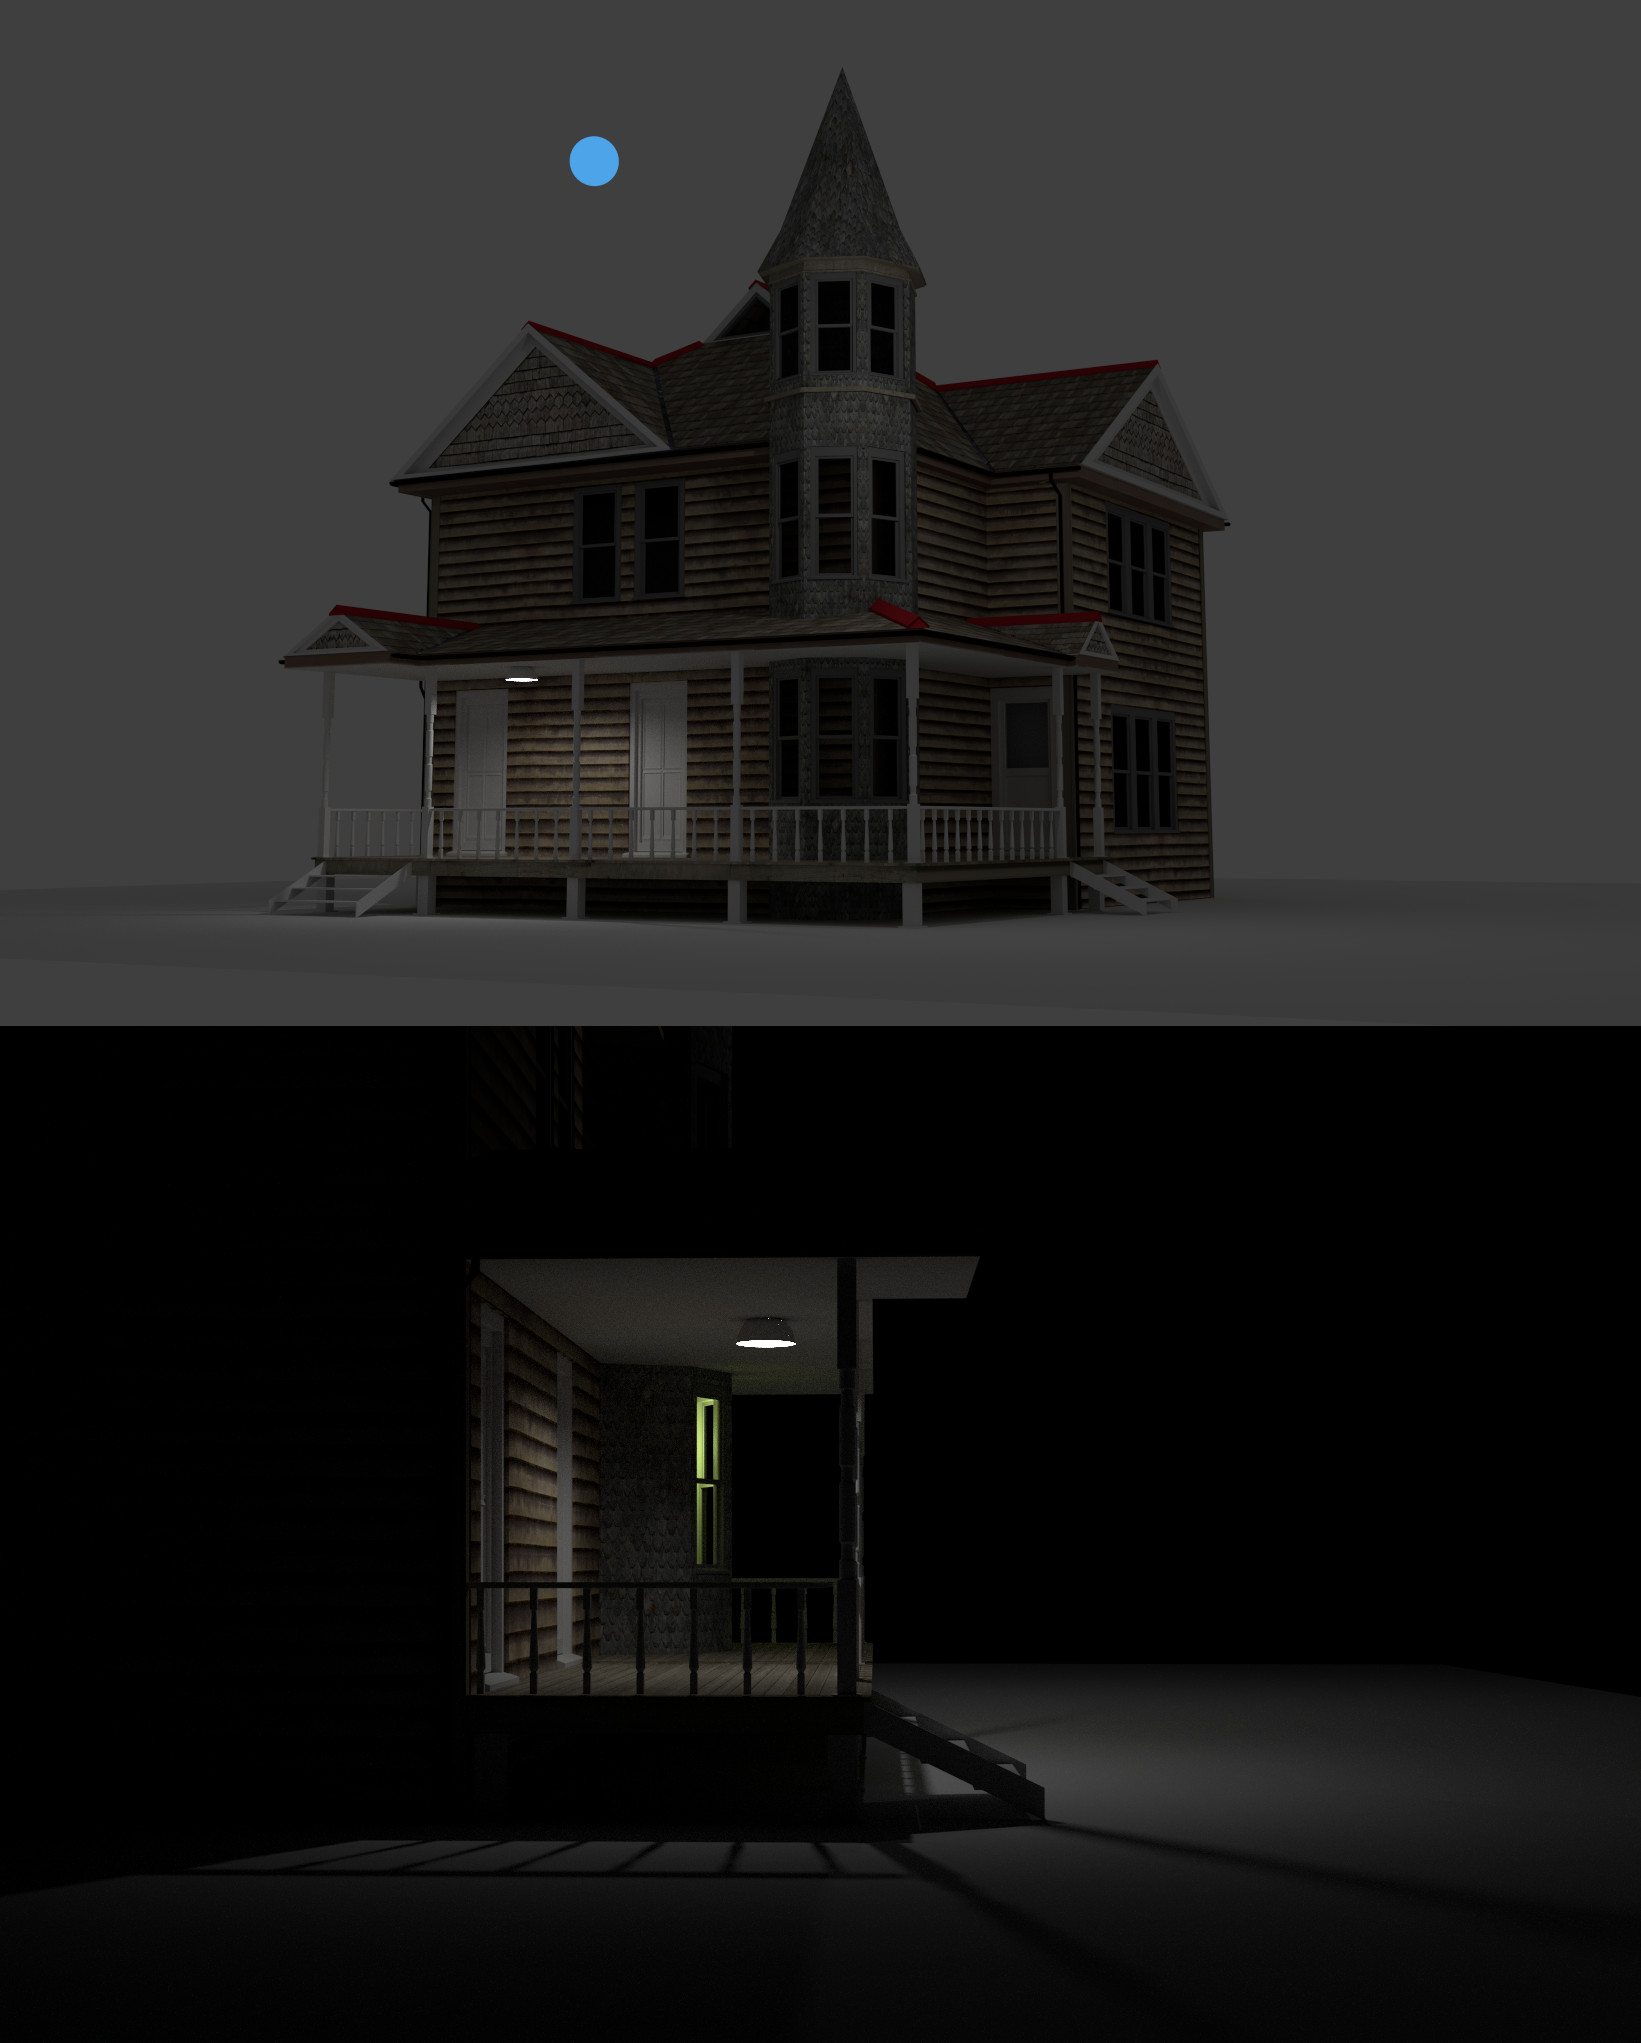
I have been messing around with textures for the last few weeks, trying to learn how it all works, and have got this far with the house. It’s not finished yet by a long way and there are several things I’m not too happy with, the tiles on the tower for one thing. They look very flat to me but I have yet to find a way to fix that.
All thoughts and comments on the house and textures are most welcome.