Hey folks, Colin Barton here. I saw that I’d been linked here thanks to checking my blog’s referrer history.
The answer to the original poster’s questions is Yes. Doing all this with Cycles isn’t really significantly different than doing it with Blender Internal. But that’s because it’s challenging with either  The key to pulling off this style is understanding what’s making it work in the first place. Let’s look at the style elements present here:
1 - Edge lining. Covered by Freestyle.
2 - Texture painted grit and damage in a pen-like style. Covered by texture painting.
3 - Very hard edged shadows. You need toon shaders and small Point/Sun/Spot lamps. See my toon shader article that was linked above. You can still use larger mesh lights for fill lights as long as they are not too strong, but they will reduce the contrast between light and shadow. Using Ambient Occlusion is also fair game.
4 - Compositor post processing, and possibly camera projected noise for grit. Projecting textures from the camera gives things a flatter look. This can be done either in the material or compositor, depending on the effect your after.
5 - Normal transfer. This is the big one, and one of the main defining factor of the new Guility Gear style. Often, your geometry will not give you toon like shadow placement. Toon shaders give you hard shadow terminators, but that’s about it. A big component of toon and anime styles is that the shadows are actually simpler than what the geometry would really produce, effectively lowering detail. An example of this is the shadow you get near the jaw on female anime faces: it tends to be very small and smooth, whereas a real face would have more contours. The issue is that these are not consistent from all angles. When building our models, we have to have the correct shape in 3D, and have it look right from all angles. But since we are trying to mimic an artstyle that has a fairly high level of abstraction and simplification, often the geometry we need ends up producing shading that is too complex. The solution is to re-orient the normals to make things look simpler than they are. This is done by copying the normals from a simpler object that is not rendered. So you can have a complex face, but copy normals in from a much simpler sphere.
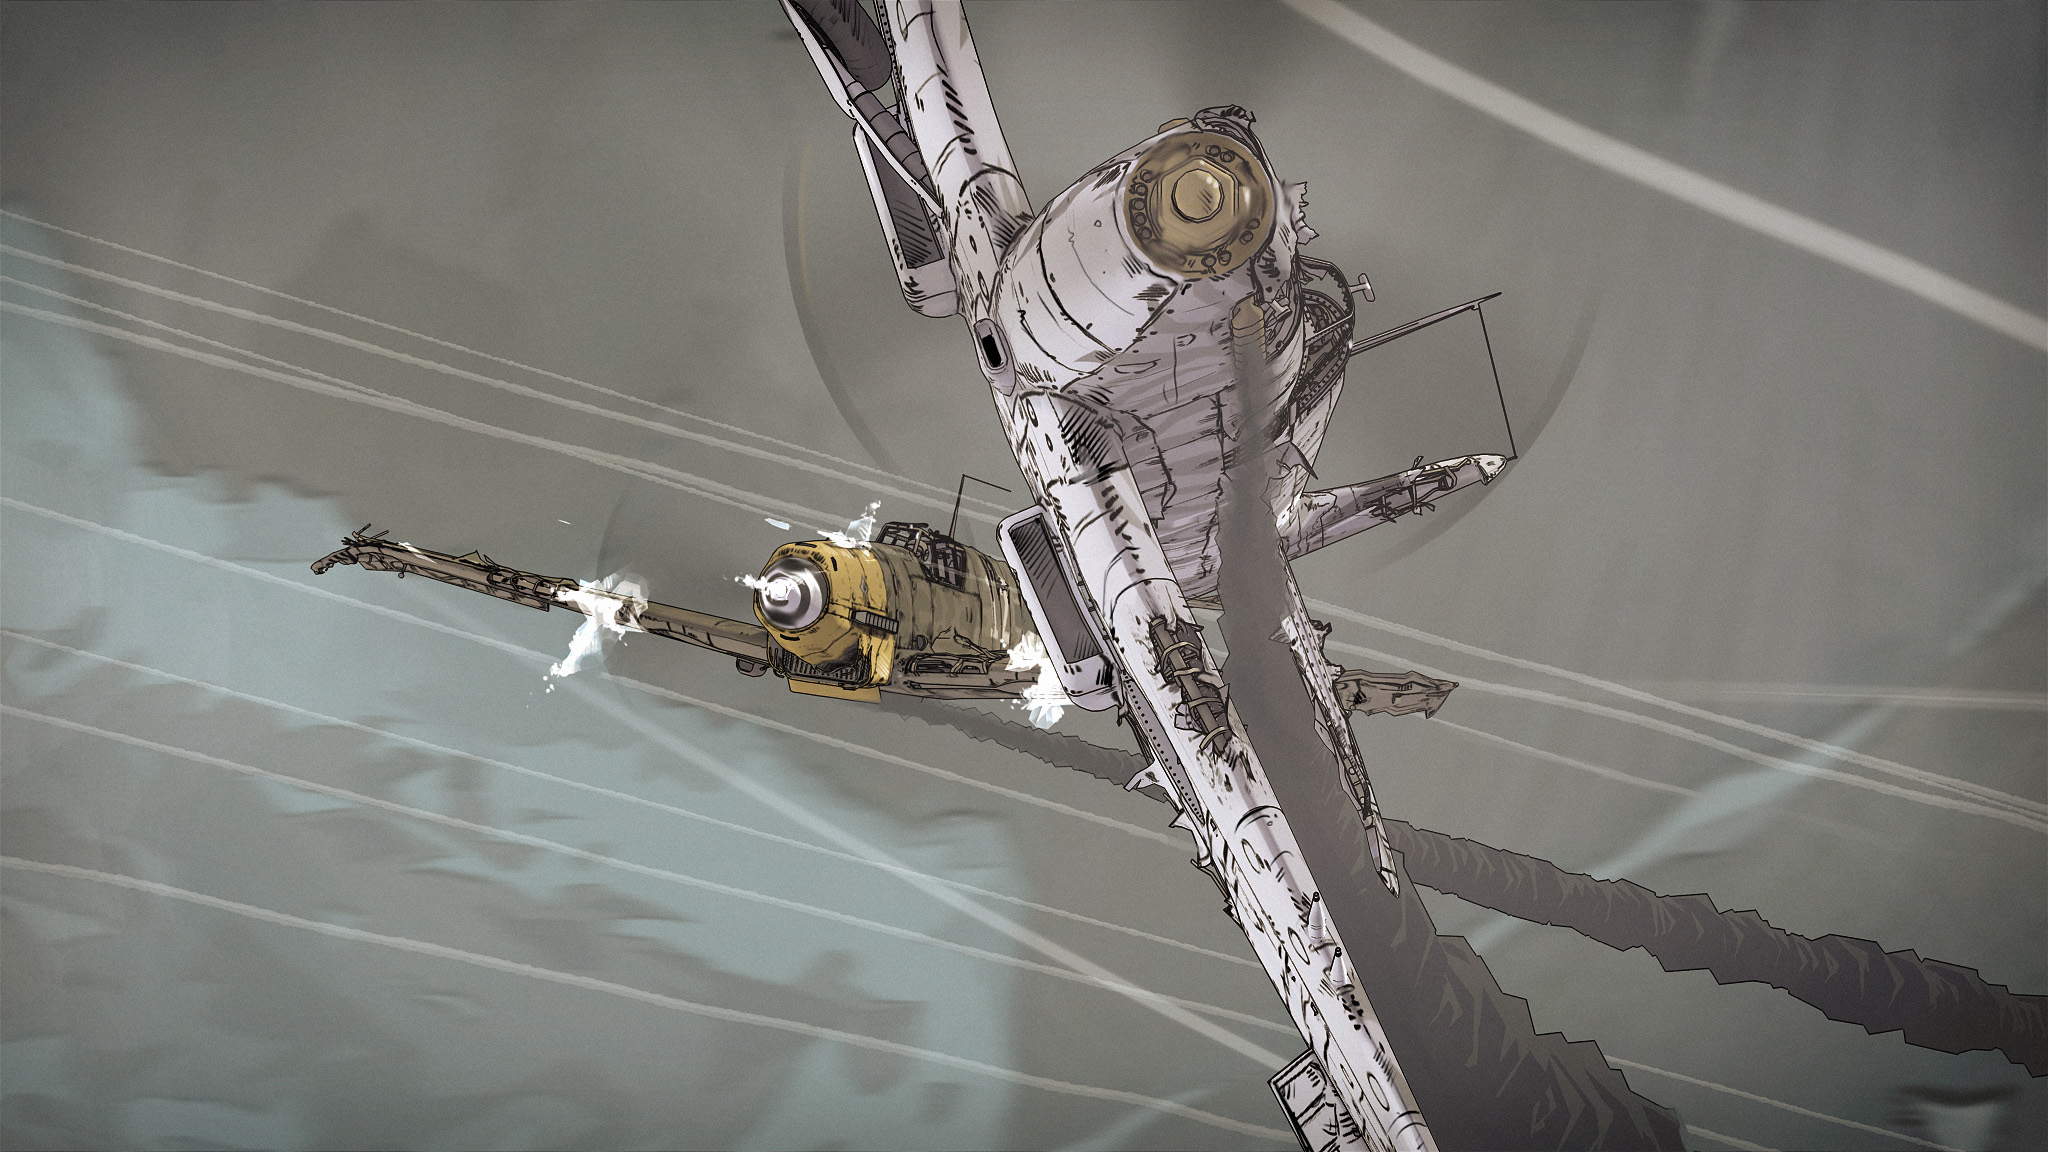
Here’s a picture:
And here’s a link to a japanese article, but it has good pictures showing what’s going on:
http://cveld.net/face-normal/
This normal transfer thing is pretty new. Someone wrote a script to do it in Blender, and there’s a custom graphicall.org build of blender that has a modifier version of it. (The script aligns normals based off one view angle, the modifier keeps it updated for every frame.) Hopefully we’ll see it in Trunk soon. I don’t have the links to either off the top of my head as I have not used this yet myself, but you should be able to find it easily by googling ‘blender normal transfer’ or something like that.
Lastly, to clarify, the main differences between using BI and Cycles for toon stuff is that Cycles can do much fancier lighting, reflections, effects (smoke, fire), and volumetrics. But it needs a GPU to be fast, and that more advanced lighting comes at the cost that you HAVE to setup your lights well, or everything will look bad. BI is quick and requires less knowledge of lights and shaders. It can also do some handy tricks like change toon shadow color, and use shadow information in the shader (Cycles has no Lamp Data node, look that up if you want to understand more. It’s important.) There are lots of small technical differences. But there’s nothing so large that a whole style is inaccessible in either.
Anyhow, hope that all helps. If you have questions, just ask. And I recommend looking up the Blender NPR and Freestyle Collaboration facebook group. That’s also a great place to ask.