How to render car headlights?

Hi all :slight_smile:

I need to render some headlights for my car in Cycles, but I can’t work it out…

I’ve built the basic reflective back of the light, and a small globe in the middle of it, as you can see in this picture.

I’m using the Emission shader to emit light, but it won’t cast a beam or even look bright enough for headlights.

Would you pros be able to give me some advice? :slight_smile:

Thanks in advance!

Two Tips:

  • Balance of lighting, if you have a sun and/or sky lamp (which are quite bright) the headlight lamp must be significantly brighter to appear as bright compared to other lamps in the scene.
  • If you wan’t beams, you’ll either have to create them using Volumetrics in Cycles, or render them from a spot lamp in Blender Internal and compose it together.

I’ll try render some headlights soon to see what kind of settings I need

Thanks, I don’t have a sun in the scene (just planes with light emitting shaders as overhead lights).

I cranked the brightness/emission value of the headlight shaders up to like 200 or so and it still wasn’t bright enough to be noticeable.

If you want I can send you my scene?

That would be useful, if you don’t mind :slight_smile:

Here’s a sample headlight setup I made, not sure how it would work on your scene:


Headlamp.blend (110 KB)

I found something recently. When compositing, light cast through transparent objects doesn’t always always seem to trigger certain effects (ie: glare). It’s sort of annoying when you’re not expecting that. Good news is there’s a way around it. Basically you assign the emitter meshes another layer specifically for purposes of rendering an emission pass to generate lighting effects via compositing that are difficult or impossible to get otherwise. Since the light object is then on its own layer, it doesn’t pass through the transparancy - and therefore you get the glare effects. Other than the light, only other things you may want on that layer are things to specifcally occlude the light.

Also some lighting effects in the compositor are rather weak, putting a gamma node with value under 1 ahead of the effect node will give it a decent boost. Adjust to suit.

At least I know this works in Cycles. Not sure if it’s necessary in BI render, so I haven’t tested it there.

zeepal, you can download it here :slight_smile:

This is my 2nd car I’ve ever made so please go easy on me, I know it sucks :smiley: (and please, for your own safety, don’t look at the mesh on the rear lights :p).

I’ll check out your scene now, though. Thanks :wink:

pauljs75, I’m not exactly sure what you’re talking about… only just started using Cycles and what you’re saying just completely went over my head :stuck_out_tongue:

proloser2 I had a look at your scene, and there is 2 changes I suggest you make, that should help a lot:

Put a point lamp inside where the bulb mesh is, they render far faster than the meshes you have (each face counts as a light). Enable Multiple Importance Sample and set the emission strength to about 5000.

Also enabled indirect clamping (in the render settings panel) set to 1, it gets rid of the caustic fireflies the mirror of the lamps are generating.


P.s. I am terrible at modelling most things myself, I generally prefer material/texture setup, as well as getting optimal lighting :slight_smile:

Wow, that looks much better now :open_mouth:

One small problem though, when I put the headlight glass back over the lights, it gives a funny effect (white circles around globes), as shown in this picture.

Thanks for all the help so far :smiley:

Might be not what you want and needs some tweaking but this is how several cones with slight displacement looks. Also, pointlight as it was said above.


I strongly prefer to tackle “atmospheric effects” like this one using separate renders (in whatever render-engine best suits my fancy), which are then composited to produce the final frame.

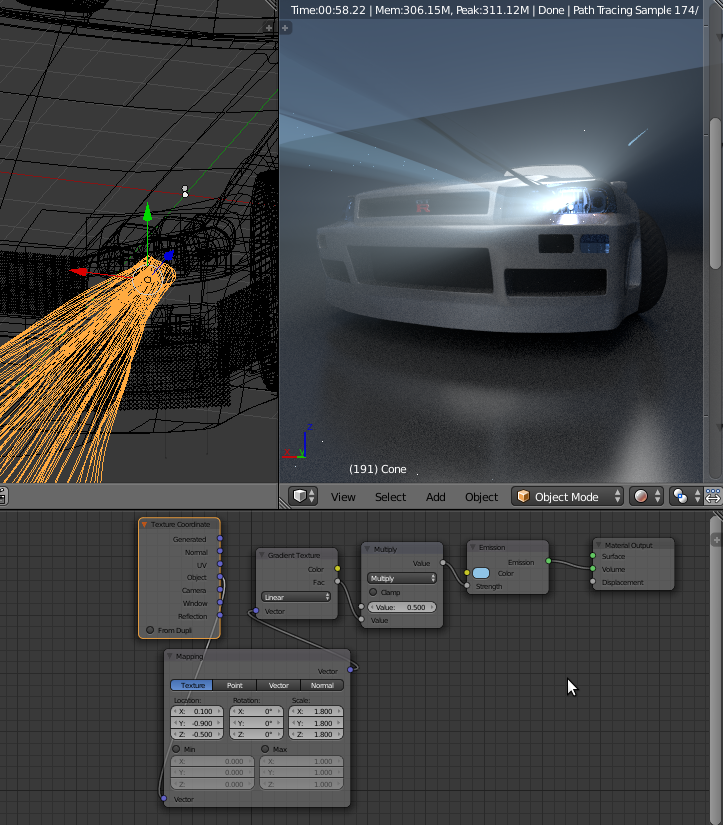
The argument in favor is a simple one: “this is precisely the sort of thing that you will most want to ‘tweak.’” Therefore, do your tweaking two-dimensionally, of course using 3-D (Zdepth) information left-behind by the render engine. You can make the light-cone, for example, more or less opaque … give it a particular tint … add noise or smoke to it … all within the compositing “noodle” net, and so it’s all very fast.

In the specific case of “light streaming from a headlamp and reflecting off the road,” there are really three distinct lighting-effects going on here, and all three of them can be and probably should be dealt with separately. (And each one, do observe, has multiple separate aspects to it.) They are:

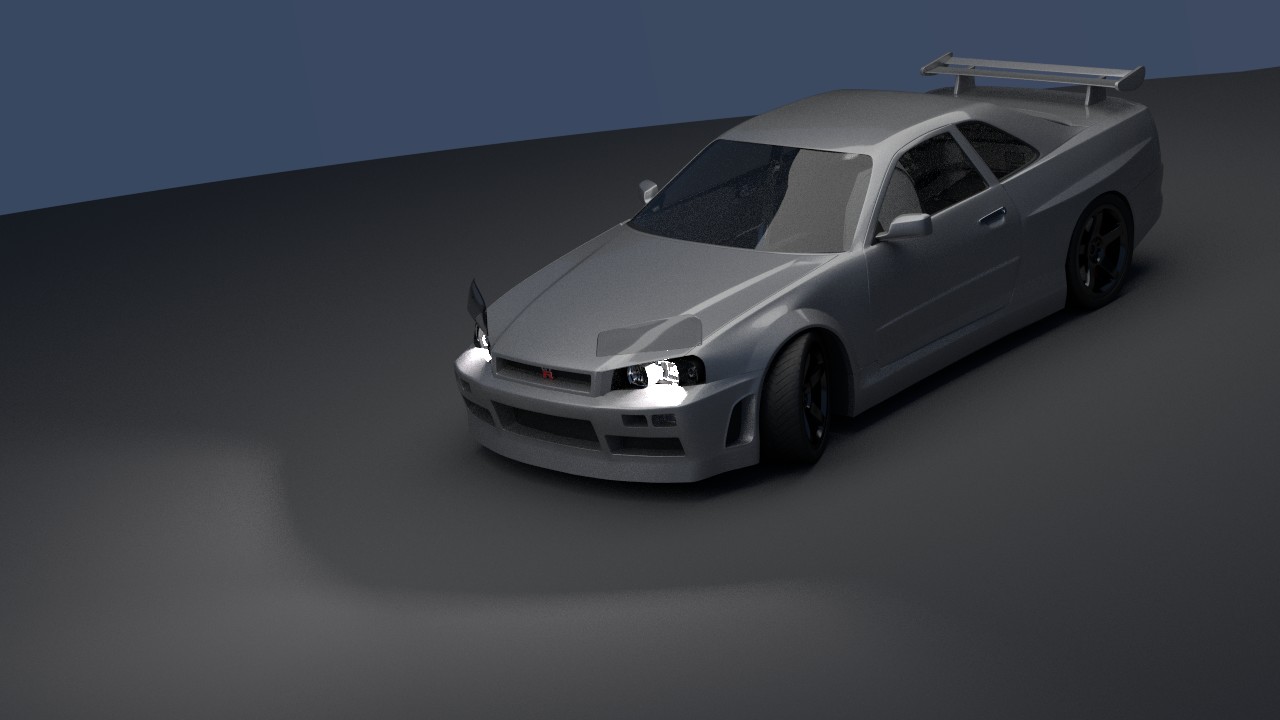
  • The light that’s coming directly from the lamp, including the light that’s apparently(!) (underscore the word, “apparently …”) coming off the reflectors within the lamp housing.
  • The beam of light passing through the air, including the effect that the light has upon whatever is behind the beam, whose illumination is passing through the beam.
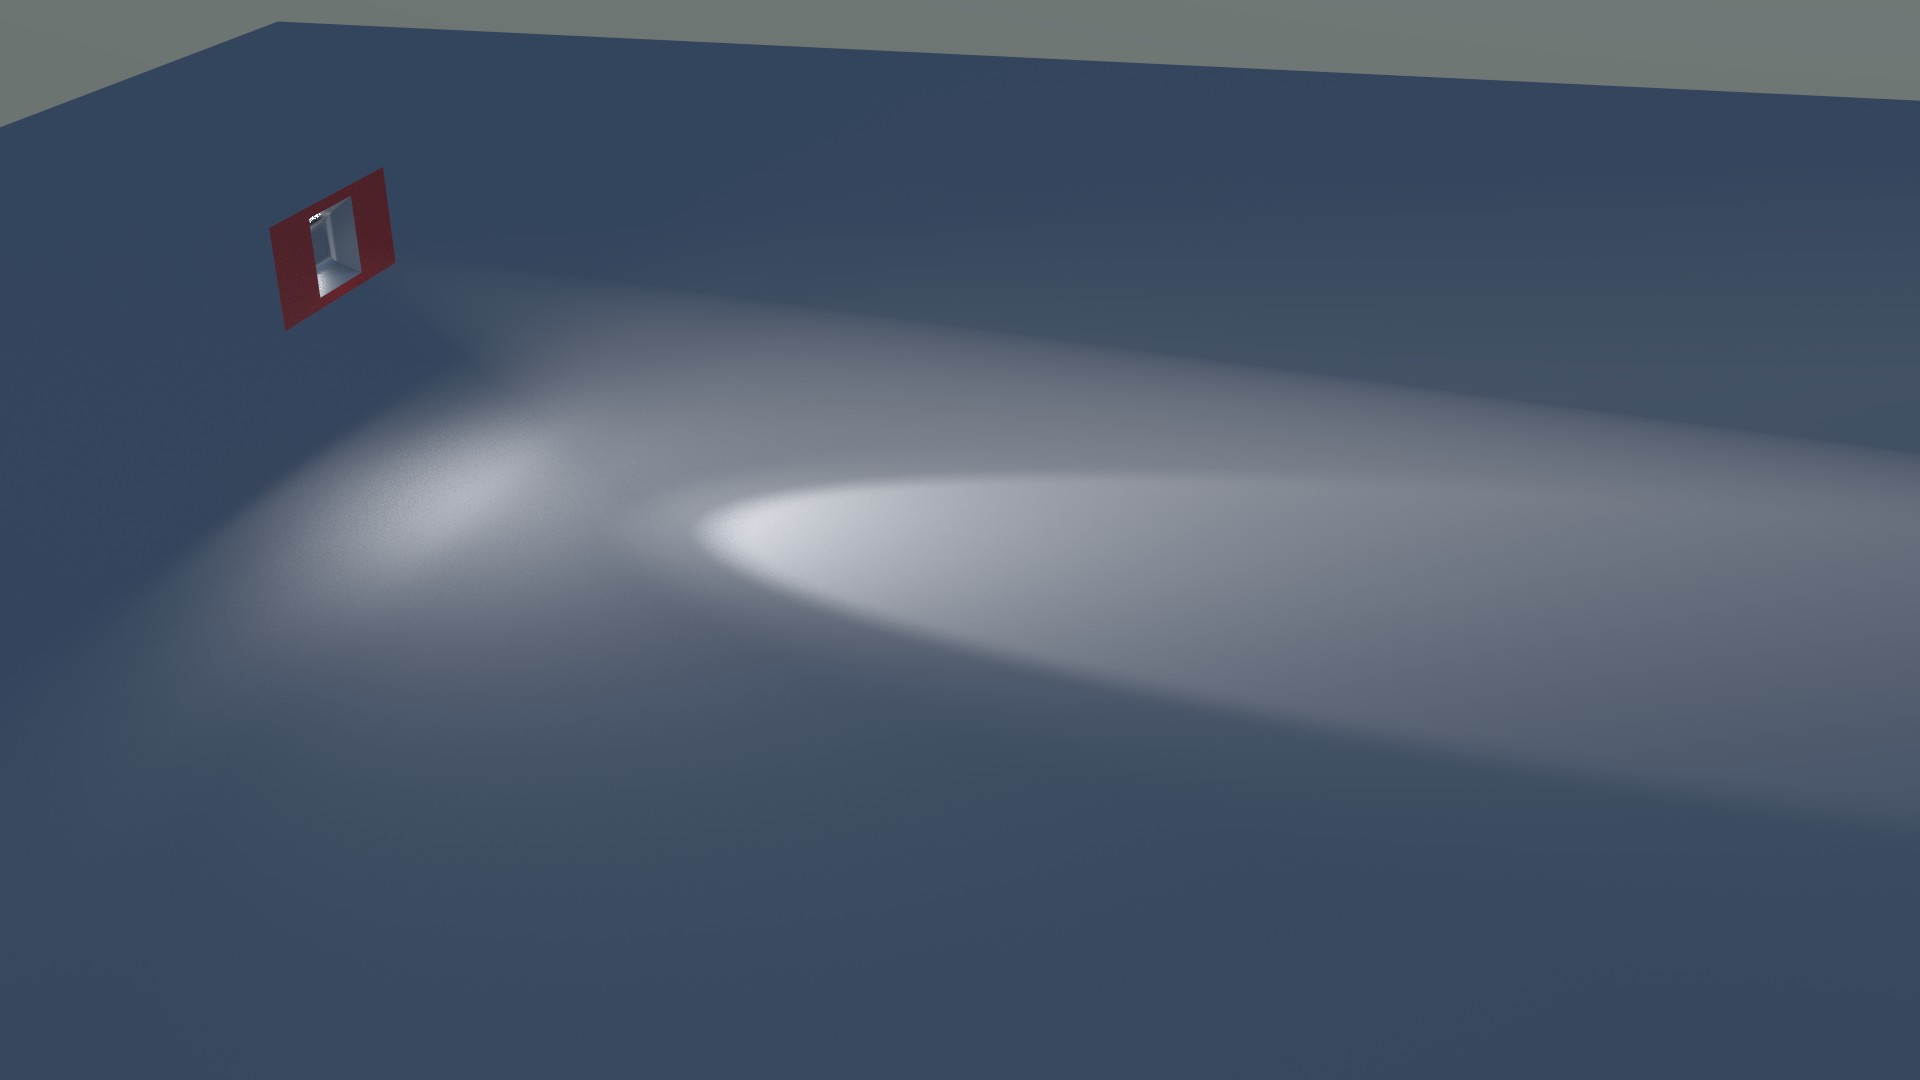
  • The spot of light that is bouncing off the roadway, and expressing the particular texture of that roadway.

In each of these three cases, there’s more going-on, apparently(!) “because of the light('s presence),” than just the light itself.

Computationally speaking, you really want to have to solve only one problem at a time, and you want to be working with independent variables. So, if you can, say, exercise independent control over the “hue and saturation” of the area that’s behind the beam, you are now able to “tweak” how opaque or how glaring the beam seems to be. If you can two-dimensionally inject a noise into the beam-of-light, the car’s now driving through a foggy storm. Yet you can still, independently, dial-up the illumination on the roadway (in spite of the foggy-beam) to emphasize the Key Plot Point in the shot. And if BI works great for one part, while Cycles is best for another, then you should be (and, you are …) free to use both.

It sounds “much more complicated and time-consuming,” but it really isn’t, because when you (carefully) render something, you don’t have to render that data again. When it’s time to put everything together, you don’t have to sit-and-wait for hours. All of the renders, all of them comparatively simple, are already completed, using the tool de jour.

As nice and tempting sundialsvc4 advice might sound, on this end it usually ditches into little-this and little-that masking, correcting, overdoing hell. Clearly another me does not care enough of sitreps and ops plans ahead of offensive ;).

In this case, while example is still a one go, separate passes is an option. Not sure how i’d go about getting reflections on the car back into the image though. Another masking riddle.

Thanks to both of you :slight_smile:

sundialsvc4, I think what you’re saying will probably be too advanced for me at the moment, as I really have only just started with blender :slight_smile:

eppo, Thanks, I will give that a shot too :slight_smile:

All the help is much appreciated, everyone! :yes:

eppo, I would probably let the headlight-light source handle all of the reflections of that light … in the housing, off the body of the car, and so on. Basically, there is “a light” there, and it’s shining on everything … even though something else is probably going to have to provide “the brilliantly glowing light-bulb itself.” So it goes. Mostly, it’s a breakdown based on what you need to tweak.

proloser2 … As we like to say in a programmer-geek forum that I also frequent:


At the end of the day, “you’re ‘here,’ and you want to get ‘there,’ and you must use a Digital Computer to accomplish that miracle.” :yes: Okay then, there’s always more than one way to do it. Many of those ways, in the world of CG, are affectionately(!) known as “cheating the shot.” Cheating, in this case, is a very good thing. (But that doesn’t imply that you have to do it, either.)

Therefore, I simply encourage you to … in due time … have a close look at Blender’s most-excellent compositor. Look at all those “shot breakdowns” in all those Making Of… videos. Put the ideas that I’ve tossed-out here, somewhere in your pocket-protector. For some other future time.

Yep, I definitely will. But I need to take it one step at a time… 4 or so months ago I couldn’t even model a car, so I’m kinda focusing more on getting my models better, then I’ll move onto more detailed rendering :slight_smile:

eppo, is it possible to have the file that you set up your lights with? I can’t seem to get any light rays with what I’m doing, would help lots to see what you did and compare :slight_smile:

Here you go http://www.pasteall.org/blend/32966

Thanks for the help :slight_smile: