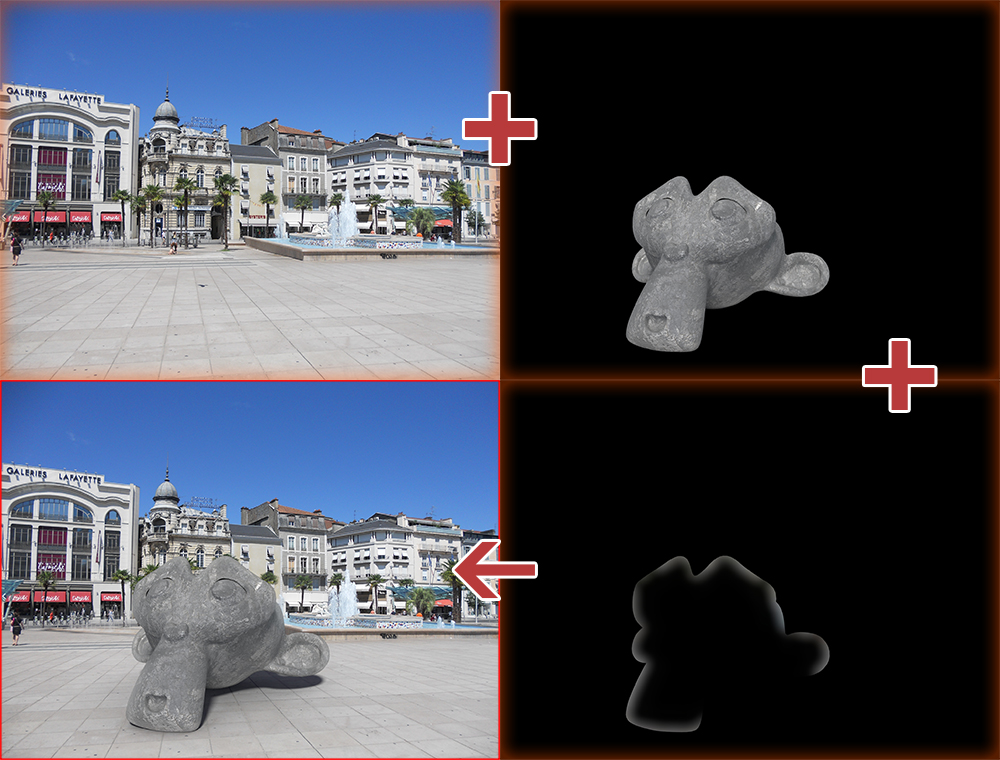
The Light - Wrap Effect is used for integrating Greenscreen shots or 3D Renders into a Backplate.
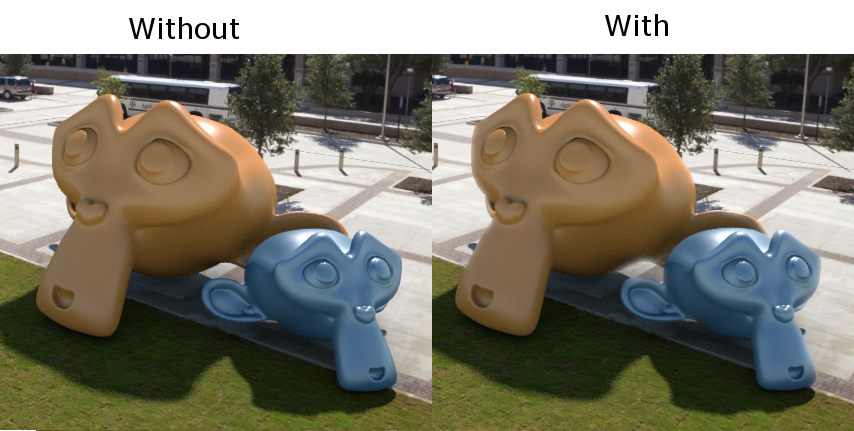
To better blend the foregroud object and the background you basically add a small rim of light determined by the background luminance and color over top of the image.
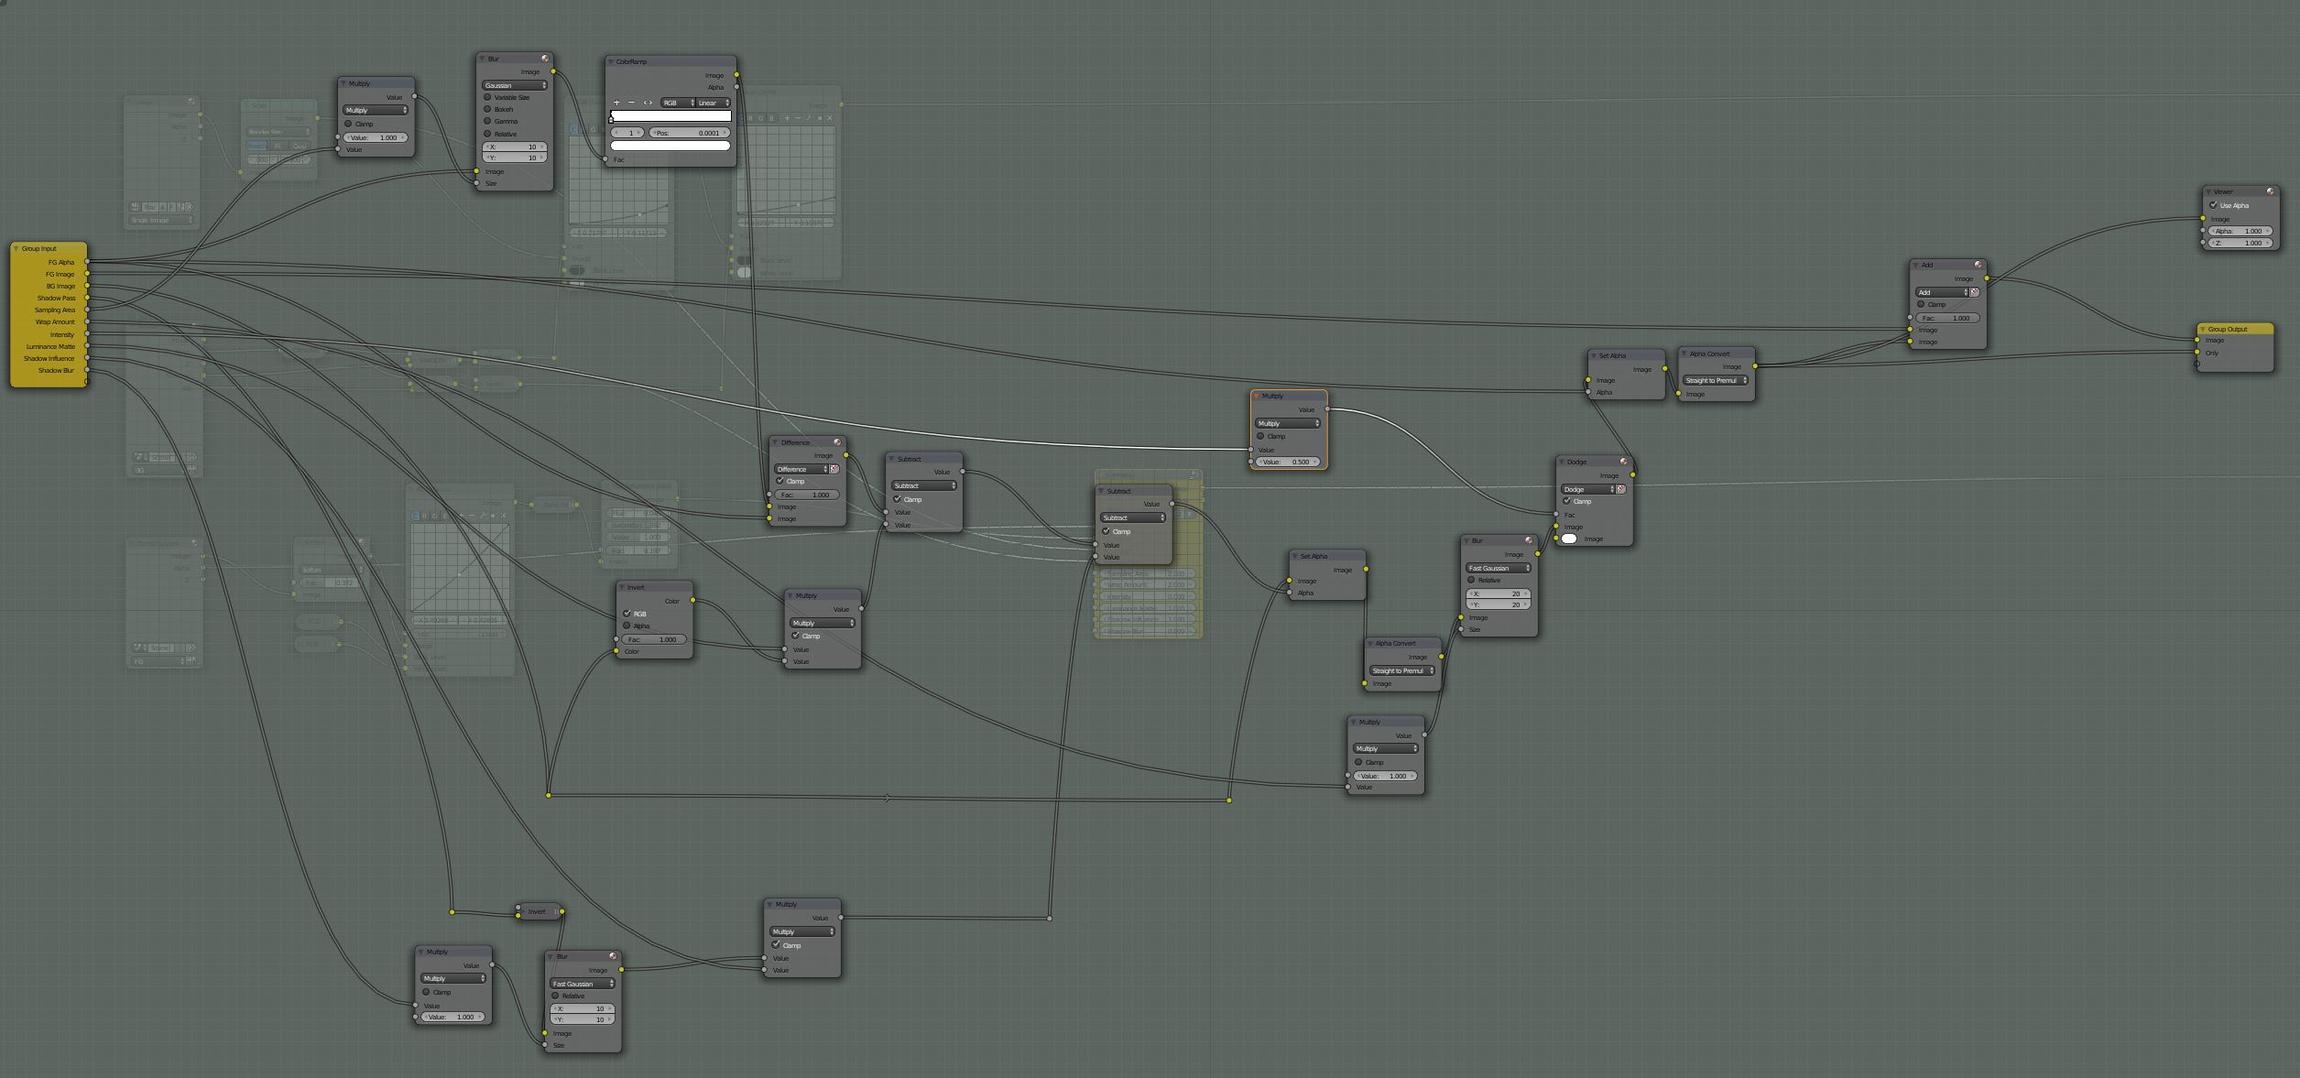
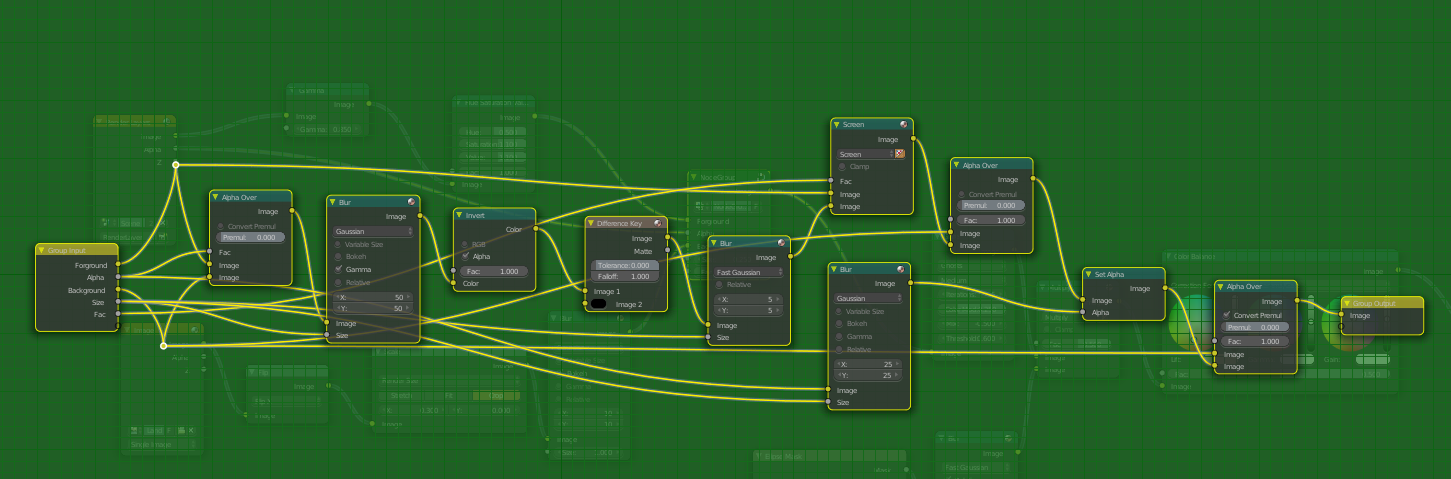
Other Compositing Solutions like AfterFx or Nuke have the Light Wrap Effect already built in or at least offer Plugins for this Task. Blender 2.72 does´nt so I have built my own custom Light - Wrap Nodegroup.
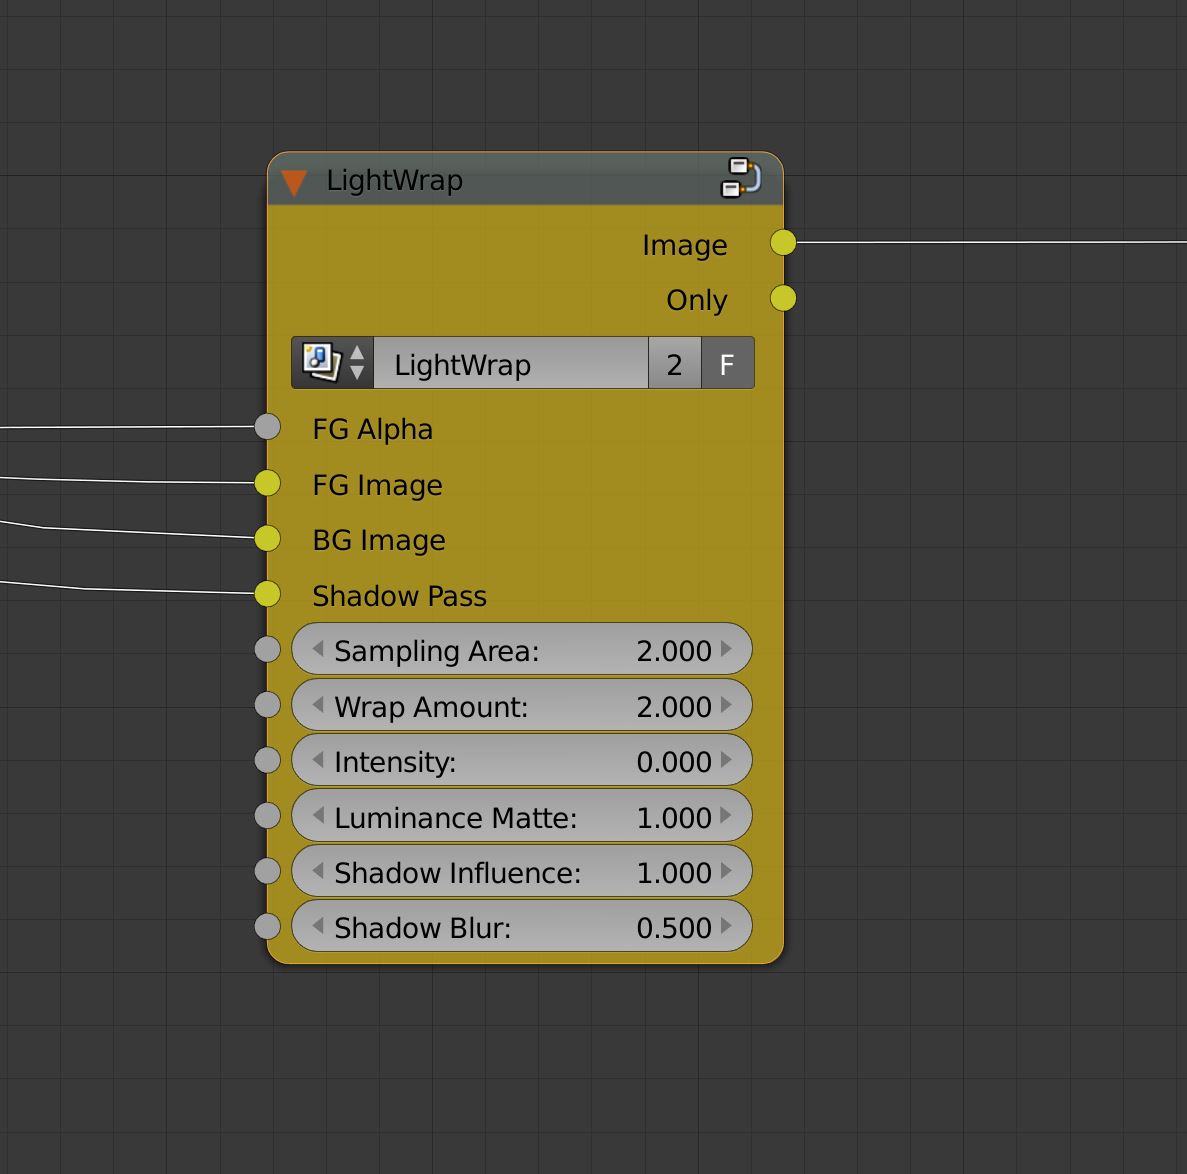
Just plug in the Foreground Alpha Matte, the Foreground Image itself and the Background image and it works. Adding a Shadow Pass to reduce the Effect of the Light - Wrap in the dark areas is opional.
As an Output you will get the Final composited Image with the Light-Wrap Effect already applied or a Light - Wrap - Only Image
(see above).
You are able to change the sampling area where the Node gets its pixel information from. Changing the Wrap amount will change the ‘blur’ of the Effect.
The Intensity of course controlls the strength.
increasing the Luminance - Matte value will limit the effect only on the brightest parts in the background image.
Shadow Influence and Blur will determine how much of an effect the Shadow Pass has on the Light - Wrap.
After a bit of testing I understood your Ppoblem. I´m sorry, I explained it wrong in the node description. The LightWrap node actually does´nt composite the FG with the BG. It just gives you the FG with the Lightwrap applied to it as an output. This Image already has the Right Alpha Channel so you just have to composite it onto th FG with an Alpha Over - Node, along with your other render - passes (like you would normally do). You just have to plug in the BG to give the node the necessary information to build the Lightwrap.
Hi Keniminus, thanks for sharing.
I was also working on a light wrap node, and it’s cool that you found a different approach! Mine is a lot more simplified, but may not be quite as powerful since yours has a few more ways to tweak the outcome. It’s worked for me so far though.
Hi Jonathan,
thanks for your feedback and sharing your approach.
I have made a few tests with your node setup. Thanks to it´s simpicity it is a lot faster than my method.
It is the first time I have seen Blender´s Difference Keyer in action. I´m going to experiment a bit with this node, because it seems quite useful for some tasks.