Was that truly necessary? And it’s not true, either. You got unsatisfactory answers to some of your previous questions because of their vague wording and your constant urge to antagonize when asked for more details. Stop that and we will all get along.
That .blend file you uploaded seems to be exactly the same as the last one?
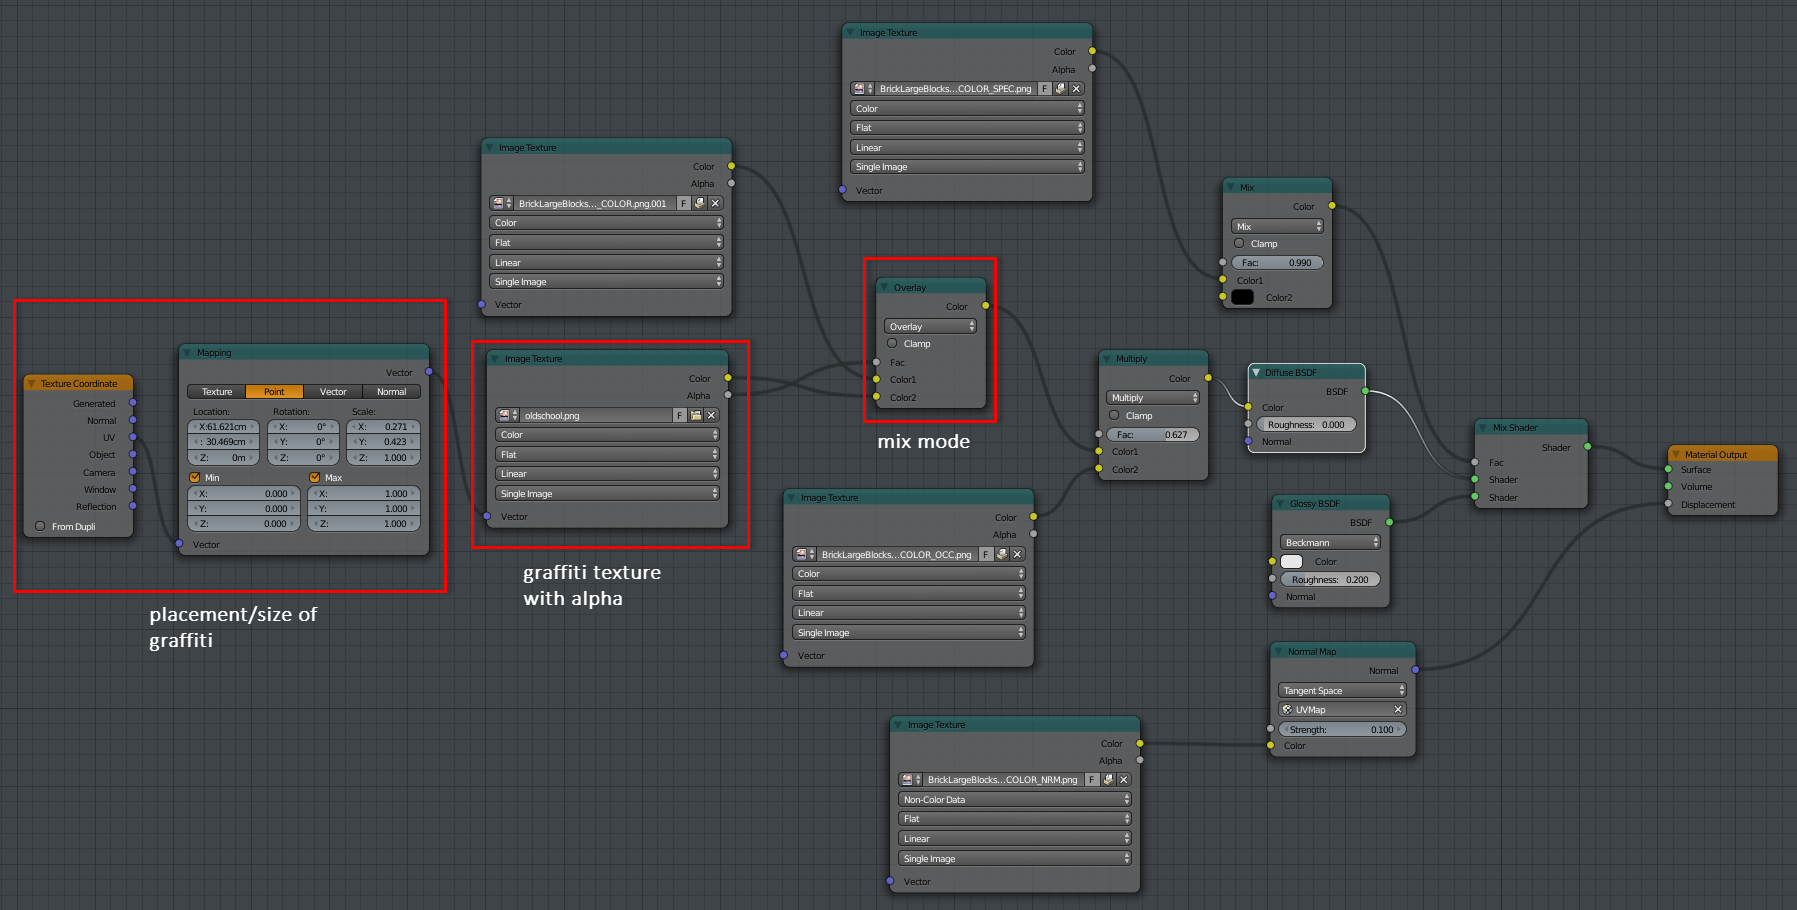
The new and important parts of my screenshots are the ones I highlighed in red. I suggest you leave the rest of your nodes as is.
Btw, for best mapping results with Cycles I would recommend using UV mapping, especially if you also want to use a matching displacement texture. That’s why I lost all the “object” texture coordinates in my setup.
If your graffiti texture tiles that way, you may have forgotten to check the min / max settings on the logo’s mapping node - watch my setup closely.
Oh, and before I forget again: The modifiers on your wall mesh are in the wrong order. The Displacement modifier needs incredible amounts of geometry for such fine detail, so you will have to use the Subsurf modifier first and then Displacement and not the other way around.
Here’s your file back:
a)
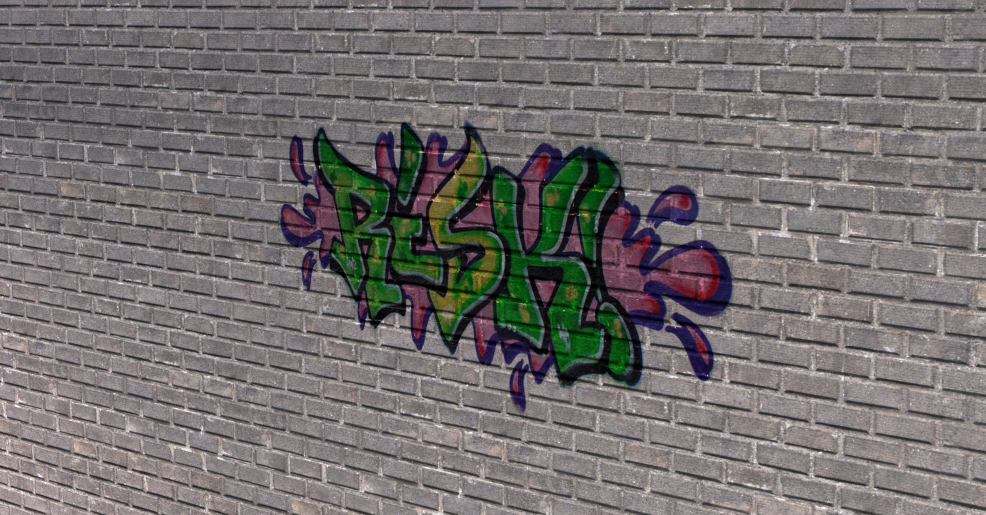
Added more geometry to the wall. Since it was essentially a single polygon, even with Subsurf that wasn’t nearly enough geometry to create a nice displacement.
b)
Changed order of the modifiers (see my last post).
c)
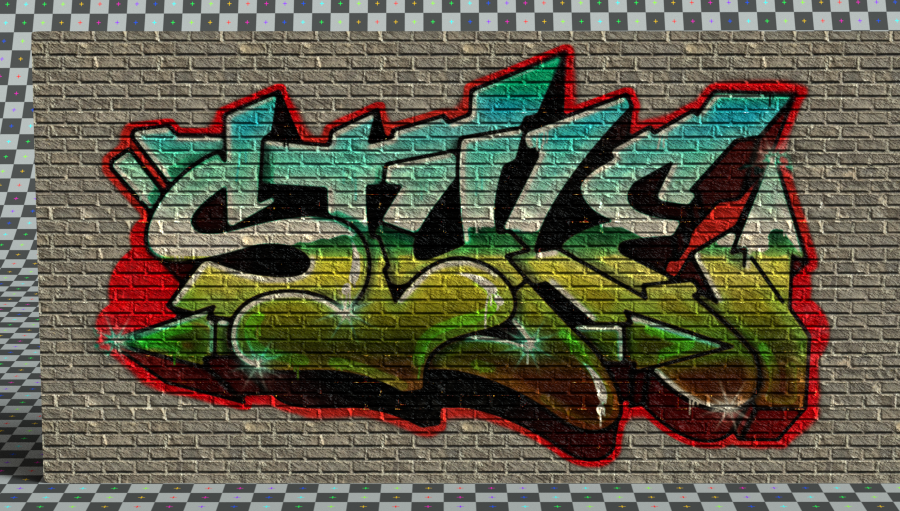
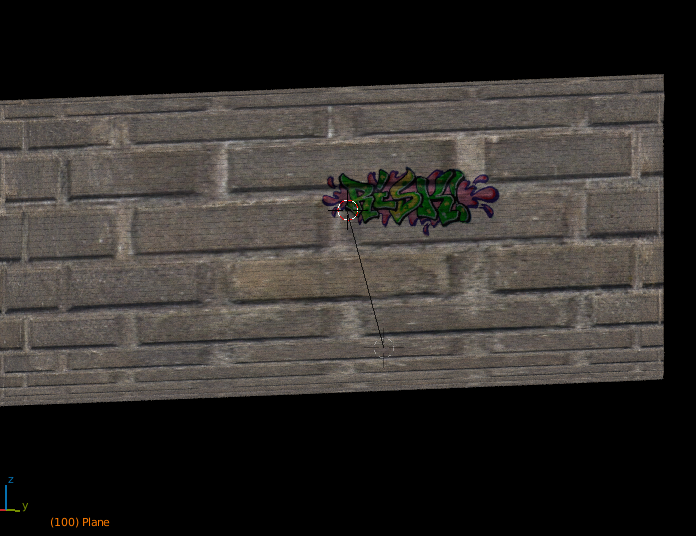
Quick UV unwrap to have consistent mapping across all textures (U > Project from view in front view). Not sure if the graffiti is mirrored or not… If so, rotate the wall 180 degrees on the Z axis so that the correct side is facing the camera (R Z 180).
d)
If you scale in Object mode, make sure to apply the scale afterwards with Ctrl-A > Scale.
e)
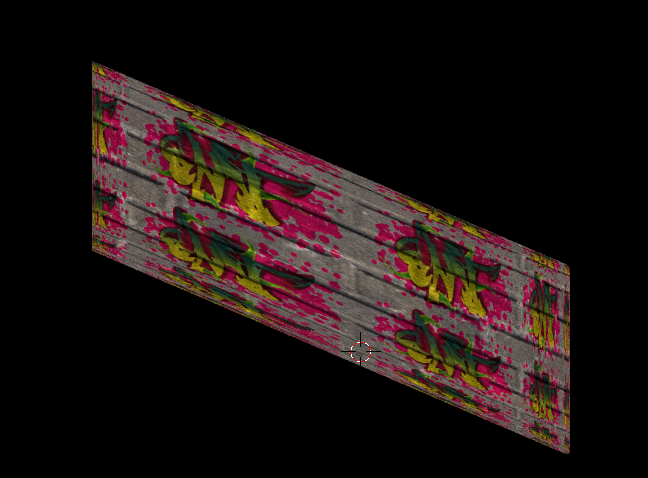
The “tearing” of that texture was caused by it not having a transparent border all the way around. Some of the pinkish “bubbles” were crossing the top image border - corrected that (quick and dirty).
f)
You’re using a low dynamic range image as environment texture. Since that is called “hdri0038.tif” I assume there must be a HDR version of it available. If you also happen have that, always prefer the true HDR version (*.exr / *.hdr).
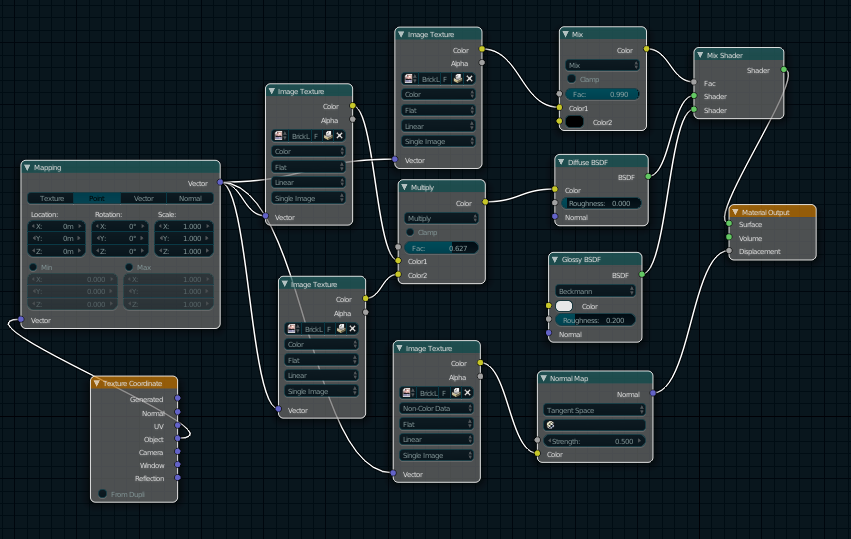
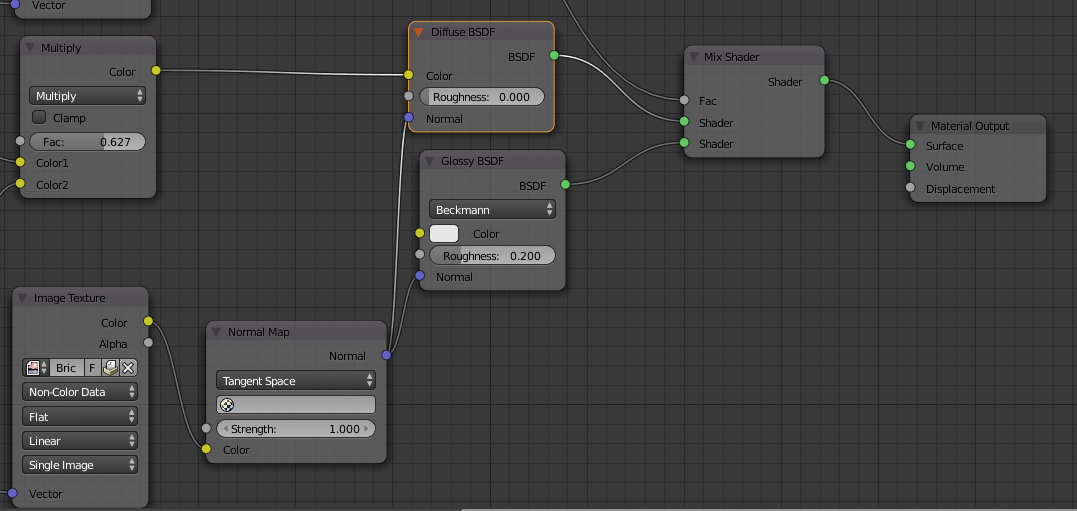
I’d also point out that the output of that Normal Map node should be connected to the ‘Normal’ inputs of your shaders, not into ‘Displacement’ output of the material:
I know you sent me a file I looked at it and made some changes to mine I would like to work it out on mine so I know what I did wrong so I can fix it myself next time it happens.But I do appreciate all the help.