First suggestion is to post up the .blend file, but since you are a new user you might have problems doing that. I think new users are slightly restricted until your post count hits a magic number around ~10ish… It’s an anti-spam measure. Normally, users here can attach .blend files to their posts, or post a link to an off-site hosting service. Quick way to up you post count is to provide feedback in the Works in Progress, Finished Works, or the Focused Critique sections of this forum, or there are a couple of games in the Off-Topic section… Anyhow, posting up the file allows someone to get in there and look around at the problem.
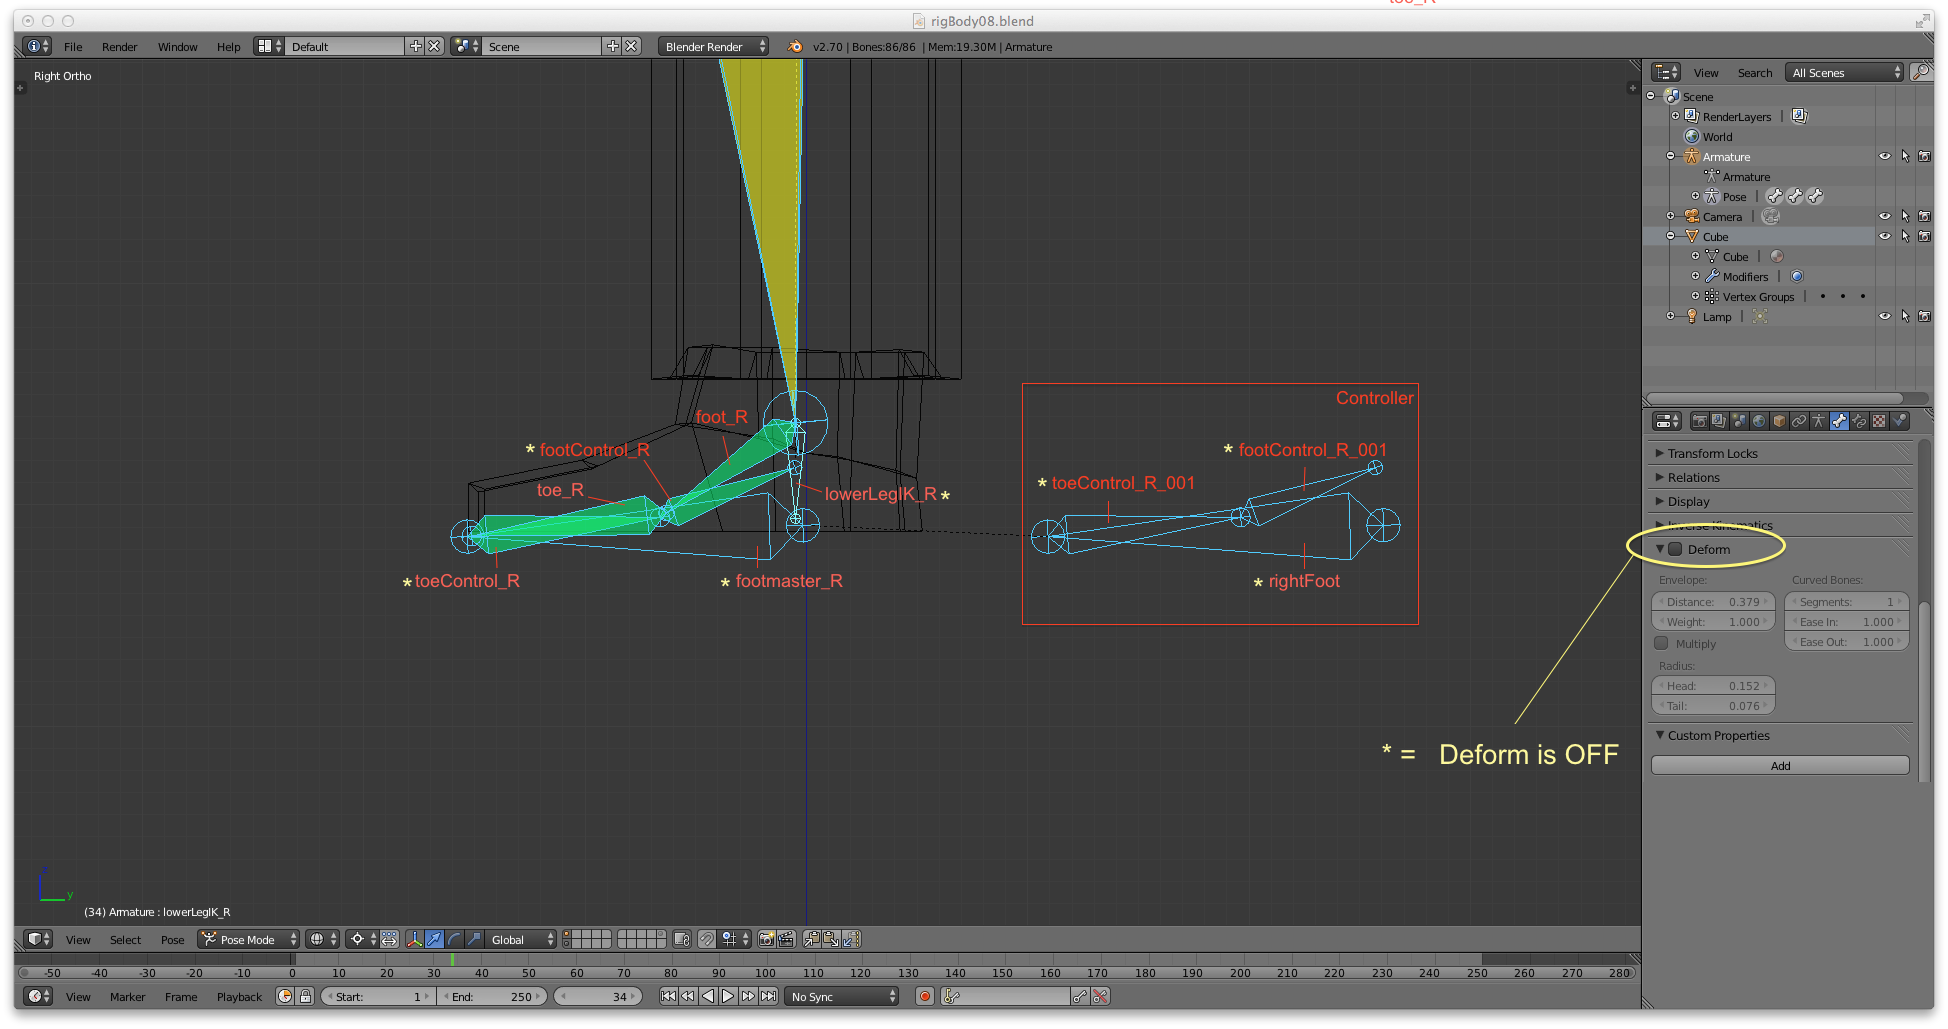
So how’s the rig work so far? No doubt you’re posed it to test that the feet bones are moving correctly, everything working smoothly? No flipping of bones? Enter edit mode for the rig & exit out of it, then open a console window and check for error messages. Errors with constraints/drivers are usually reported there. And turn on the bone axis view option in the armature properties panel. To me, it looks like your heel bone might be flipping on it’s y-axis 180 degrees, that’s why the bottom of the foot mesh is up around the bottom of the pant leg. So look at the heel bone’s x & z-axis arrows when in edit mode and in pose mode, are they pointing in the same direction? If not, then a constraint/driver is causing the problem. If the console doesn’t give you a error, then it might be a bit harder to find the problem.
Yes, I think the problem is about flipping.
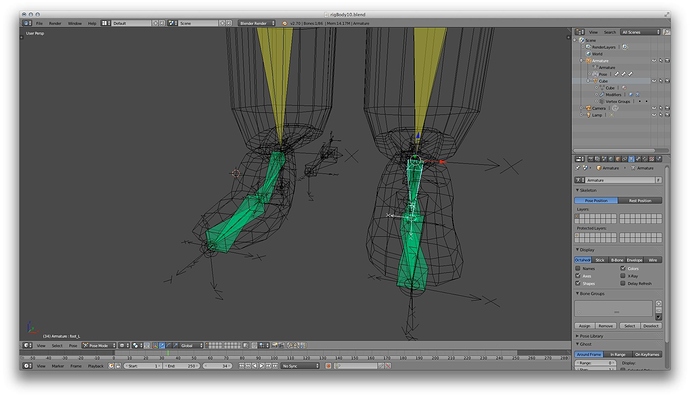
This is how the heel’s bone looked like.
In the Pose Mode, the x axis is obviously opposite to other bones’, even they are the same x direction with other bones.
(And of course, the toe bone as well.)
Then I tried to flip the bones with this problem.
Under Edit mode, in the menu I chose: Armature > Bone Roll > Recalculate Roll, and chose “Local X Tangent” to make these bones have the opposite direction to other bones in the Edit Mode.
It did make the heel/toe bone have the same x axis direction with all the other bones.
And the twisted foot shape is back to normal!
I am not sure if this the right way to fix it.
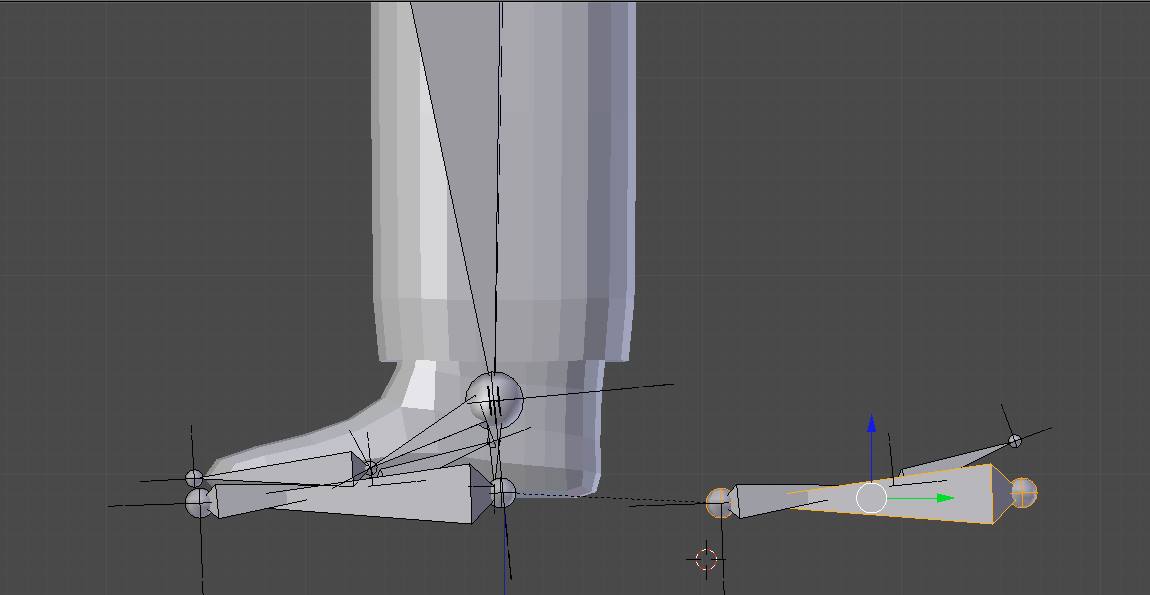
and actually the shape of the foot is still changed from the original:
(it how the foot shape look like in the Edit mode)
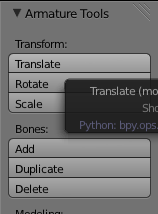
when in edit mode… with a bone selected note that in your right hand tool bar under Transform… there is a “Roll” adjustment slider… you can slide it or click it to input numbers to adjust the Roll angle of that bone…
Do both the toe & heel deform bones in the feet have the same x-axis when in edit mode? Before you messed with the roll angle of that bone?
I’m thinking it’s an issue with a constraint flipping the bone instead…
Both of the bones, the heel and toe deform bones, should have matching x & y-axis in edit mode.They should also match in pose mode. Before your bone roll fix that is…
when in edit mode… with a bone selected note that in your right hand tool bar under Transform… there is a “Roll” adjustment slider… you and slide it or click it to input numbers to adjust the Roll angle of that bone…
Thanks norvman
I tried to select the Roll adjustment slider under Transform of the Tool Bar as you mentioned. However I only found" Translate/Rotate/Scale", but couldn’t find “Roll”
I think it’s because I am using 2.71a
And I think is might be move under Armature menu under the Editor Memu.
Bone Roll>> Set Roll (Ctrl R)
When this issue was found, I thought it might be about constraint setting as well, but could confirms this. I would be great if you could take a look of my file, but I can attach blender file due to my account is new. you might get it from this link (just updated!):
I tried to select the Roll adjustment slider under Transform of the Tool Bar as you mentioned. However I only found" Translate/Rotate/Scale", but couldn’t find “Roll”
you must have a bone selected… and be in edit mode…
OKay… easiest fix for this is to replace your “track too” constraints on your .
.
with IK constraints… set to the same targets… but set the Chain length to “1”…
That’s awesome. this replacement indeed fixed the problem.
I seems like the Track to constraint is the right method for such a bone structure.
track to is one of those little pieces of blender that needs some work…
in fact you should avoid ‘track too’ and use ‘damped track’ instead…
however in this instance I think your much better off the ‘IK constraint’
reason being is that the IK constraint is always the last constraint to get figured of all the constraints…
and because your using more than one constraint on one bone , that certainly comes into concideration…