Hey all,
at first i have to apologize for my bad english skills … I’am new in this forum and now switching from 3D’s Max to Blender.
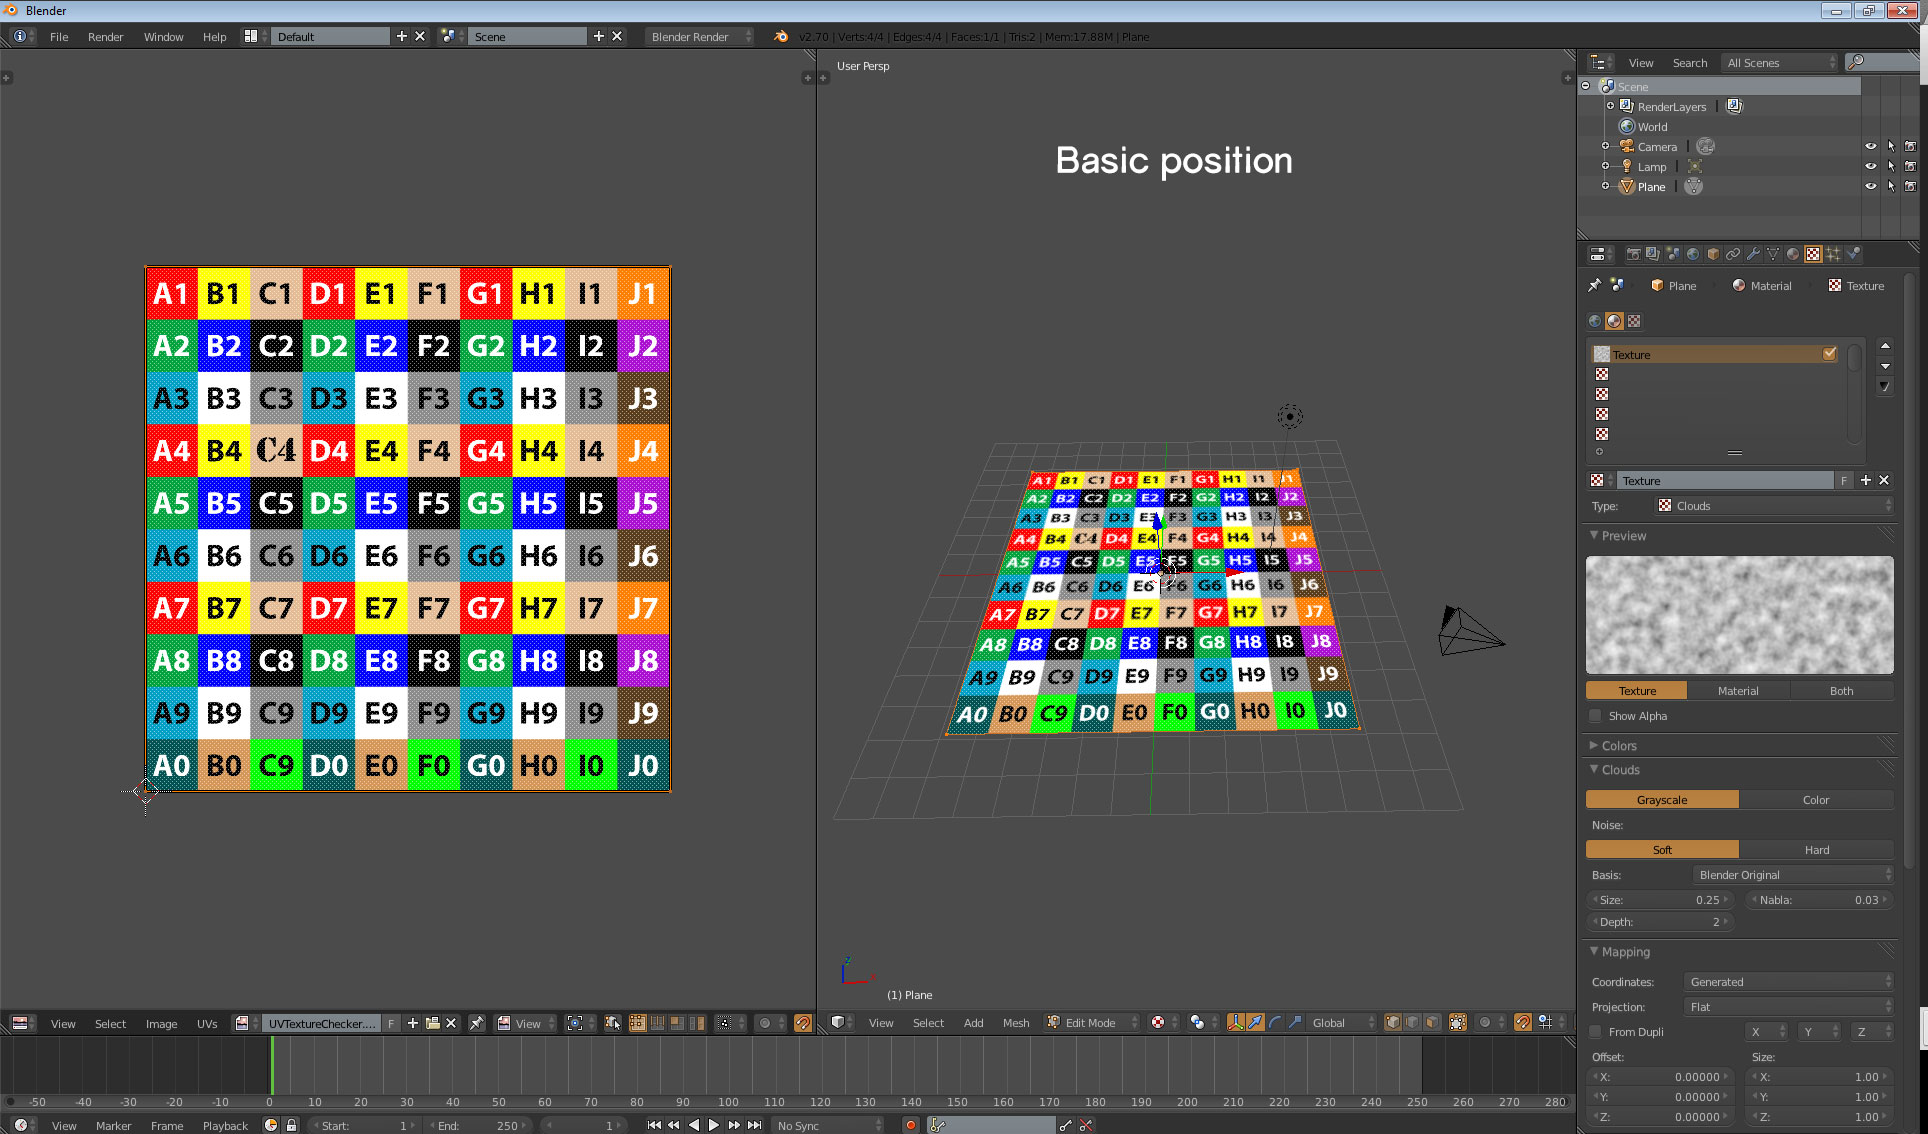
Iam working on an environment scene with tileable textures. So i want to edit my UV mapped plane ( i want to move vertices WITHOUT scretching the texture ). in 3D’s Max its just ja checkbox to hold the UV in place while moving vertices and max begins automatically to tile the texture and keep proportions.
Is there a way for the UV to stay in position while moving vertices and edges, without subdividing the plane and unwrap it again after editing ?
for those who dont understand what i want to achieve, here is am example.
Live Unwrap seems to be very limited (and not really user friendly, there’s multiple things to enable for it to work, and it looks like it’s only about putting seams, not re-unwrapping anything when moving vertices) from what i see in that video , so i don’t think it would be of any help in that thread case unfortunately :
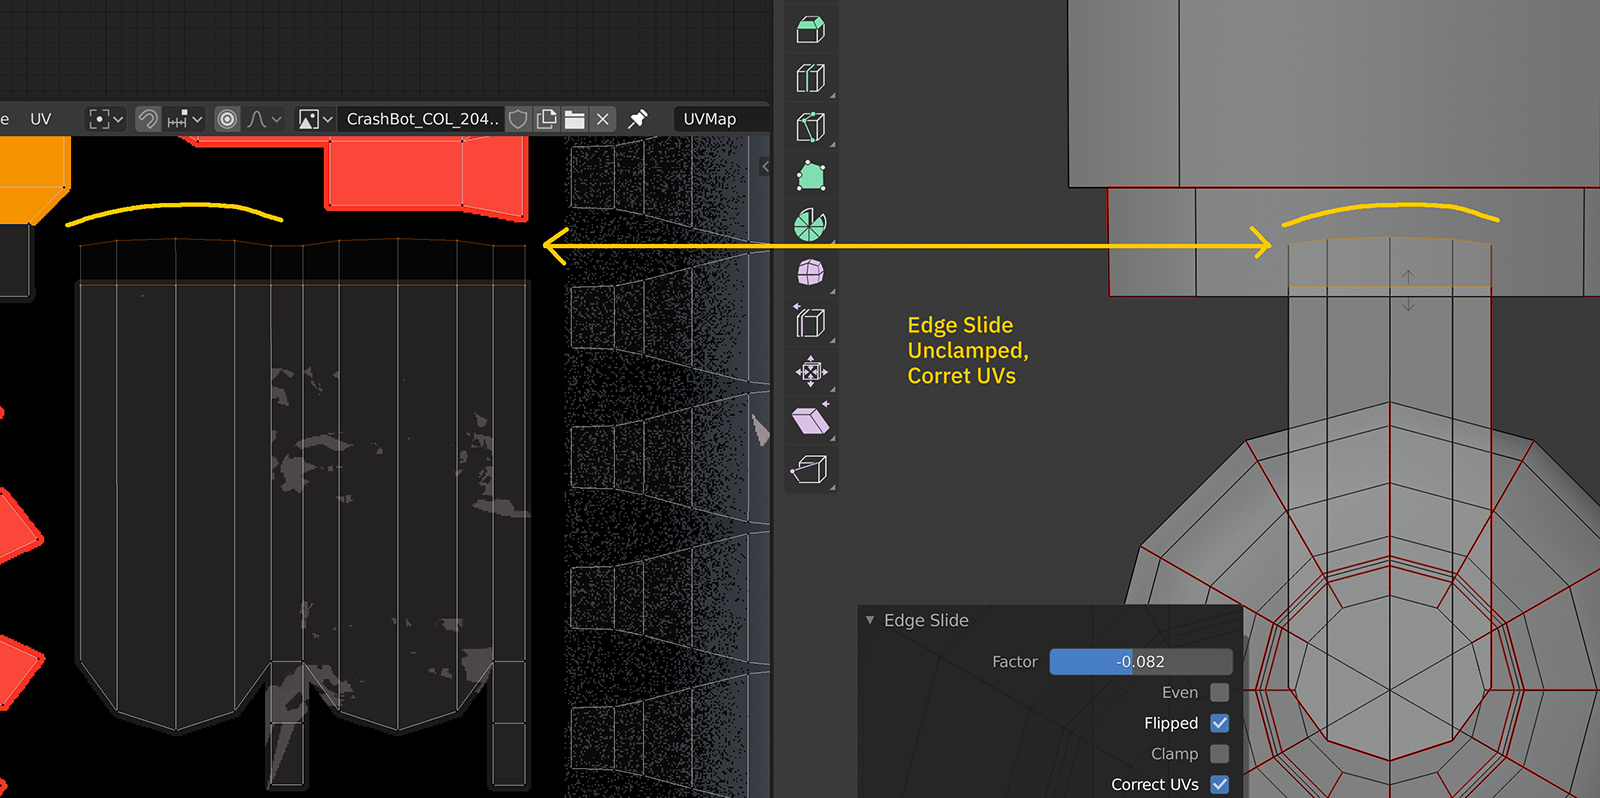
I know there’s an option for UV preservation when you’re using edge slide (select an edge, press G G and move the edge, then press F6 and enable “CorrectUV”, any further G G will preserve UV ) but unfortunately it does not seem this option exist for other tools (not even vertex slide has it) ( edit : loop cut, CTRL+R has it) . But a limitation of the edge slide is that it can only be done inside of the existing mesh too, you can’t even edge slide an edge out of the mesh .
I hope there will be some focus on the UV tools and their relations with the edit mode (preserve uv should seriously be a must have) during that goosebery project movie thing, many limitations there.
So the best way in the current state of the UV tools is just to pin vertices in the UV editor that you want to keep where they are, then re-unwrap again
I needed to preserve UVs while making edits to a model and found this thread.
It seems Edge Slide (G+G) is the only tool that has a Preserve UVs option in Blender.
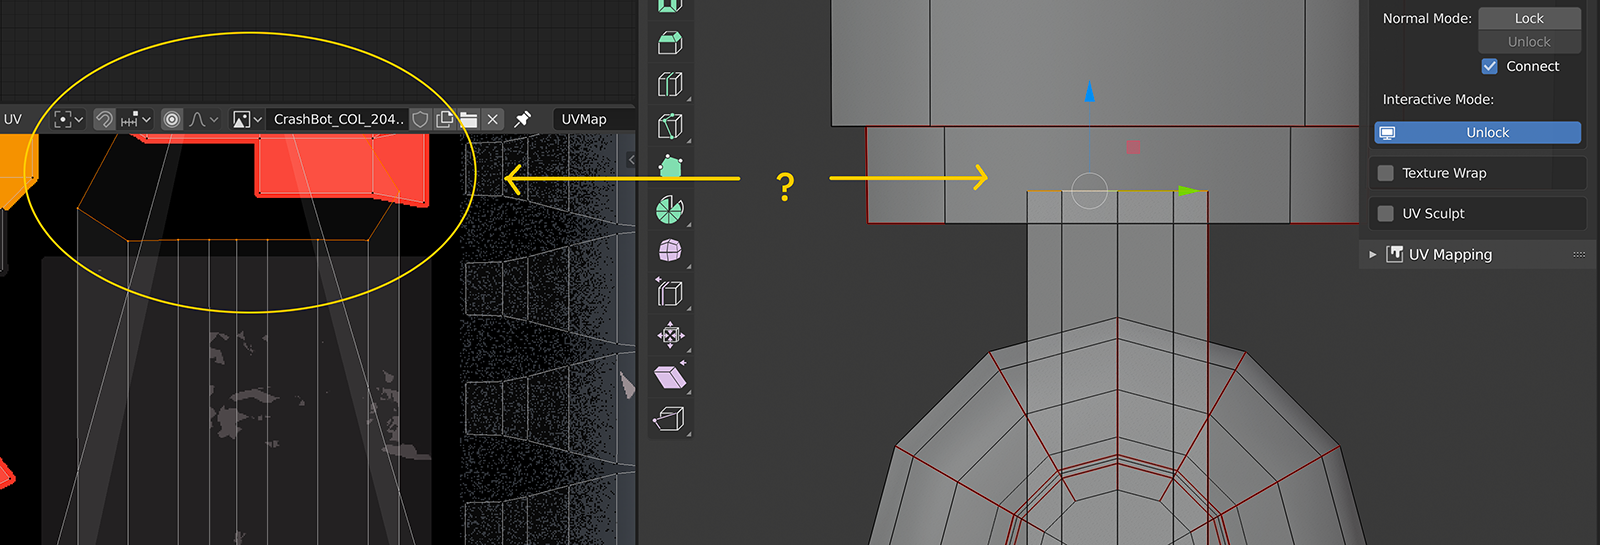
I needed to extend some geometry out so used Edge Slide with Unclamp but couldn’t straighten the newly extended edge because that operation wouldn’t be updated in the UVs.
Magic UV Texture Lock only worked if you edit one vert or edge at a time, and this will damage the UVs as soon as you select more than one element or if you do any edits on a seam.
Preserve UVs would be a great general option in Blender.
I concur that this is a missing feature in Blender, was it requested on rightclickselect?
Sliding a vertex works, but ONLY along an existing edge. It’s not possible freely position a vertex.
There’s a “preserve UVs” option in 3dsmax and maintains UVs whatever you do with the mesh.
I switched over from about a decade of Maya & Max experience where this feature has been pretty handy in making quick tweaks to architecture that is past a blockout phase. Feels rough to not have it.
I’m loving Blender post 2.8, but hopefully this can be implemented soon.
In Blender 2.9 this can be done by selecting the edge you wish to move then selecting Edge->Edge Slide(Shortcut GG). Then if you wish to move the edge out of bounds press C to unclamp it or HOLD ALT.
The same applies to vertices. Select the vertex then Vertex->Slide Vertices(shortcut GG or Shift-V). Slide along the desired edge. If you wish to move out of bounds press C to unclamp or HOLD ALT, and you can move it out of bounds. If you were sliding along the wrong edge when you unclamped it, just press C to clamp again or release ALT, slide it along the edge you wanted, and press C or HOLD ALT to unclamp it again.
So in short terms pressing double G and holding or releasing ALT are your friends.
It’s not as free form as 3DS MAX, but it works just as well.
This may work in 2.8 but I haven’t checked yet.
Update: By mistake I found out that if you press G three times you can move the edge or vertex in free form while maintaining your UVs.
Yes, thank you for that ‘Correct Face Attributes setting’
This has been driving me mad for a while now. What surprises me the most is that more people don’t have an issue with this being the default setting. It seems pretty fundamental to me that UVs should map with the mesh when editing.