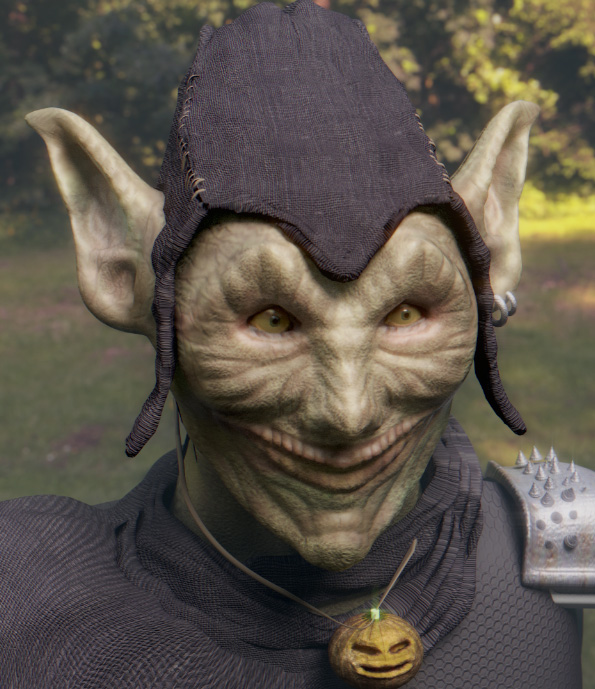
Hey guys ! I am looking to get as much feedback as possible on this. I have stated this several times but this is only my second sculpt ever and I was wondering what you guys think and what areas I can improve on. . I would like to know before I start getting ready to finalise this project. All criticisms are welcome !
the textures are nice, but your going to need to add some subsurface scatter to bring it to life. the eyes need some gloss too. it will look a lot better once you change the default grey backround as well.
HI!
I like the cap a lot! Eyes are also fine.
Possible improvements: As Small Troll mentioned, a nice sss and gloss is needed to be more alive. For the background you should use some texture or a simple color ramp. The lights can also be improved with a hdri texture and a stronger rimlight. The pumpkin is very grey so it should be a little more saturated (+sss).
Cheers
Cheers for the advice guys ! I am going to have an update soon. I have added a hdri map to the background and have added some gloss and sss to the skin. You are right, it is really beginning to bring the character to life !
Nice progress!
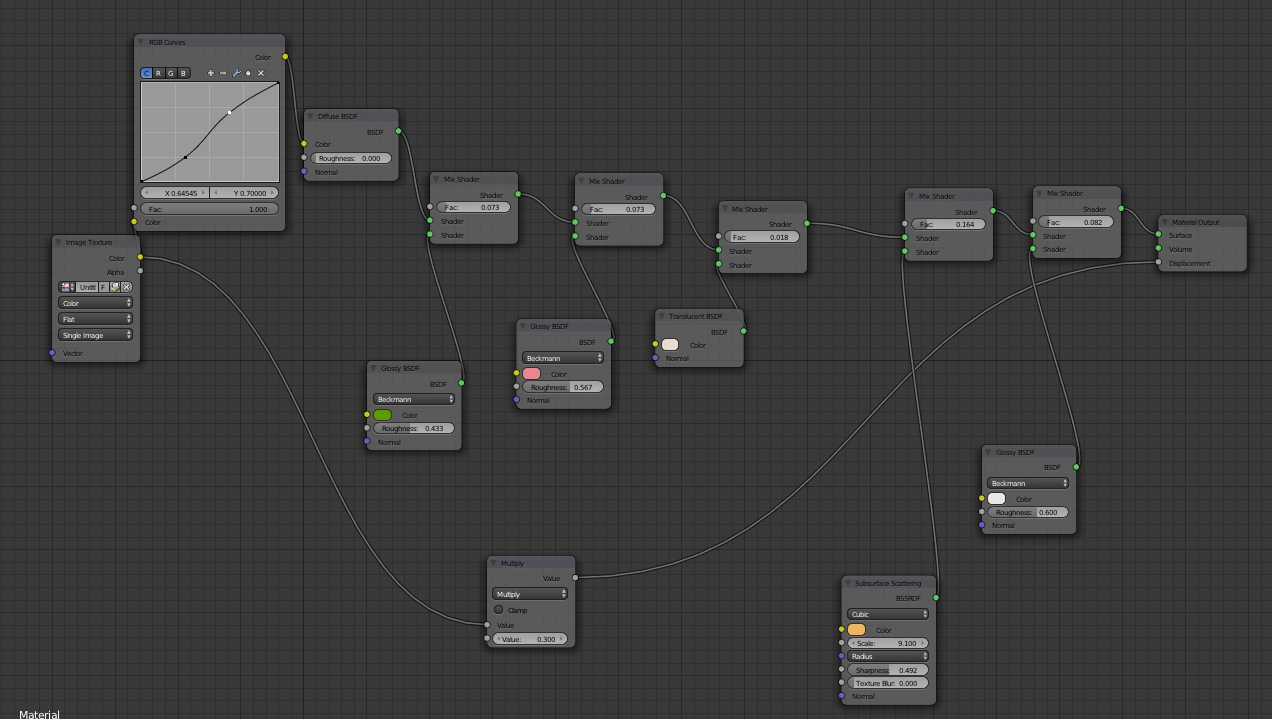
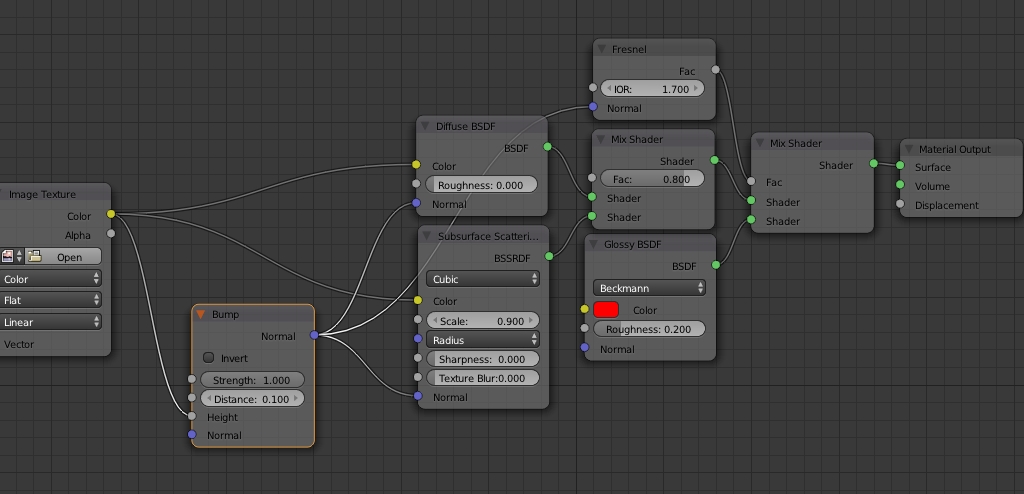
I think the skin shader setup is a little complicated, and there are some nodes that are not much needed.
Here’s a very basic setup (i think it’s fair enuogh though) which i use mostly. You may want to notice the sss scale which is far below yours. The best way to find the good solution is to play a little with a cube or a sphere in a dark environment with a simple light. The key is that tweaking values should go by little steps. Another hint: to figure out what color the scaterring effect will be, is to simply copy an rgb setup from any color wheel (eg. for a red scattering - r:1 g:0 b:0 etc.).
And you can also try bump instead of a displacement effect.
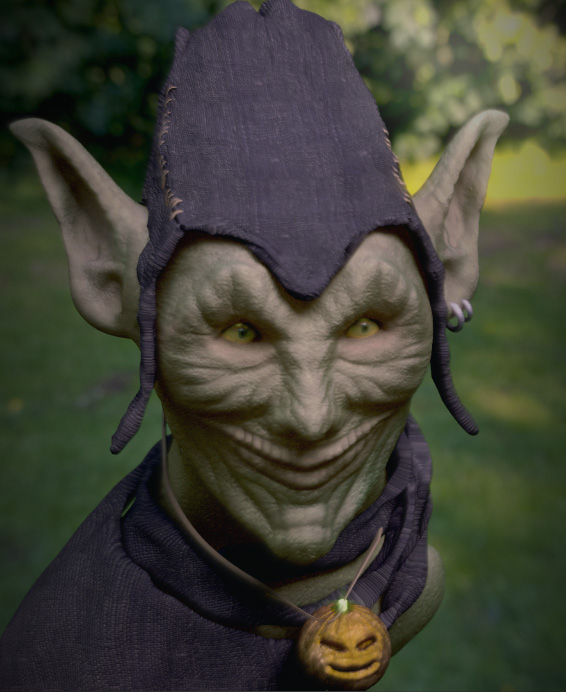
Here is my latest update using the nodes you suggested. I think that is more like it. Still not entirely sure about the composition itself but it is getting there. Thank you very much.
I agree modron, I think I lost a lot of detail because instead of plugging the image texture directly into the sub surface scattering, I put it into one of the mix shaders
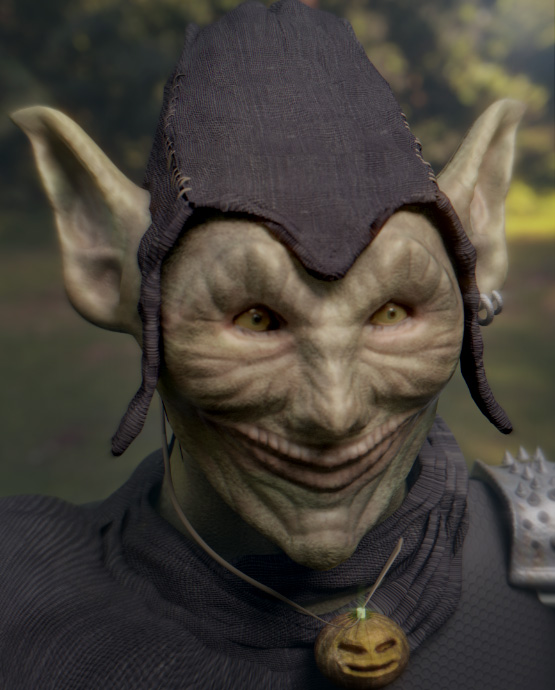
Another update. I need to sort out the left eye but I have been testing different looks for the shot and this one is my favourite so far. Let me know guys what you think !
Yeah, I did notice that. I am currently rendering out a new version without the stretching. What do you think of the skin ? Is it starting to look more alive ?
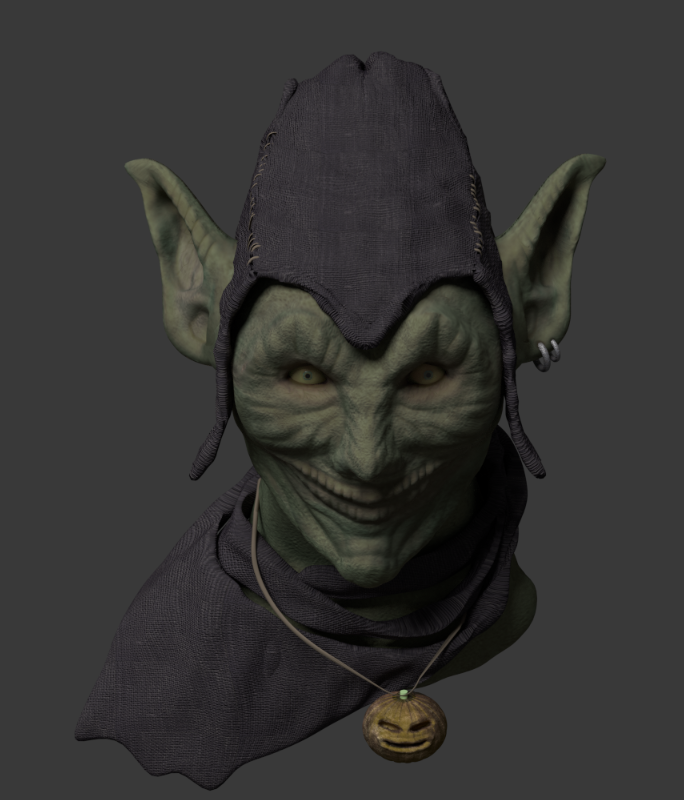
Hey guys here is a newer update with more details to the face added. For some reason I can’t seem to get rid of the stretching around the neck of the fabric. I have used a solidify modifier on it. I used a plane to create it, would it be better to use a different modifier or start from scratch using a cube ?