I’ve used the particle system to create hair before, but that’s going back to around 2008-2009.
I’ve attached a picture detailing the problem.
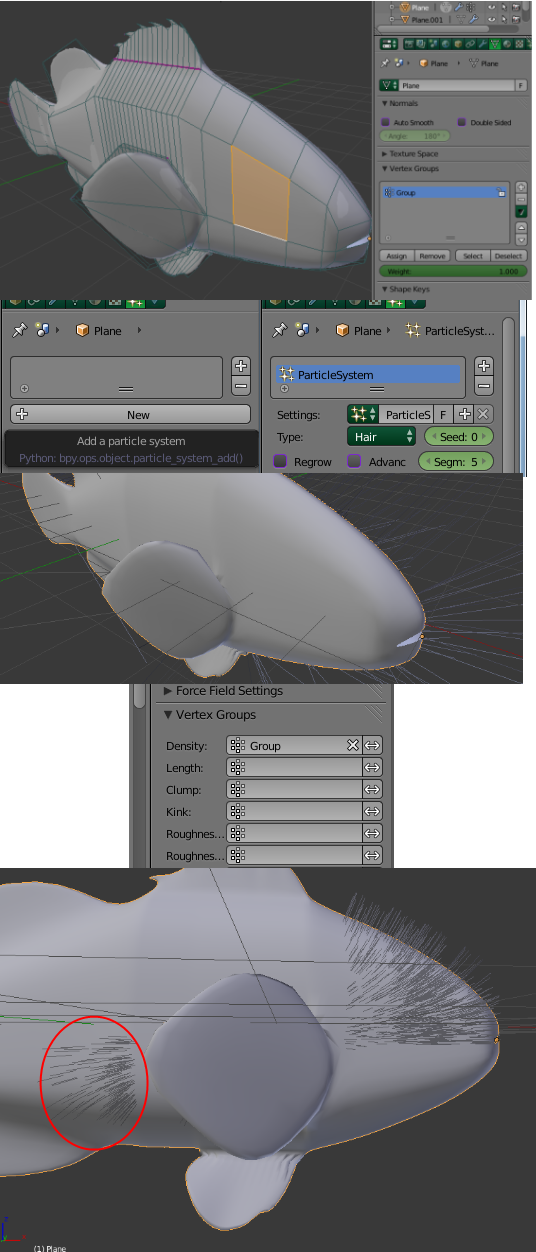
I know cycles have been added, but I don’t know if that change has anything to do with this problem (because I haven’t had it before): when I create a new vertex group, even if it’s only a single face, and then create a new particle field to emit from it, the particles (in this case, scales for a fish) emit from a face that is nowhere close to the one selected/assigned, and has nothing to do with said selection. I’m using a mirror modifier, which hair had issues with before, but removing the modifier or applying it makes no difference, so that’s not the problem.
I tried searching for this problem here on the forums before posting, but didn’t find anything. Apologies if it’s been mentioned before, if it’s a common issue; I just can’t for the life of me figure out why it’s doing this, and it makes no sense.
Try (short)
free edit on the hair system
check the checkbox ‘use modifier stack’
Try (long)
Apply the mirror
Remove doubles, recalc normals
assign the vertex group (Again)
Make a new hair system, check the checkbox ‘use modifer stack’
set the vertex group in the system.
Swim little fish, swim.
Your solution seems to be working thus far, thanks for the help!
Out of curiosity, do you know what the explanation is for why this behavior occurs? “Use modifier stack” implies that the wonky selection of where particles are emitted is based on the modifiers and their order, though I find it strange to think that a subsurf modifier of 2 (it’s the only mod aside from the mirror, which I think doesn’t have any affect) would make the results so…nonsensical.
I didn’t apply anything, just using the modifier stack seems to make it work as it should. Just turning off the mirror in the 3D view fixes the weirdness from that, and the subsurf doesn’t seem to affect anything, so…who knows.
The one thing I’m finding annoying, though, is that emission from a vertex group isn’t restricted solely to that group, with sharp, defined regions, because blender paints that group automatically with a weight of 1 by default. The thing is, any weight-painting on vertices surrounds them, so even I want hair to sprout from one face on a mesh, the weight paint makes it “bleed over” onto the adjacent faces.
I think the only way to get around that is to finish the mesh and subdivide it a few times, making such an overlapping effect very small.
I should also add that you use the separate scalp concept, just add plane as a separate object slightly inside the fish and add a hair system to it. I mean you can subdivide make a simple shape out of it too of course, or even duplicate a face(S) from your model, and separate by loose parts. It’s actually easier to do it this way. Whatever shape you want the hair to be, model it, the system will never go outside the edges.
The only drawback to this method is that I have found that if you are trying to do hair dynamics, with baking, that the collision will have more problems than if the hair was on the mesh.