First post here, and I apologize if this has been addressed. I attempted a search and couldn’t find a thread that answered my specific question.
I have created a model of a ship. I am happy with the layout, and have decided to venture into the world of UV mapping, and have had a bit of trouble grasping some of the mechanics in Blender.
As far as the basics, I understand (or at least think I understand) unwrapping the model and mapping the UVs. I’ve watched several tutorials.
Where I am getting confused is when attempting to create multiple UV maps, so that I may split the model up for texturing.
What I am doing:
Select all the faces for first “section” that I want a discrete UV map for
Create a material for those faces (already created), assign just that area to the material with assign button
Go to UV mapping interface, unwrap…looks lovely…next!
Select next region of faces that I want a second map for, create a new material, assign just the new faces to the new material
Create a new UV Map for the new section
Unwrap the new section on the new UV map
Now here is where I get confused, and it may be that I’m doing something that isn’t necessary, but when I unwrap the new section on the new UV map…it unwraps fine but the faces from the previous UV map do not disappear (even though I have selected the new UV map below). I have to physically move them off of the “map” area to the left by pressing Ctrl-I and grabbing them over.
So all in all, I’m getting the areas I want UV mapped…but I cannot figure out why I cannot exclude those faces previously mapped from displaying in the UV editing window on new UV maps. If I export the maps, they aren’t there because I have drug them out of the light grey mapping area, but I’m confused as the mechanic of why they still show in the editor window.
Thanks in advance. Any explanation would be helpful!
When you UV unwrap you can’t just assign UVs to those selected faces, ALL faces get UVs applied. You can do anything you like with them, you can move them outside the UV space or shrink down to an unused space on your tee
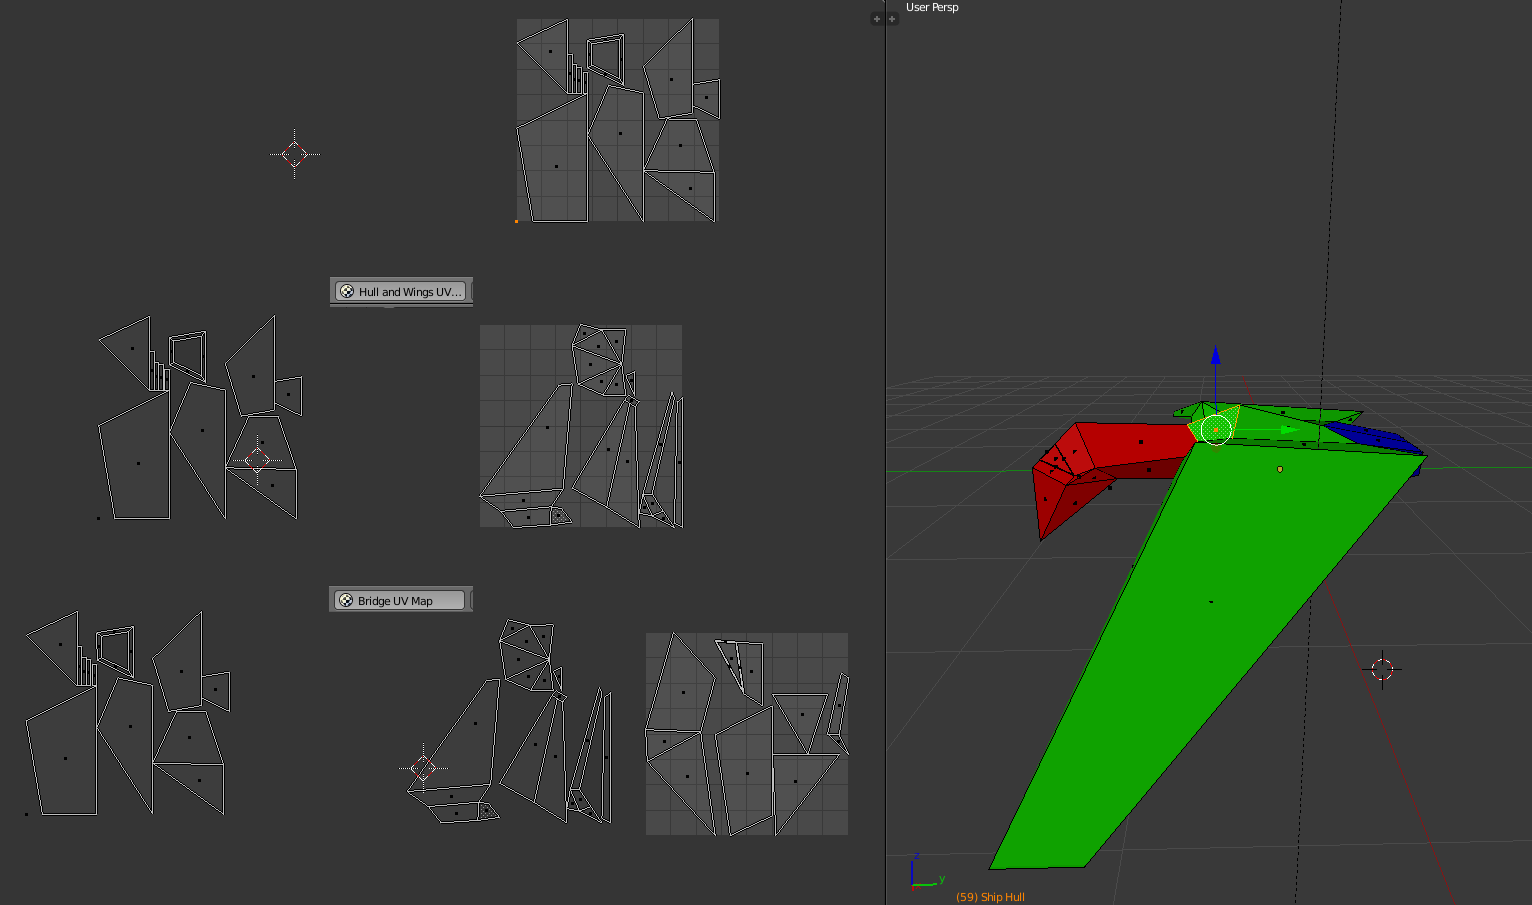
Richard, thanks for the clarification. It’s really strange then because on my first and second unwrap, none of the faces from the later unwraps are present, like in the picture below. If all faces are getting UV wraps applied as you say, where are the faces “hiding” in the first and second unwrap? I simply don’t understand what Blender is doing with them.
And just to caveat so I don’t get flamed, I realize I don’t need 3 UV maps for this very simplistic model, and I don’t have the most ideal unwraps for each part. I’m simply trying to learn how to use Blender properly before I try and apply these methods to complicated models and confuse myself further.
Actually I am very grateful for a posting like this. Because I have the exact same problems figuring out the UV unwrap workflow. I did them “somehow” in the past and it worked “somehow”, but every time after a pause it gets confusing to start again.
What I’d like in blender is clear buttons like:
“Apply selected Faces to this UV Texture”
“Show Faces of active UV Texture”
“Hide Faces of active UV Texture”
But there isn’t. The dropdown menu for UV Textures confuses me everytime. I don’t know which Faces were unwrapped for which Texture in the list. Or if an assignment happens by simply changing the value in the dropdown or not. All the UV’s are everywhere visible. You can hide and reveal some but later again you don’t know which unwrap belongs to which texture. Neither can you select specific faces dependent on the UV Texture you assigned them for (or believed you assigned them - because there is no clear indicator). The workflow is very fuzzy and loose :mad:
Not even that, there are different confusing workflows: e.g. you can UV map via multiple ways, but you don’t know how much they overlap each other. And which steps are required at which approach. E.g. you can add multiple UV-Maps in the Properties-Frame, or you can add multiple Materials (but you are not required to!), or you don’t add UV-Maps or Materials at all and still have UV-Maps, because blender might automatically create some if you forgot. But it doesn’t always work, which makes it brainfuck.
Blender is a really mighty tool, but these things are really cumbersome to figure out. I’d prefer a much more streamlined workflow in order to avoid all these “trials” and “experiments”, which cost a lot of time and energy.
I think there’s a small (rather huge) misunderstanding here about UV unwrap.
As Richard Marklew stated before, each UVmap will have information for every face in the object. And this means that normally there’s no need of using more than just one UVmap.
But sometimes this is needed, but only when for example, you are trying to add decals to the original texture, and you don’t want to transform the decals to the original UVmap (or because of some other specific situation that requires another UVmap).
My advise is to stick to just one UVmap. It will be enough for 98% of the cases.
@vida_vida:
“Apply selected Faces to this UV Texture”
“Show Faces of active UV Texture”
“Hide Faces of active UV Texture”
because UVmaps use all the faces, this has no meaning at all!
but you can still synchronize selections between 3dview and UVeditor, which will hide/show only selected elements. But all the elements will still be present in the UVmap.
Ok, thanks. I am a bit clearer now. Can you help me out with one further problem?
When I have 1 object, which should have 2 independent Textures on its surface (no Atlas), what is then to do? Create 2 UV-Maps?
I achieved the same in the past with 1 UV Map the following way:
Select first part of Faces -> Unwrap -> in the UV Editing Menu go to -> Image New (produces new Texture)
Select second part of Faces -> Unwrap -> in the UV Editing Menu go to -> Image New (produces new Texture)
This somehow assigns 2 Textures to the same object and works if you make no mistake. But whenever you click the Image-Dropdown-Menu again you can mix up the whole setup. Therefore I ask: is my approach wrong?
I think I’ll follow your advice and stick to a single UV map for now.
Richard, that dot in the bottom left was a vertex that got pulled in by accident on that first map. It was indeed highlighted when I unwrapped, so even though it shouldn’t be there it should be. That was one of my first assumptions too when i went to try and find the missing faces. Thanks for the help, I’ll keep tinkering with it understanding that all UV maps have all faces now. Its just a matter of where the faces are!
Ok, one last thing: when you got 2 Textures applied to an object and then click a random Face, then in the Image-Dropdown-Menu of the UV-Editing it automatically jumps to the specific Image value. If you change this to another Image in the Dropdown-Menu it is immediately applied to the randomly clicked Face! And that is the dangerous thing.
What would really help to keep order is the following: that when you click on a Face (and it shows to which Texture it was applied), that you could automatically get all other Faces selected, which were also assigned to this specific Texture. Or is there such an option?
I’m not really following… when I change the active image in the UV/Image editor, it will only display that image in the viewport, which is quite intentional for setting up things right. But when I render, both textures will appear.
Actually, I can even have an active texture, showing up in the viewport, but if it’s not connected in the material, it will not show in the render.
AH, maybe I didn’t express myself clearly enough. However I found a solution to my problem:
I can select all Faces which have the same Image/Texture applied by Select->Similar->Image. My “mistake” was, that I looked in the menu bar of the UV-Editing, where this option didn’t exist. It is only available in the menu bar of the 3D window. Now I can easily see if some Faces are assigned to the wrong image texture.