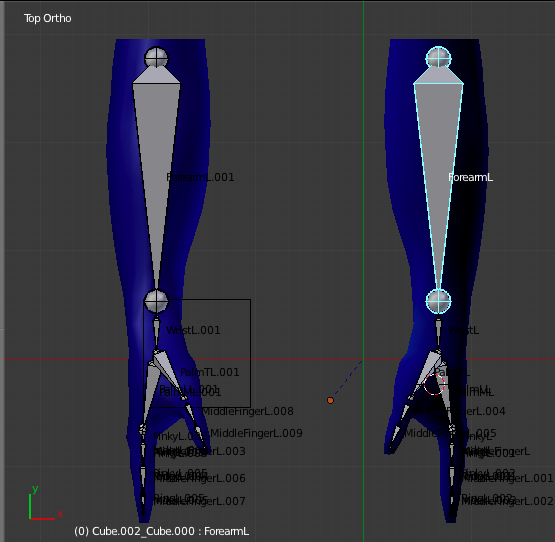
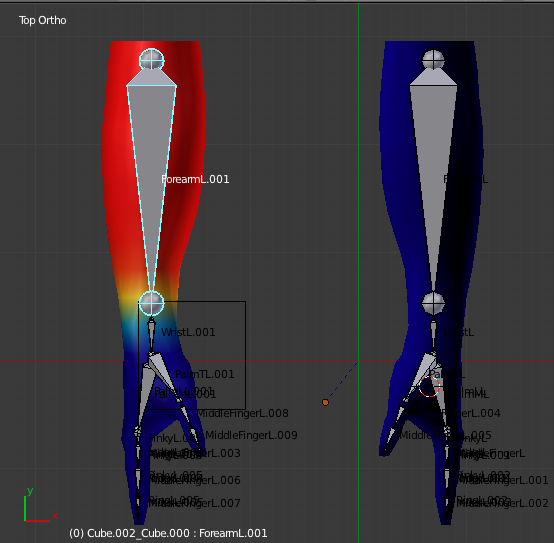
Would anybody know why when I use ‘With Automatic Weight’ the right hand is properly weight painted but the left hand is not? The bones of the left hand are in the same armature as in the bones of the right hand and the meshes are combined. I know that I could use ‘Object>Scripts>Bone Weight Copy’ from the right arm to the left arm but I feel strongly that I should not have to do that. Both meshes, the right and left arm, are joined together (CTRL+J). The left arm mesh is a copy of the right arm mesh. The left arm set of bones is a copy of the right arm bones in edit mode. I am using only one armature for the meshes. Any response will be appreciated. Here is a link of where you can download the blender file: http://www.mediafire.com/download/ko72hozfkf0z8y5/armature_problem_1.blend
“Would anybody know why when I use ‘With Automatic Weight’ the right hand is properly weight painted but the left hand is not?”
Because automatic weights suck
Every time I use them I spend several hours correcting the really bad job it dose. And still have to manually adjust them anyway. I’ve experienced auto weights assigning arm weights to the head bone…
Better to parent with empty groups and build from there, unless this character is just going to wave that one arm…
As for copying the weights, I usally have a mirror mod on and if you need to apply it, it will mirror the weights too.
I agree that parenting/assigning with empty vertex groups could be faster, if that’s what you mean by “parent with empty groups and build from there”. The mirror mod seems to work as well, thanks for the tip. However, I do feel that there should be a faster way of doing this. It just doesn’t make sense that the right arm mesh worked just fine but the left one did not. I do agree that the ‘With Automatic Weight’ function is not perfect but it should do something right. I could manually correct the weight painting, by painting it myself but I feel it defeats the whole purpose of efficiency. I am wondering if the other case is that the arm meshes have to be connected by a vertex/face/edge.
Even though the ‘With Automatic Weight’ function does hold controversial reputation of competence. I just keep thinking that the ‘With Automatic Weight’ function could be working and something else in my blender file is messing it up or affecting it in some way. Perhaps a modifier, unchecked checkbox, bad relations with parents/child/vertex groups, naming, etc.
Name your bones properly. Every bone in here is named whatever.L.0001. Left side bones should be named bonename.L and right side bones should be named bonename.R for mirroring and other automated functions to work.
Auto weights will work not too bad if the topology is simple. But for a mesh that has a “life like” appearance, your probably going to have “hand verities assigned to the head bone”.
Weighting is really tedious work. Unfortunately I don’t know any real way to do it faster. Even the training vids I bought warn against auto weights.
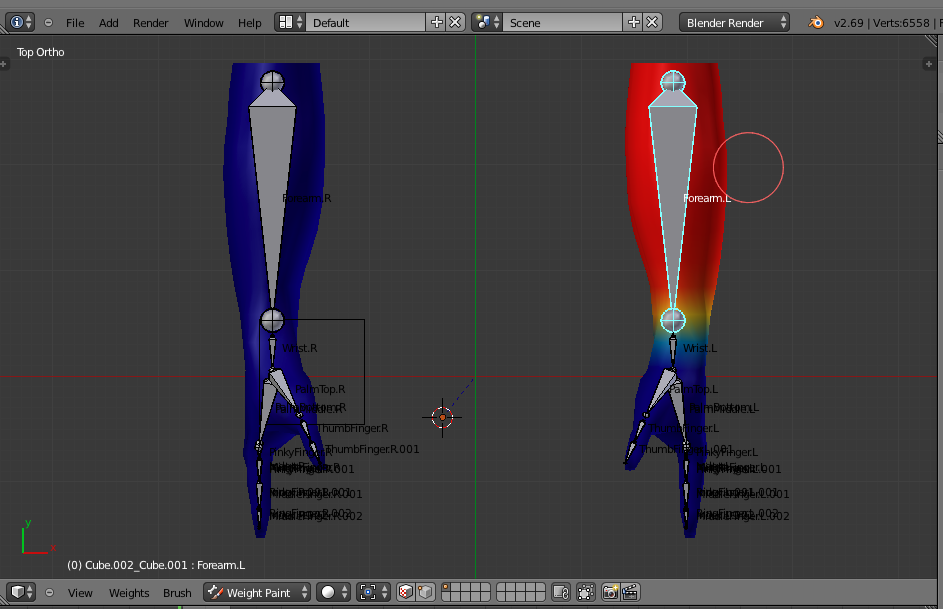
@ Horseman, thanks for the advice, it actually contribute to the solution I am about to reveal. @ Arkinum, thanks for the advice as well, the mirroring trick did add contribution to the solution as well. And I’ll try to keep in mind that Auto Weights are not recommended. The problem was that before using any weight function to bind the mesh and the bone, I had to clear any other previous existing vertex group name the right arm had. Additionally, I corrected the naming convention which helped well. Then I duplicated the bones in (Shift-D) in edit mode and mirrored them holding (CTRL-M). Selecting the duplicated bones, I pressed W>Flip Names, to make the new left arm have .L extension rather than .R. The problem was that my mesh already had vertex group names and I think that conflicted “With Automatic Weight”. I have to select my mesh got to where the Vertex Group tag was and minus all the pre existing groups. It is very odd, I am questioning my belief to this answer but this process does work as shown in the picture below. Nonetheless, I thank you for both of your responses, it truly aided me in this issue and hopefully it will aid others.
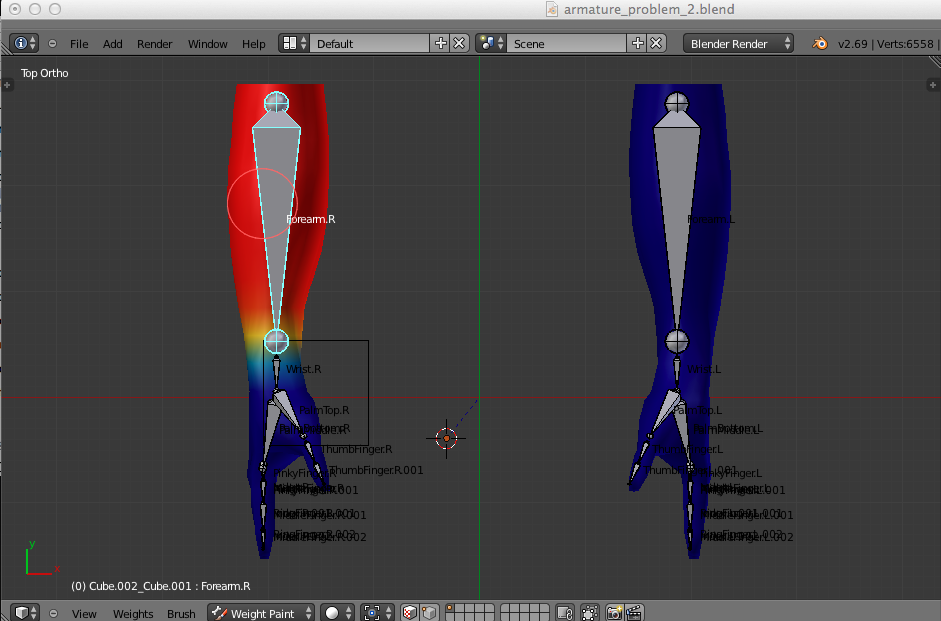
I don’t want to mislead anybody but I tried the method again to verify that it works and it did not as I explained in the previous post. I am not sure how I was able to do it. But I am trying every method to find out how I was able to manage this.
Before you begin, make sure your mesh does not have any modifier that is linked to any armature and that it is clear of any vertex groups.
Step 1: Make sure you have all bones labeled with the appropriate name. You can copy the bones by pressing Shift + D. To mirror them press CTRL + X and choose what axis you want it to mirror by pressing X, Y, or Z. Then press W > Flip Names.
Step 2: Make sure that the mesh on the arm shows correct weight painting because that is the arm that is going to be chosen as the primary arm it’s going to be mirrored.
Step 3: CTRL + P > ‘With Automatic Weight’. Make sure the weight paint looks good. Do not touch armature modifier. ‘Preserve Volume’ is optional and most likely recommended.
Step 4: Copy the mesh by using the Mirror modifier. Then align the vertices along with the other arm.
Step 5: Go to Vertex Group tab when selecting the mesh. And delete all vertex groups.
Step 6. Select the mesh again and the armature in object mode and select ‘With Automatic Weight’ again. Voila, there you have it.
If anybody finds an easier solution or finds the culprit in this problem, please feel free to post. The file can download in the first post. I still feel that you should only have to select ‘With Automatic Weight’ to finish a base throughout your whole mesh for weight painting. Then manually weight painting should be optional or recommended.