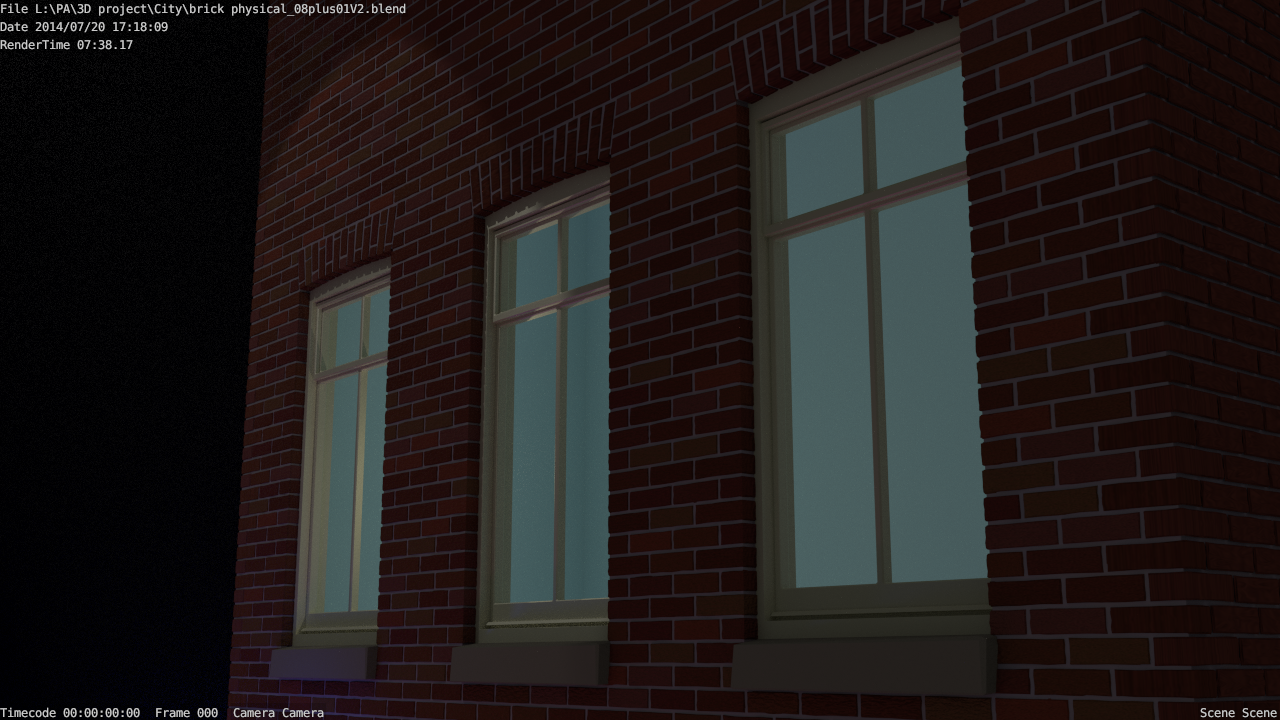
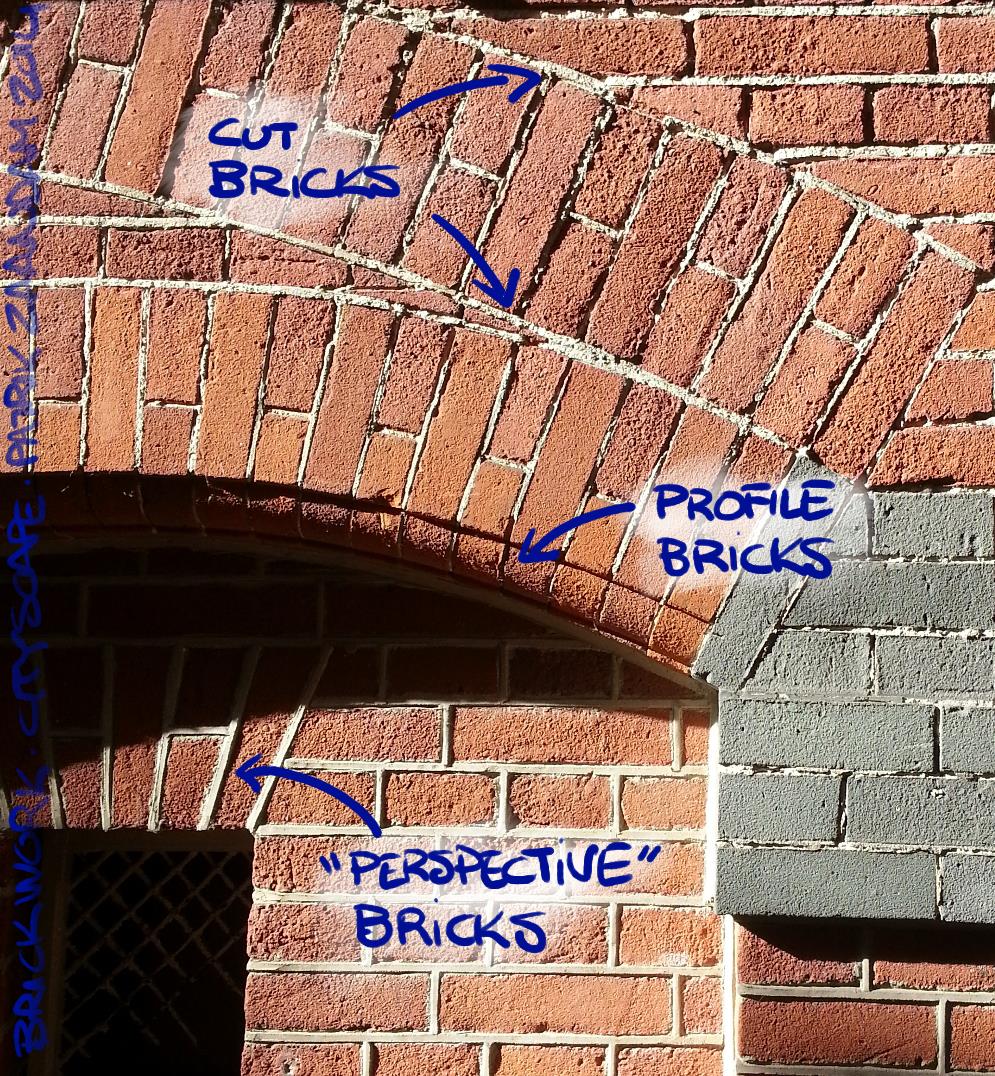
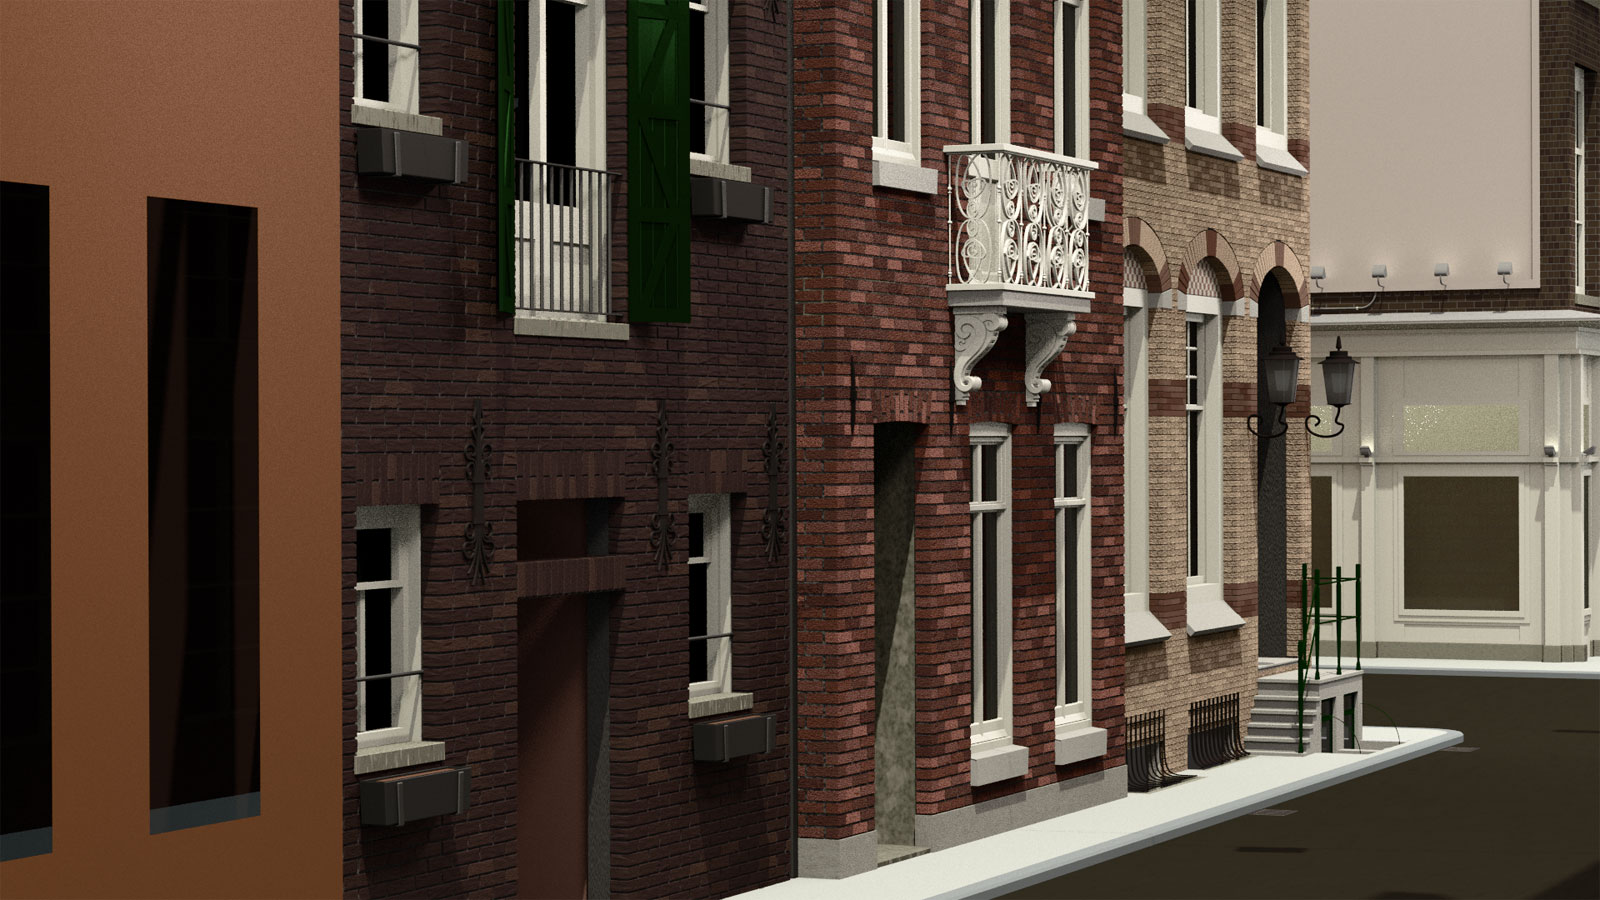
…with one building. Trying to work out the effective approach to brickwork. Don’t like the straight shadows and edges that a simple mesh with bump mapping produces…
Surprisingly with the mesh alternative the render times were very similar…
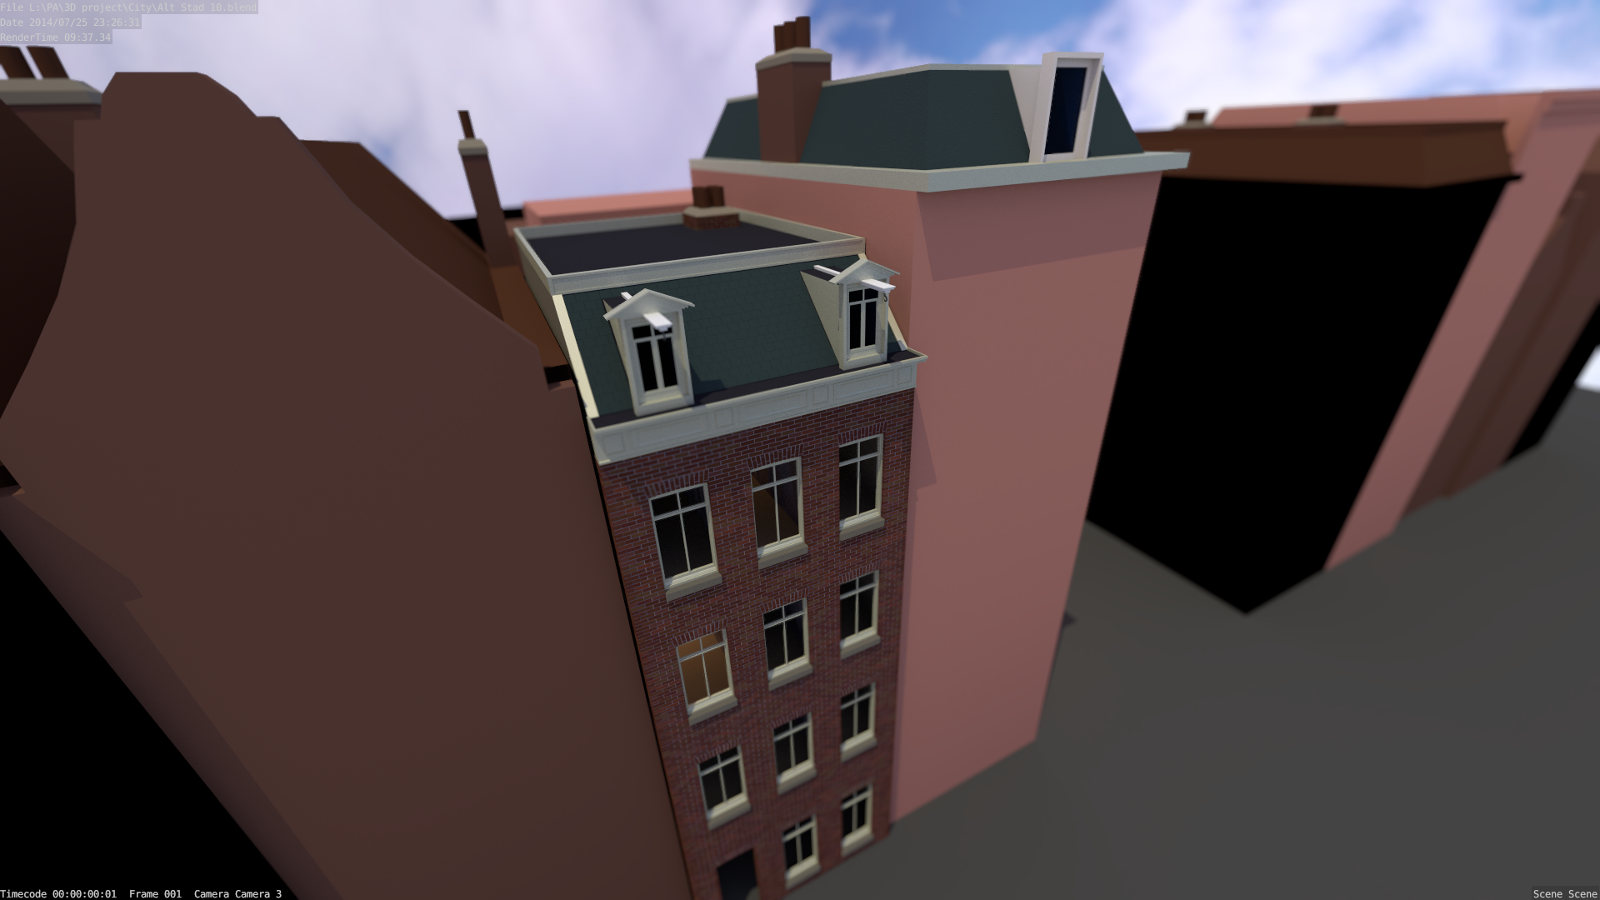
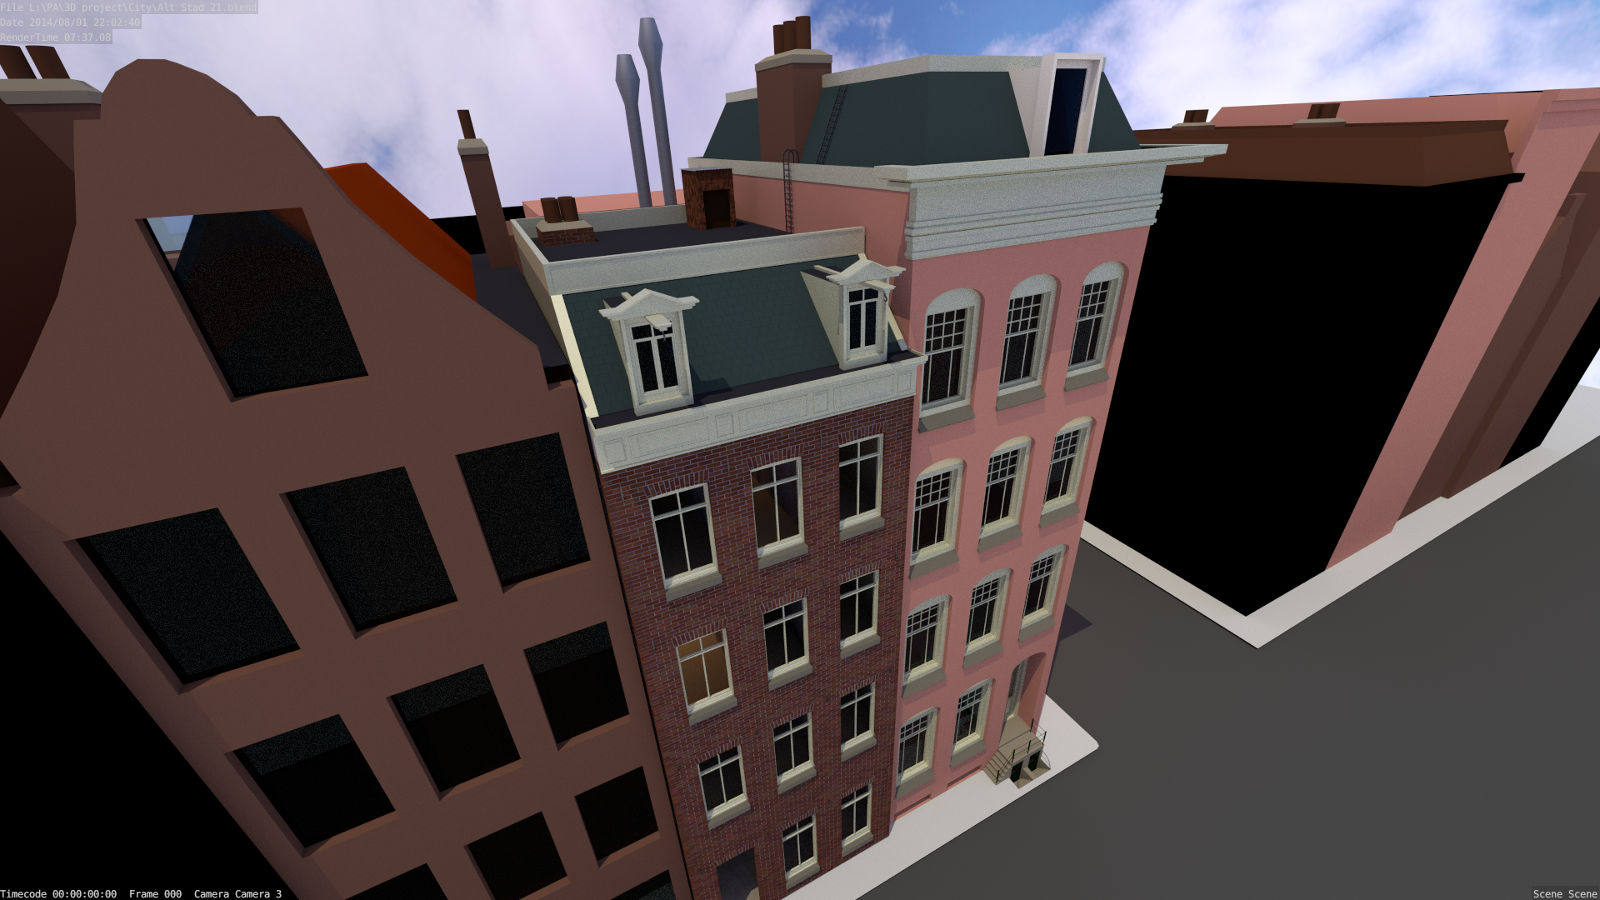
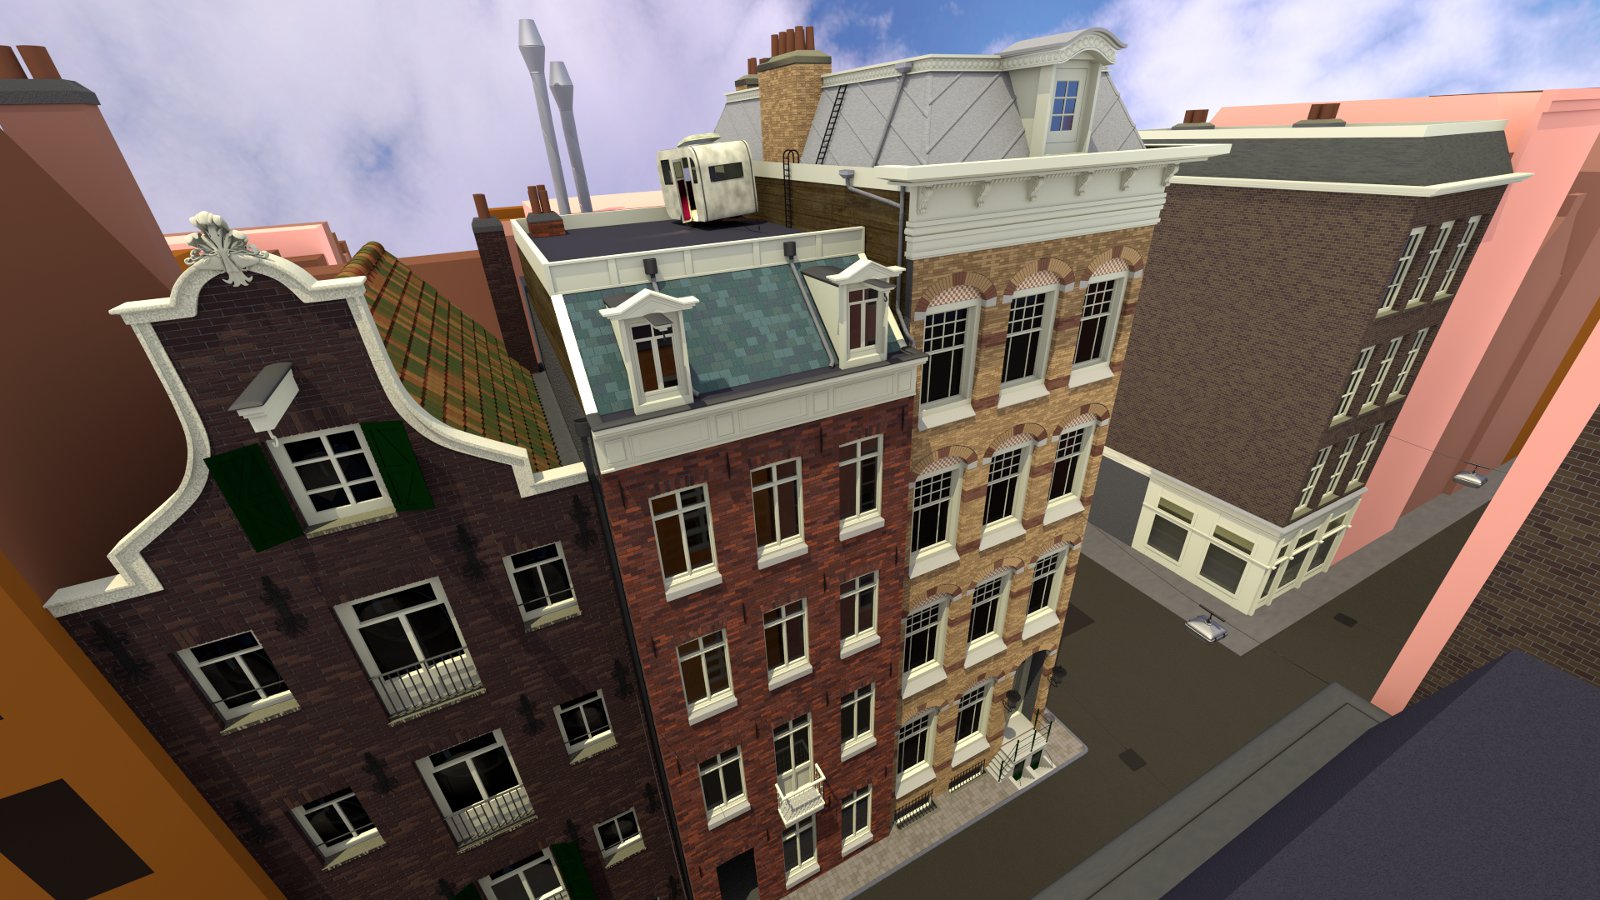
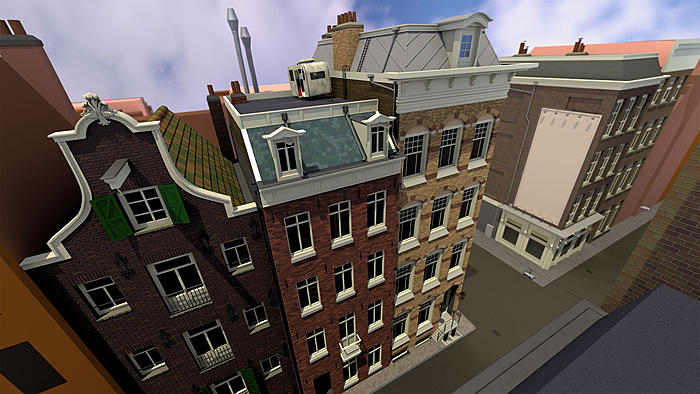
For now the building is grouped and plan to eventually append the individual buildings to form the city. Extra dirt & detail much further down the road…
…working at introducing UV mapping [bricks] to less important buildings & playing with the composition. When I’m happy with the general setup hope to start working on on some grunge - it is not my intention to leave this all so squeaky clean. Just glad that I am making some progress…
I’m assuming your using the procedural brick texture? You might want find an image texture to use instead or figure out a fancy node setup to give more grunge and stuff. You could also take a ton of time to paint textures for it.
Hi TARDIS Maker - thanks for sharing your thoughts. I had a go at both proceedurals and started playing with textures, but the models in the last post are all mesh which I know might sound a bit crazy.
If it was easy enough to combine proccedurals on one surface with combined direction flows it would be more interesting. The shape change of bricks and the mortice seams, for example, I haven’t figured out.
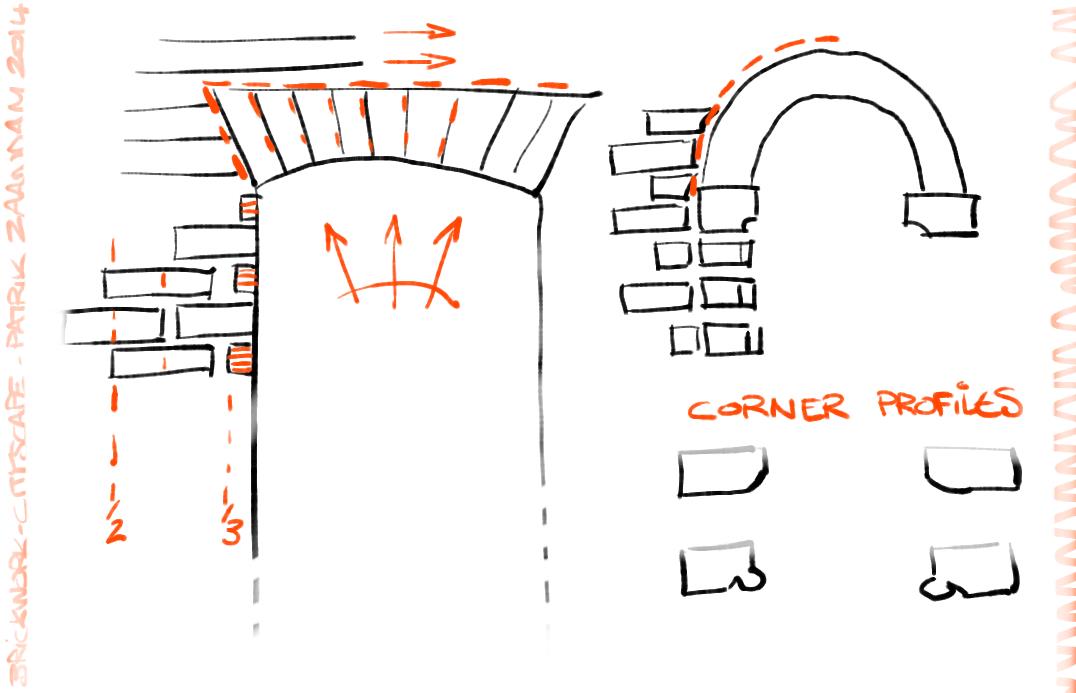
The problem with textures in general is they give straight line shadows, where I want to see the teeth like shadows bricks cast on surfaces. I tried displace but I needed more vertices to maintain the same level of detail.
I started palying with materials just to try get a feel and also to think about how to achieve the aging. At the moment the brick objects have a random node in the material to give some variation. It could be a nightmare to think of texturing them one by one. Combining them again might be the way to go. Also wondering whether a semi transparent plain close to the surface might be a dirty fix…
I wish I could try combine the techniques but it seems impossible for me [or Cycles…probably me] to light & colour them consistently.
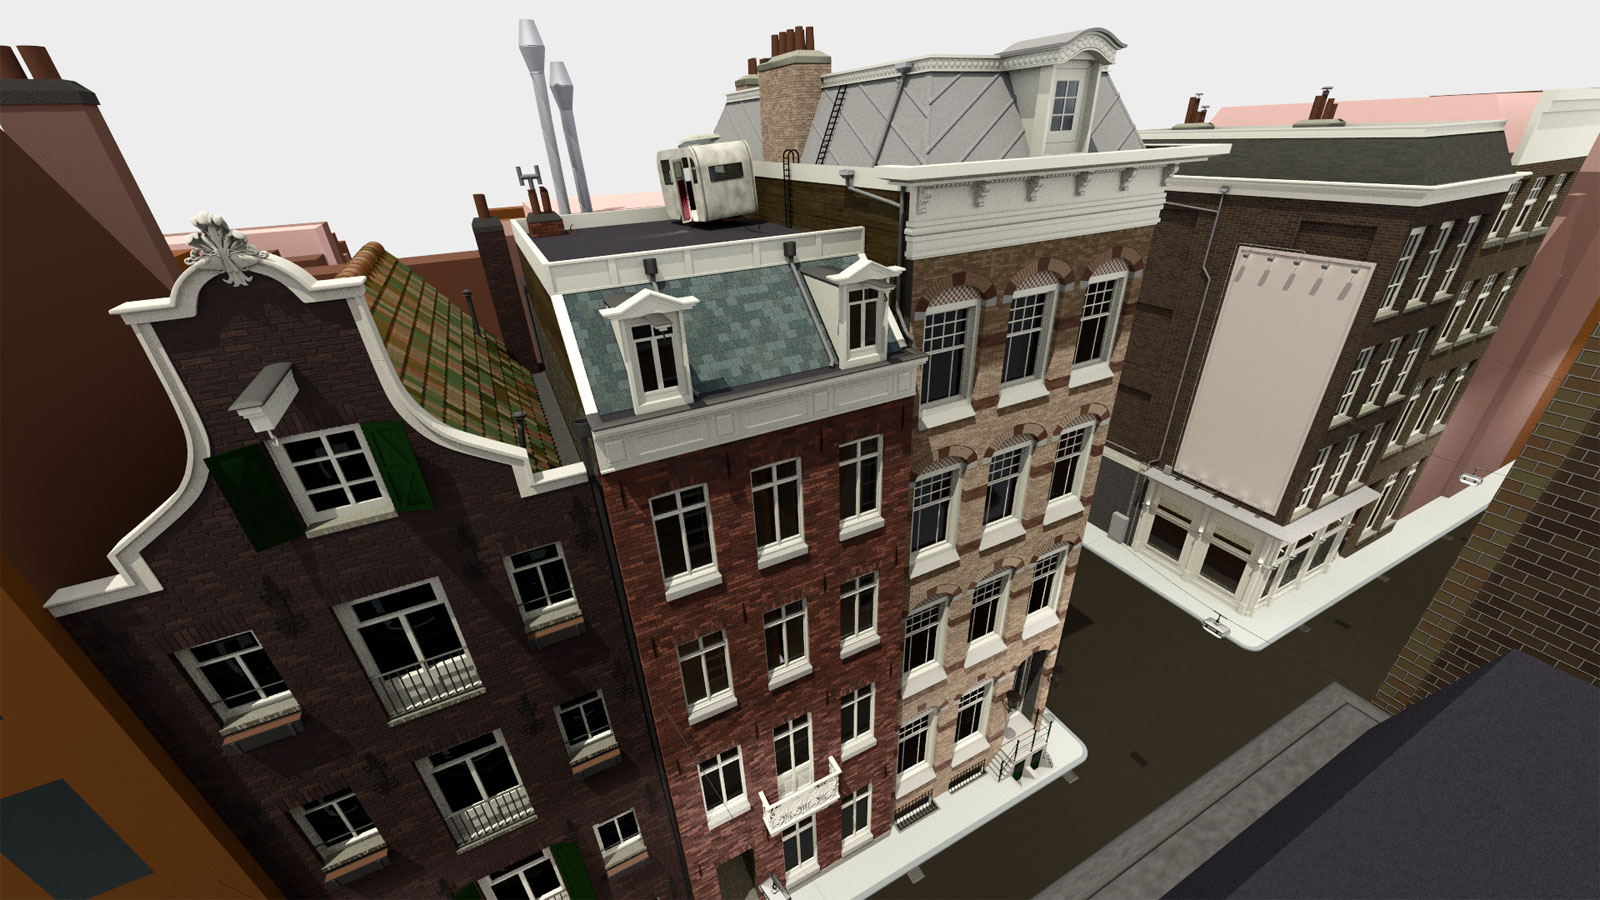
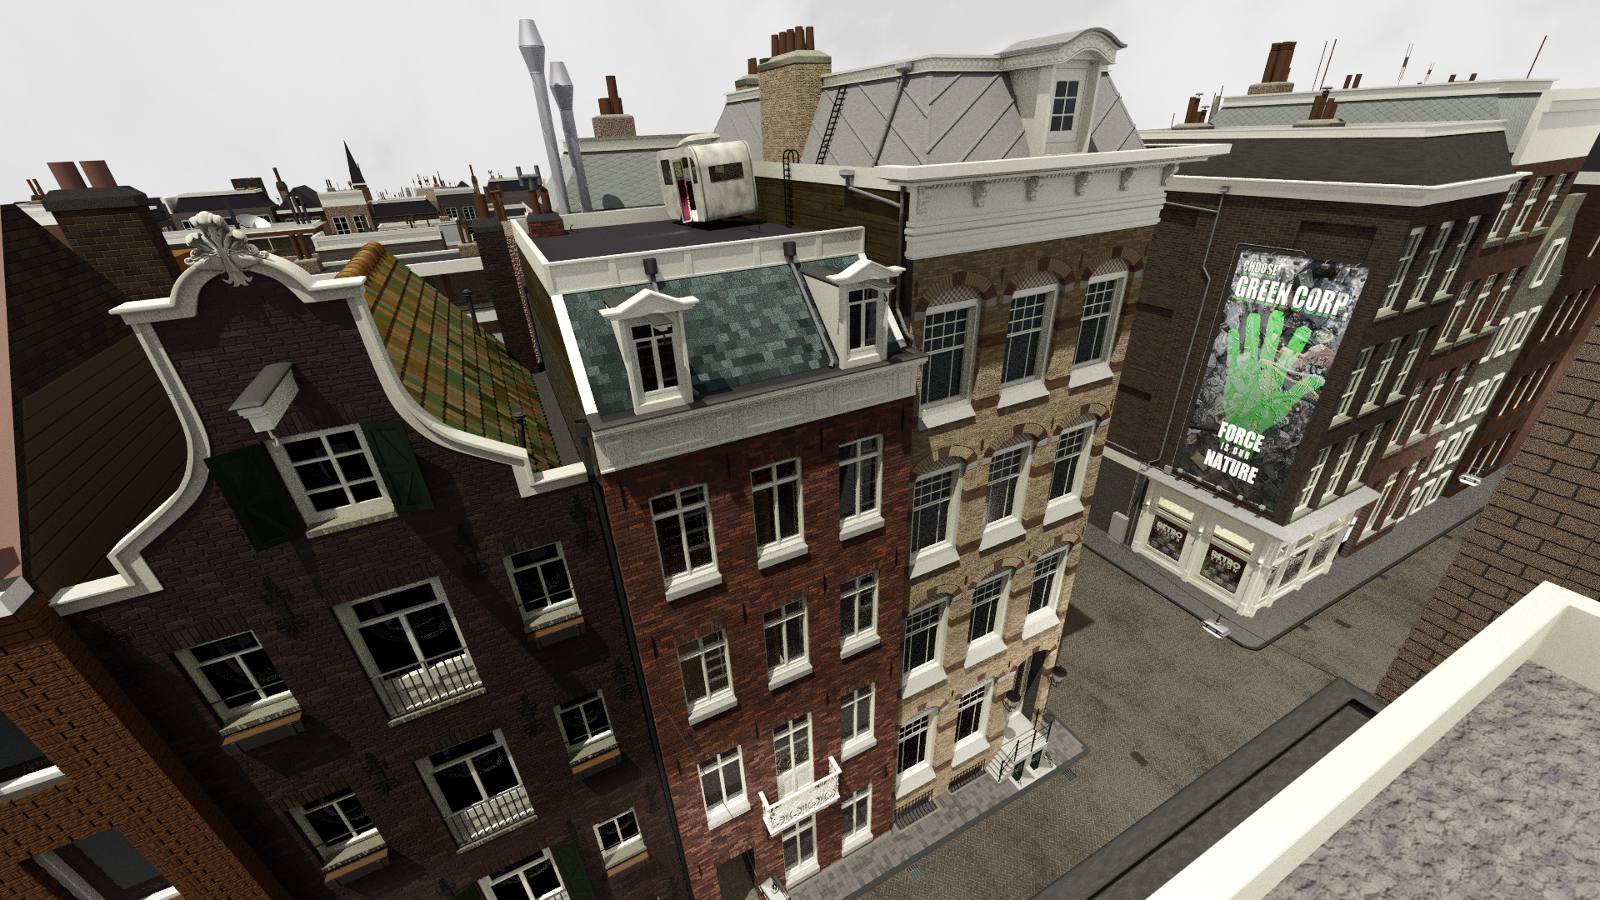
Anyway I thought the images below might explain the modeling I have been refering to…
Had to stop for a bit of re-organising = my computer was saying the limit was approaching fast. With a bit of help from Jason’s blog I sorted the groups and re-assembled the scene. The ‘linked library’ add-on is proving extremely useful and practical. Prefer to work with everything in place, but if the choice is grinding to a halt…
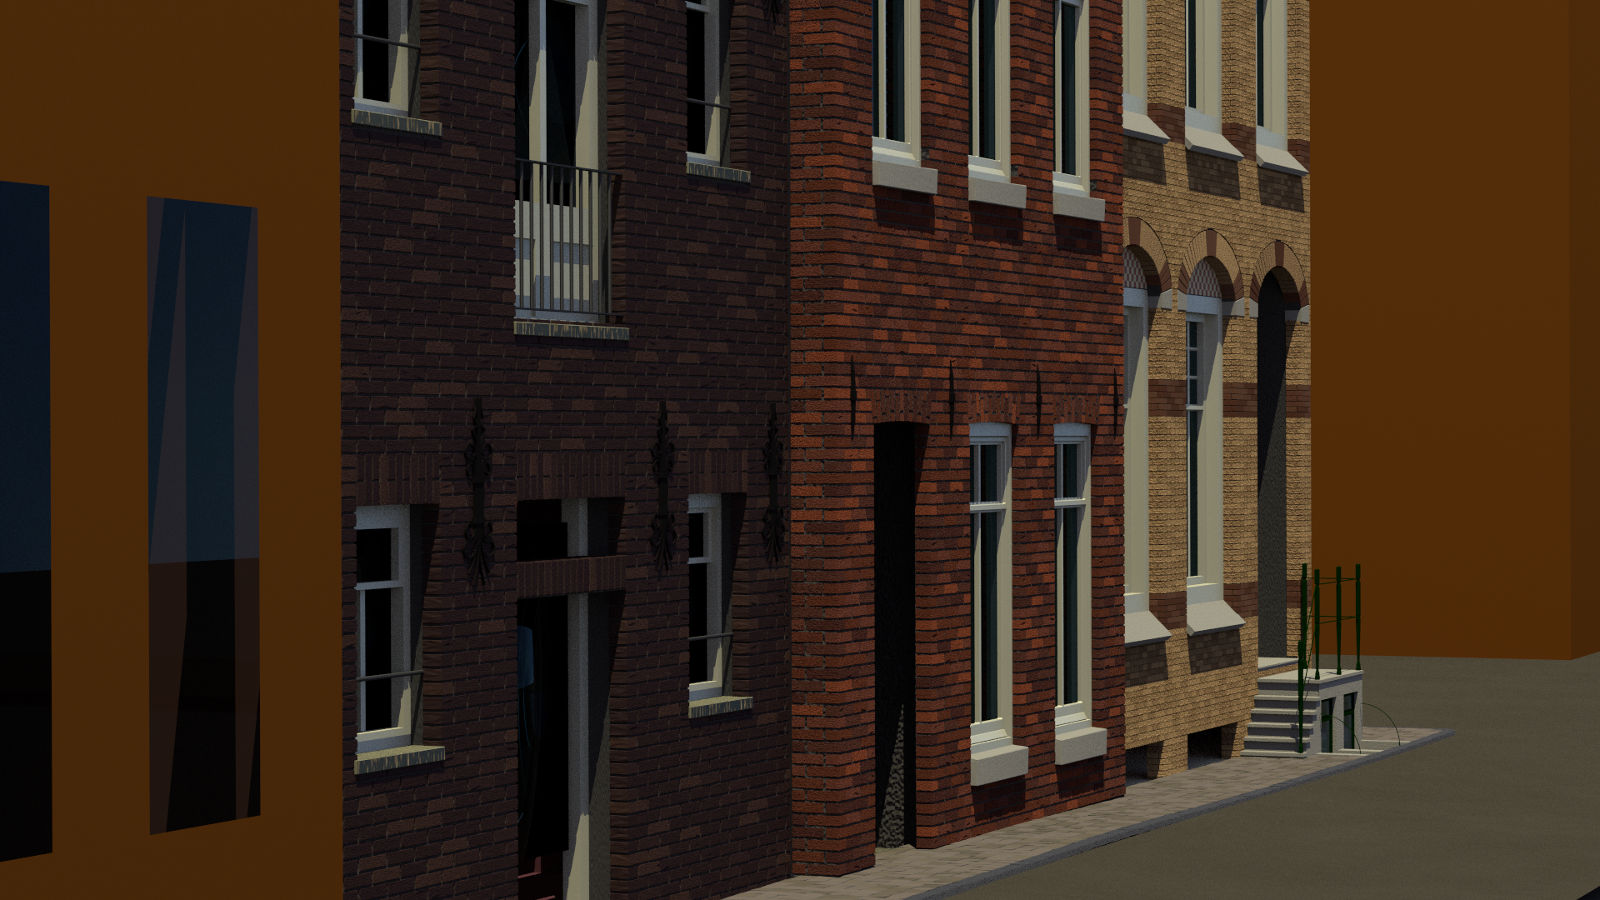
Started using procedural bricks for the buiiding farther away - repeated the material on the wall closest to camera. Not planning too much focus there so think it’s okay for now.
Still concentrating primarily on the model and filling in volumes. Expect I will return to try some UV unwrapping again later…
Sorry that I didn’t reply earlier, I didn’t see that you had replied. You should watch Blender Guru’s realistic texturing and materials tutorials for cycles. Cycles can do bump maps so you should be able to get the result you want without modelling the buildings brick by brick. I have to say, I’m impressed that you took the time to model the buildings like that. If I was going to do something like that, I would be trying every cheat to get a result faster, but it probably wouldn’t look as good if you cheat it.
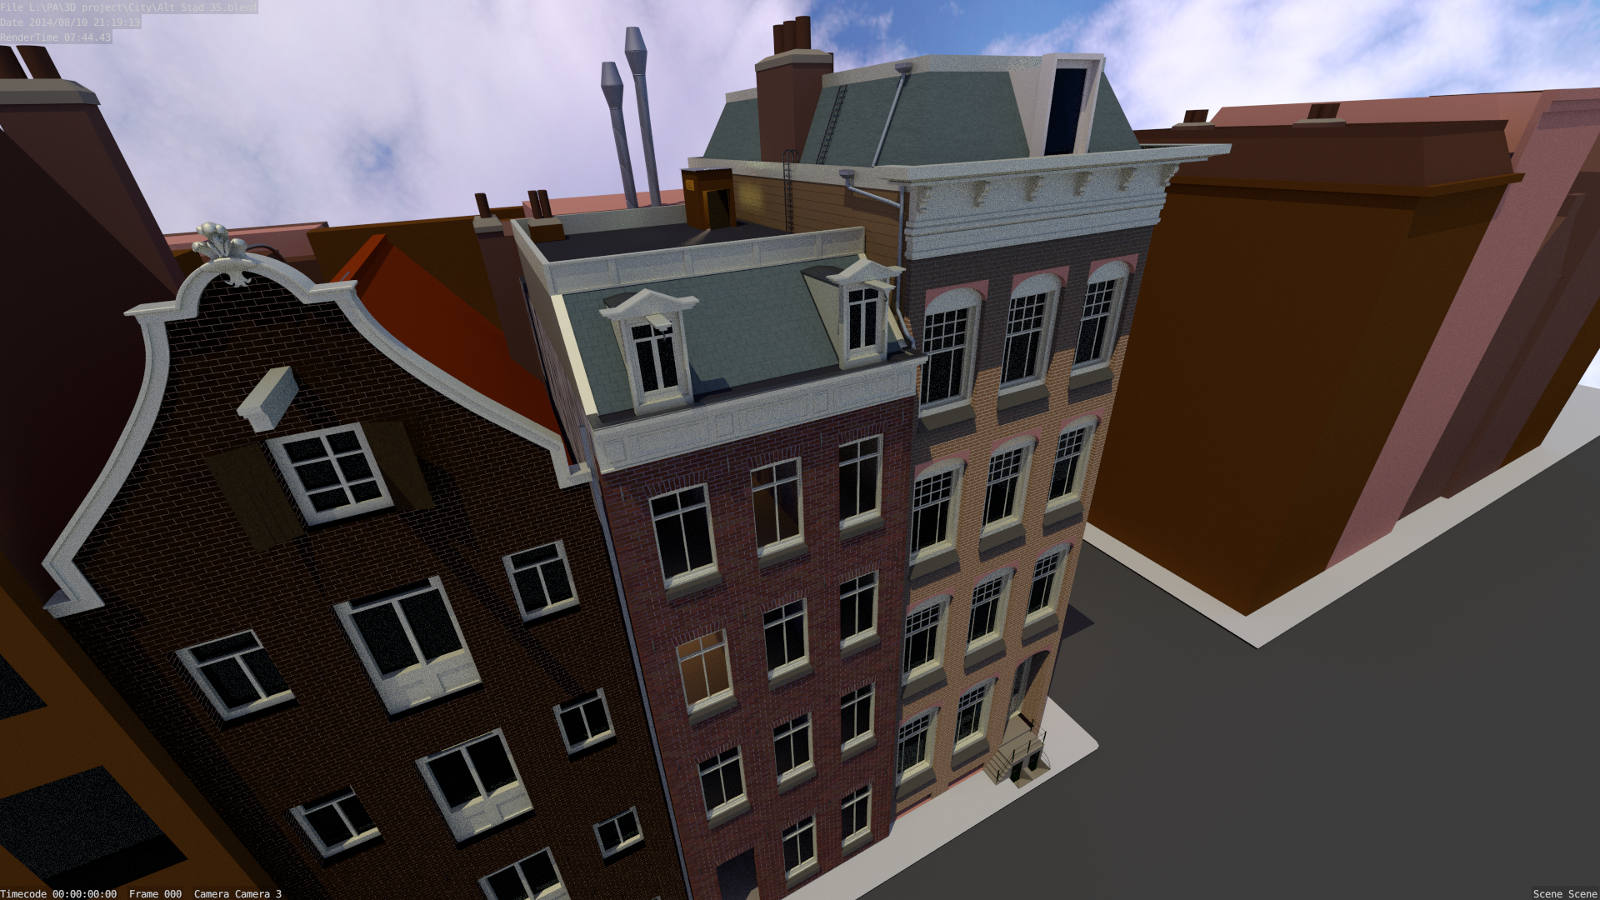
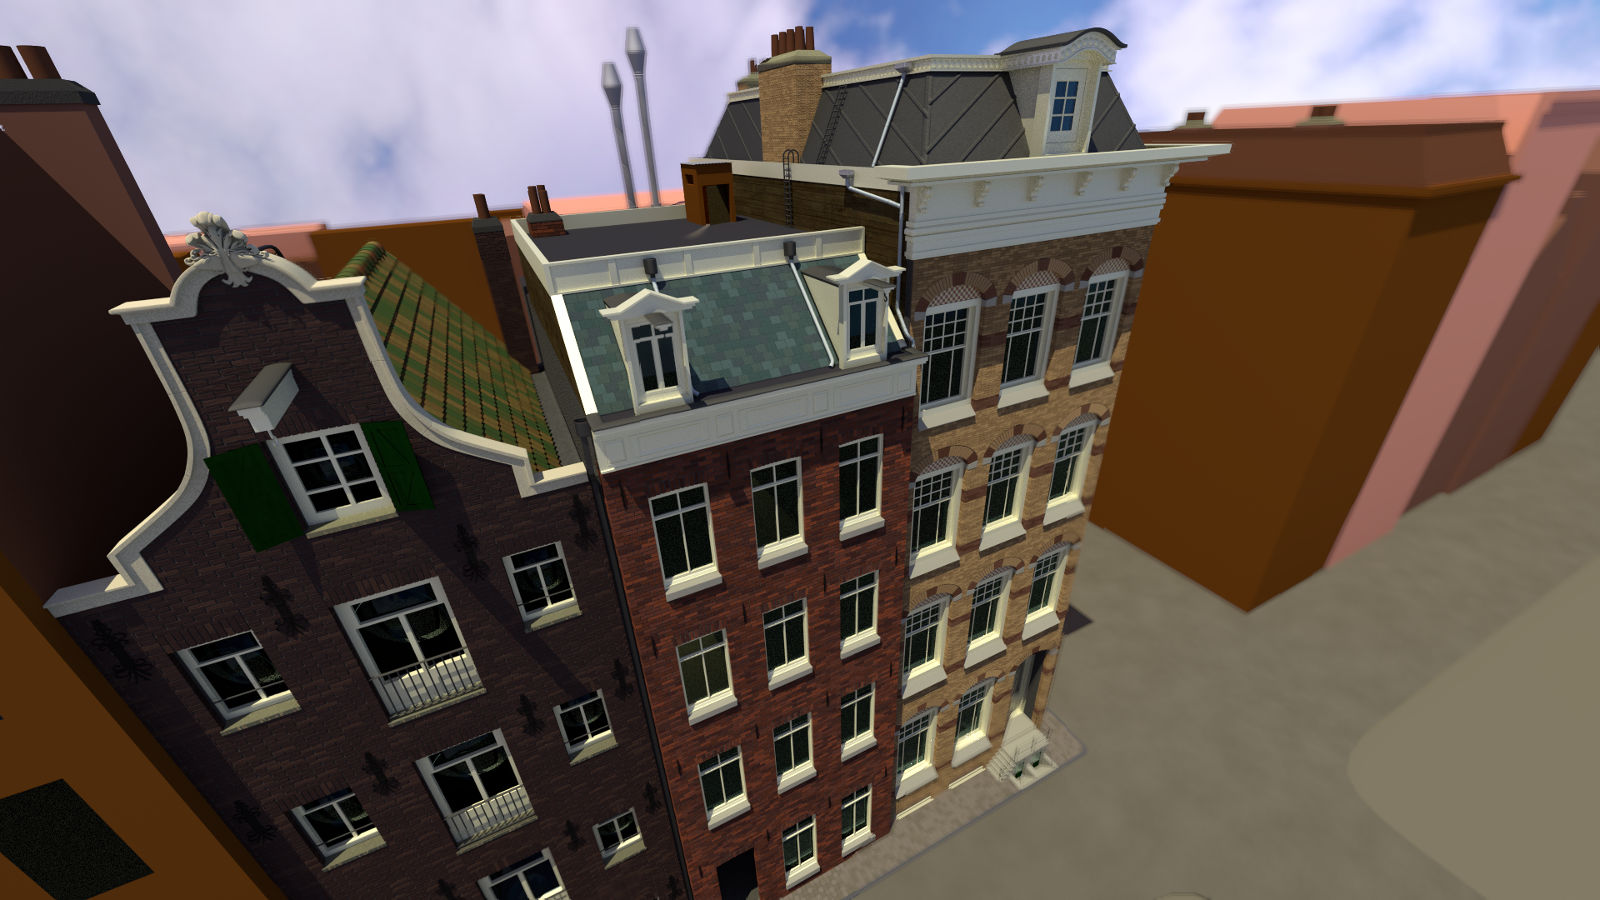
I’ve had similar thoughts about brick/masonry modeling. I came to the conclusion that it would require a higher number of verts to do a decent Displacement Modifier than it would to just model basic bricks and use Arrays and Curve modifiers and some nodes to add random bump/dirt (That is, to achieve the level of detail I was after, which wasn’t photorealism by any stretch.). Anyway, it looks good. I particularly like the building third from the left.
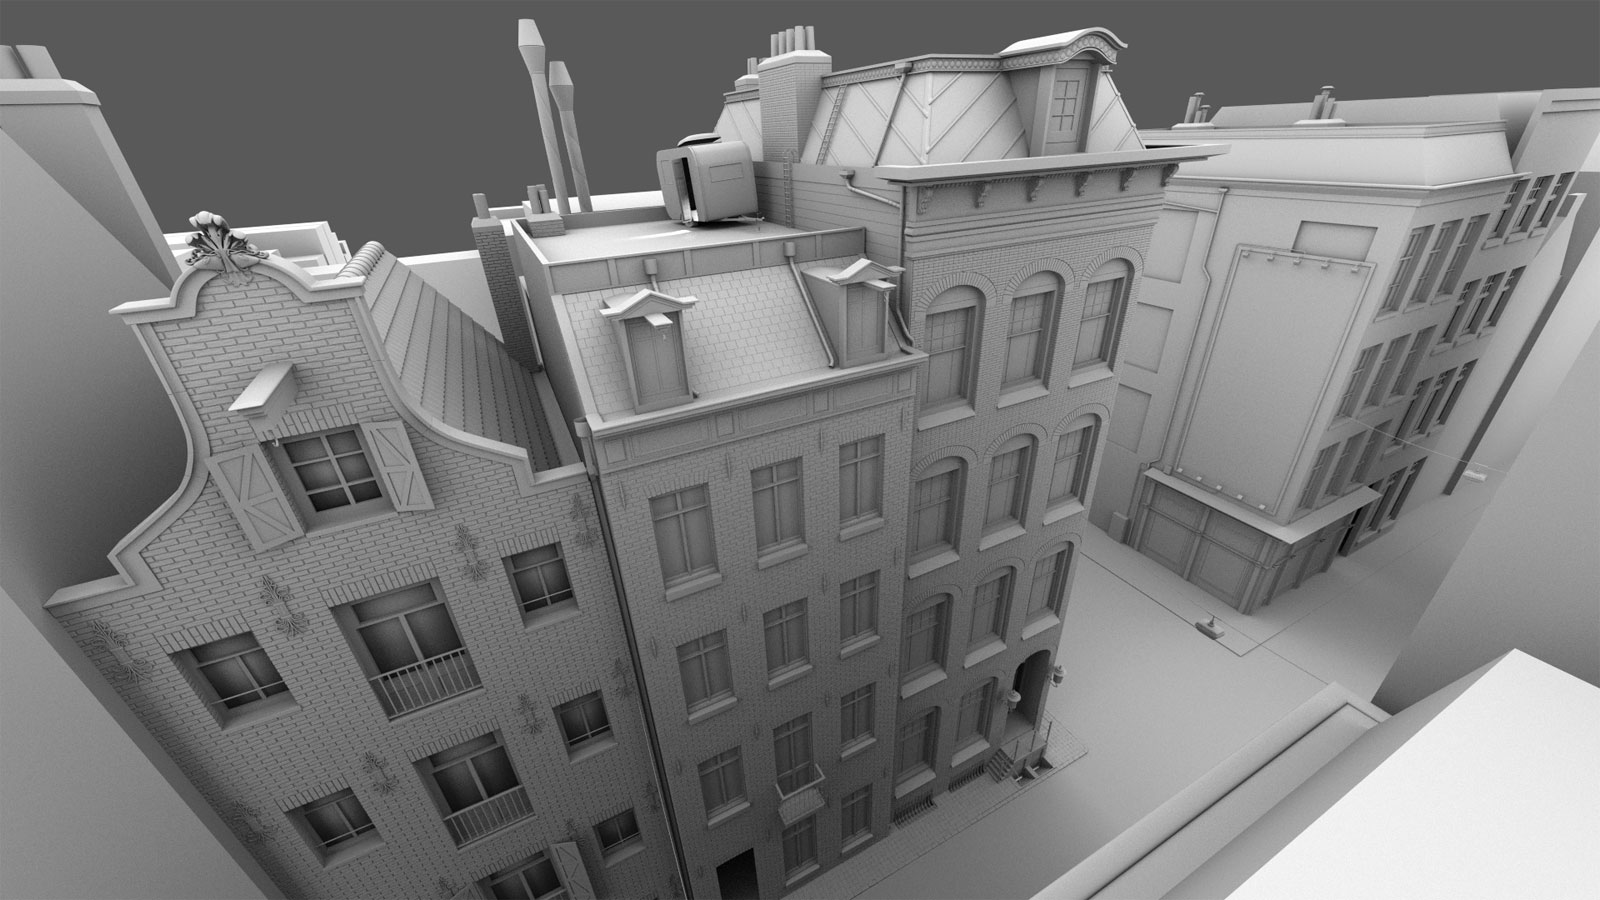
Thanks for the response TARDIS Maker & Rajakabapockets [wow that’s a long name!]. To create an intial brick build up the Array is a quick worker - it’s the edges & details that take time. It has been suggested to me that I also try masking and superimposing the detail bricks over the generic brickwork - something else I want to try - when I get my head around that! But I am certainly going to re-visit the texturing - if anything to give relief to my overheated computer. For now a small update with Clay render - thanks Cam Omile - and contrast with the basic lighting & material version…
You are correct TARDIS Maker :o I was jumping ahead by introducing colour while I’m not even finished modelling yet!
B&W the detail is so much clearer too. Hope I can bring that back in the colour version later. At the moment the files all exist seperately - even the bricks have their own seperate file - and are linked in to the one collective. This way I keep my computer somewhat happy, but it makes other things less efficient - for example I would have to open the files one, by one and change their materials. Changes I can make are global, for example in the compositor. Hmmm, more food for thought…
You might want to look into the linked library script. It allows you to much easier edit linked files. It might come with Blender, but if not, you should be able to find it with a singe google search.
Yep - using Linked Library add-on - it gives quick access to the linked files, but you cannot work on them in place - they basiclly open in a new file, isolated from the collective. Ideally it would work best if they opened inside the collective [maybe freeze everything else] so that there was still a reference. In this case it would be handy to contrast the colours next to eachother. In another case with the street light cables - I couldn’t see where they should meet the walls. In the case of the cables I ended up making them in the collective as I couldn’t figure an alternative out.
You could try working a building at a time, and make one building real (I’m sure there’s a hotkey for that somewhere), then play with that one, then put it in another file, delete it out of the current file, and then relink it.
The B&W does have a certain appeal to it. Great share with Linking/Appending blog post, by the way. I’ve always gone about linking rather haphazardly, so that was a nice read.
Just curious, is this part of a larger project, or is it your mission to master the methods of digital masonry?
@TARDIS Maker - will keep trying. Think I must re-use my early model with Low vertex count = might do the trick
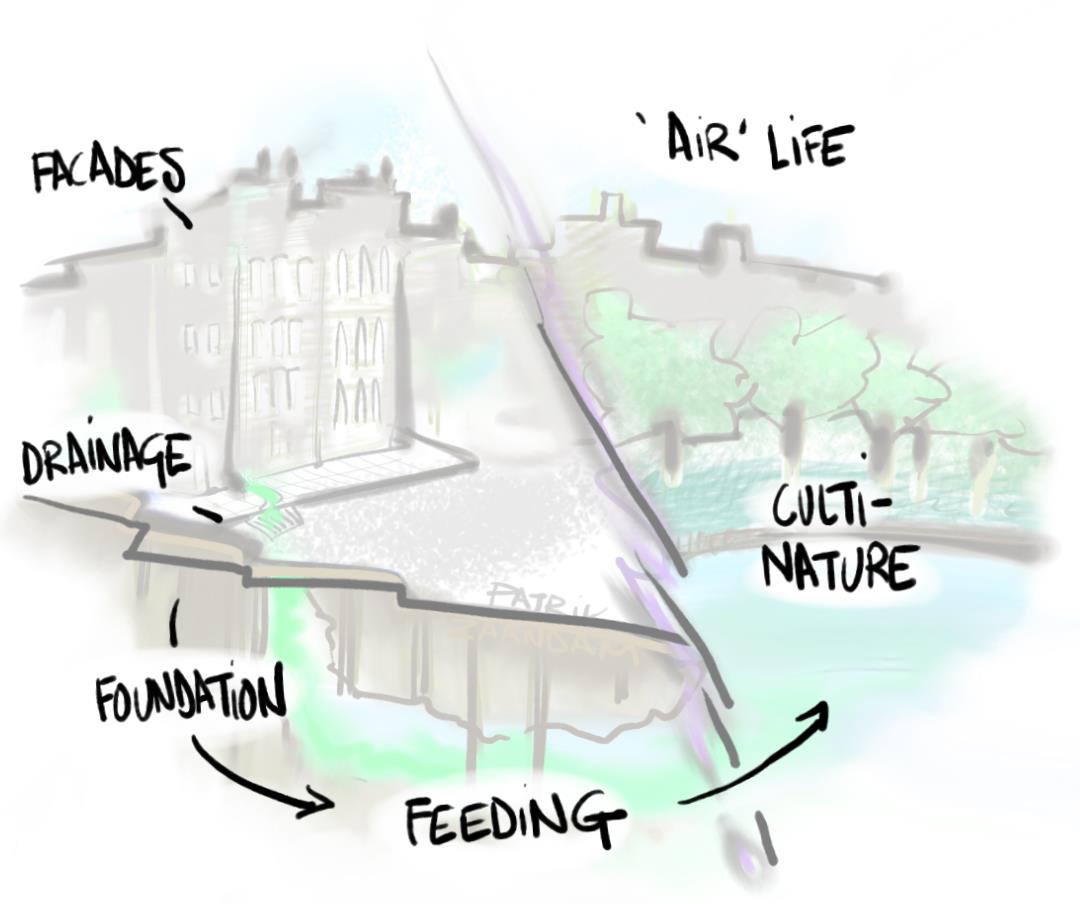
@Rajakabapockets - I want the scene to keep growing yes, but I’m also interested in the stories small details can tell. I think the masonary is a good place to start as it can give the buidlings more character.
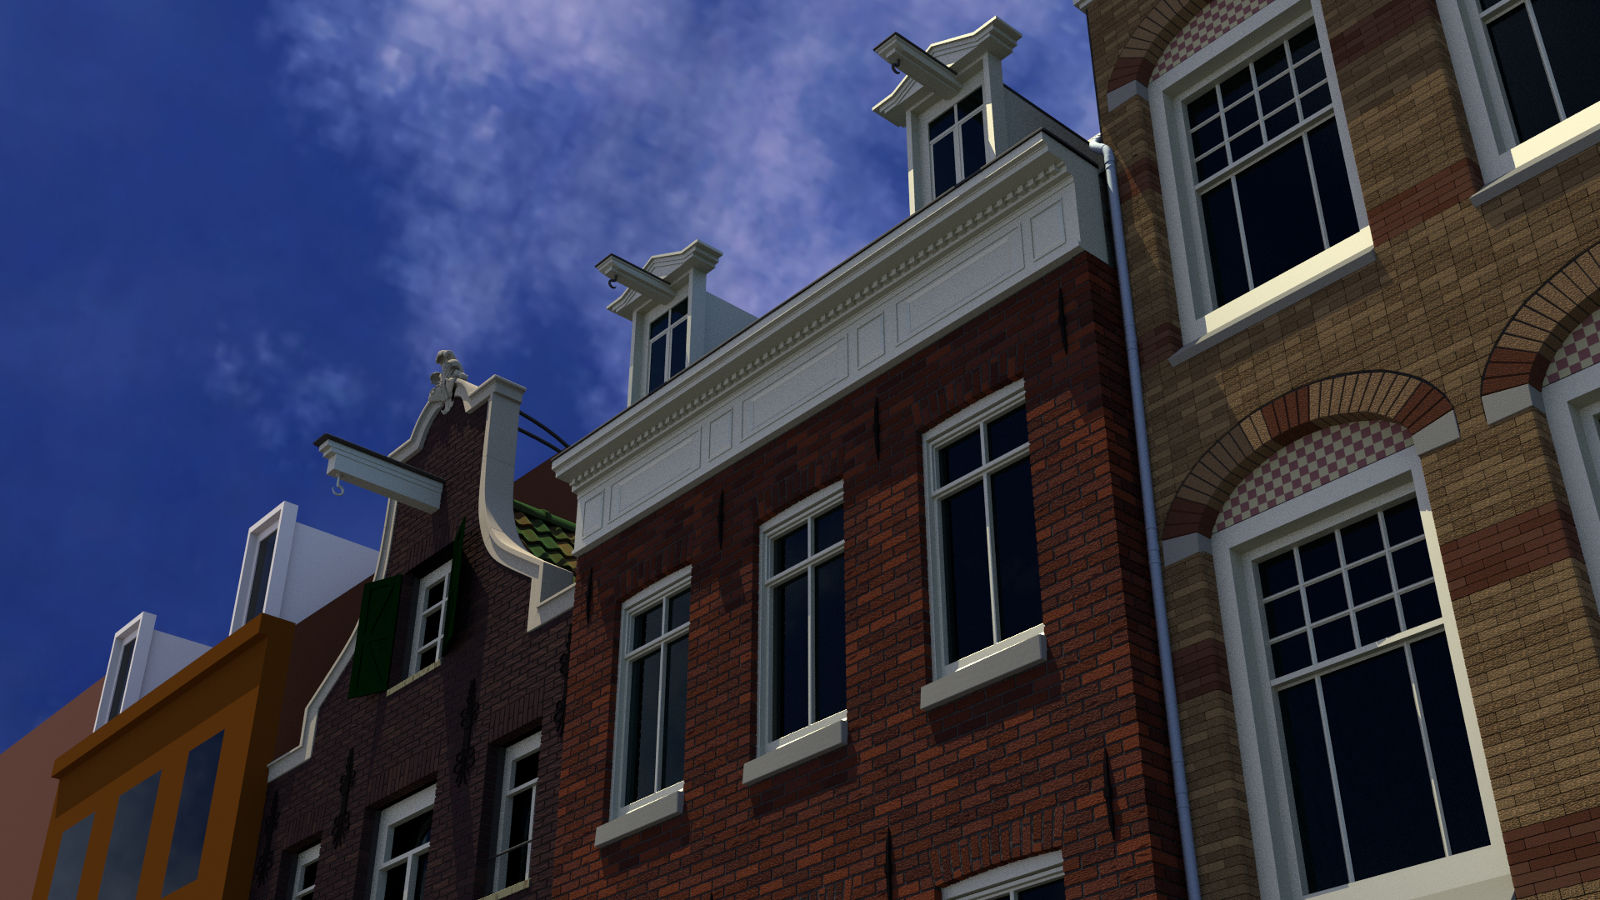
After I finish the modelling, the lighting, the materials and then textures from this angle - my next move…
Can’t even follow my own advice! While slowly progressing with modelling, just can’t leave the materials alone. Because ultimately everything is also going to affected by light - started palying with that too. And the compositor. Blender is just so full of distractions, I hardly feel that I alone am to blame. At the end of the day the lighting and compositor are easy changes…
WIP - [left the sky out for now]. A bit more modeling still to do, but heading towards the finish line. Following that, the next main challenge is to tweak materials, textures…