Hey guys,
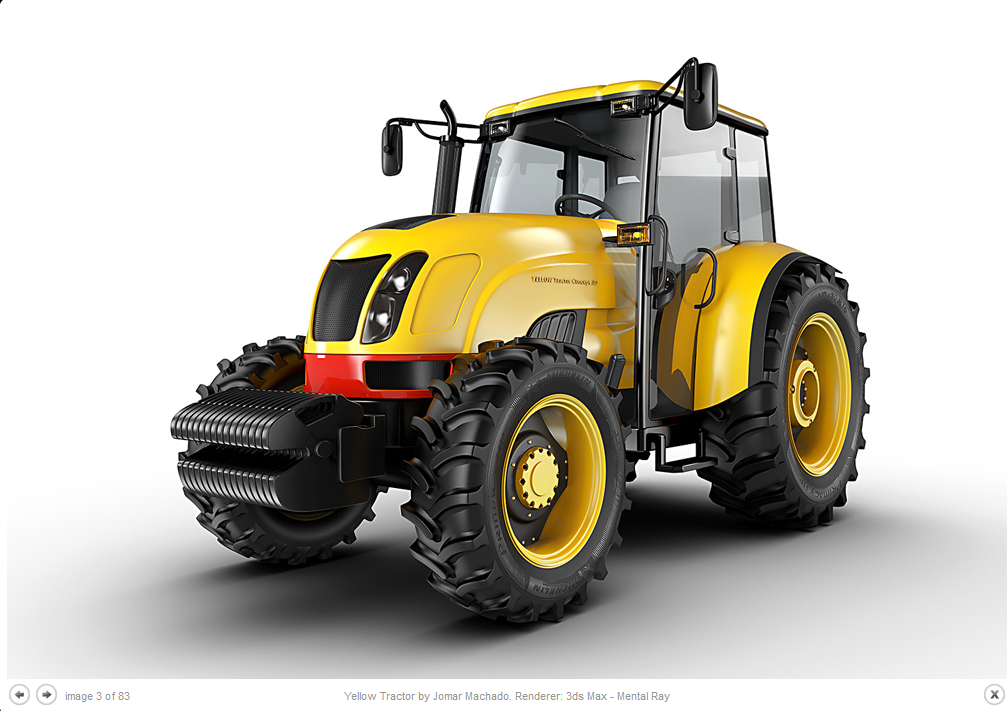
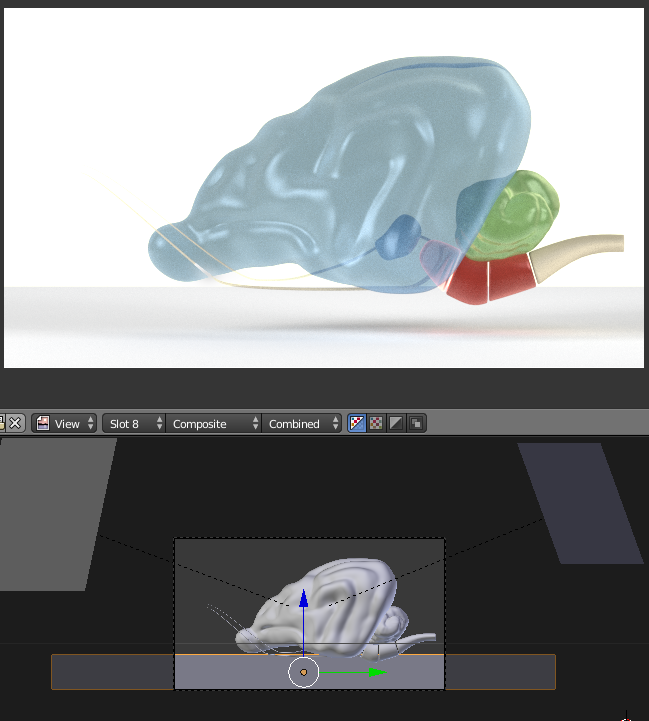
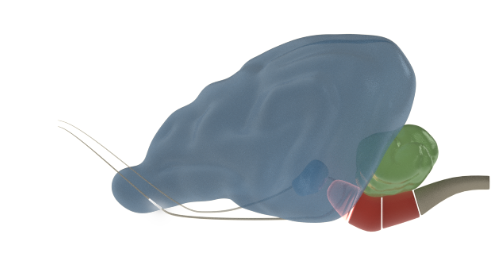
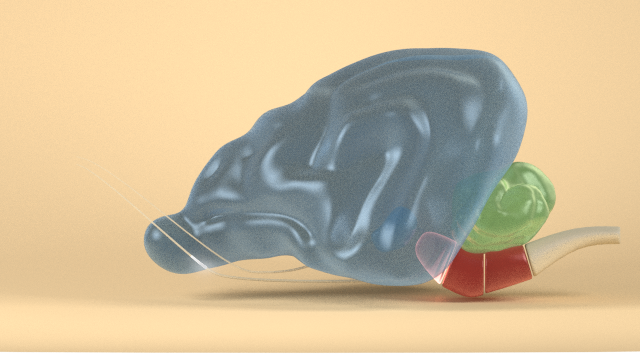
What is the best setup to achieve a ‘flat’ white background without blowing out the object detail with strong lights/background. The purpose is to create isolated web illustrations like these examples below…
Please advise,
Thanks


Hey guys,
What is the best setup to achieve a ‘flat’ white background without blowing out the object detail with strong lights/background. The purpose is to create isolated web illustrations like these examples below…
Please advise,
Thanks
I dont know what you exactly mean, but you can render transparent background and add white layer with gfx software.
I dont know what you exactly mean, but you can render transparent background and add white layer with gfx software.
With this suggested method how would you render subject + shadows + floor reflections with transparent background?
What I mean is, rendering in a simulated studio (white L-shape plane as backdrop with three point lighting) never gives me a perfect white background like the samples above. And if I try to play around with with background light/ambience to try and whiten the background even more, I end up with the subject and shadows looking washed out and ‘over exposed’.
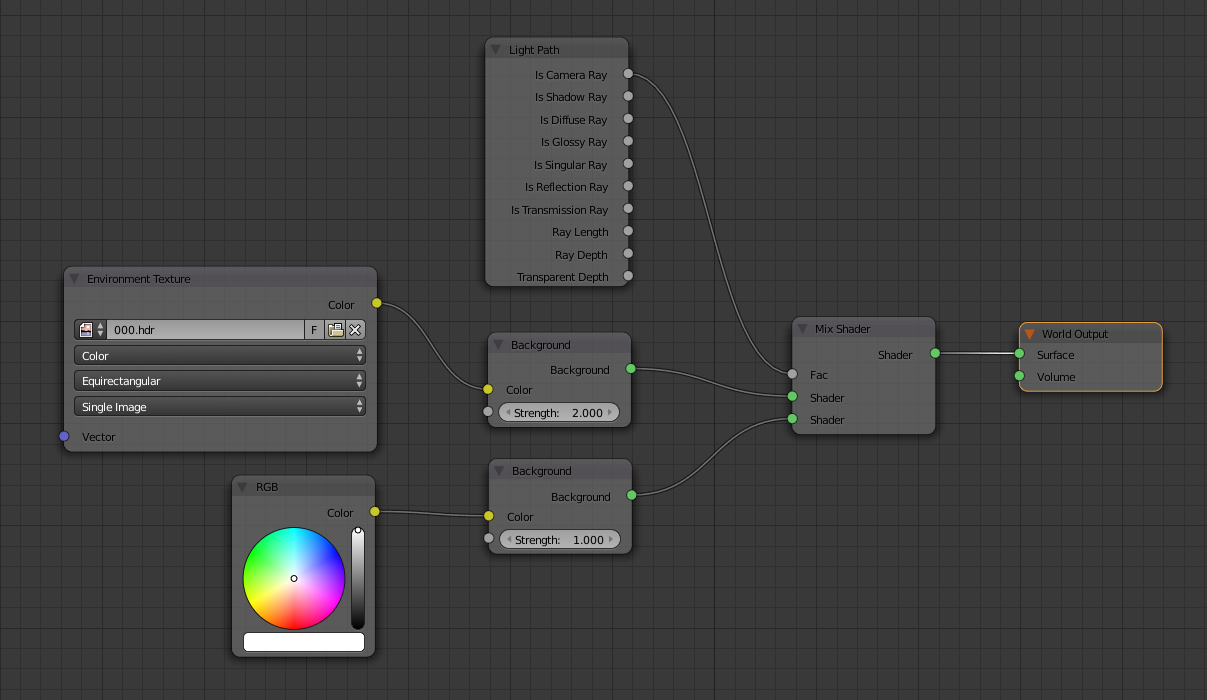
Cycles? Then you could also do something like this:
You have one background material with a HDR texture (for lighting and reflections) and a pure white one that is only seen by the camera and does not contribute to scene lighting at all.
Ikari could you expand a bit more on this technique?
If I’d like to try get this model looking so that it is suspended just above a matte studio floor.
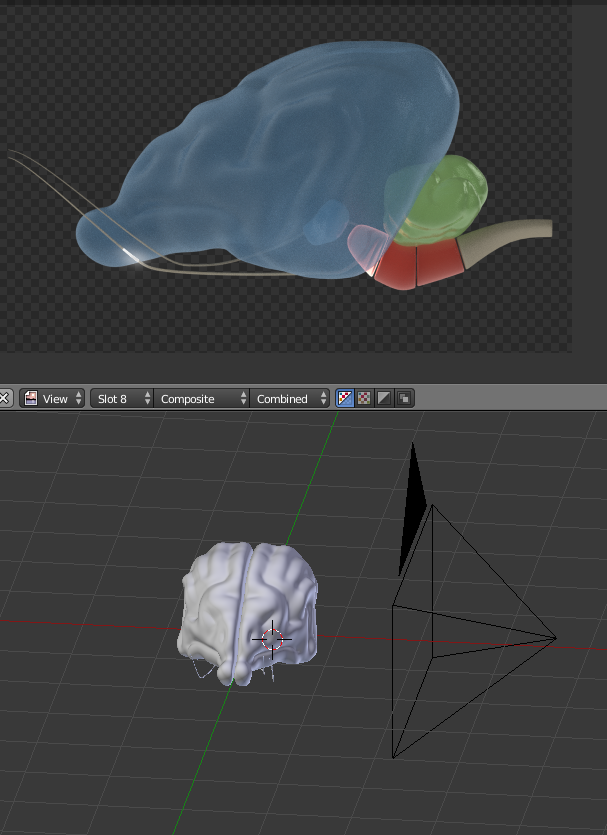
Using the node setup above I got this result.
Adding a studio backdrop didn’t help either
Ah, no. The method I described does not contain a floor setup and was more aimed at the OPs first screenshot (that dandelion brain thing).
What you want to achieve is a matte/“shadow catcher” material, which is to my knowledge still very tricky to set up in Cycles. Quite frankly: For shots like that I use other render engines, as the compositing involved for Cycles is way over my head…
Way i would do it is add a single plane to one layer that is aligned to the camera (this will be the background) and then change it’s color and lighting to my liking and then isolate it to one scene.I would put my object on another scene and set it so that the object’s shadow doesn’t render on the first scene and the second one behaves like a sort of mask for the first one.
Bit of compositing to mix them and add depth of field and you’re done.
If it’s over IS’s head you can pretty much assume it’s not doable. There are simple cases that can simulate the effect and yours is one, since it’s just one object on white you should be able to combine two effects - have a white world that is visible only to the camera, and have a white floor plane that catches the shadow. The little trick is to have the floor fade to transparent at the edges, blending with the background.
Sadly this does not work for shadow catchers that have a texture or an image, or with worlds that are HDR images so it’s very limited…
Speaking white -not this impressive model, no composite, preview:
Hope helps.
Hmm… I’m still not sure if that was meant sarcastically, but for my ego I will assume it wasn’t…![]()
However, this might be one of those limited compositing setups. And limited it is indeed: Cycles’ shadow pass seems to fail with image and mesh based lighting(?), if the “real” lights are not positioned carefully it may produce artefacts and overall it looks not too realistic either. Mind you though, that - as I already tried to hint - compositing is not my strongest suit. So, please take everything I say with a grain of salt.
What I ended up doing was using an HDR for the reflections, area lights for the shadows (= I had to set up and try to match two different lighting systems) and that compositing thing on top with a shadow and an AO pass:
Hello all of you, thanks a lot for the responses =)
Eppo I tried your way and it seemed to work well in my hands
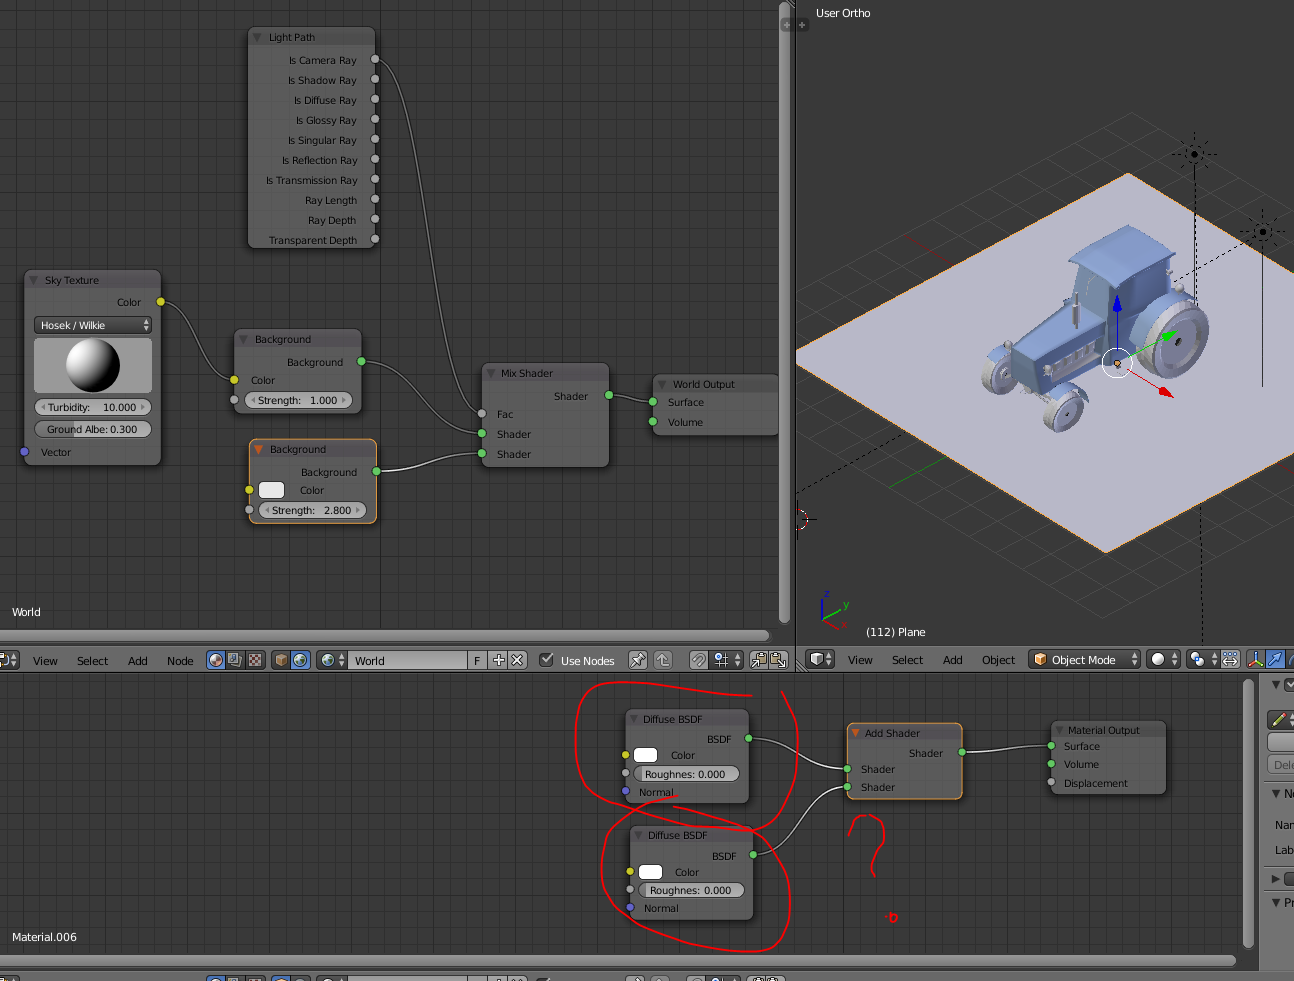
His setup was as follows:
When using a studio drop (curved background that filled the camera) I got the following result without any tweaking, not bad. PS whats the benefit in adding two diffuse shaders together?
With just a plane (angled slightly towards the camera) I also got a similar effect but I couldn’t get the plane to blend nicely to the world like you have and Druban suggests.
IS, I gave your setup a go but the majority of compositing is beyond me and unfortunately I couldn’t get it working, - I’ve also got a bunch of other compositing setup in the scene already that I daren’t touch too much. Will try it on future scenes & hopefully will be of use to future readers too.
Thanks again
A
I suppose it just might go slightly against energy conservation rules under the lights -> Add 2 Diffuse BSDFs.
Pixel values for rendered image in UV editor window are slightly above 1 for the plane and as a result it’s pure white after clamp.
Idk if it would work or would be easy to adjust for different from white color; postpro in image editor? You could render Object ID mask to facilitate that.
Edit:
couldn’t get the plane to blend nicely